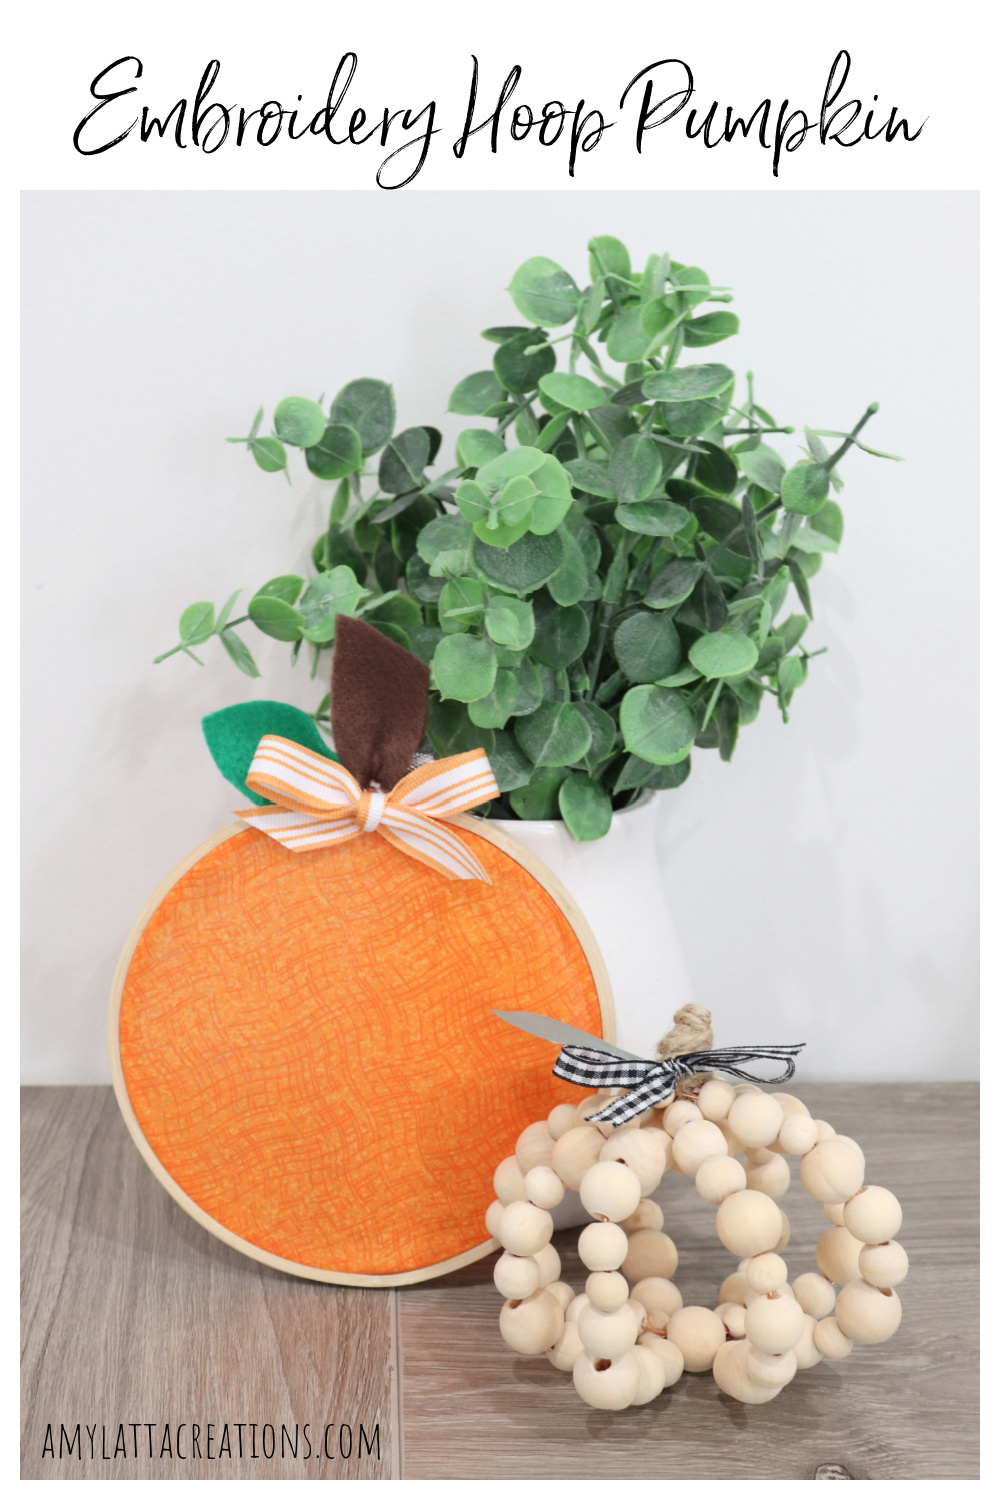
Embroidery Hoop Pumpkin
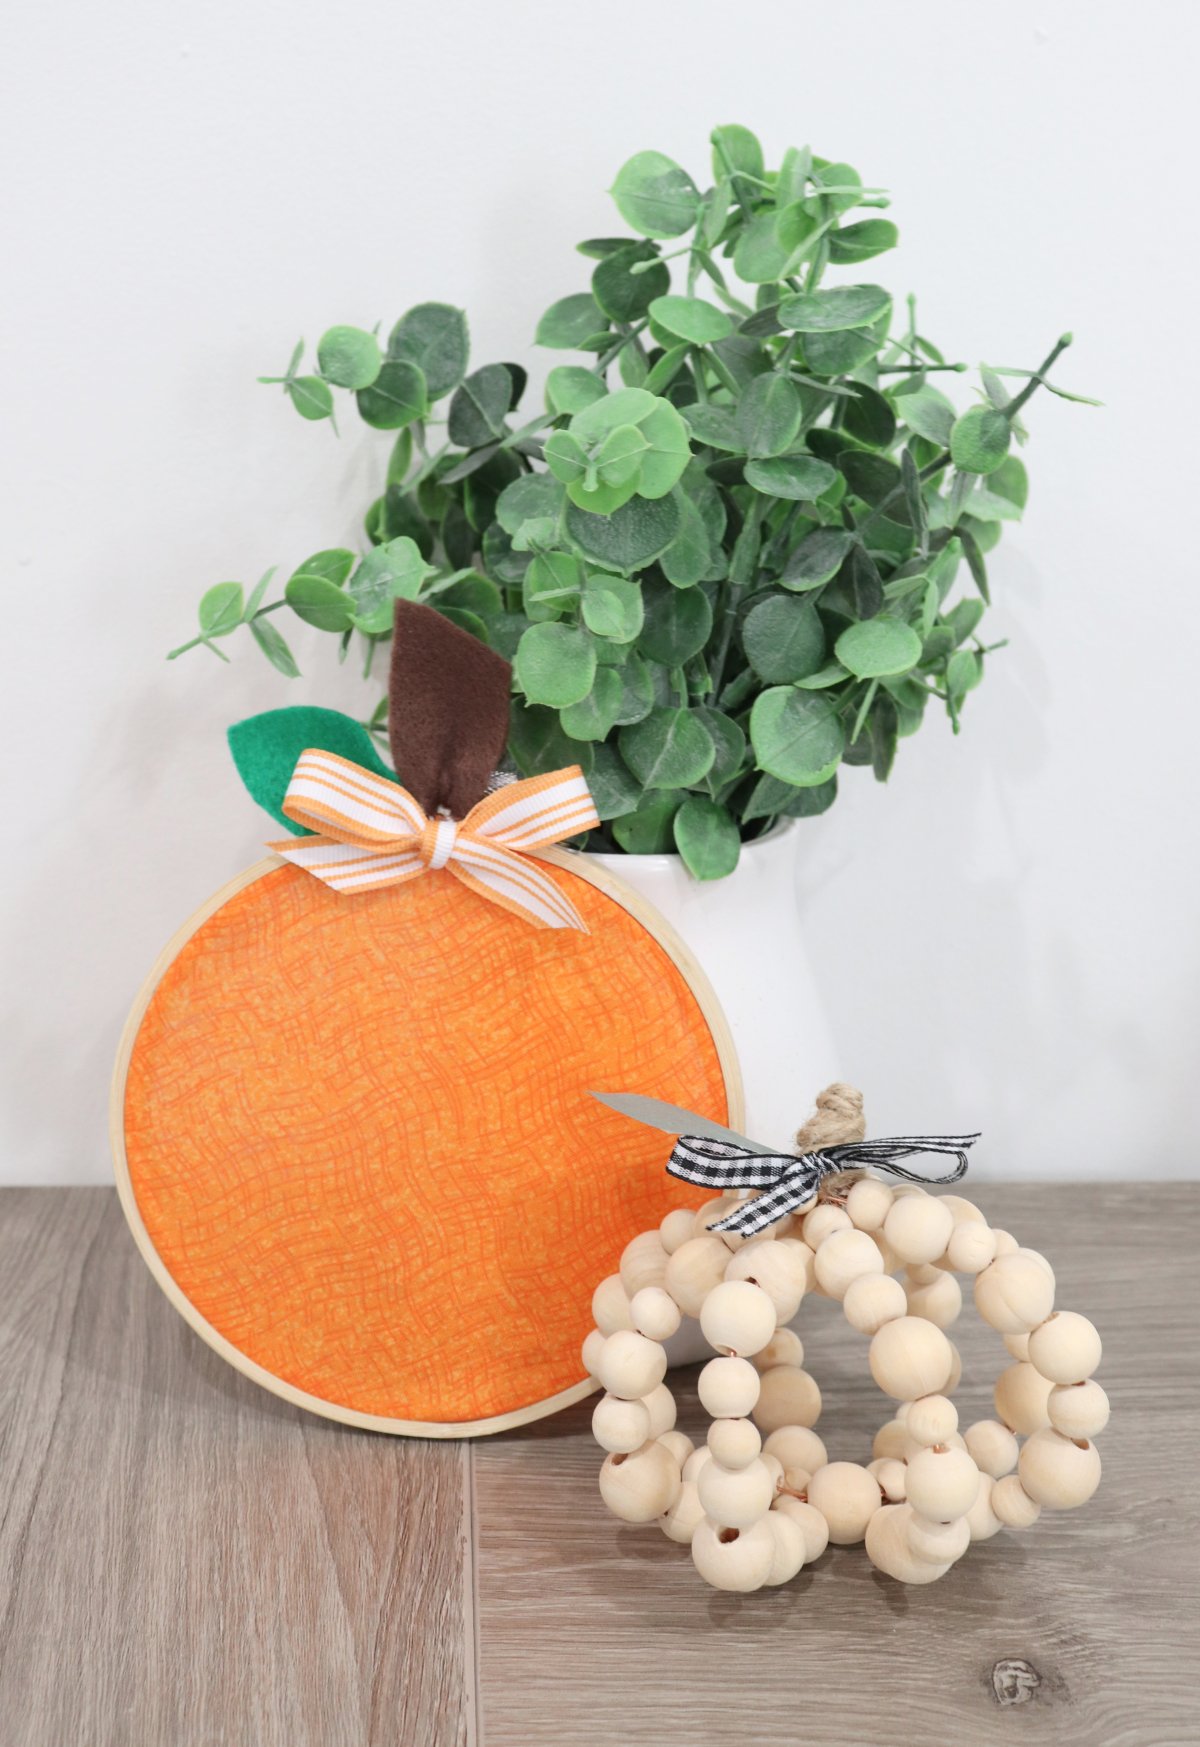
‘Tis the season for all things pumpkin! This fall, decorate your home with all kinds of pumpkin inspired projects, like this simple craft made from an embroidery hoop. Here’s how to make your own:
You’ll need:
an embroidery hoop, any size
square of fabric in your choice of color/pattern (must be larger than your hoop)
scissors
glue
brown and green felt
ribbon (optional)
Making your pumpkin:
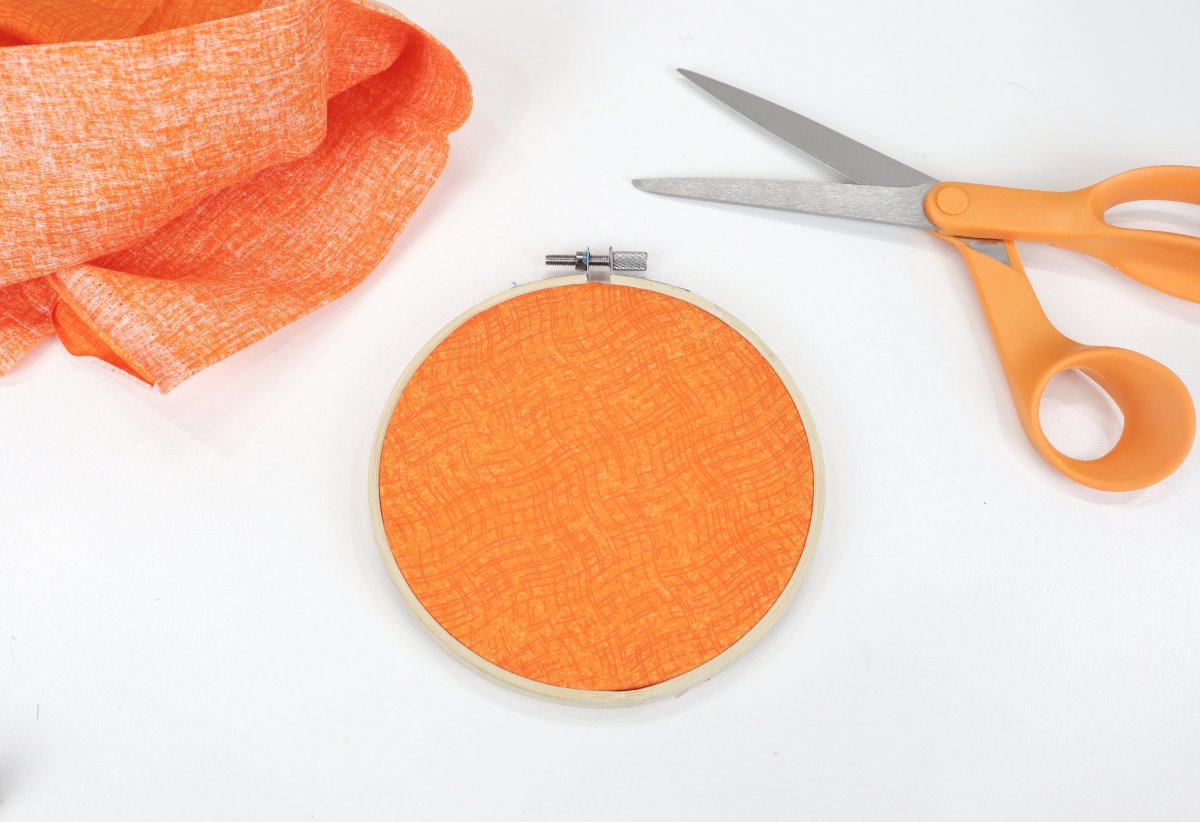
Step 1: Secure your fabric inside the embroidery hoop and trim the excess.
If you haven’t used an embroidery hoop before, it’s really simple to do. Just loosen the screw at the top enough to slip the smaller inner hoop out of the larger one. Place your fabric in between the two hoops and push the small hoop back in position. Tighten the top closure to hold the fabric in place.
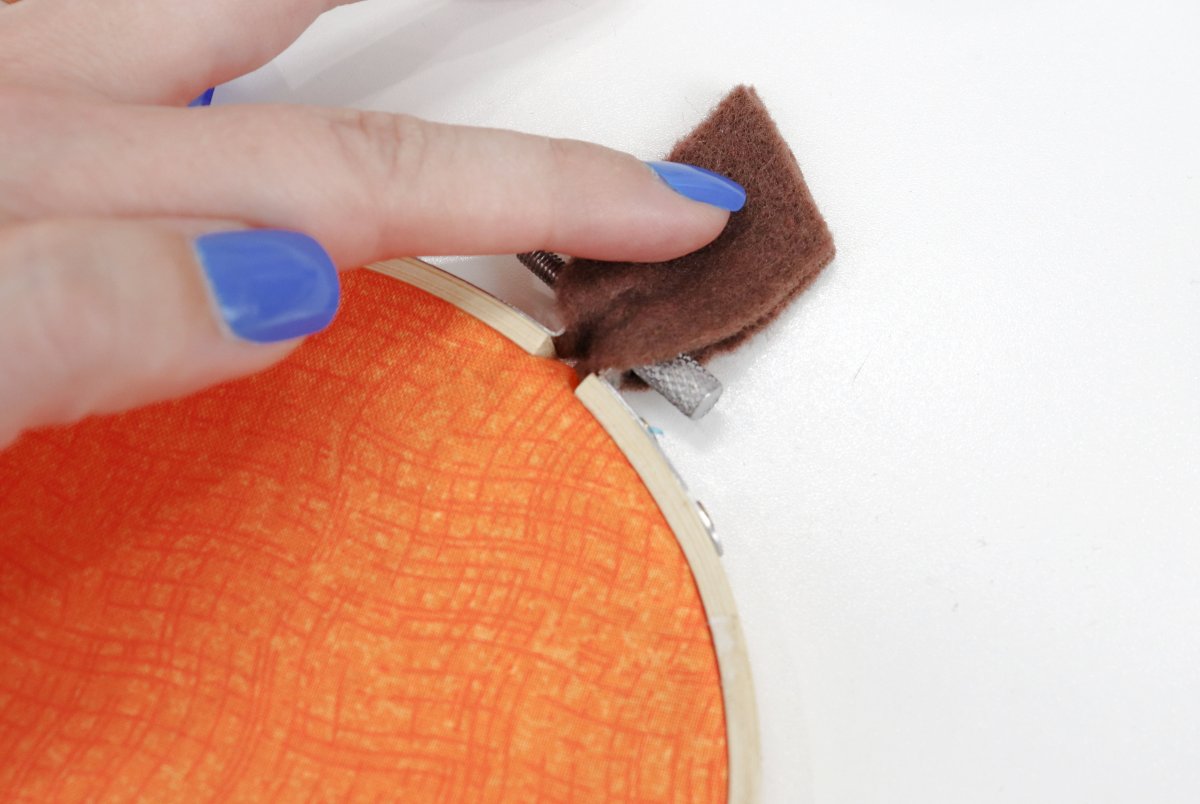
Step 2: Add a stem.
Cut a long, thin strip of brown felt. Thread it through the space just below the hardware at the top of the hoop. Trim it to your desired length and glue the front and back together.
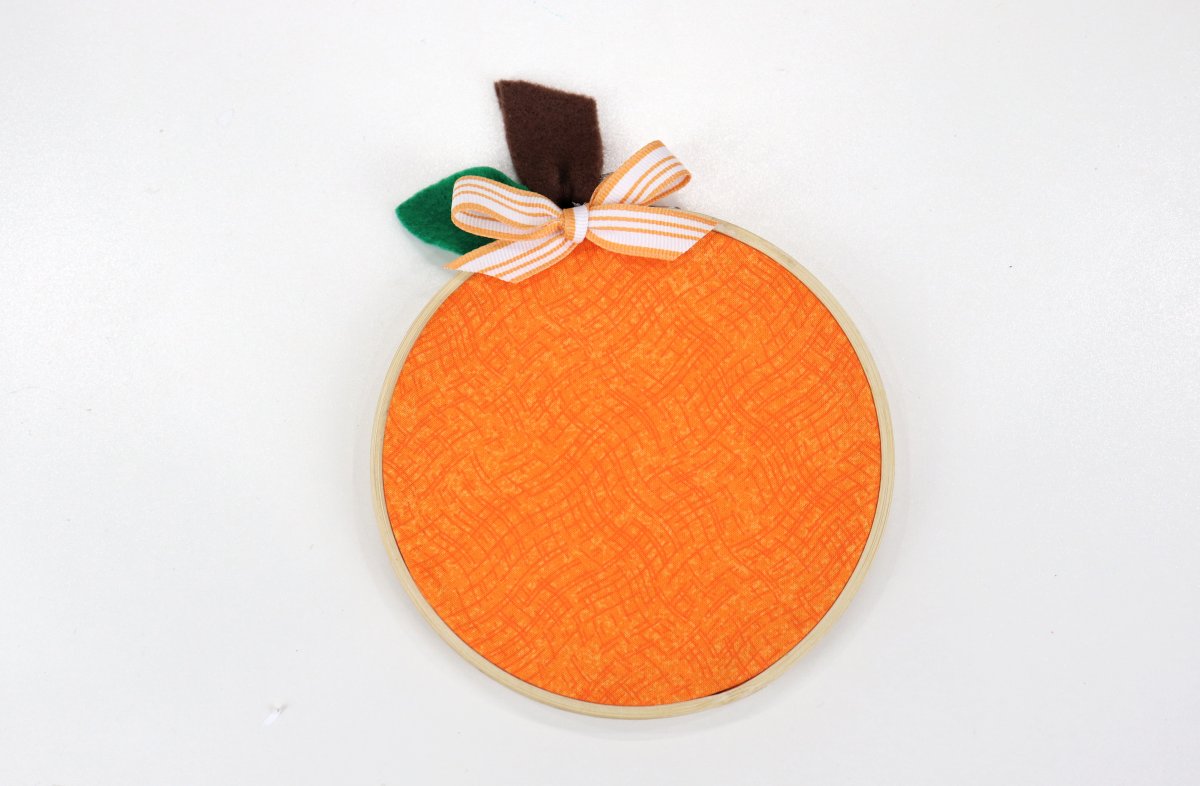
Step 3: Add a leaf and/or bow.
I cut a small leaf shape from green felt and hot glued it to the top of the hoop. Then, I tied a ribbon bow and glued it in front of the stem. These accents help to hide the hardware.

It’s that easy, just a few simple steps and your pumpkin is ready to display! It can be a hanging wall or door decoration, or you can prop it up on a mantel.
Whether it stands alone or with other seasonal decorations, this embroidery hoop pumpkin is sure to bring a fun touch of fall to your home. Try the project with different fabrics and ribbons, as well as different sized hoops to make a whole patch of DIY pumpkins!

Looking for more ideas? Try these other pumpkin crafts!
I’d love to see how yours turn out, along with any other fall projects you’re making. Be sure to join the Amy Latta & Friends Facebook Group so you can share your photos and we can all be inspired. See you there!

One Comment