Christmas Handprint Plaque
Hey friends, I have a really special treat for you today! You’ve heard me mention one of my best friends, Erin, about a million times…well, she’s here today to share one of her own projects with you and in her own words too, which makes it super-awesome because she’s absolutely hilarious. I know you’re going to love her…and this project too! Here she is…
.jpg)

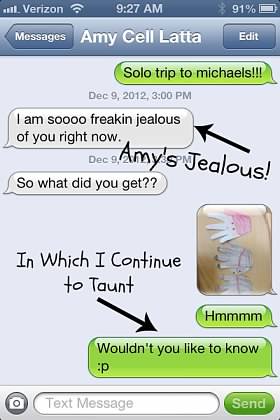
My Michaels trip was successful, and I came home with some new craft supplies (and apparently Toy Story Christmas wrapping paper. Darn you, Michaels.) Here was the haul:

So, what you need for the Christmas Handprint Plaque:
-Felt (I did brown, red, and sparkle red. I only used the brown and sparkle)
-Letter Stencil (optional)
-Wooden Plaque (or any flat surface)
-Spray Paint (I did blue, to cover the plaque)
-Pom Poms
-Tiny Jingle Bells
-Various Paint (I had white, flesh tone, brown, and black)
-Snow-Tex
-Picture Hanging Kit (Optional)
-Various Paint Brushes
-White Card Stock
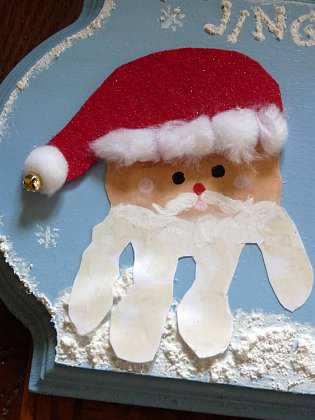
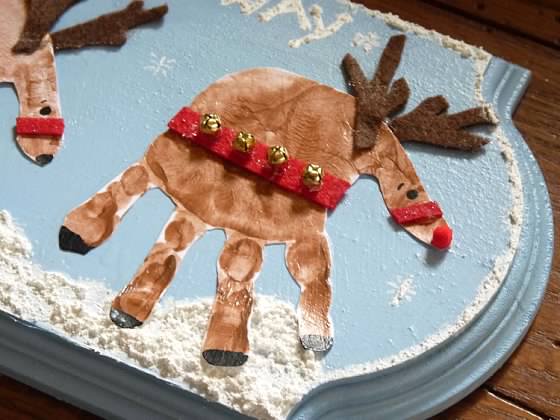
Next up was the scariest part. Handprints. Ok. I have two little boy toddlers, one of which is a CONSTANT mover, the other (the eldest) who’s funny about things on his hands. I had no idea how this was going to go, as I have never been successful with handprinting them before. My husband was on standby with paper towels and extra card stock paper, and a clear path to the bathroom sink. First up, the youngest. He was to have “reindeer hands” so I took a sponge paint brush, and painted his little hand brown. I was shocked as he held still long enough for me to paint him, and then place his hand on the cardstock. Seriously, this was too good to be true! He allowed me to do about 7 prints, giving me plenty to choose from! My eldest was up next, and I placed the paint on his hand (white on the fingers, flesh tone on the palm for Santa) and held my breath. He LOVED it! Success! I got about 8 good prints from him and I only needed one! The prints were done and needed to dry. I have 4 animals and two toddlers. Finding safe drying places is tricky.


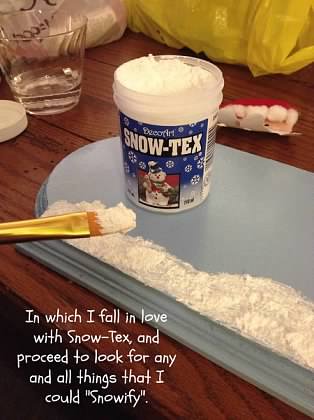
The next day, the plaque was dry, and so I pulled out the Snow-Tex to add a snowy landscape. I’ve never worked with the stuff before, but I fell in love with it. Seriously. Love at first brush stroke.
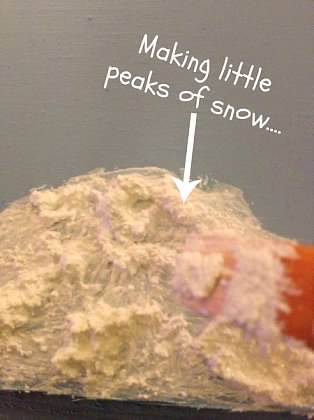
Once you do your first layer of Snow-Tex, you can put more on to add bigger snow peaks.
Next up, was stenciling letters on the plaque. I began with practicing on a piece of cardstock, so I knew where it would go, how big it should be, letter spacing, etc. I HATE stenciling. There, I said it. I feel better.
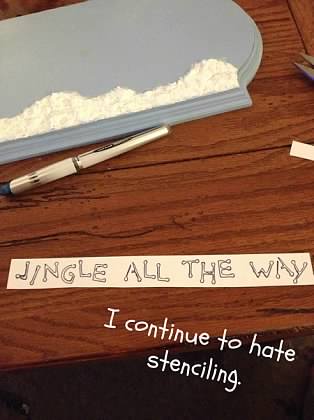
See, I don’t mind the stenciling when it’s on a piece of paper, but knowing that I might have to stencil on the actual project? I always mess it up. Always. So I usually use the stencil as a guide and free hand it.

Not too bad. I also added Sno-Tex on the top of the letters because I’m obsessed because it looked really cute.
Once everything was dry, it was time to add Santa and his reindeer. I mod podged the back of the handprints, stuck on the prints, then mod podged over them. I also ended up hot gluing the reindeer feet and Santa’s beard down on the snowy peaks, to keep them flat. I added a border of snow-tex around the whole thing, as well as a few snowflakes.
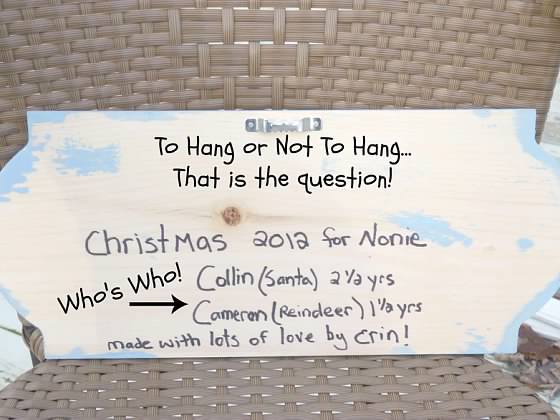
The following day, I added a picture hanger on the back, in case Nonie wanted to hang it up, as well as a quick inscription with dates, names, and ages.

A huge “Thank you” to Amy for allowing me to hijack her blog for the day! I wish a lot of you knew Amy in real life, because you have no idea how amazing she is. She has a beautiful, generous spirit and her warmth and laughter is a blessing in my life. I love you One Artsy Mama!
Sniffle…*little tear*
Oh, ahem, thanks so much, Erin, for sharing your project with us today! Hope you all enjoyed it as much as I did! Now I feel a sudden need to go buy some Snow-Tex, how about you? Well, have a fabulous day, friends! And I love you right back, Erin!


What a super cute idea! I never would have thought to use handprints in this way…clever!
I just bought this plaque at michaels yesterday so we can do hand prints of the grandkids for my mom. So glad I saw this and she did the prints on paper and then modge podged them on, I was worried about getting the babies hands on there right. This is the perfect solution!
Okay for one – this is totally adorable! And two, I love your “drying racks”!! The microwave is brilliant, LOL! Super cute, thanks for sharing!
I love the Santa handprint – very original!
Such a sweet gift, Erin! I love it, and your toddler proof drying racks…hehehe! Great job!
How cute!! Such a great way to remember how little they are/were. I too love the drying racks! Loos just like my house, ha,ha. So glad you shared today.:)
One Word – Precious!
So stinkin’ cute! I love it!
Wow! I love this idea!!
What a cute idea!! Great job Erin! Thanks for sharing this Amy!
Barbara at Chase the Star
I LOVE this! It’s so cute and such a great way to capture little handprints forever. My parents are expecting grandchild #3 soon… perhaps next Christmas they’re going to receive a plaque with 3 reindeer…
I loved this so much that I submitted it at Fun Family Crafts and it’s being featured. 🙂 You can see it here:
http://funfamilycrafts.com/santas-reindeer-handprint-plaque/
If you have other crafts you’d like featured, we’d love it if you would submit them! If you would like to display a featured button on your site, you can grab one from the right side bar of your post above. Thanks for sharing your adorable idea!
Love this! I wonder how it would work with older kids – guess you would just need a bigger plaque. 🙂 Pinned.