Hi there, friends! Today I wanted to share one of my most recent jewelry projects with you! If you follow my buddy Meredith at
Wait ‘Til Your Father Gets Home, you may have seen this already because I guest posted on her blog while she was at SNAP! {lucky girl!} But, for those of you who might have missed it, here it is:
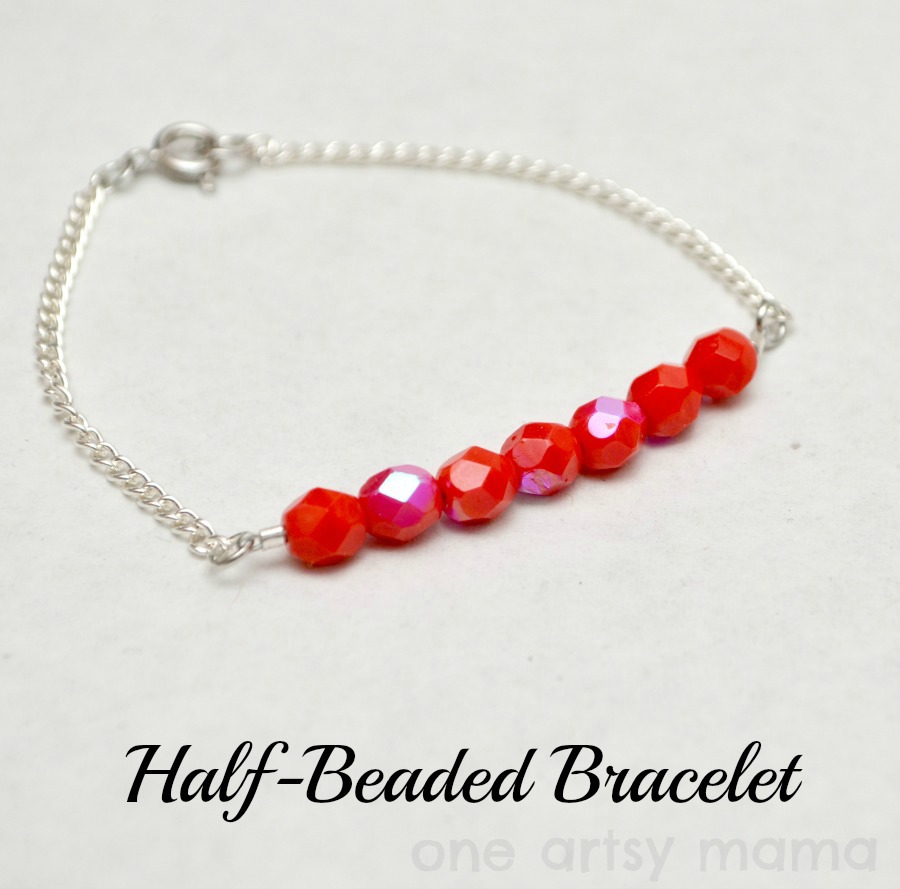
You guys know I’m kind of a fashion junkie. I love reading the latest issues of Lucky, InStyle, Style Watch, and other fashion-related magazines and trying out some of the latest trends. One of the things I’ve noticed recently is that while beaded bracelets will certainly never go entirely out of style, there’s a new twist on the old standard…a half-beaded bracelet. Basically, the top part is composed of some pretty {and often delicate} beads, and the rest is made from chain, leather, or some other material for contrast. I decided that instead of paying top dollar for one, I could make my own {and so can you}!
Here’s how I did it:
Materials:
– 5-9 beads of your choice, depending on the size of the beads and your wrist
– stringing wire
– two crimp beads
– four jump rings
– clasp
– chain
– wire cutters, needle nose and flat nose pliers, crimp tool {optional}
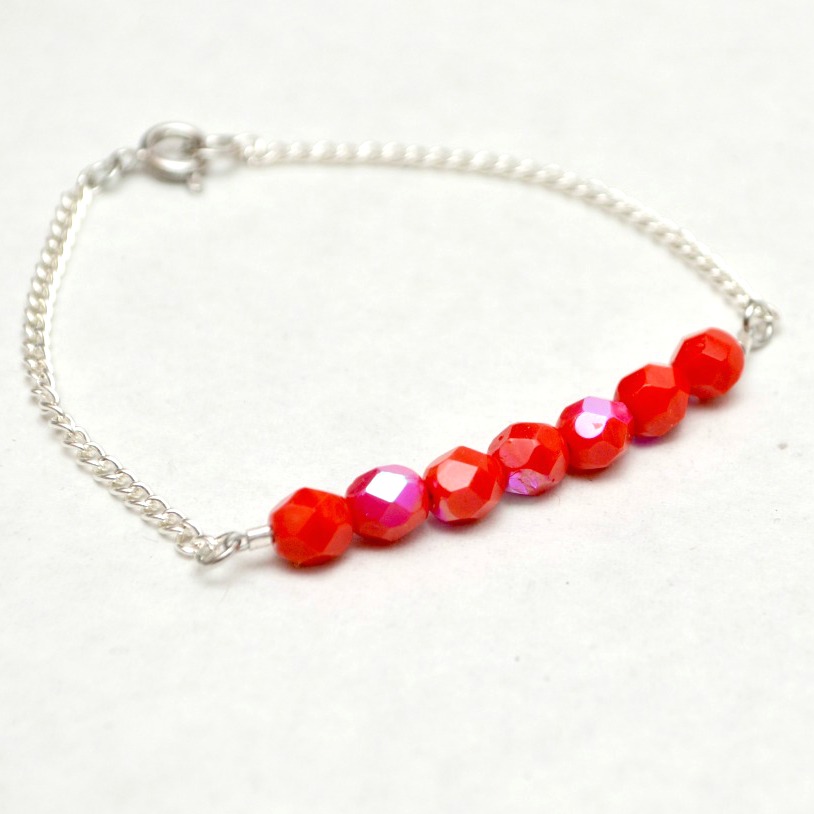
First, let’s talk about the beads. I saw mine at the Potomac Bead Company on my last visit there and had to have them. The iridescence caught my eye right away and I knew they’d make some pretty statement pieces. I found some similar ones on
Etsy…the only difference is that they’re not opaque, but they’d look very much the same if you like the particular beads I used.
Step 1: Cut a 6″ piece of stringing wire. Place one end through a crimp bead and a jump ring. Thread the wire back down through the same crimp bead. Tighten by using your crimp tool, or {if you don’t have one} squeezing the bead flat with your pliers.
Step 2: String your beads onto the wire. I think an odd number looks best. I chose to use 7 beads, which makes the beaded part almost as wide as the top of my wrist but not quite.
Step 3: Place a crimp bead and jump ring on the wire at the other end of your beads. Thread the wire back down through the crimp bead as well as the closest two beads. Tighten the crimp bead, then cut the wire and hide it by tucking it down into the beads.
Step 4: Attach small pieces of chain to the jump rings on either end. This is a great use for scrap chain you have from other projects! You may want to measure your wrist first so you know how long you want each side to be.
Step 5: Add a jump ring and clasp to one chain, and a large jump ring to the other. Hook clasp in ring to close.
That’s all there is to it!
What do you think? Easy peasy? I’ve worn this several times, and I just can’t get over how fun the beads are!
Hugs & Glitter,


Very pretty! I wouldn’t exactly call it easy-peasy for us jewelry novices, but MAYBE I could make one. 🙂
Very cute!! I haven’t made jewelry in several years now. I may have to see what all I need and make my daughters some.
Love it Amy! I’m gonna copy you and make one when my crazy days slow down a bit. Love the colour too xx Nat Pinning btw!
Amy, this is so cute, and has so many possibilities too! Pinned for later use, when I become more confident with my jewelry projects!
~Emily
A Tossed Salad Life
Really nice & beautiful article. This is really an easy step to make beaded bracelet. Thank You! 🙂
My girls and I adore your blog space here! I am seriously trying to start DIY’ing some jewelry. It’s a FIRST for me! So, I truly appreciate how you point and label each product and item needed as I NEED these simple steps explained to me! Lol 😀 Thanks Again
Aw, thanks so much, Jeanine!! So glad you’re enjoying the tutorials! Good luck with your jewelry!