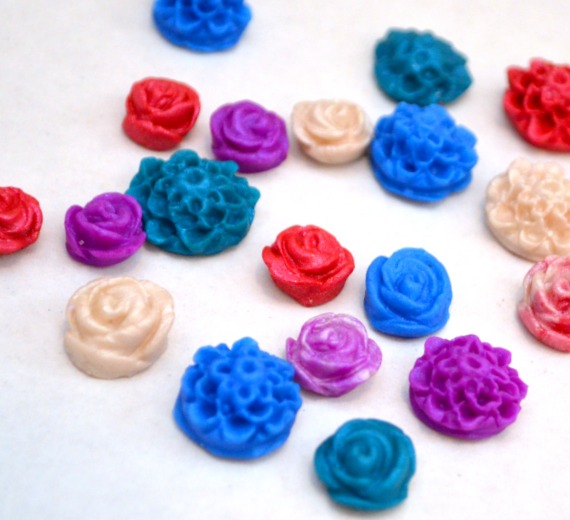
DIY Polymer Clay Cabochons
Friends, I’m sure you’ve seen {and probably even own} some jewelry made of little flower cabochons. You may have even made some. I have too; in the past, I’ve ordered the flowers from Pick Your Plum or other suppliers when a good deal came around, and I’ve turned them into rings, hair pins, necklaces, and earrings. But it wasn’t until recently that I realized I could actually make my own flowers with very little effort! I love it because not only does it mean the entire piece is handmade instead of just gluing two things together, it also means I can create flowers in whatever color, shape, and size I want. Take a look…

Materials:
Disclosure – I received my supplies free of charge from Wholeport.com and Sculpey. All opinions are my own.
– Silicon Mold{s}
Mine were the 3 Hole Chrysanthemum and 3 Hole Rose mini molds, and you can get both of them together for $5.
– Sculpey Polymer Clay
Mine was a Premo Pearl Colors assortment
To create the flowers, all you have to do is warm the clay in your hands so it’s soft and pliable, roll it into small balls, and press it firmly into the molds. Try to keep the backs as flat as possible since that’s the part you’ll be gluing down to your jewelry findings. You can use clay tools or a knife to help smooth them out.

My little helper loved this part, and he also enjoyed popping the flowers out of the molds to place onto the cookie sheet.

Once you’ve created all the flowers you want, just place them on a baking sheet covered with non-stick foil or parchment paper. Preheat the oven and bake the flowers according to the directions on the clay package; usually 30 minutes per 1/4″ thickness.

Once the time is up, remove them from the oven and let them cool completely. When they’re cool, they’re ready to be turned into jewelry! Just use E6000 or Super Glue to adhere them to ring blanks, bails, earring posts, or whatever you like! I just recently got a bunch of bobby pin blanks from Wholeport, and those work perfectly for the small roses.

What do you think? Would you try your hand at making your own cabochons? There are just so many things you can do with a little bit of clay!
Hugs & Glitter,

If you enjoyed this post/project, you may also enjoy these!


These are adorable! I love the little one on a bobby pin, I’d definitely wear that 🙂
Thanks so much, Becca!! Glad you stopped by!
This is so cool! Do they already come in these awesome colors or did you color the clay somehow? Also, would it possible to make them beads or do they need to be used flat? They’re really beautiful!
Sarah, the clay comes pre {gorgeously} colored. I did mix a few, though…the purple and white and the red and white, I just mixed two colors together for a swirled look.
They came our really pretty!
Thanks so much!
Amy, I love them! I have been wanting to try to make some! Its on my someday list!
Very cute. I love the bobby pin.
I had NO idea what a cabochon was, but these are adorable! They would make great baby shower gifts. 🙂
Thanks for introducing me to Wholeport.com, I’ve been trying to figure out where to get silicone molds from.
These are really cute…They turned out great. 🙂
Those turned out great!