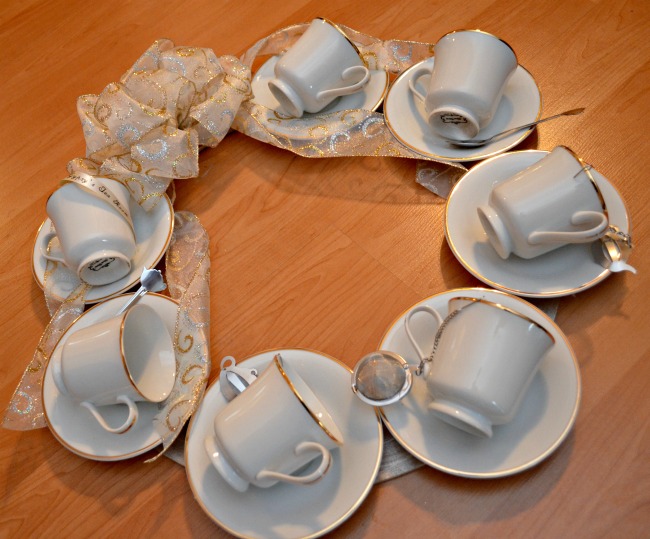
Teacup Wreath
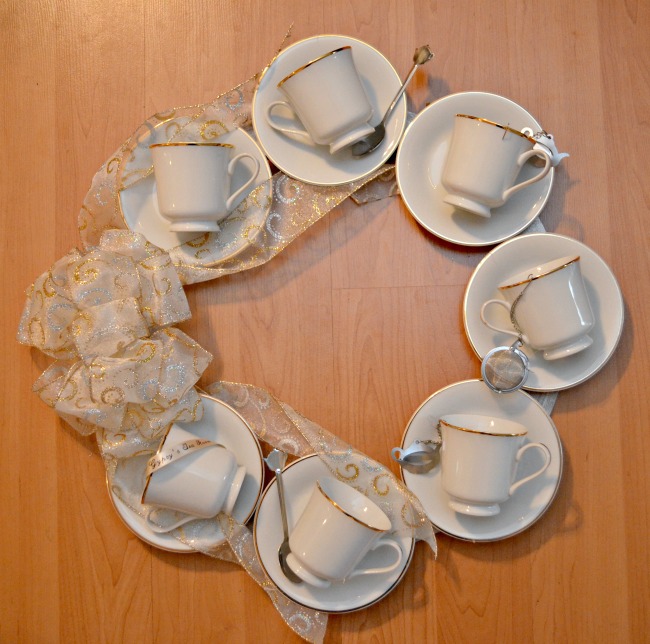
Friends, you all know I love me some coffee, but today we’re actually talking tea! Every year, our local Arts Center hosts a Festival of Wreaths where individuals and businesses create and display holiday wreaths for a silent auction. My friend Kat was asked to make a wreath for the Tea Bar where she works as well as for the local Tea Room, and she asked if I’d like to help. Here’s the wreath we created to represent Gypsy’s Tea Room.
Teacup Wreath
Materials:
– large wooden wreath form
– teacups and saucers {we used 7 of each}
– assorted spoons, tea diffusers, and teabag holders
– wide ribbon {the more glitter, the better!}
– wire and wire cutters
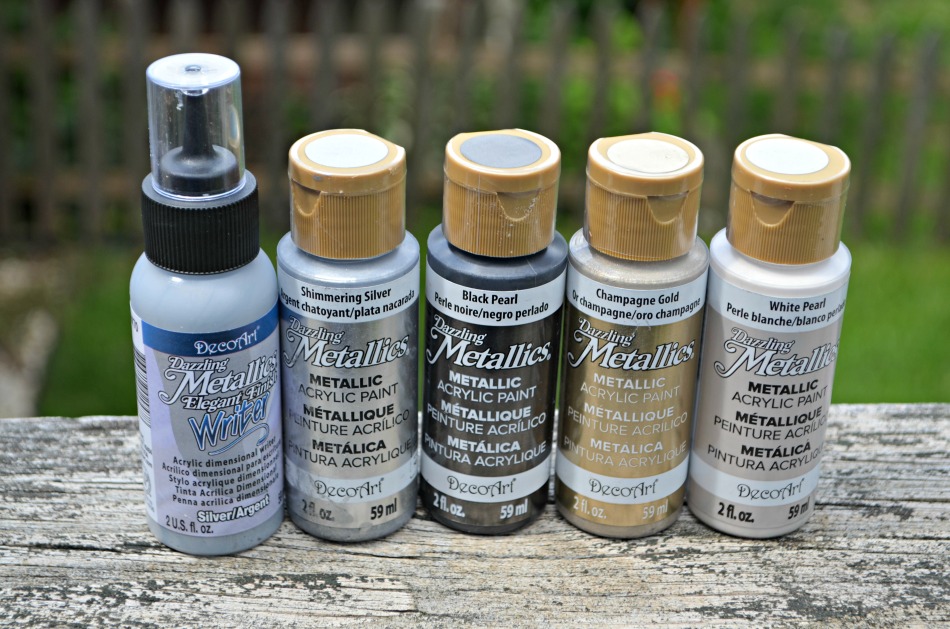
– gold paint
– paintbrush
– hot glue and glue gun or super glue
– Epson LabelWorks Label Printer and Ribbon Cartridge {optional}
Step 1: Paint the wreath form gold.
The saucers, when placed next to each other, don’t totally cover the entire wooden form, so it’s important that the part you can see matches the wreath. We wanted to stick with the elegant white, gold, and silver palette, so we used DecoArt Champagne Gold. Two coats was enough to get good coverage. Make sure you let the paint dry completely before moving on to the next step.
 Step 2: Glue seven saucers {or fewer if your wreath form is smaller} to the wreath form as close together as possible.
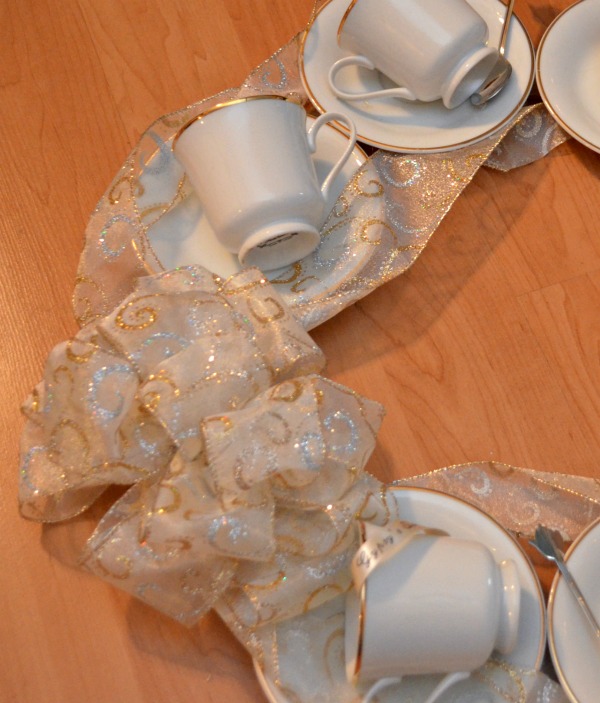
There will be an empty spot left; that’s where your bow goes!
Step 3: Glue a teacup to each saucer, alternating directions.
I didn’t want it to look too symmetrical, so I varied the angles and directions of the cups as well as which side the handles were facing.

Step 4: Add accents to the cups and saucers, like spoons, teabag holders, etc. and glue in place.
Again, I tried to vary the positions of the accents and to space out similar ones so there weren’t two of the same thing right next to each other. You could also add gold tea bags in some of the cups if you have them.
Step 5: Create a bow and wire it to the wreath form in the empty spot. I liked the look of having the bow on the side, rather than the top or bottom, but you can choose whatever placement you like.
I also like to position the streamers exactly where I want them to “sit” and glue them in place.
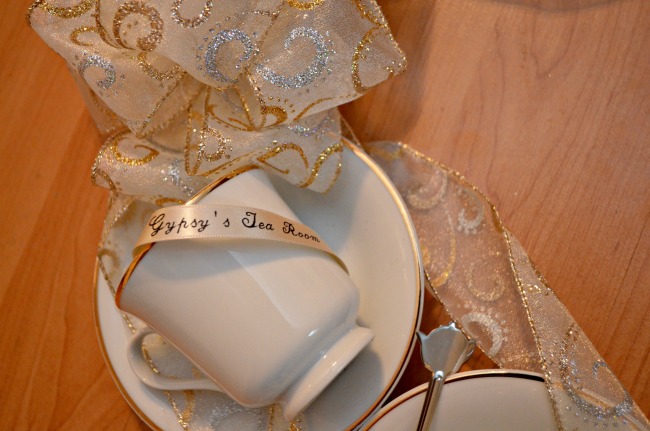
Step 6: {optional} Print and attach ribbon using the Epson LabelWorks.
If you’re just making this for your home, this step isn’t necessary, although it could be fun to put your family name or another message on there for sure! Since ours represents a business, though, we wanted to find a pretty way to incorporate the name of the Tea Room into the wreath. I used my ribbon printer {have I mentioned I love that thing?!} to create a piece that says “Gypsy’s Tea Room” and glued it around one of the teacups that didn’t have another accent already.
Due to the weight and fragile nature of the wreath, it’s honestly not really meant for hanging. I suppose you could try, but I would personally be afraid to. But it sure makes a pretty piece to sit on a table, doesn’t it? Imagine it maybe with a tea pot in the center or perhaps some advent candles… I think it turned out gorgeous and elegant, and we’re hoping that the silent auction attendees do too!
If you’re local, stop by during the Festival of Wreaths November 29-December 7. If not, I still hope you enjoyed seeing this one! And guess what…this isn’t the only wreath I had a hand in for this year’s festival. That’s right. Erin and I whipped up a little something of our own to represent One Artsy Mama. Oh, yes, friends, it’s fabulous and crafty and you are going to love it…plus we have a sing-along video AND a blooper reel for you coming soon; stay tuned!

Why does a tea cup look good when it’s positioned like that? Also, that’s too scary to move.
What a fun wreath! This would be great for an Alice & Wonderland party!
This is absolutely GORGEOUS! Perhaps a child’s set would work better for hanging, or as decor in a little girl’s room.
Absolutely gorgeous!!!! I love the wreath!! It would be perfect with a teapot and a couple of candles in the center. Gorgeous!!