Build a Pallet Bench: Part 2
Thanks to Thompson’s® WaterSeal® for sponsoring today’s post. All opinions, as always, are honestly my own.
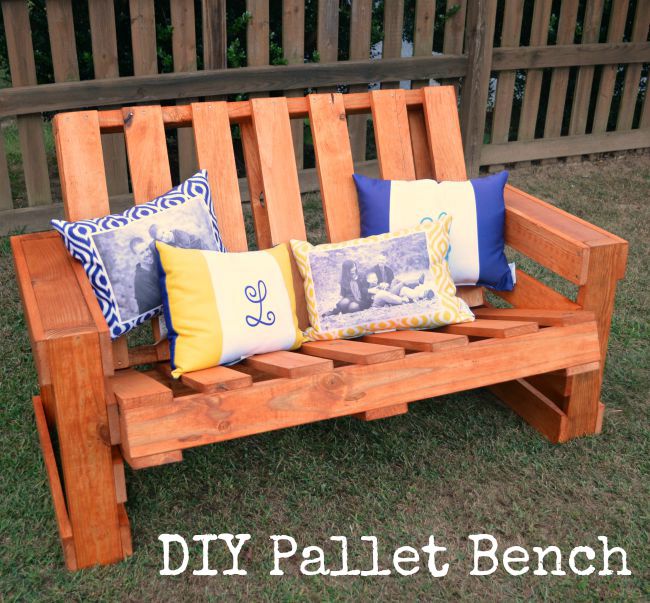
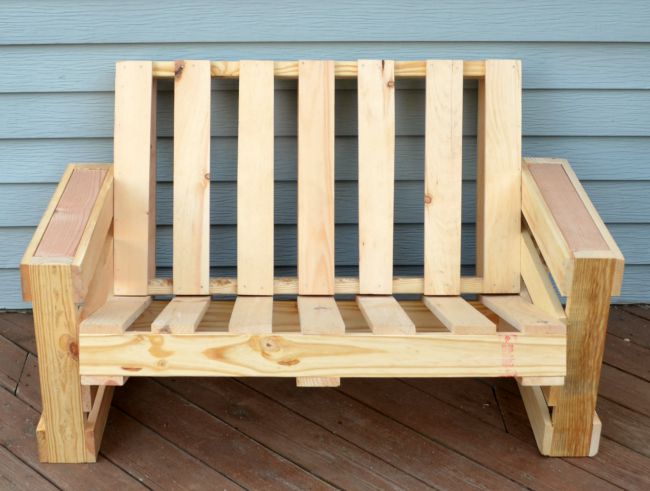
Friends, can you believe I actually built a bench?! I am so excited about this latest project; it’s the biggest, most useful thing I’ve ever actually constructed myself, and I even got to use power tools to do it! If you missed the first post in the series, be sure to check it out and see how simple it is to build your own bench using two half pallets, two quarter pallets, and a couple of 2×4 boards. Here is my fully assembled bench, ready for the next steps.
The purpose of this bench is to provide a place to sit in the rose garden we’re creating in one section of our backyard and enjoy the view. Since it’s going to be uncovered and outdoors year round, I knew that I wasn’t finished until I sealed and protected it from the elements. I also knew I wanted to stain the wood because it wasn’t all the same color to begin with, plus I wanted a darker finish. For this part of the process, I decided to use Thompson’s® WaterSeal® Penetrating Timber Oil because instead of having to stain and then waterproof it, the Timber Oil provides both beauty and protection all in one coat. It’s designed with a triple blend of deep penetrating premium oils that protect the wood from water damage, while the coating resists mildew and UV damage. It also contains premium iron oxide pigments to provide long-lasting beautiful colors that hold up to wear and tear and minimize lap marks and color streaking.
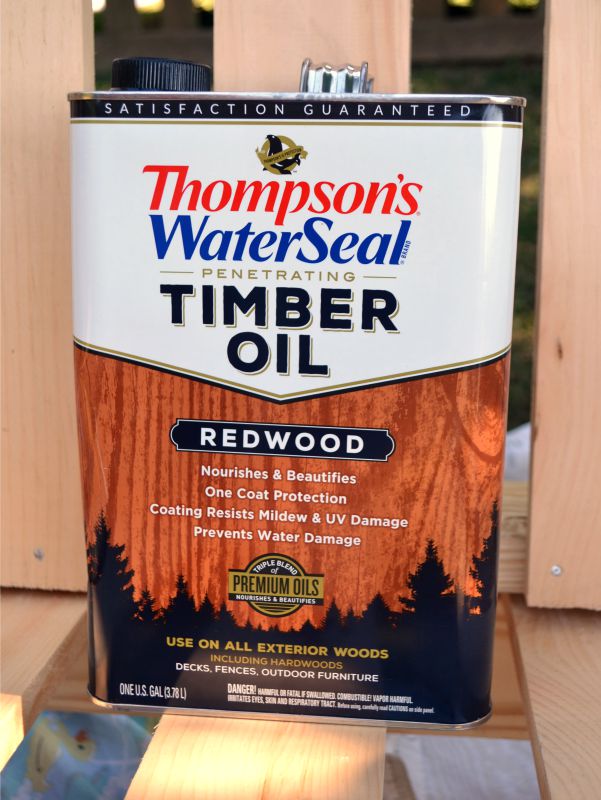
Thompson’s® WaterSeal® Penetrating Timber Oil exceeds the industry standard for waterproofing wood, provides year-round protection, and even reduces marring and visible scratches. You can apply it with a paint pad, a brush, a sprayer, or a roller, depending on what works best for your project.
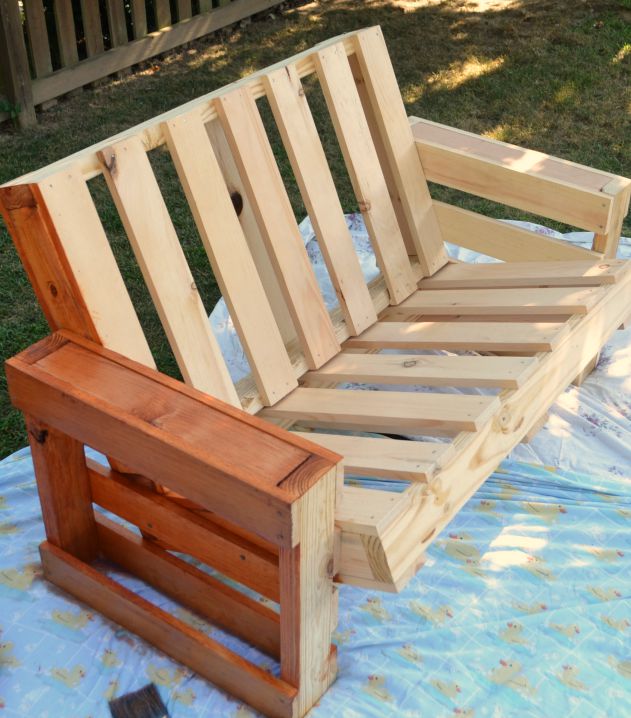
The process is simple. Before you start to stain, make sure you thoroughly sand your project to get rid of any splinters, rough edges, and unwanted markings. Then, all you need is your choice of Thompson’s® WaterSeal® Penetrating Timber Oil {I picked Redwood}, a brush, a disposable paint pan and liner, and gloves. I shook the can well, poured a small amount of timber oil into the paint pan, then carefully applied it to the wood. I started on one side of the bench and worked my way across the front to the other side and finally the back.
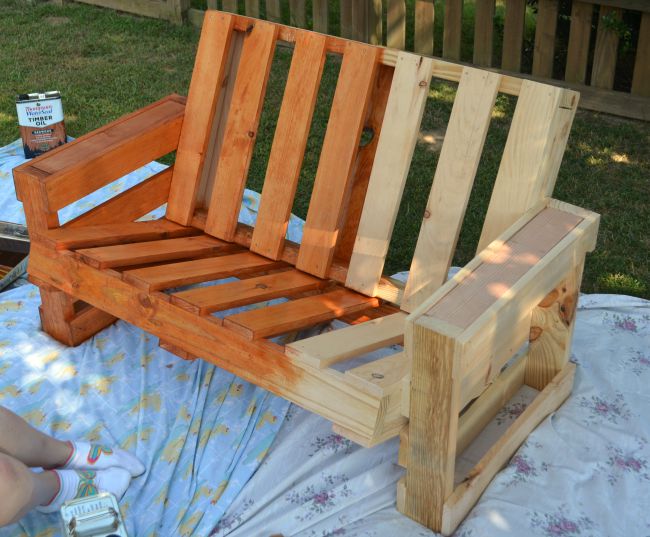
The key to getting a nice finish is to use the timber oil sparingly…a little really goes a long way. Only apply a thin coat at the rate the wood can absorb it, which is pretty quickly! Any spots that have excess product or look especially wet may end up tacky. You also want to avoid drips. The process wasn’t difficult at all, just a little time consuming because there are a LOT of surfaces on a pallet!
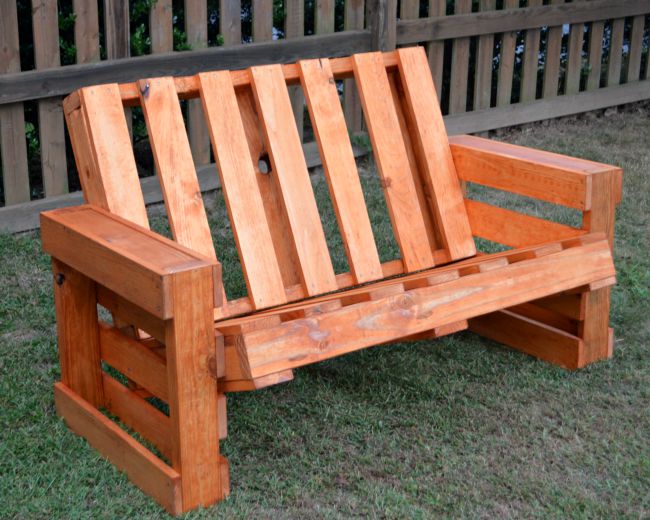
In retrospect, I think next time I’d do the staining and sealing first, then build after everything was dry because some of the crevices were a little bit tricky to reach once the bench was assembled. One coat did the job, there was no need to reapply. Once you’re finished applying the timber oil, let it dry completely for at least 8 hours before trying to sit on your furniture.
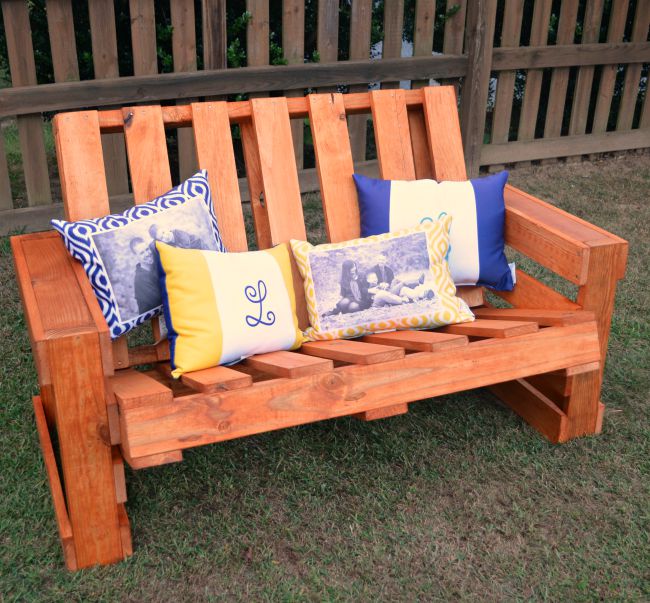
I am thrilled with the color and the way my bench turned out! I feel like it looks so fun and so professional at the same time. I am in the process of ordering some cushions and pillows for it, but in the meantime, I tossed a few of the Shutterfly Outdoor Pillows that usually live on my deck chairs on it just to give you an idea of how it will look.
Stay tuned for Part 3 to check out the finished project, complete with its own cushions. What do you think? Would you love to have a bench like this in your yard or on the porch?


Love it…especially the color!! I’d love to have it on my porch 🙂
is it seemed to be a kind of wood stain ? is’n it?
Yes, it is. The Thompsons WaterSeal is a stain and sealer all in one!
Hi there Amy, nice bench you’ve got there, and it seems pretty easy to make. I think I am going to try out something like this come next weekend. I have lots of old wooden pallets which I believe can make something cool, then maybe add some stain. Thanks a lot for the share.
Cindy
Yay! I’d love to see what you create! I was surprised by how easy this was to do.
Thumbs up!
Nice bench. Wouldn’t be more comfortable if the pieces of wood on the seat and the back are closer together? I am defiantly making a couple of these for our relaxing area.