Watercolor Resist Leaf Paintings
Thanks to Elmer’s for sponsoring today’s post. All opinions are honestly my own.
I’m always looking for fun, seasonal projects to do with Little Crafter, but each year, I find myself needing to get even more creative. If you’ve seen a fall craft on Pinterest, we’ve probably done it…maybe even twice. We’ve turned flowerpots into pumpkins, vases into luminaries, and made fall trees out of pom-poms. We’ve made bottle ghosts, fall leaf coasters, yarn monsters, and popcorn box mummies. This time around, I wanted to do something that would help hone his artistic skills and be a piece we can keep on display all season, from now until it’s time to break out the Christmas decorations. Here’s what I came up with.
This project requires very few supplies and is easily adaptable for an art class. You can modify it for students/kids of all ages; in fact, it’s even fun for grownup artists! For older kids, it’s a great chance to talk about warm and cool colors, resist technique, watercolor technique, and more. For very small artists, it can still be just plain fun!
Materials:
Pencil
Blank Canvas {ours is 6×6}
Elmer’s Glue-All or X-Treme School Glue
Watercolors
Paintbrushes
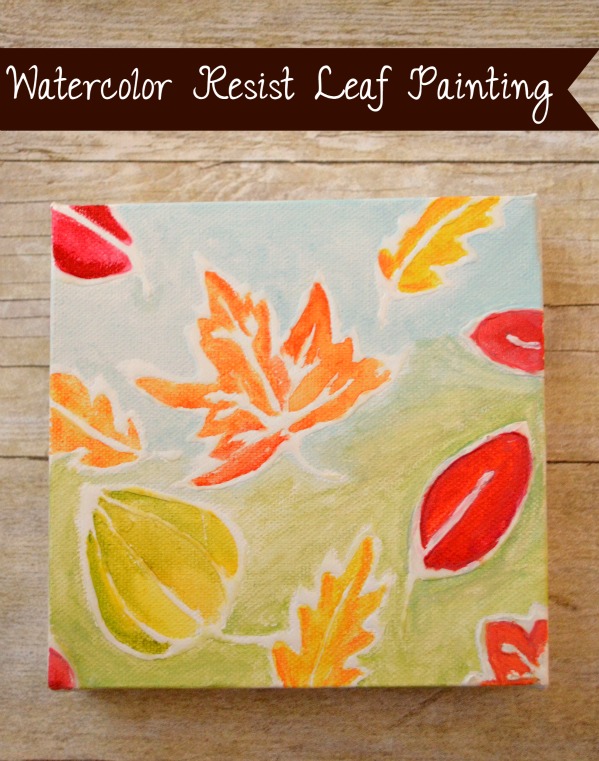
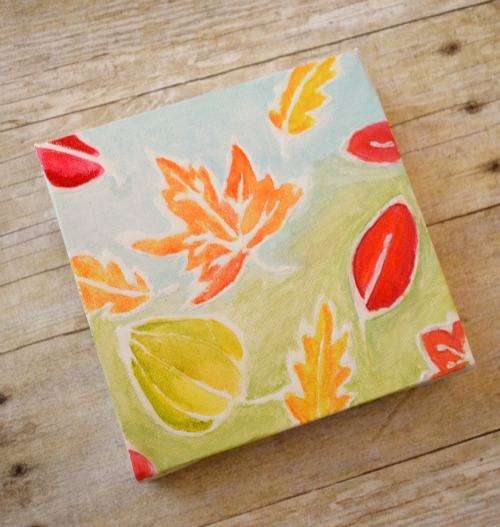
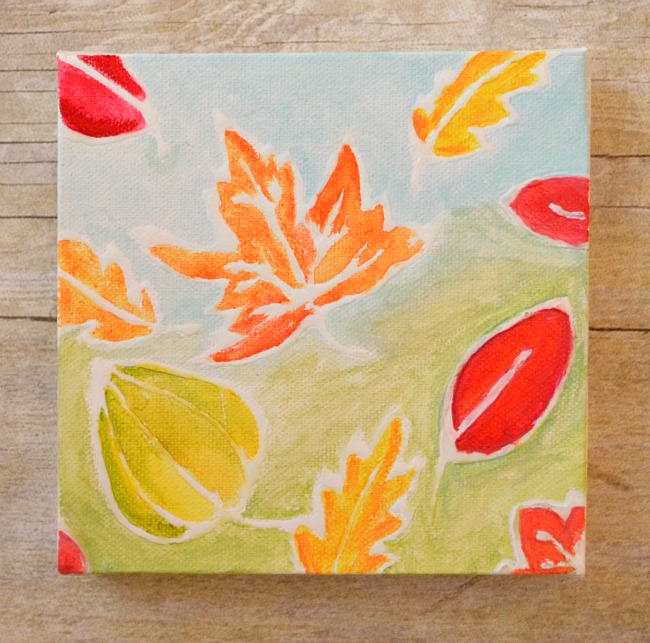
Step 1: Trace or draw leaf shapes onto your canvas.
We decided to do lots of small leaves but you could also do just one large one in the center. Part of the fun of this project can be the preparation step, where you actually go outside and hunt for leaves of different shapes and sizes to trace.
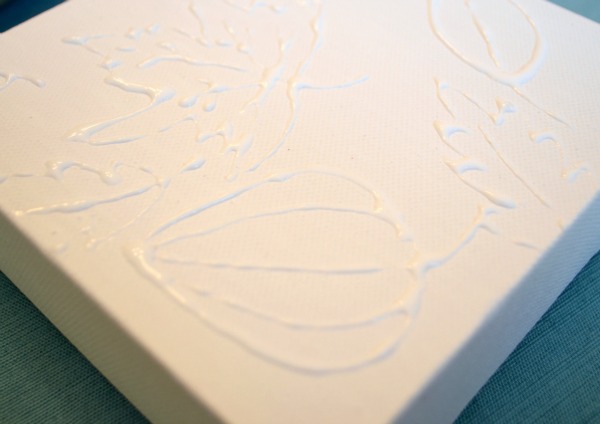
Step 2: Outline your shapes with Elmer’s glue.
In addition to the outside edges of the leaves, you’ll want to make some lines to represent the leaf veins. Let the glue dry completely before you move on.
Step 3: Fill in your leaves and background with watercolors.
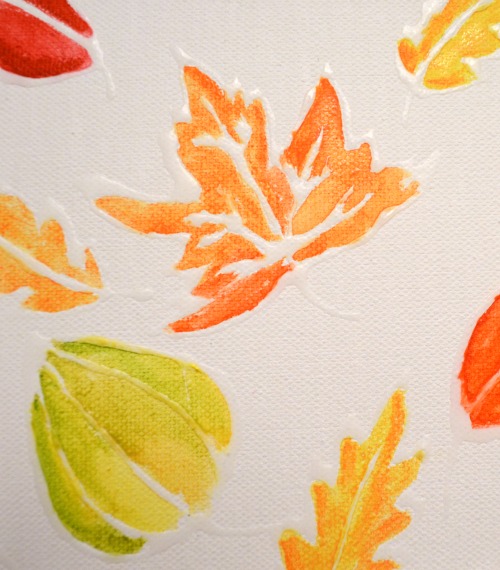
This is a great time to talk about warm and cool colors with your kids/students. Fall leaves tend to be in the warm color family: reds, oranges, and yellows, so you can encourage kids to use those for the leaf parts of the painting. Then, have them use a cool color like blue, green, or teal for the background.
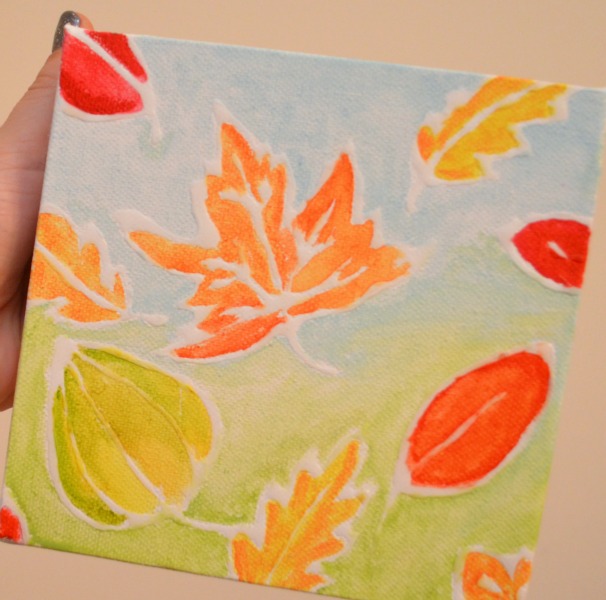
That’s all there is to it! If you like, you can trace around the glue lines with black permanent marker to make them pop, but we chose not to. Now you have a fun, seasonal piece of art to display on your wall or mantel! Create several to make your own mini gallery wall just for fall. If you’re doing this project with a large group and don’t have canvases for everyone, watercolor paper will work too and you can frame the finished products or display them on a bulletin board. What do you think? Is there a little artist {or several} in your life who would love this project? Would you enjoy trying it yourself?

I recently tried this myself using vidid colors. It was great fun.
I really love that! Cute kids art that you can actually hang (you know, instead of sticking in their memory box ;D)
It’s nice to see a bright Fall colour palette. Just have to say, great use of the warm colour cool colour rule, I think many people forget to combine the two colour categories.
Amazing project! I cannot wait to try with my daugthers 🙂 THANKS for sharing the tutorial 🙂
I love how beautiful this is! Watercolor always appeals to me, and I think it looks great on canvas. So fun!
That turned out really nice…love the colors…
Great idea! I am always on the lookout for crafts for my daughters aduld day care., do you think you might have a christmas craft idea thst i could also use? This group are very capable and enjoy diff crafts. Thanks will be doing the leaves next week!
Thank you! I have quite a few Christmas craft ideas; you can find them all by clicking on the “Holiday Ideas” tab at the top of the website, then scrolling down to the Christmas subheading. All the crafts from previous years are there!