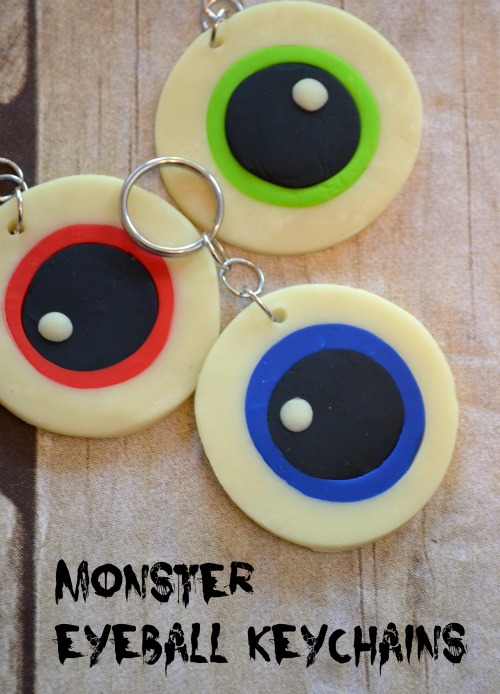
Glow in the Dark Monster Eyeball Keychains
Thanks to Sculpey and Polyform Products for sponsoring today’s post; all opinions are my own.
Halloween is less than a month away, which means it’s time for this artsy mama to start thinking about what Little Crafter is going to give out to his classmates this year. There are quite a few kiddos in his class with various food allergies, plus we all know there’s no shortage of candy and sweets at Halloween, so I decided to come up with a non-edible treat instead. This way, everyone can enjoy the same thing, no one will feel left out, and it’s something they can actually keep and enjoy for a long time to come! I recently found out that Sculpey has Glow in the Dark clay, so I thought it would be pretty awesome to use it for creating Monster Eyeball Keychains the kids can use on their backpacks. Here’s how easy they are to make…
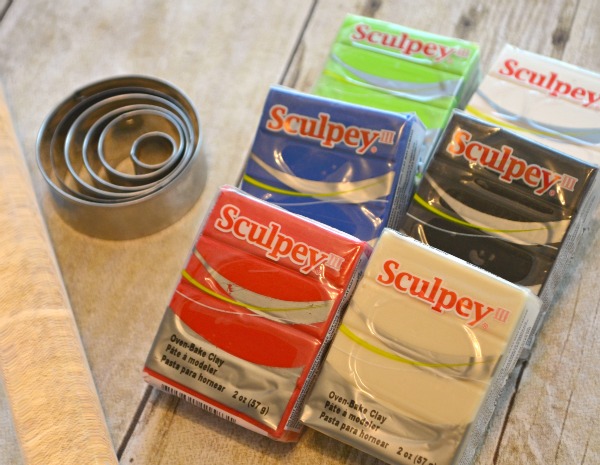
Materials:
Sculpey III Glow in the Dark clay
Assorted colors of Sculpey III: I used Red Hot Red, Blue, Granny Smith, and Black
Acrylic Roller
Sculpey Graduated Circle Cutter
Toothpick or Clay Needle End Pointer Tool
Aluminum foil and baking sheet
Key ring
Jump rings
Needle nose pliers
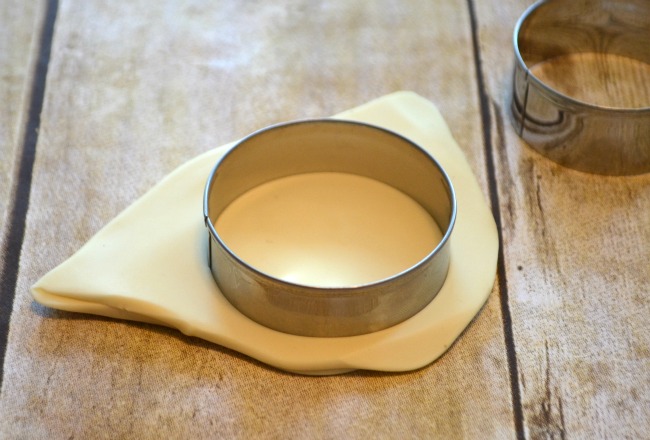
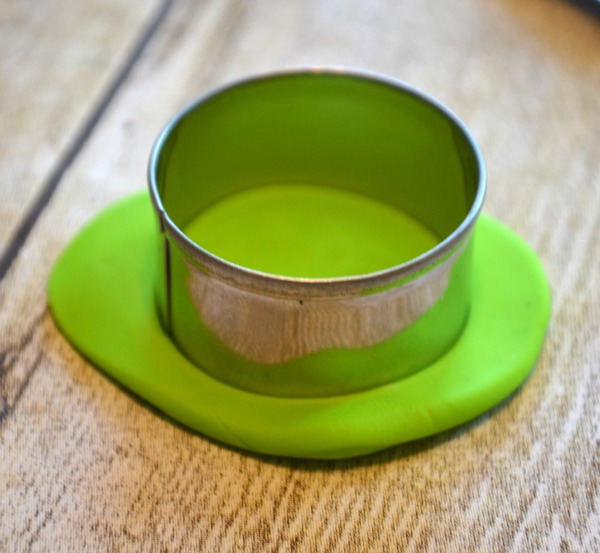
Step 1: Roll and cut an eyeball from Glow in the Dark Clay.
You’ll want to condition the clay a bit first by rolling it around in your hands to warm it up. Then, place it on a flat surface and use your acrylic roller to flatten it to about 1/4″ thickness. If you don’t have a clay roller, a rolling pin or other substitute will work, but be sure that any materials you use when working with clay are dedicated just to your craft projects and will no longer come into contact with food. Then, use the largest of the circle cutters to create your eyeball base.
Step 2: Roll and cut the iris of the eye.
Choose whatever color you like and repeat the first step, this time using a smaller circle. I used the third largest cutter in my set for this part.
Step 3: Cut an iris-sized circle from your main eyeball. Take it out and replace it with the colored one.
Just pop the new one in the hole and it should be a perfect fit.
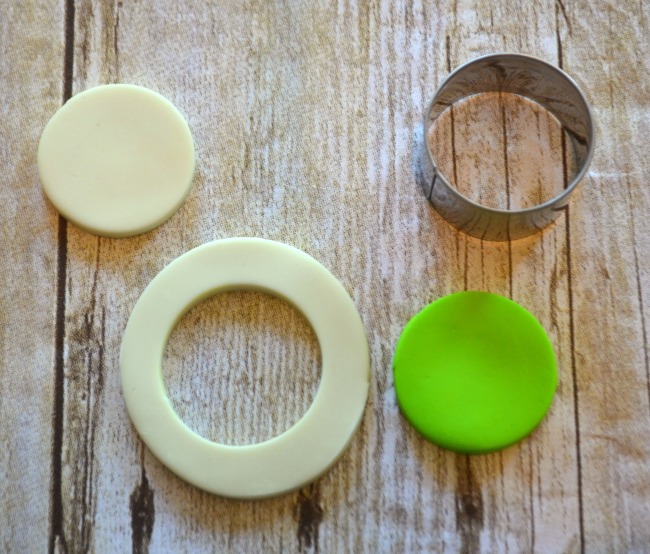
Step 4: Roll and cut a pupil.
Follow the same steps again, this time using black clay and your smallest circle cutter.
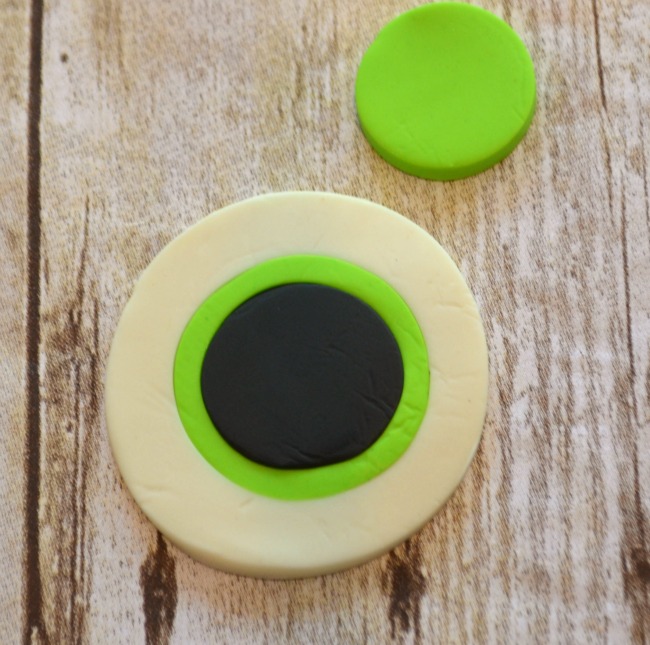
Step 5: Cut a pupil sized hole from your eyeball and place the black one inside.
This part works exactly the same as when you put the iris in. Remove the colored circle and switch it out for the black one.
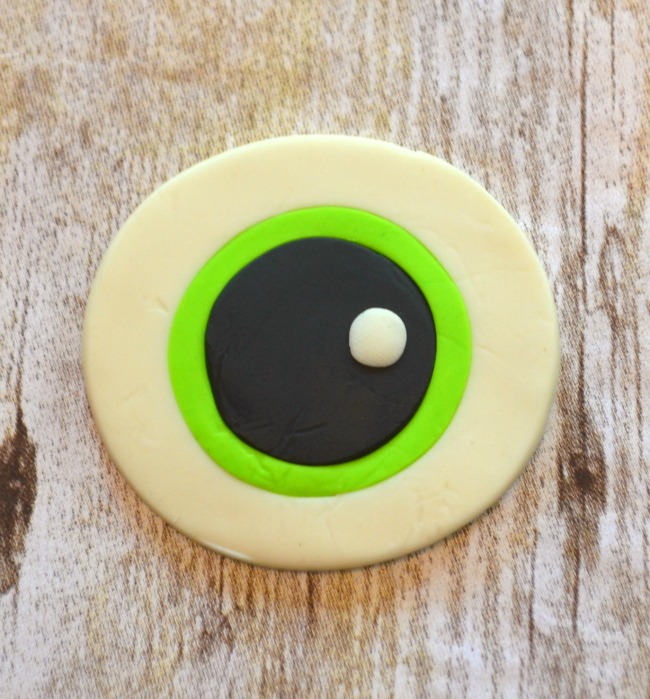
Step 6: Gently roll over the clay to bond the layers.
Since you’re putting three separate circles together, you’ll want to make sure they’re firmly attached to each other. Place wax paper or foil on top of the eyeball and gently roll to “smoosh” {that’s a technical term} the clay together. Be careful not to roll too hard or you’ll distort the shape. If the eyeball does look a little more oval than round when you’re finished, just use that largest circle cutter on the whole thing one more time.
Step 7: Poke a hole in the top using a toothpick or clay tool.
Make sure it goes all the way through the clay and is a clean opening large enough for your jump ring.
Step 8: Bake according to package directions.
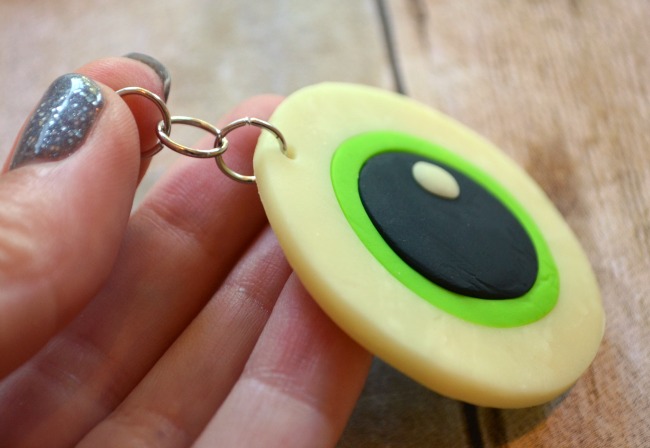
Step 9: Attach jump rings.
I used three to build a little chain between my eyeball and the key ring. You can use as many or as few as you like. Always make sure to open and close jump rings by gently twisting the cut ends away from each other rather than pulling them in opposite directions.
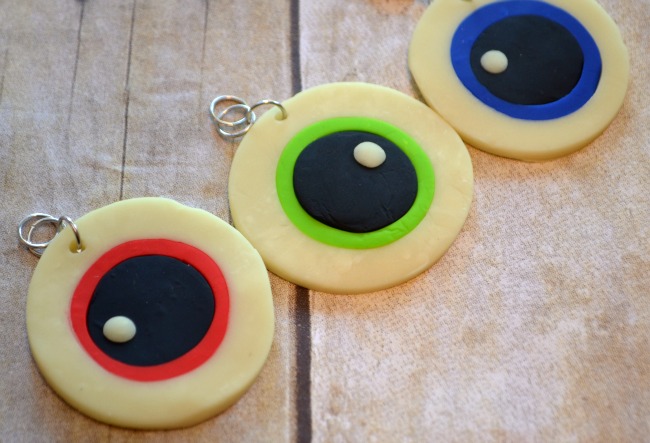
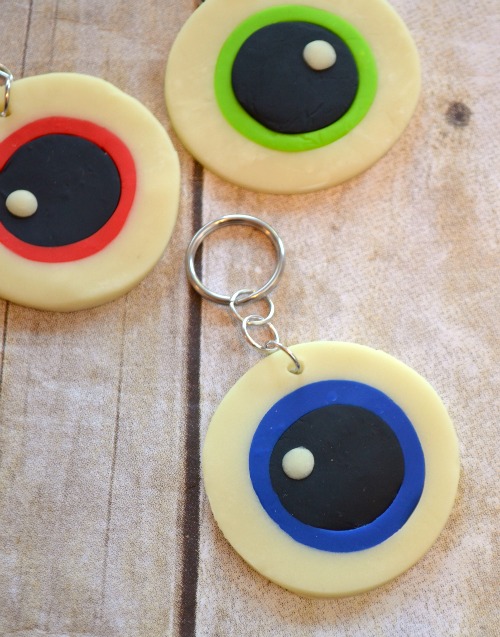
Here’s a look at the three color variations I made. Which one is your favorite? I like the blue one best, but the others are definitely creepy! If you want to get extra monster-y, you can use a fine tip red marker to add veins.
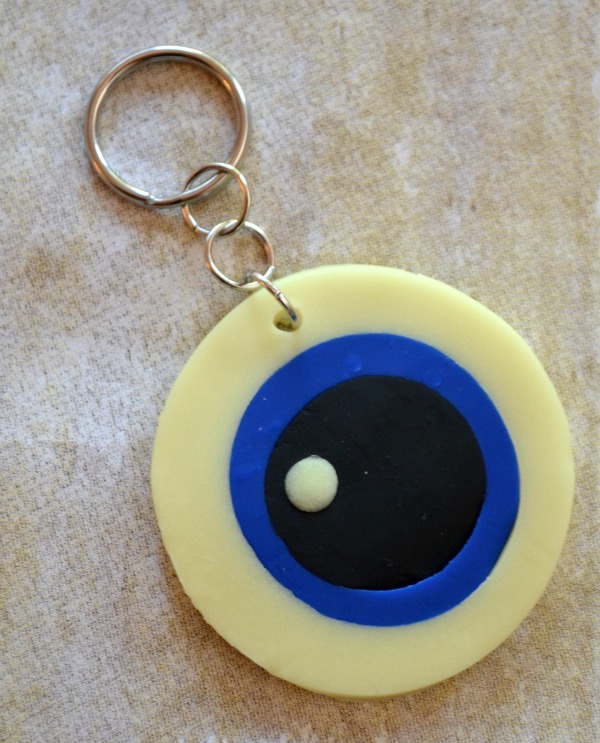
Step 10: Attach a key ring.
I thought a key ring was a fun choice because LC’s friends can put them on their backpacks or coats as zipper pulls and enjoy them all season long. If you prefer, though, it’s just as easily to use only one jump ring and a piece of cord or chain to turn these into simple necklaces.
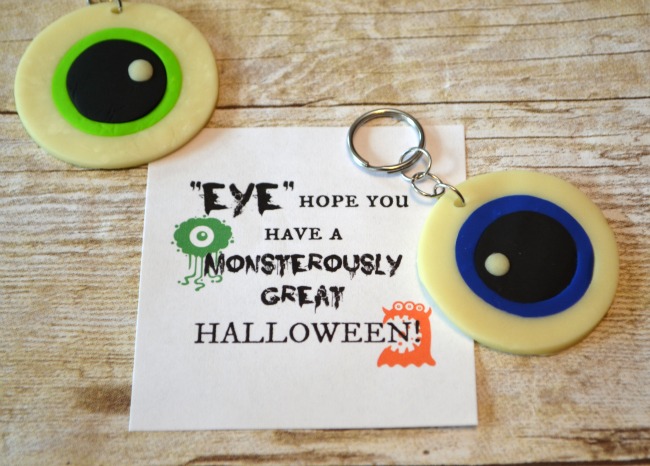
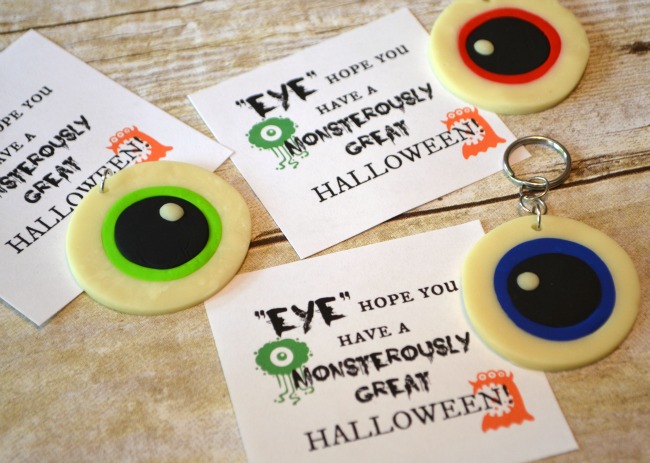
Step 11 {optional}: Attach your printable.
I thought we could write the names of LC’s classmates on these along with his name at the bottom so that everyone knows whose eyeball is whose.
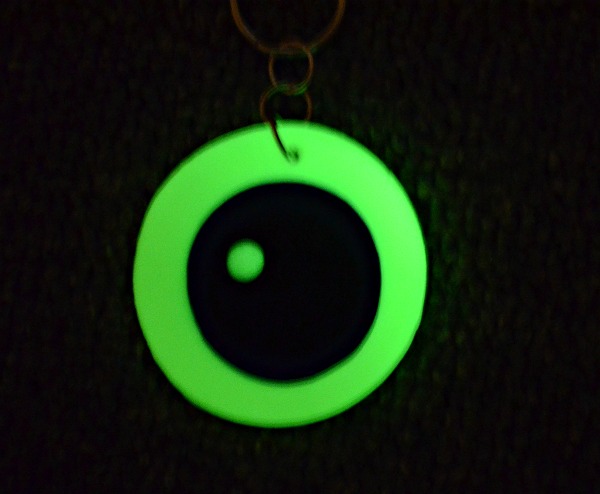
Of course, once these were finished, I had to test out the best part…do they really glow in the dark? Turns out, they sure do! They look totally awesome when the lights go out! If you’ve ever tried to photograph something in the dark, you’ll understand why this was the best photo I could get, but trust me…the kids are going to love it.
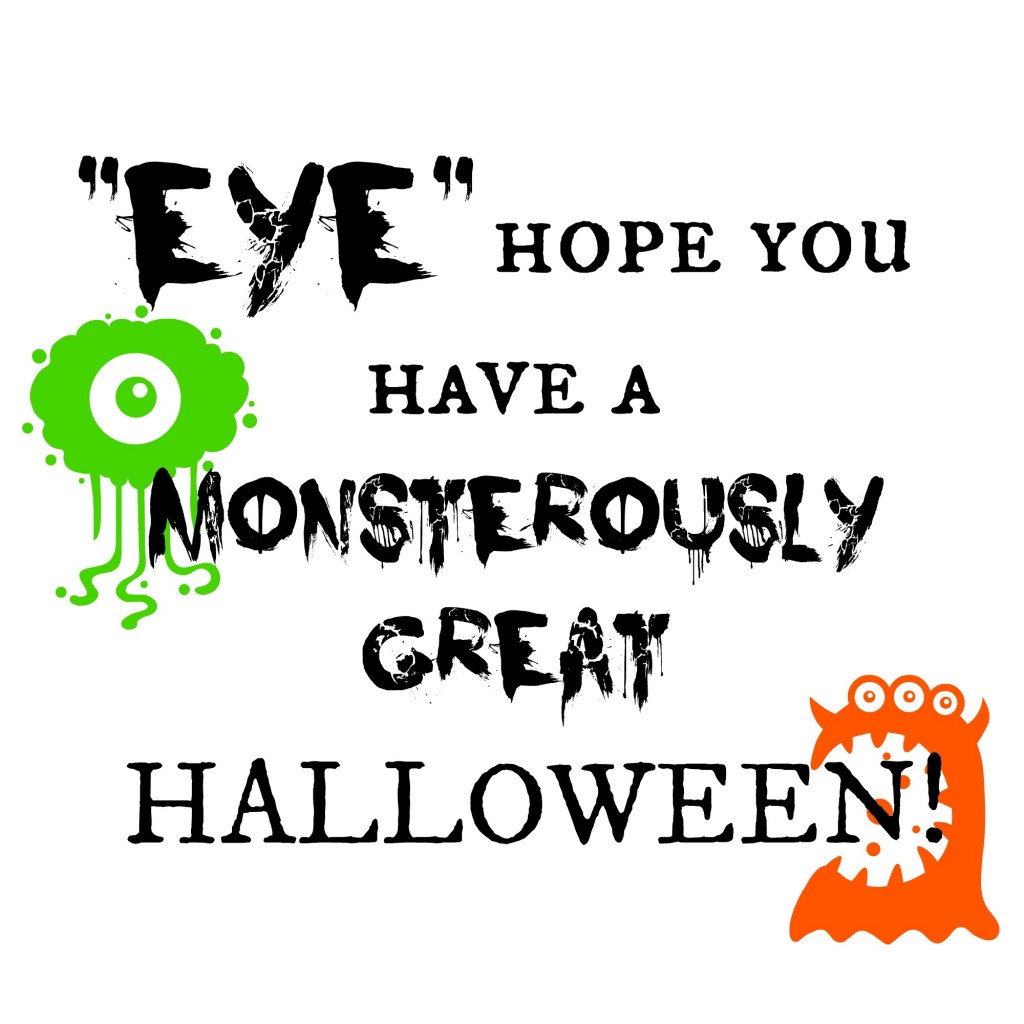
In case you want to make your own, here is the printable I made up to go along with them when we give them out at school. Feel free to right click and save the image to your own computer, then print out as many as you want for personal use!
What do you think? Aren’t these fun and festive for Halloween? I can’t wait to see what LC’s friends think of them. Are there some little people in your life who would love something like this as a holiday surprise?

These are AMAZING!! So creative. Trying this for sure!
Um, I LOVE the glowing so much!!