Hand Lettered Wooden Sign Workshop
Thanks to Plaid Crafts for sponsoring today’s post. All opinions are honestly my own.
Did you know that March is National Craft Month? That’s right, it’s the perfect time to get out your supplies and start creating! And what could be more fun that crafting with your friends? To celebrate, I invited a group of my girlfriends over for a Hand Lettered Wooden Sign Workshop where we enjoyed each other’s company, had some delicious desserts, and made decorative signs to display in our homes.
Here’s what you need to have your own group crafting night:
unfinished wooden signs
assorted colors of Apple Barrel® Paint
assorted stencils
paintbrushes
paint pens and/or permanent markers
Step 1: Set up your crafting area.
I covered my tables with plastic tablecloths and provided each guest with a paper plate she could squeeze paint onto. I also printed out a packet with some basic hand lettering instructions for each of my friends to use as a reference. Then, I placed two baskets filled with paint and a variety of stencils and paintbrushes on the table for everyone to share.

Step 2: Each person chooses a sign.
We were lucky enough to have handmade wooden signs provided for us by the husband and son of one of my friends. They had lots of scrap pallet wood and actually enjoyed creating a bunch of signs in various shapes and sizes. If you’re not up for making your own, you can easily find these types of signs in craft stores or the craft section of other retail locations.
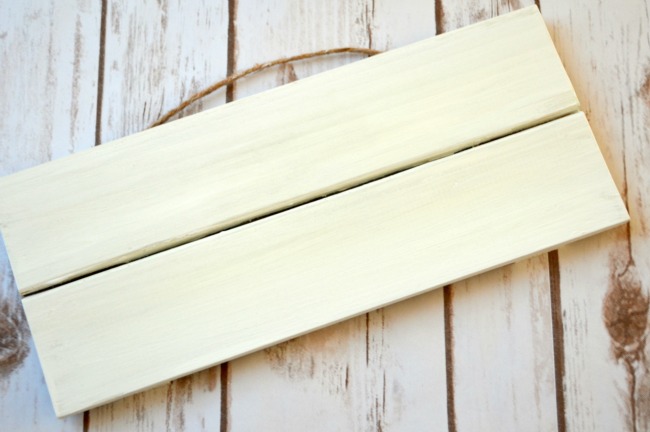
Step 3: Paint the sign.
Each guest got to choose whatever color{s} she wanted, then got to work giving the sign a few good base coats with a wide brush. Most of us knew where we were planning to display our signs, so we coordinated with the color scheme in those rooms. Apple Barrel paint comes in a huge variety of colors in Regular, Multi-Surface and Gloss formulas. You can find it for a great price as well as the largest selection at Walmart.
Step 4: Let it dry completely while you enjoy some snacks and drinks!
This was definitely a fun part of the process, because my friends brought amazing snacks, including chocolate peanut butter cookies, peanut butter blondies, brownie bites, cheesecake, homemade caramel corn, and more! This gave us a time to chat and catch up and for some of the ladies to get to know each other better while our projects got ready for the next step.
Step 5: Add lettering and stencils.
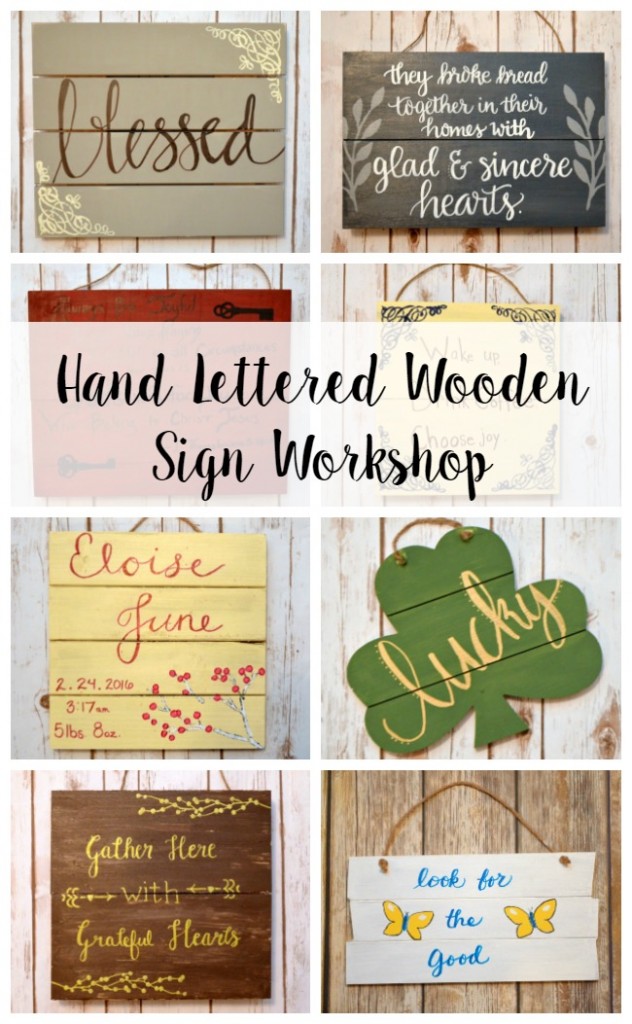
It was time to finish up our signs by decorating them with words and images. Most people came with an idea of what they wanted their signs to say. I also provided a variety of FolkArt® and Martha Stewart® stencils to add an extra decorative touch. We used the Apple Barrel paint for the stenciled images, which is always a great choice because it’s water-based for easy soap and water clean-up, as well as certified AP non-toxic, and made in the USA. For the lettering, guests could use paint, paint markers/pens, or permanent markers. Here’s how they turned out!
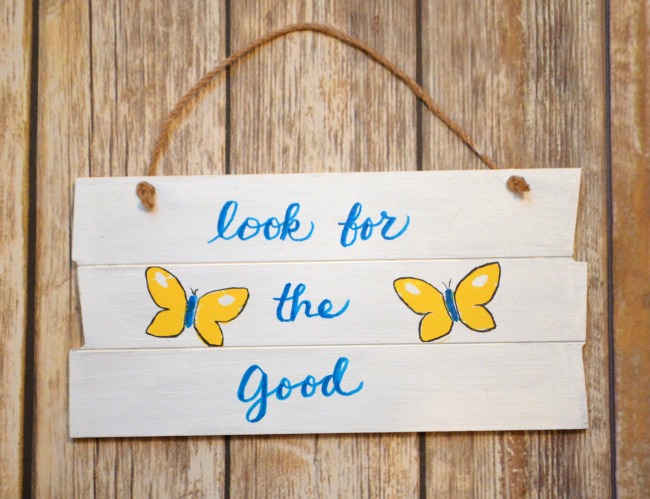
Sherl made a small sign painted with Apple Barrel White and some cute stenciled butterflies for her kitchen to remind herself to look for the good every day!
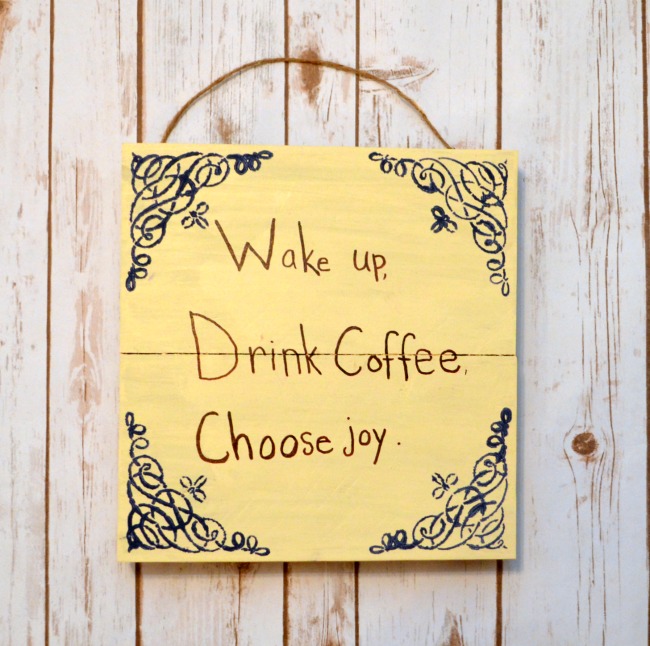
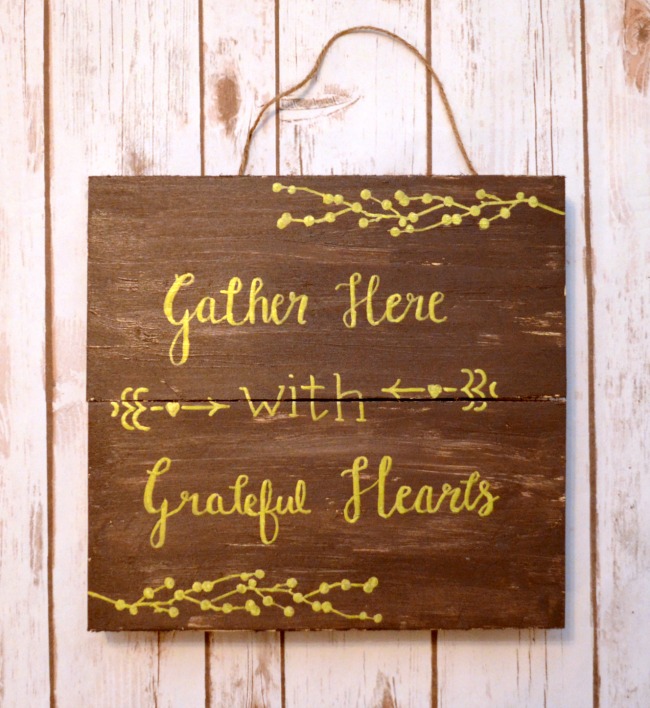
Maggie wanted a sign to hang over her coffee pot, so she chose this fun saying! Her background is Toasted Marshmallow, with English Navy stenciled embellishments in the corners.
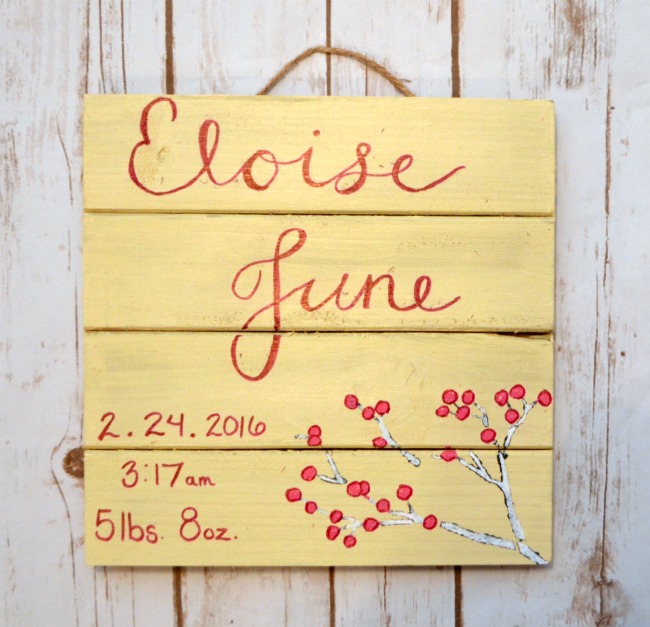
Meghan also chose Toasted Marshmallow as the background for this sign she created to celebrate the birth of a good friend’s baby girl! She created the effect of a birch tree by stenciling in Pavement first, then White, and added blossoms in Paradise Pink. How sweet will this look hanging in the nursery?
Nicole painted this pretty sign for her dining room using Chocolate Sprinkle and Toasted Marshmallow. She created the distressed effect by painting with the lighter color first, then adding the darker color before it was completely dry.
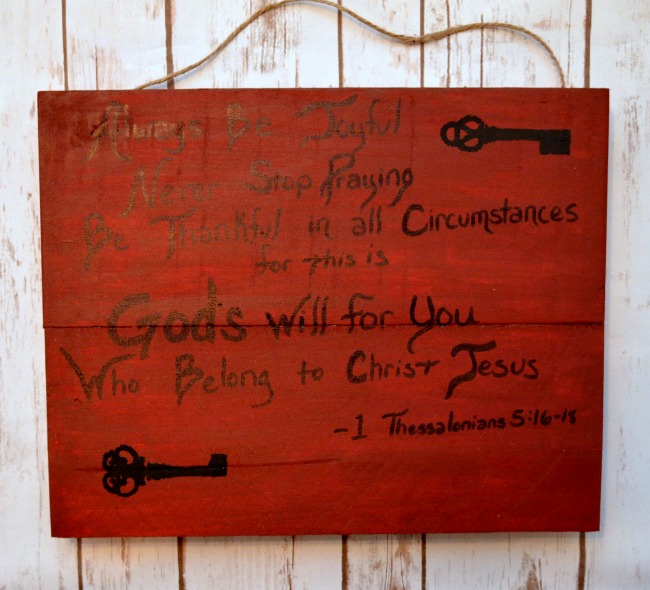
Pinwheel decided to mix Candy Apple and Admiral Blue to create her own shade of red for this sign. She also used one of my favorite stencils, the Skeleton Keys {which I also used on my Decorative Crate last month}.
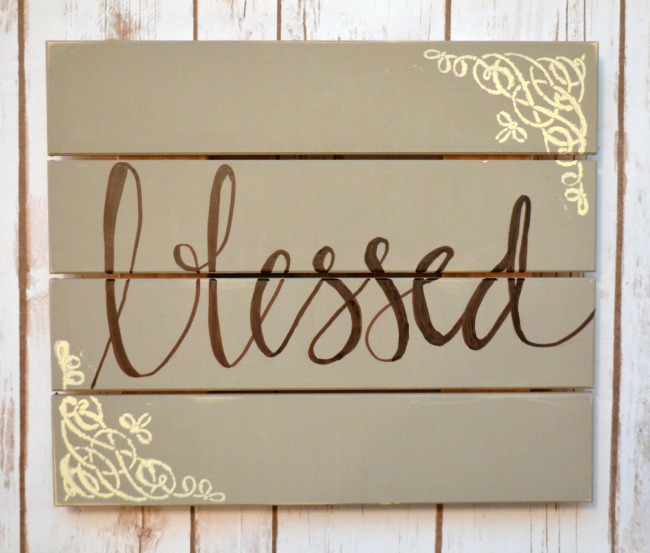
Bonnie made this gorgeous “blessed” sign using FolkArt® Home Decor Chalk in Castle along with Apple Barrel Toasted Marshmallow stenciled embellishments.
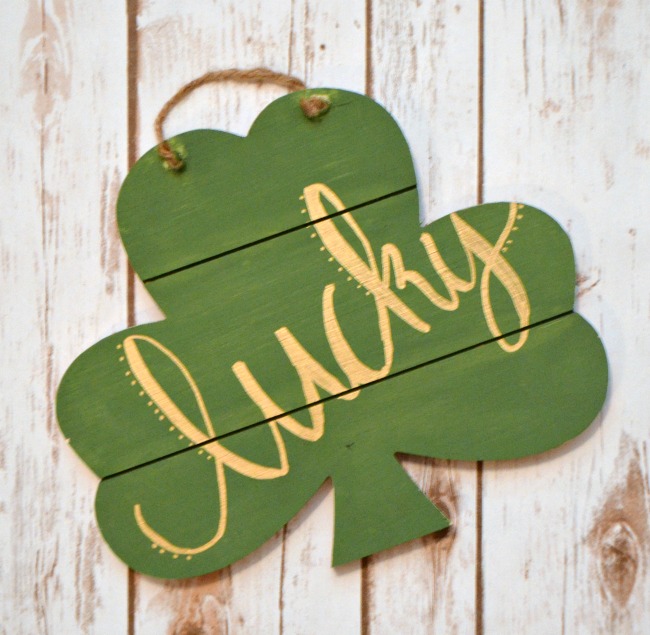
She also brought along a shamrock shaped sign, which she painted for her front door!
That just leaves one more sign to share, mine! I’ve wanted a sign with this phrase for my dining room for a long time now, so I finally created it! I used Dark Granite for my background and Timeless Gray for the stenciled leaves. I’m thrilled with how it turned out!

Hosting a party like this with Apple Barrel paints is a fun, affordable way to explore creativity and make memories together. Everyone who came had a great time, and those who couldn’t come have been asking if I will host another workshop so they can make signs too. {Of course I will!} Who do you know that might enjoy getting together for a girls’ crafting night?
Be sure to check out this month’s projects by the other Plaid Creators!
Cherished Bliss
Made to be a Momma
The Cards We Drew
DIY on the Cheap
Petticoat Junktion
Flamingo Toes
The Pretty Life Girls
P.S. Don’t forget, Plaid is celebrating its 40th “birthday” this year, so be sure to follow along on Facebook, Pinterest, & Instagram and sign up for their newsletter where they’ll be sharing throwback crafty trivia, highlights about the history of crafting, and special giveaways all year long!
Looks like you all had a great time! I love the cute signs!
This looks like so much fun! Adding a crafting night to my to-do list.
It was a great time! You totally should!
I love these signs! I want to make one for Easter. Just trying to figure out what I want it to look like now. Thanks for the idea 🙂
This is such a great idea to get friends together (or a MOMS group) and do something different than a restaurant or a movie, plus you can talk all night!
They all turned out great!
You guys had such a fun time – I love it! I wish I could have come over!
I wish too! That would have been so fun!
Wow, looks like a fun party. I love how all the signs have such a different personality. Paint is a wonderful thing. 😀
Thanks, Sheila! We had a great time!
What fun signs! I love them all!
These are so cute!
Thanks, Kristin!
Awesome signs! Signs are one of my favorite crafts too! Holly 😉