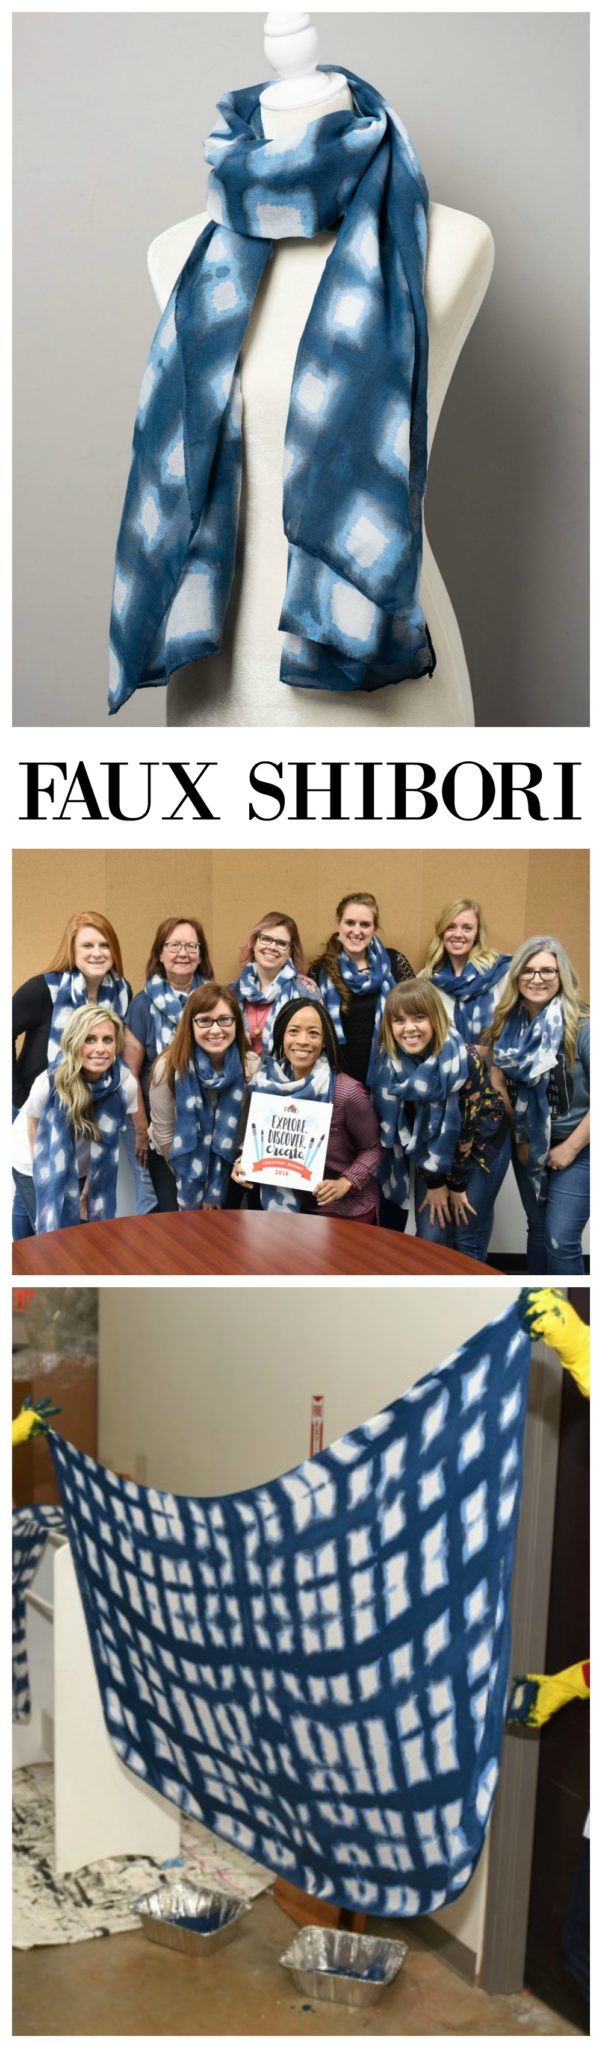
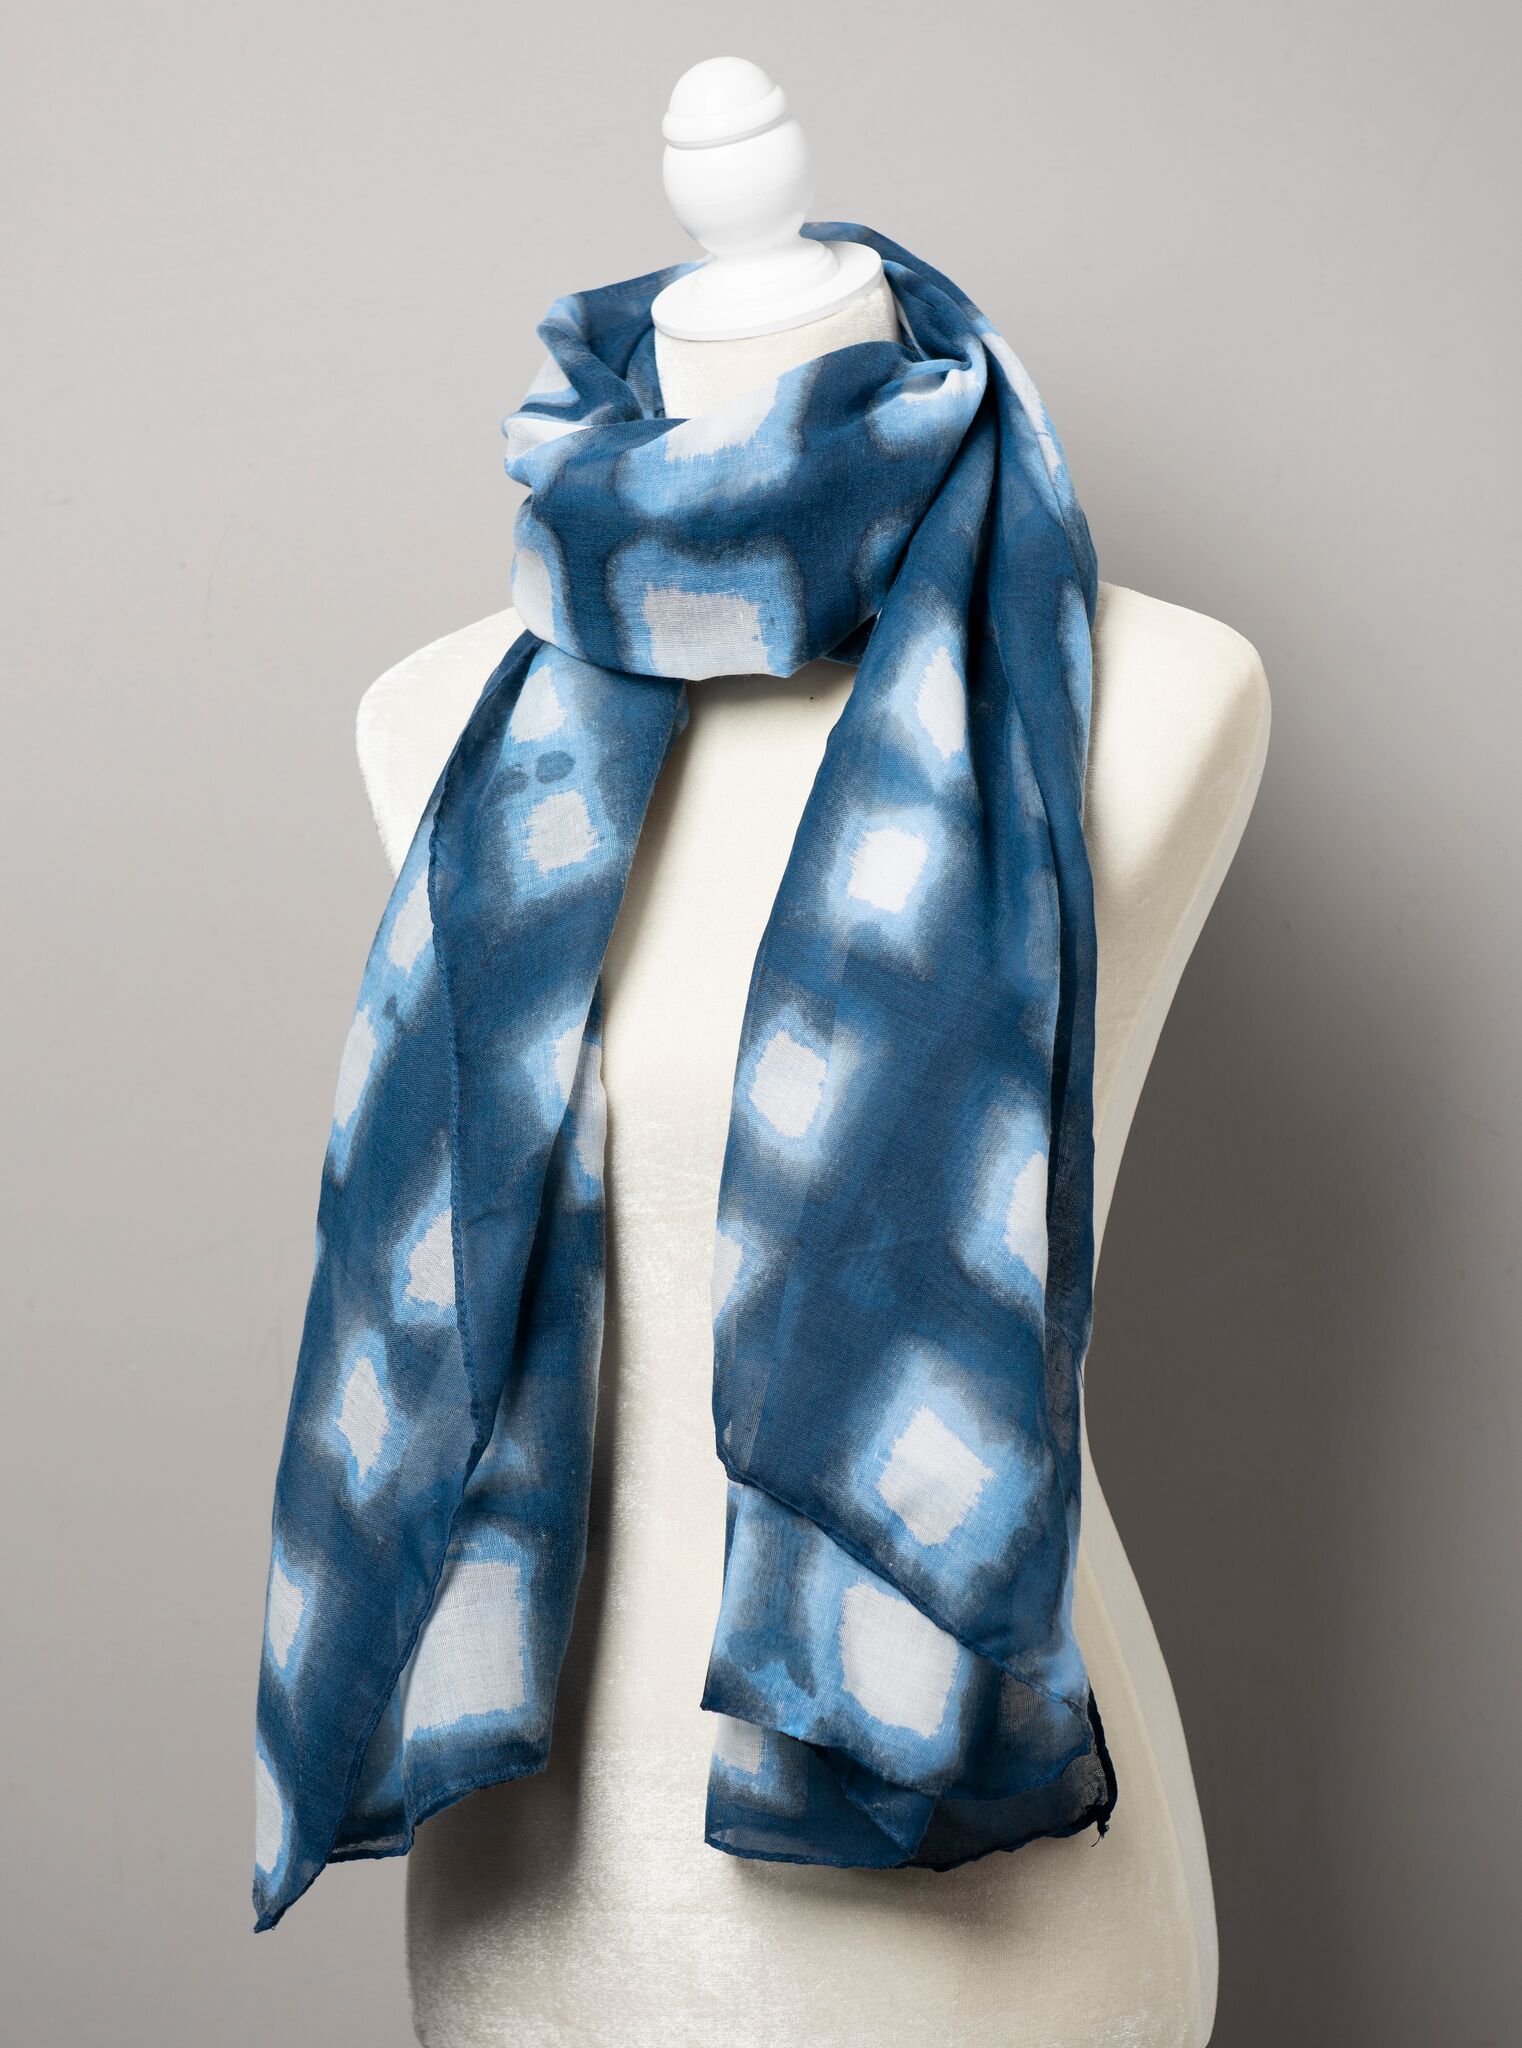
DIY Faux Shibori Scarf
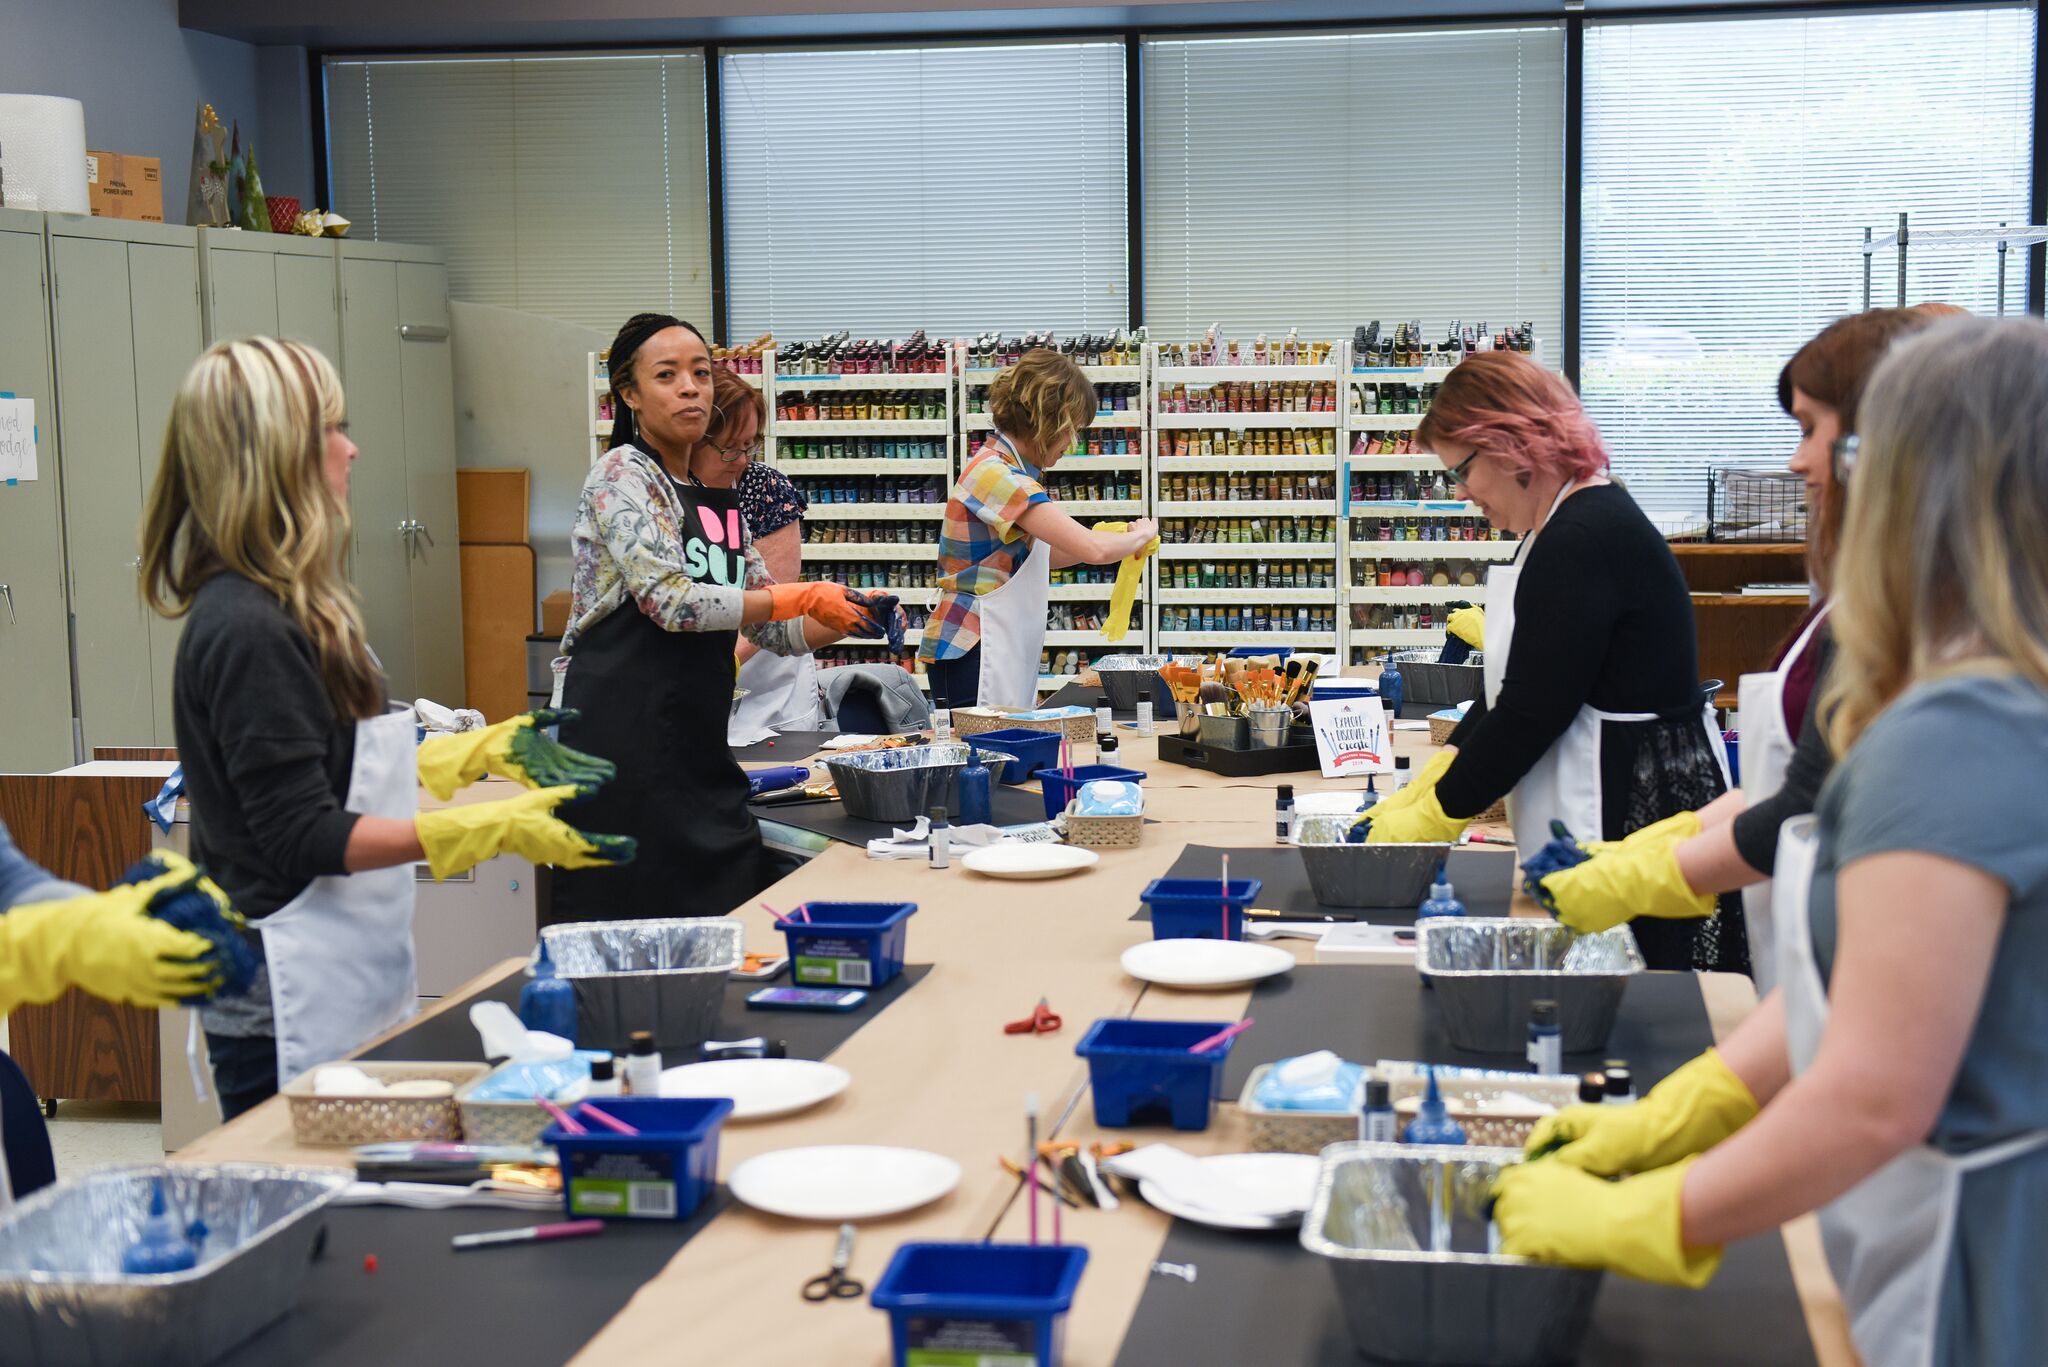
A few months ago, I had the opportunity to visit Plaid Headquarters in Georgia, where I got to play around with lots of new products and make all kinds of fun craft projects. One of my absolute favorites was a Faux Shibori Scarf. It was incredibly easy to do and the end result is stunning! I think you’re going to love it as much as I did, so today I want to share with you how you can make your own at home…take a look.
Shibori, if you’re not familiar with the term, is an ancient Japanese dyeing technique that typically involves folding, twisting or bunching cloth and binding it, then dyeing it in indigo. Doing “real” Shibori can be quite messy, and the indigo tends to stain your hands and anything else it touches. We substituted FolkArt Fabric Creations Soft Fabric Ink instead, because it’s water-based and non-toxic, but will be permanent on the fabric once it’s heat-set. That way it stays where we want to it to stay, and easily washes off of everything else!
Here’s a complete list of the supplies you’ll need.
Materials:
Fabric Creations Soft Fabric Ink
Rubber/Latex Gloves {the longer the better}
Rubber bands {you’ll want lots!}
Two wooden boards similar in size
Bin or tub, preferably disposable
Water
Step 1: Fold your scarf accordian style.
You’ll want to use one of your wooden boards as a guide for how large to make your folds. Start by folding the scarf accordian style lengthwise so that each fold is the same width as your board. Then, once you have a long strip, start at the top and make another accordian fold that’s the same size as your board so that you end up with a folded square. There are many other ways you can fold a shibori piece; this just happens to be the one we used. Feel free to find and use any method you like. There’s really no wrong way to do it.
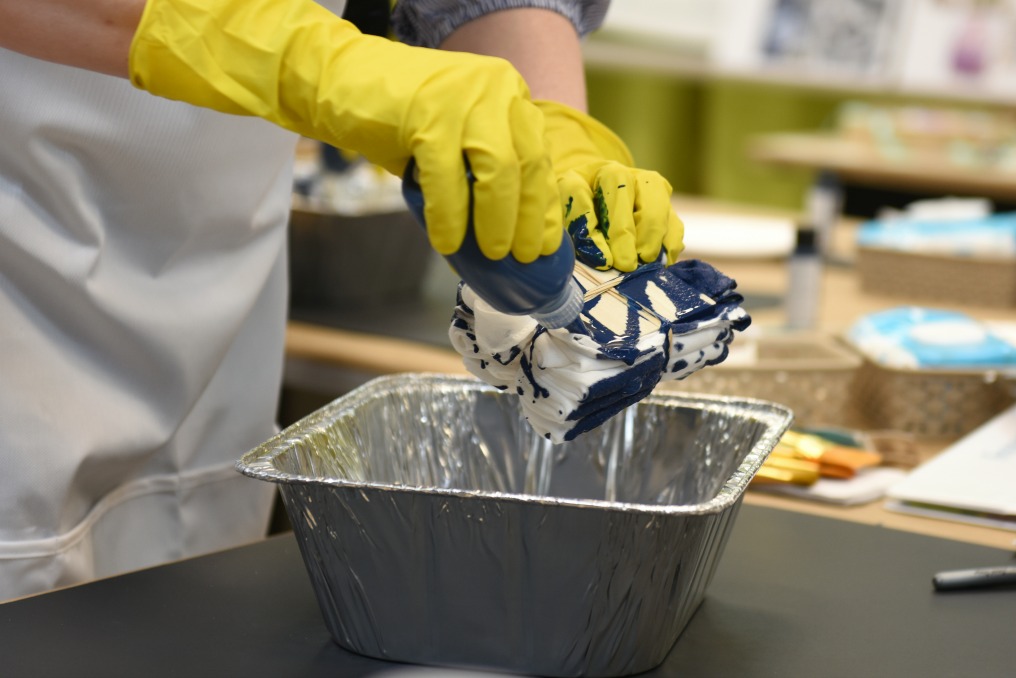
Step 2: Make a “shibori sandwich” with your scarf in the center and one board on each side.
Secure the scarf between the boards by placing plenty of rubber bands around the entire thing. You want your scarf to be tightly bound, so the more bands, the better. The tighter your binding is, the more white space you’ll have in your scarf. The idea is that any exposed areas of the fabric will get covered in dye, while those that are bound in the center will remain white.
Step 3: Mix your water and fabric ink.
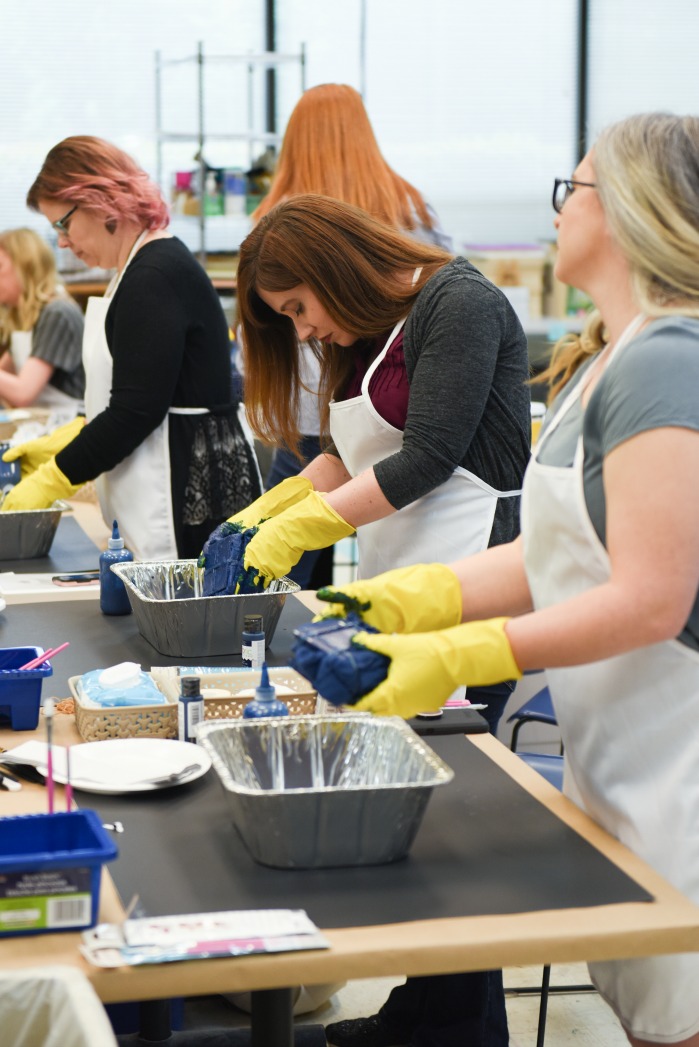
Now is a great time to put on your gloves! Place one full 2 oz bottle of the Fabric Creations Soft Fabric Ink in your squeeze bottle. Then, add water. We added 4 oz of water, which meant our bottles were filled to the 6 oz line. The 1:2 ratio of paint and water seemed to work really well, but you can play around with that too. More paint and less water will give you a darker result that spreads less, while more water will give you a thinner dye that is a little less concentrated. Shake the bottle well to mix the paint and water thoroughly.
Step 4: Squeeze the dye/water mixture onto all exposed areas of the fabric.
You’ll want to do this while holding your scarf over a bin or tub so that the excess dye is contained. A foil baking pan is perfect for this job. We used at least half, if not closer to all of the dye in our bottles. Make sure all the visible white areas are covered, then feel free to “massage” the dye in as much or as little as you like.
Step 5: Allow a few minutes for your dye to work its magic.
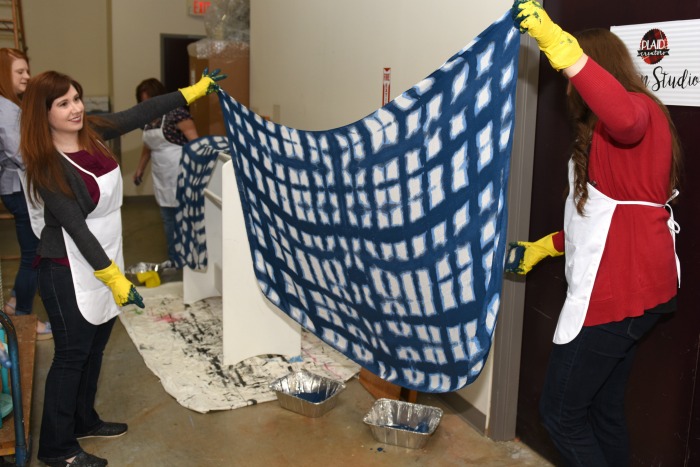
Step 6: Carefully remove the rubber bands and wooden boards and unfold your fabric.
Be careful not to touch any white spaces, or the ink from your gloves will transfer! It’s really helpful to have a second pair of hands for this step, so you may want to recruit a family member or good-natured neighbor!
Step 7: Hang your scarf to dry for 24 hours, then heat-set.
To heat-set, heat an iron to the highest setting allowed for the type of fabric. Lay the scarf on an ironing board and place a pressing cloth on top. Without using steam, press the decorated fabric for 30 seconds, lift the iron and
move to another section. Once heat-set, you can machine wash your scarf on the gentle cycle, or hand wash in cold water and line dry.
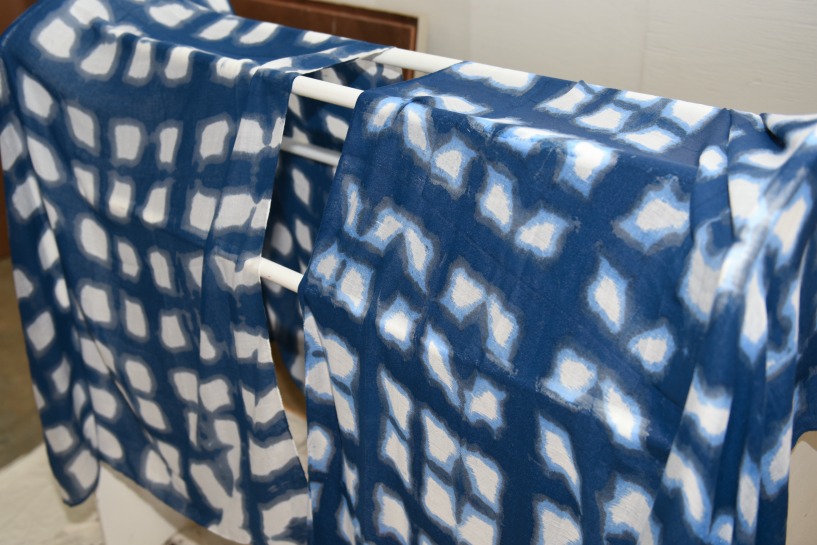
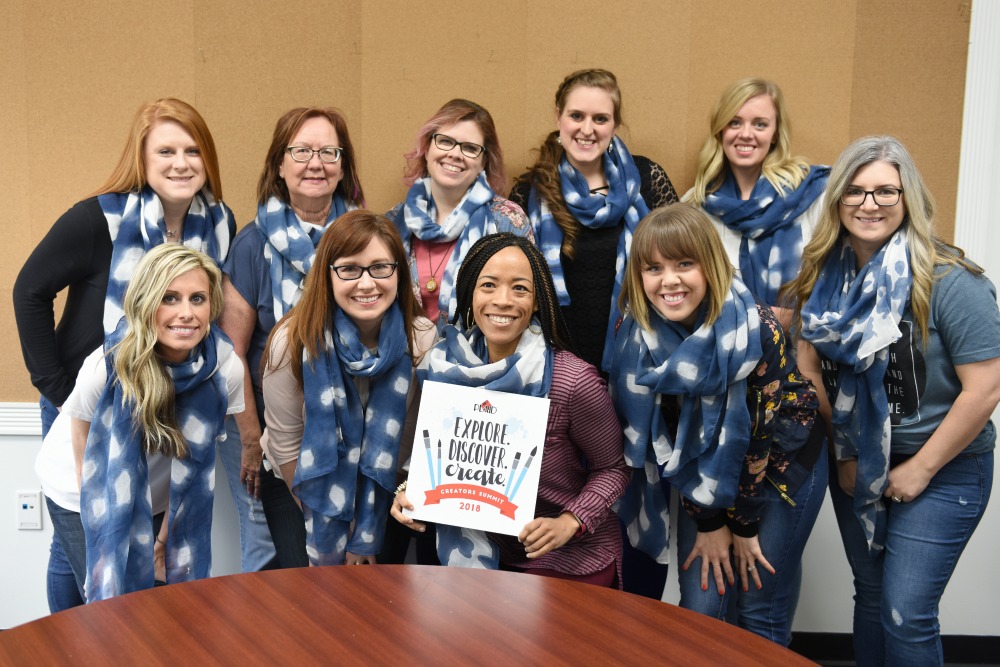
You can see that each of our scarves turned out as unique as the people who made them! The end result depends on the size of your folds, the tightness of your binding, and the amount of dye you use. When all three factors are combined, they create your finished look!

Here we are modeling our Faux Shibori creations! I love how they all turned out! We used blue Fabric Creations ink because it mimics the look of the traditional indigo dye, but you can also do this same project using any of your favorite colors. Even kids can join in the fun with some supervision and create their own variations using whatever type of fabric they want. You can follow the same basic steps to create t-shirts and all kinds of other dyed masterpieces, and you don’t have to worry about anything because it’s water-based and non-toxic. What do you think?
If you like it, don’t forget to put a pin on it!