Floral Doodles Watercolor Canvas
Thanks to Plaid Crafts for sponsoring today’s post; all opinions are honestly my own.
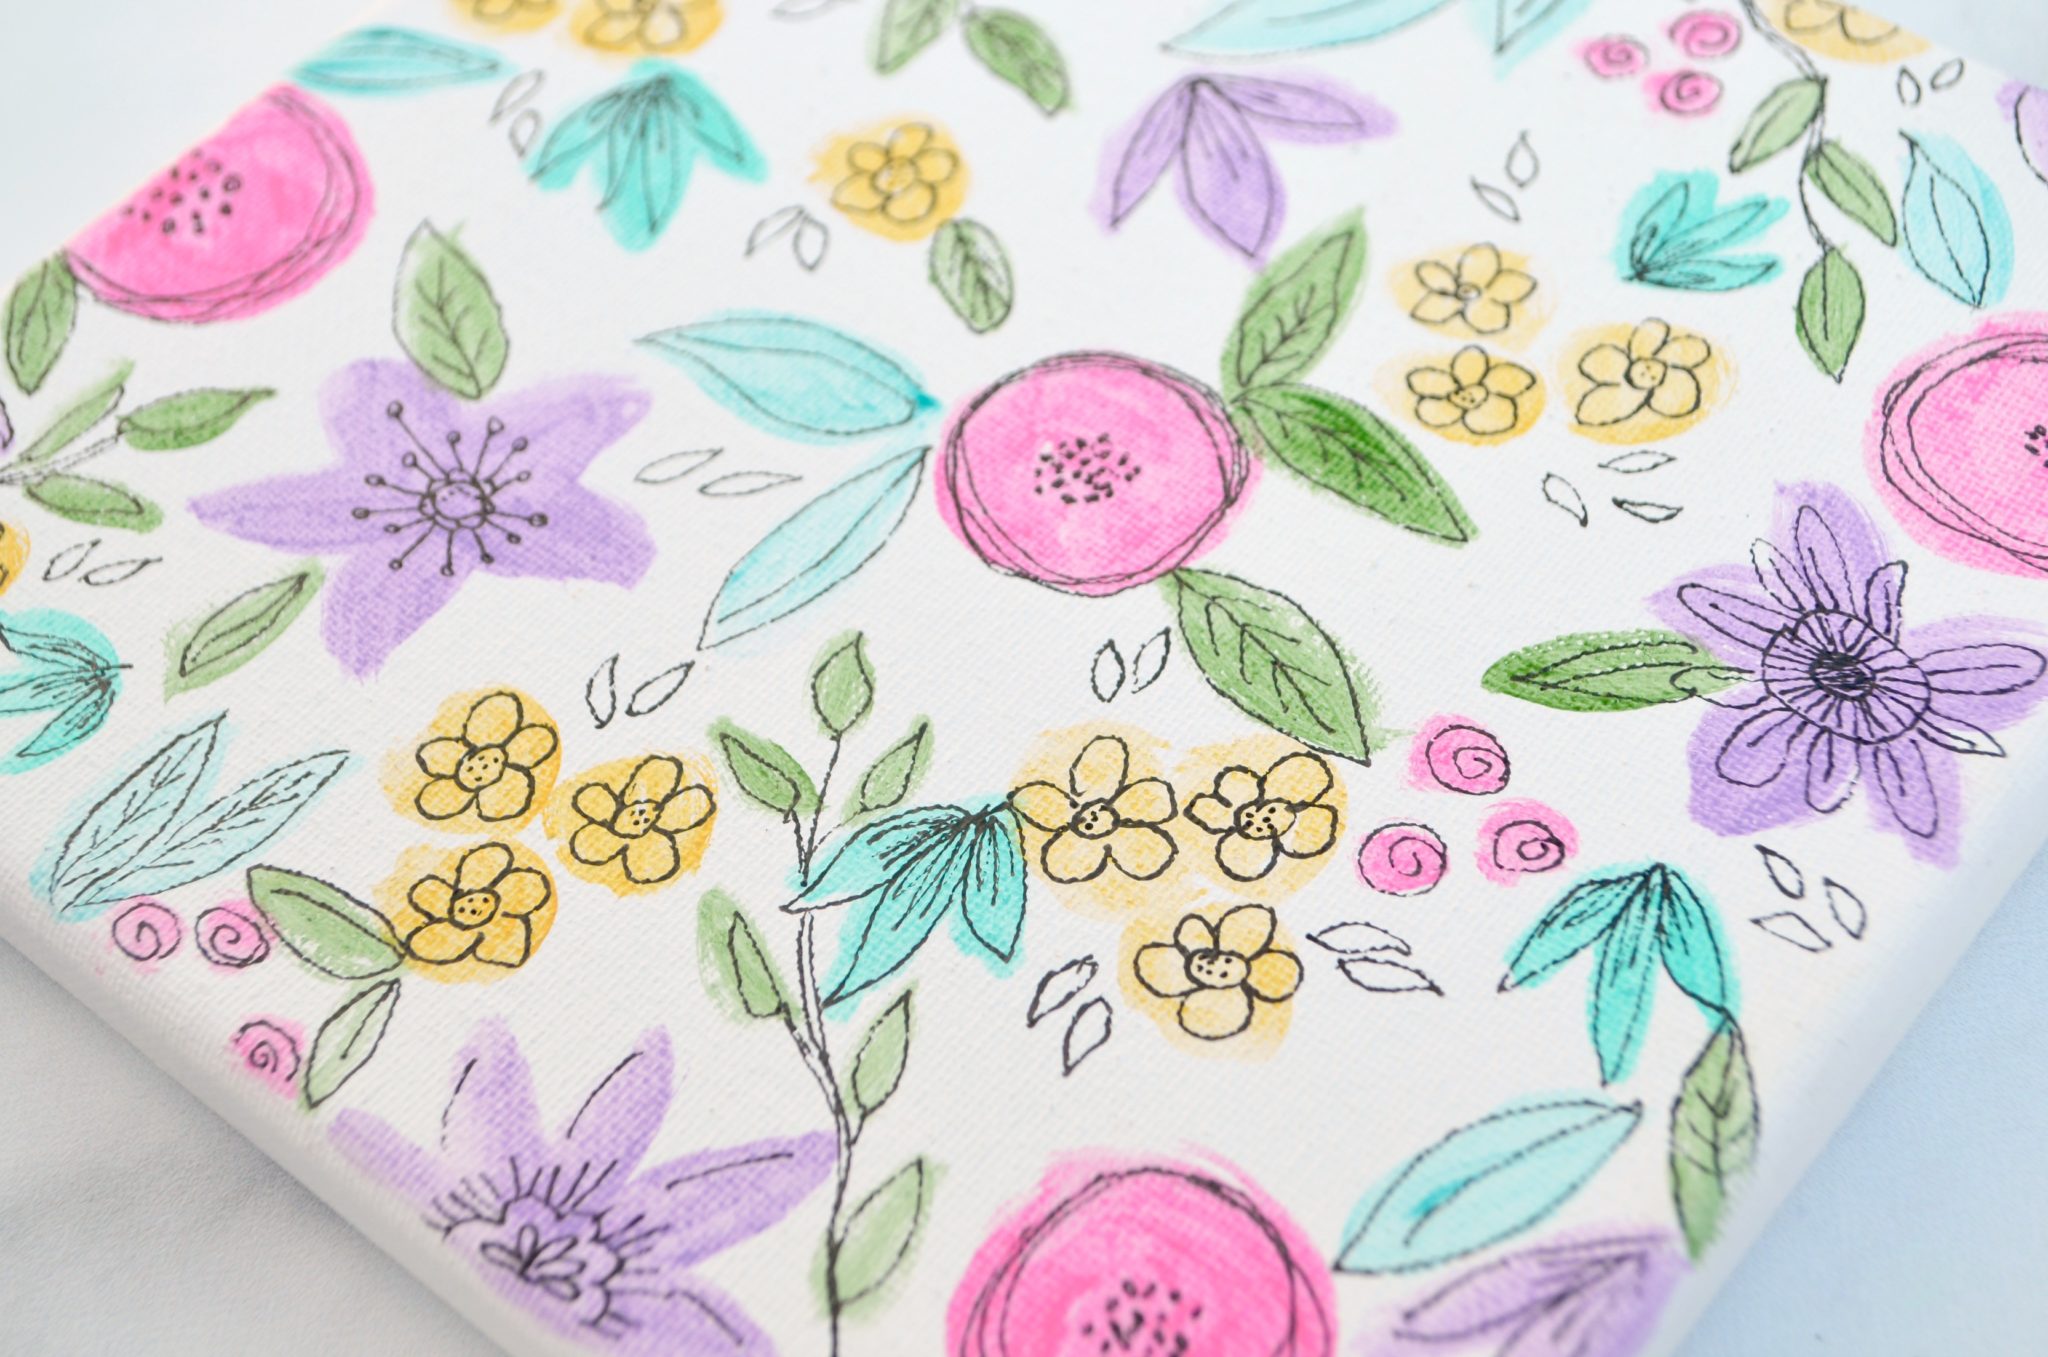
Friends, are you loving florals as much as I am right now? They’re everywhere in fashion and home decor, and I couldn’t resist trying my hand at making a floral project of my own. I absolutely love how it turned out, and it’s so incredibly easy to do. Today, I want to show you how you can create a Floral Watercolor Canvas like mine with just a few basic supplies. Take a look…

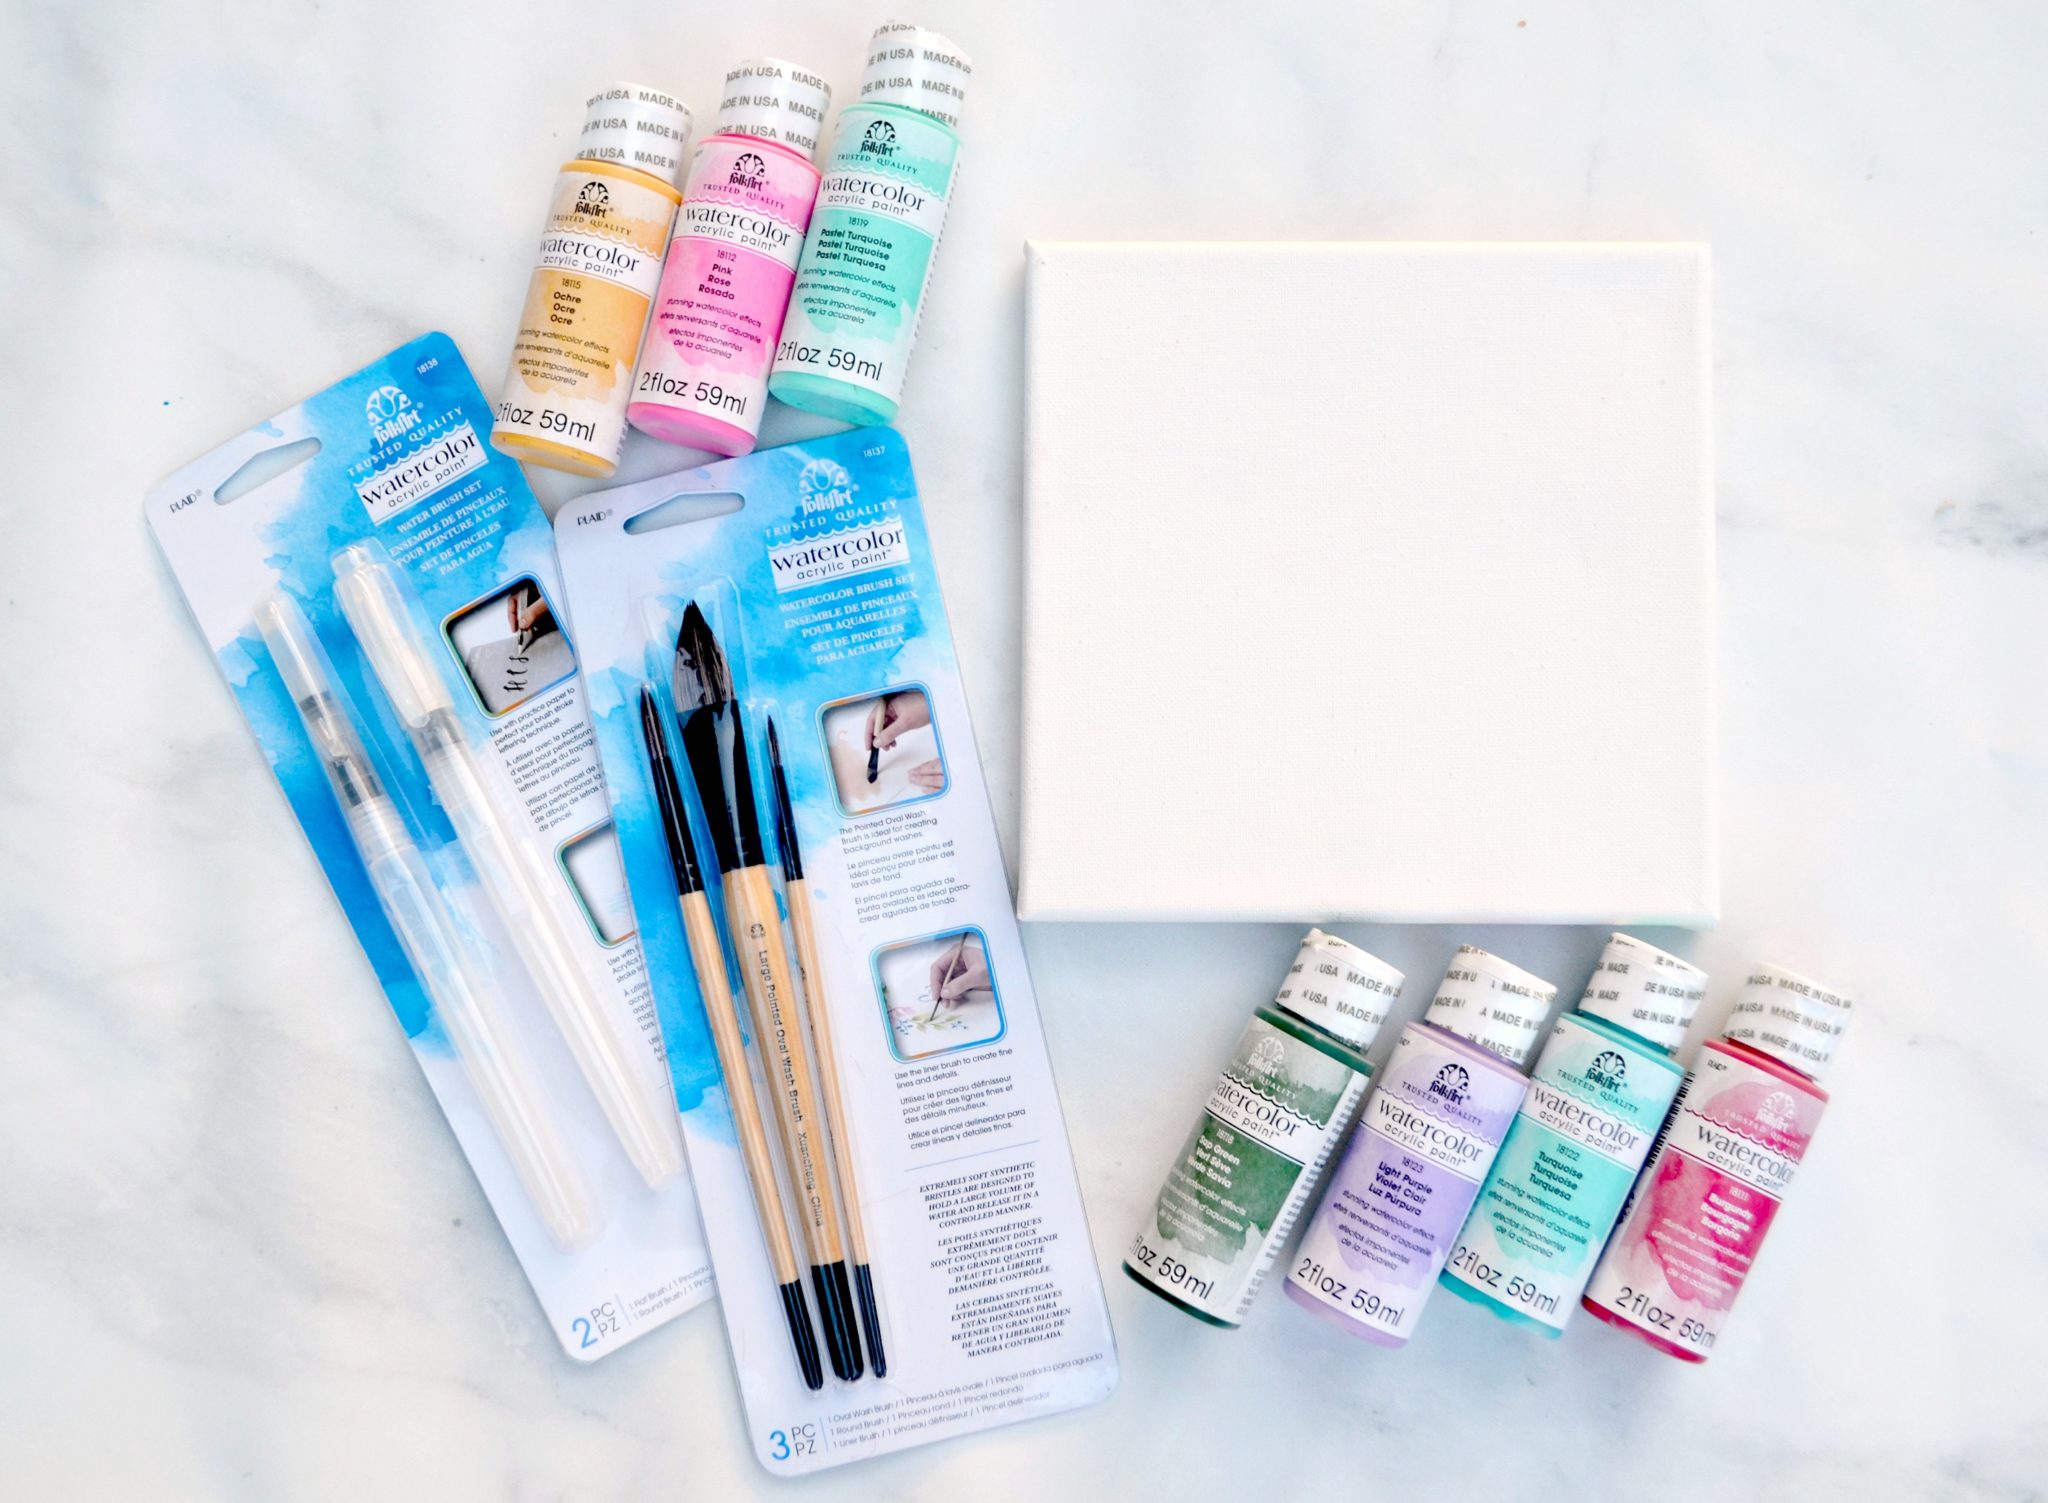
You’ll need:
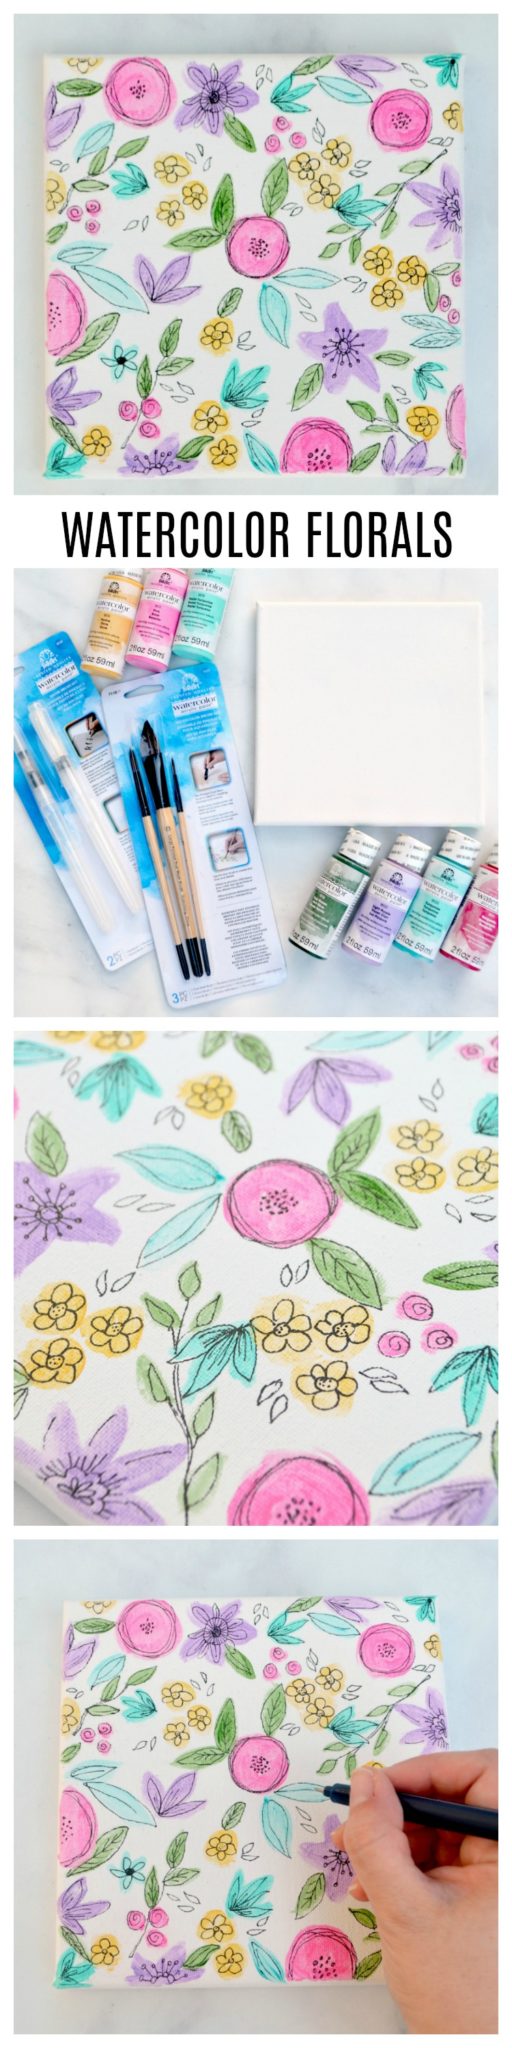
FolkArt® Watercolor Acrylic Paint™
FolkArt® Watercolor Acrylic Paint™ Watercolor Brush Set
FolkArt® Watercolor Acrylic Paint™ Water Brush Set
Fine Tip Black Marker
Canvas, any size {mine is 8×8}
Water
Palette or Paper Plate
Before we get started with our project, there are two important things that have to be done.
First, choose your colors.
I was incredibly excited when I heard that FolkArt had created a line of Watercolor Acrylic Paint, because it allows you to create beautiful washes of color while having some special benefits that traditional watercolor paints don’t. For example, unlike other watercolors, these paints dry permanent and won’t re-wet. This allows you to create designs on fabric that are machine washable, and it lets you experiment with different techniques using other water-based media on top without ruining what you’ve already created. Today, we’ll be using marker on top of our watercolor, which would cause the marker to bleed if the watercolor weren’t permanent when dry. You can use these paints on many different surfaces, including canvas, fabric, wood, paper, and even glazed ceramics.
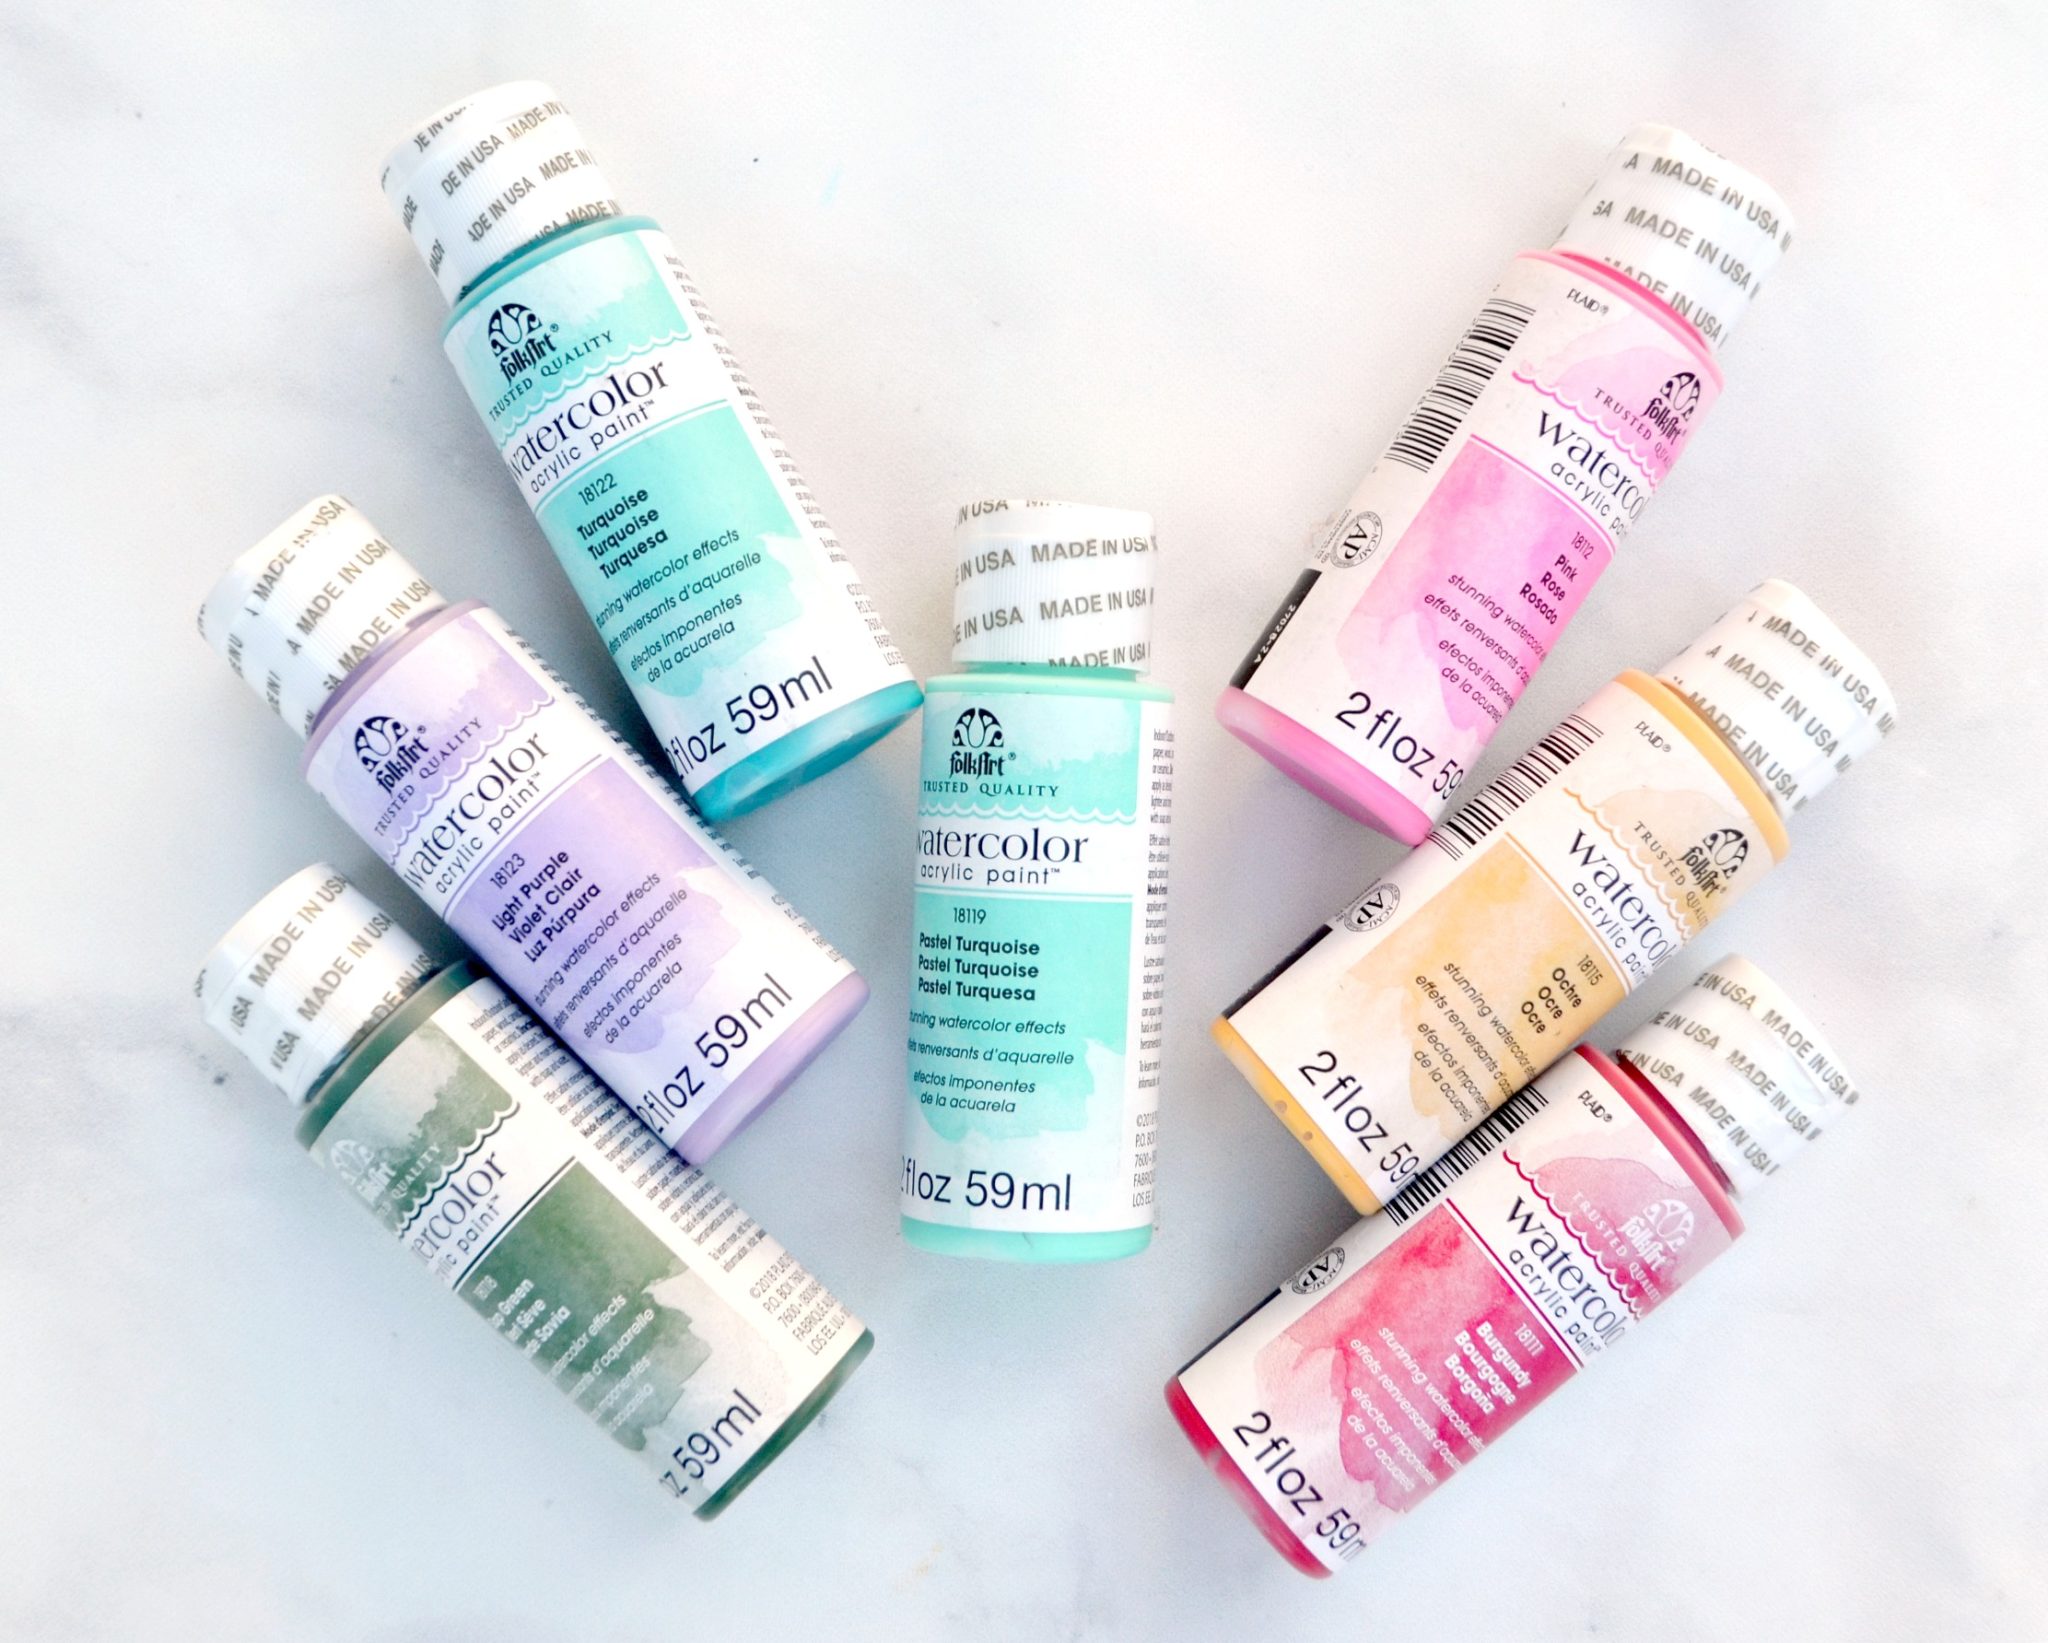
This paint is super easy to use; just thin it with water for a soft, muted look, or leave it concentrated for a different, darker, effect. There are 16 water-based, non-toxic colors to choose from, all made in the USA and available in 2 oz bottles. You can also mix the existing colors to create new shades if you like. I recommend choosing between 3-4 colors for the flowers and 2 colors for the leaves. I used Pink, Light Purple, Ochre, and Pastel Turquoise for my flowers, along with Sap Green and Turquoise for my leaves.
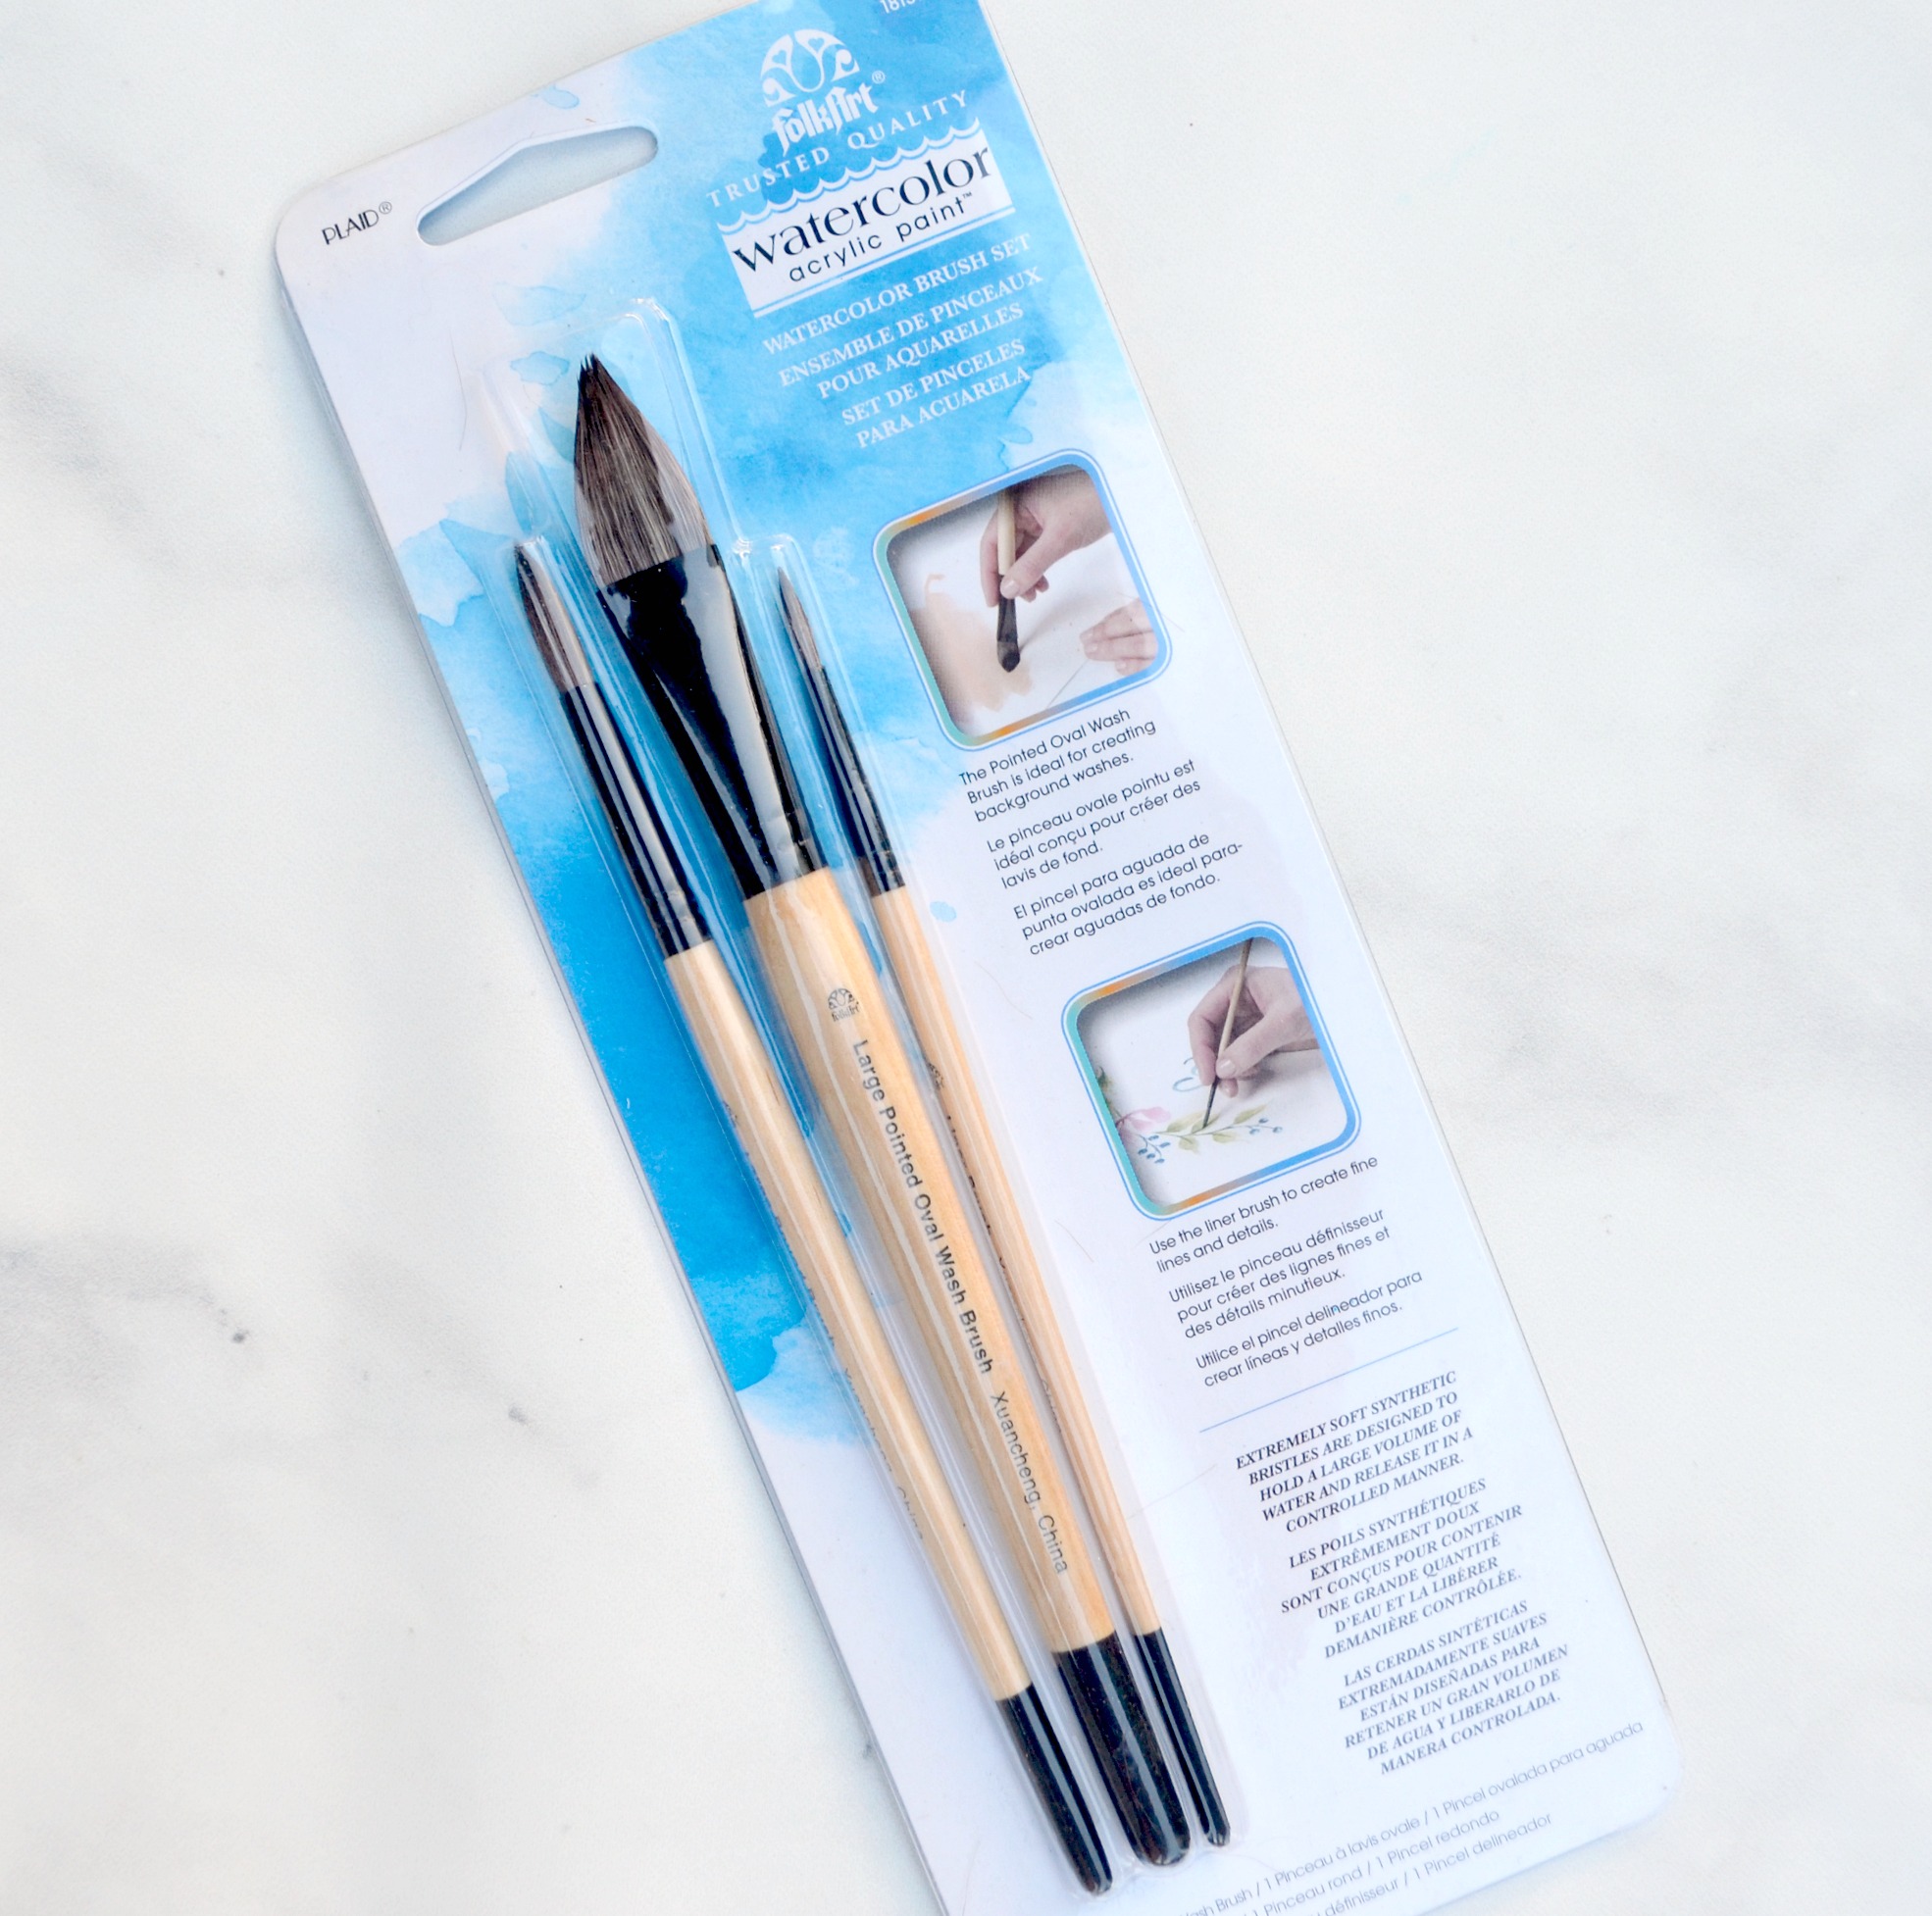
Choose your tools.
One option you have is to use these paints with the FolkArt Watercolor Brush Set. Designed specifically to pair with these paints, each brush set contains one pointed oval brush for background washes, one liner brush for fine lines and details, and one round brush for general application. The extremely soft synthetic bristles are designed to hold a large volume of water and release it in a controlled manner. They’re also easy to clean; just wash them out with soap and water while they’re wet, reshape them with your fingers, then let them dry with the bristles up. I’ll be using the round brush and the liner brush for my project.
Another great set of tools for the FolkArt Watercolor Acrylic Paints is the Water Brush Set. These brushes have a built-in water reservoir for a handle, which means you can fill them with water or diluted paint. The 2 piece set contains one flat brush and one round brush. These are particularly great tools for hand lettering projects.

There’s one other tool we won’t be using today, but that you might like to check out for future projects. FolkArt Watercolor Resist allows you to create masking designs with a permanent finish. The clear, non-pigmented formula will prevent watercolor paint from bleeding and works wonderfully on wood, paper, fabric, and with stencils. It dries to a permanent finish, is non-toxic, and easily cleans up with soap and water.
Now that we’ve got our supplies, are you ready to get started creating our floral canvas? Here we go!
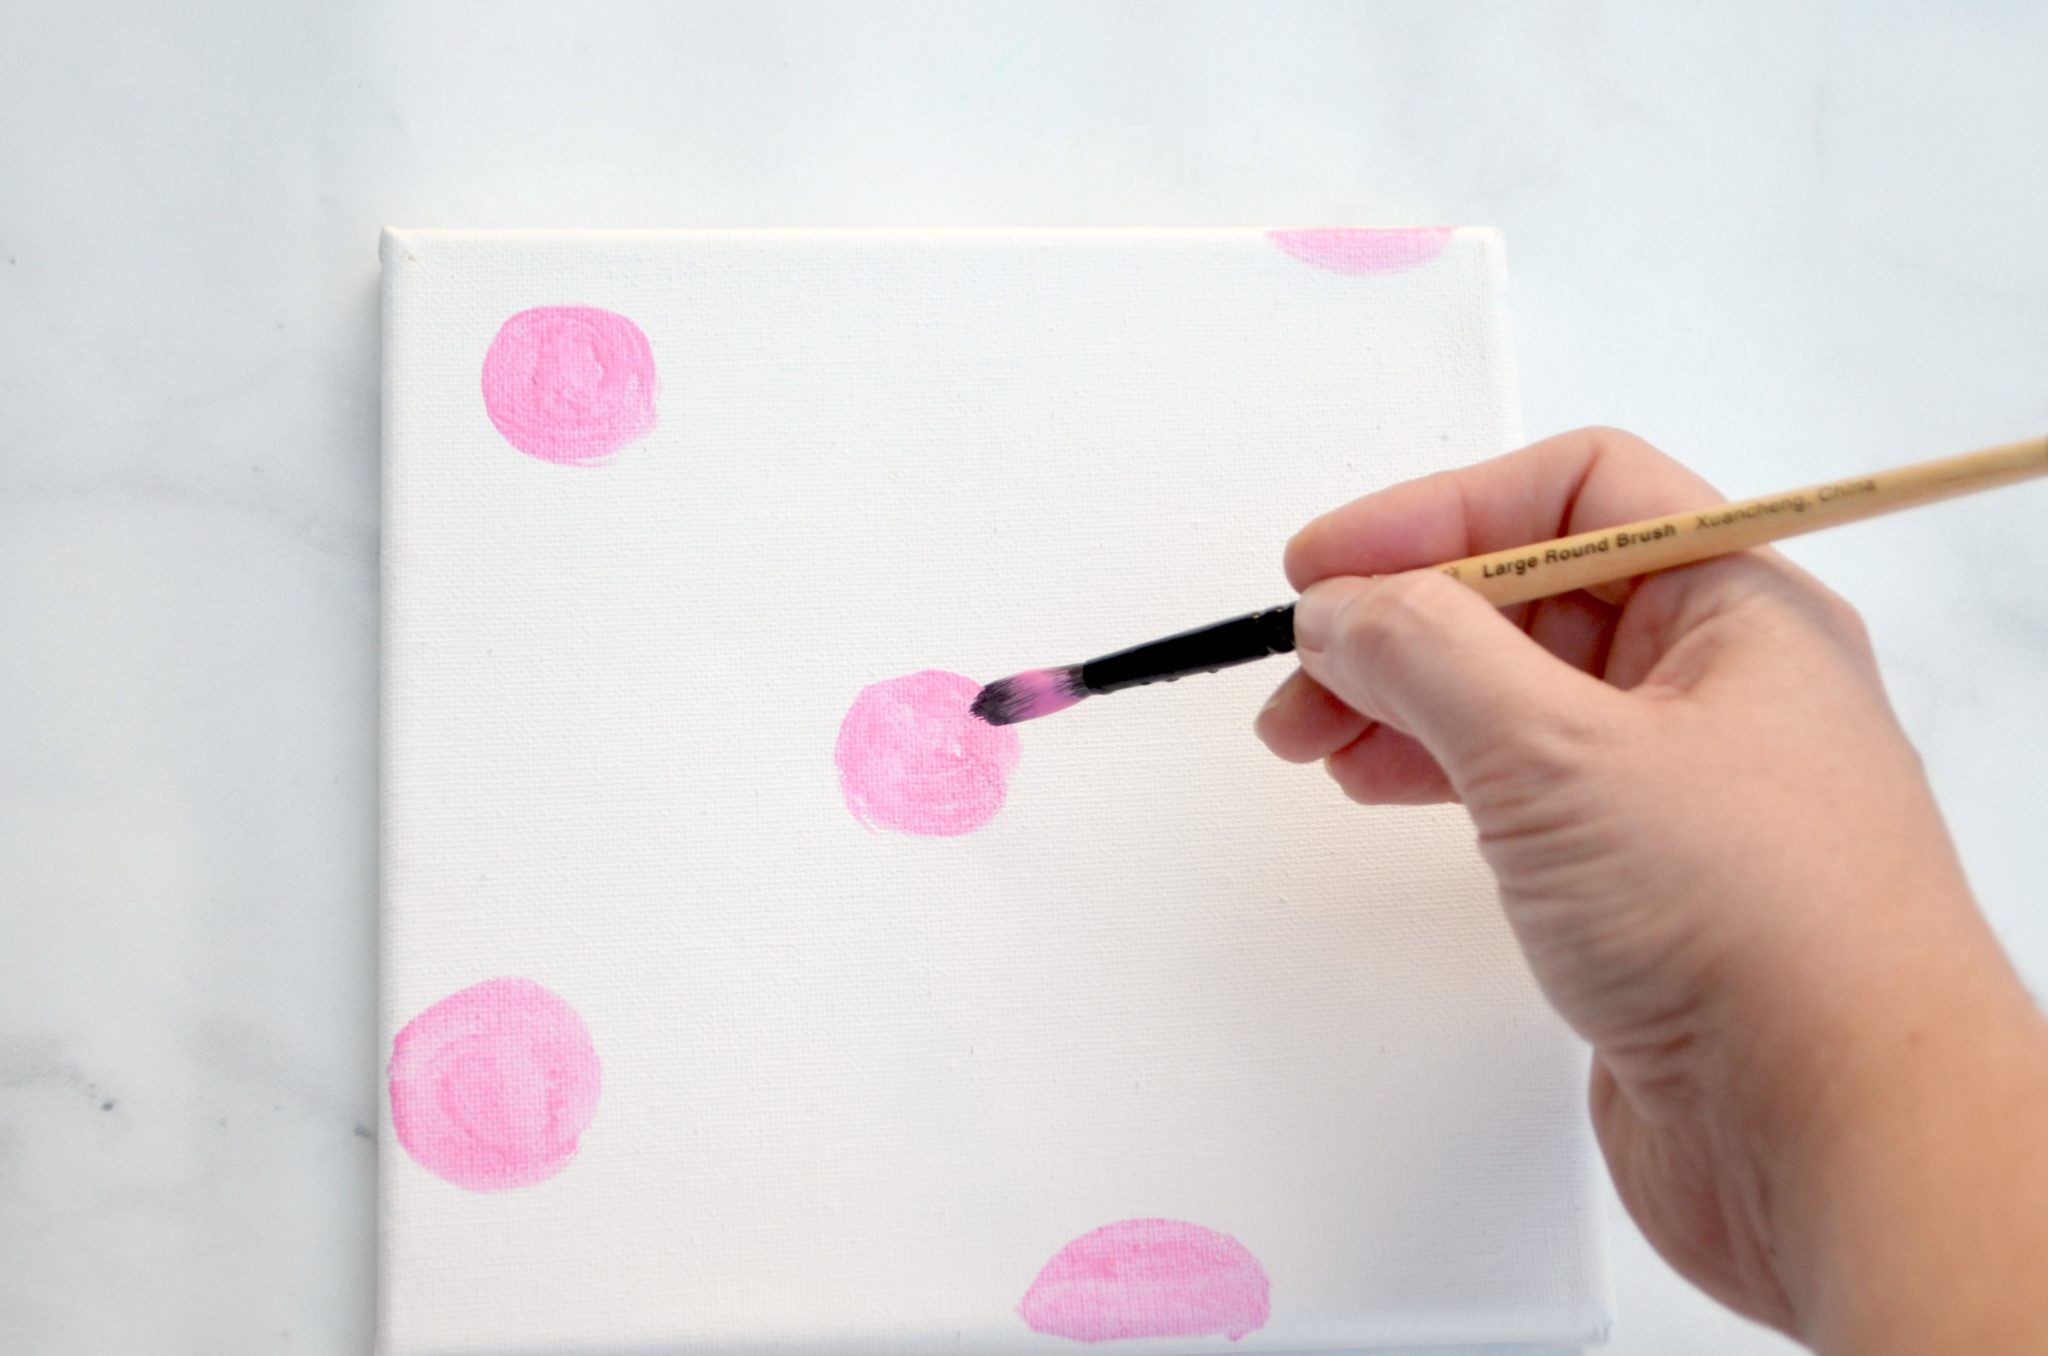
Step 1: Paint some circles onto your canvas.
You can use any of the colors you like. Squeeze a small amount of each color onto a palette or paper plate, then add a little bit of water and mix until you like the consistency. I used the round Watercolor Brush for this step and spread my circles out in random spots all over the canvas. Sometimes I grouped a few smaller circles together, while other times I let the larger ones stand alone. The idea behind the style of this project is that it’s meant to look like doodles; we’re not going for perfect, realistic flowers. This gives us the freedom to make imperfect shapes without worrying about every brushstroke.
Step 2: Next, paint groups of lines/petal shapes.
Again, you’ll want to spread these around randomly. I made some groups of three petals and some groups of five. I used the round brush as well as the liner brush so that I got different sized flowers. Remember, these are just loose, imperfect shapes that we’re going to define more later.
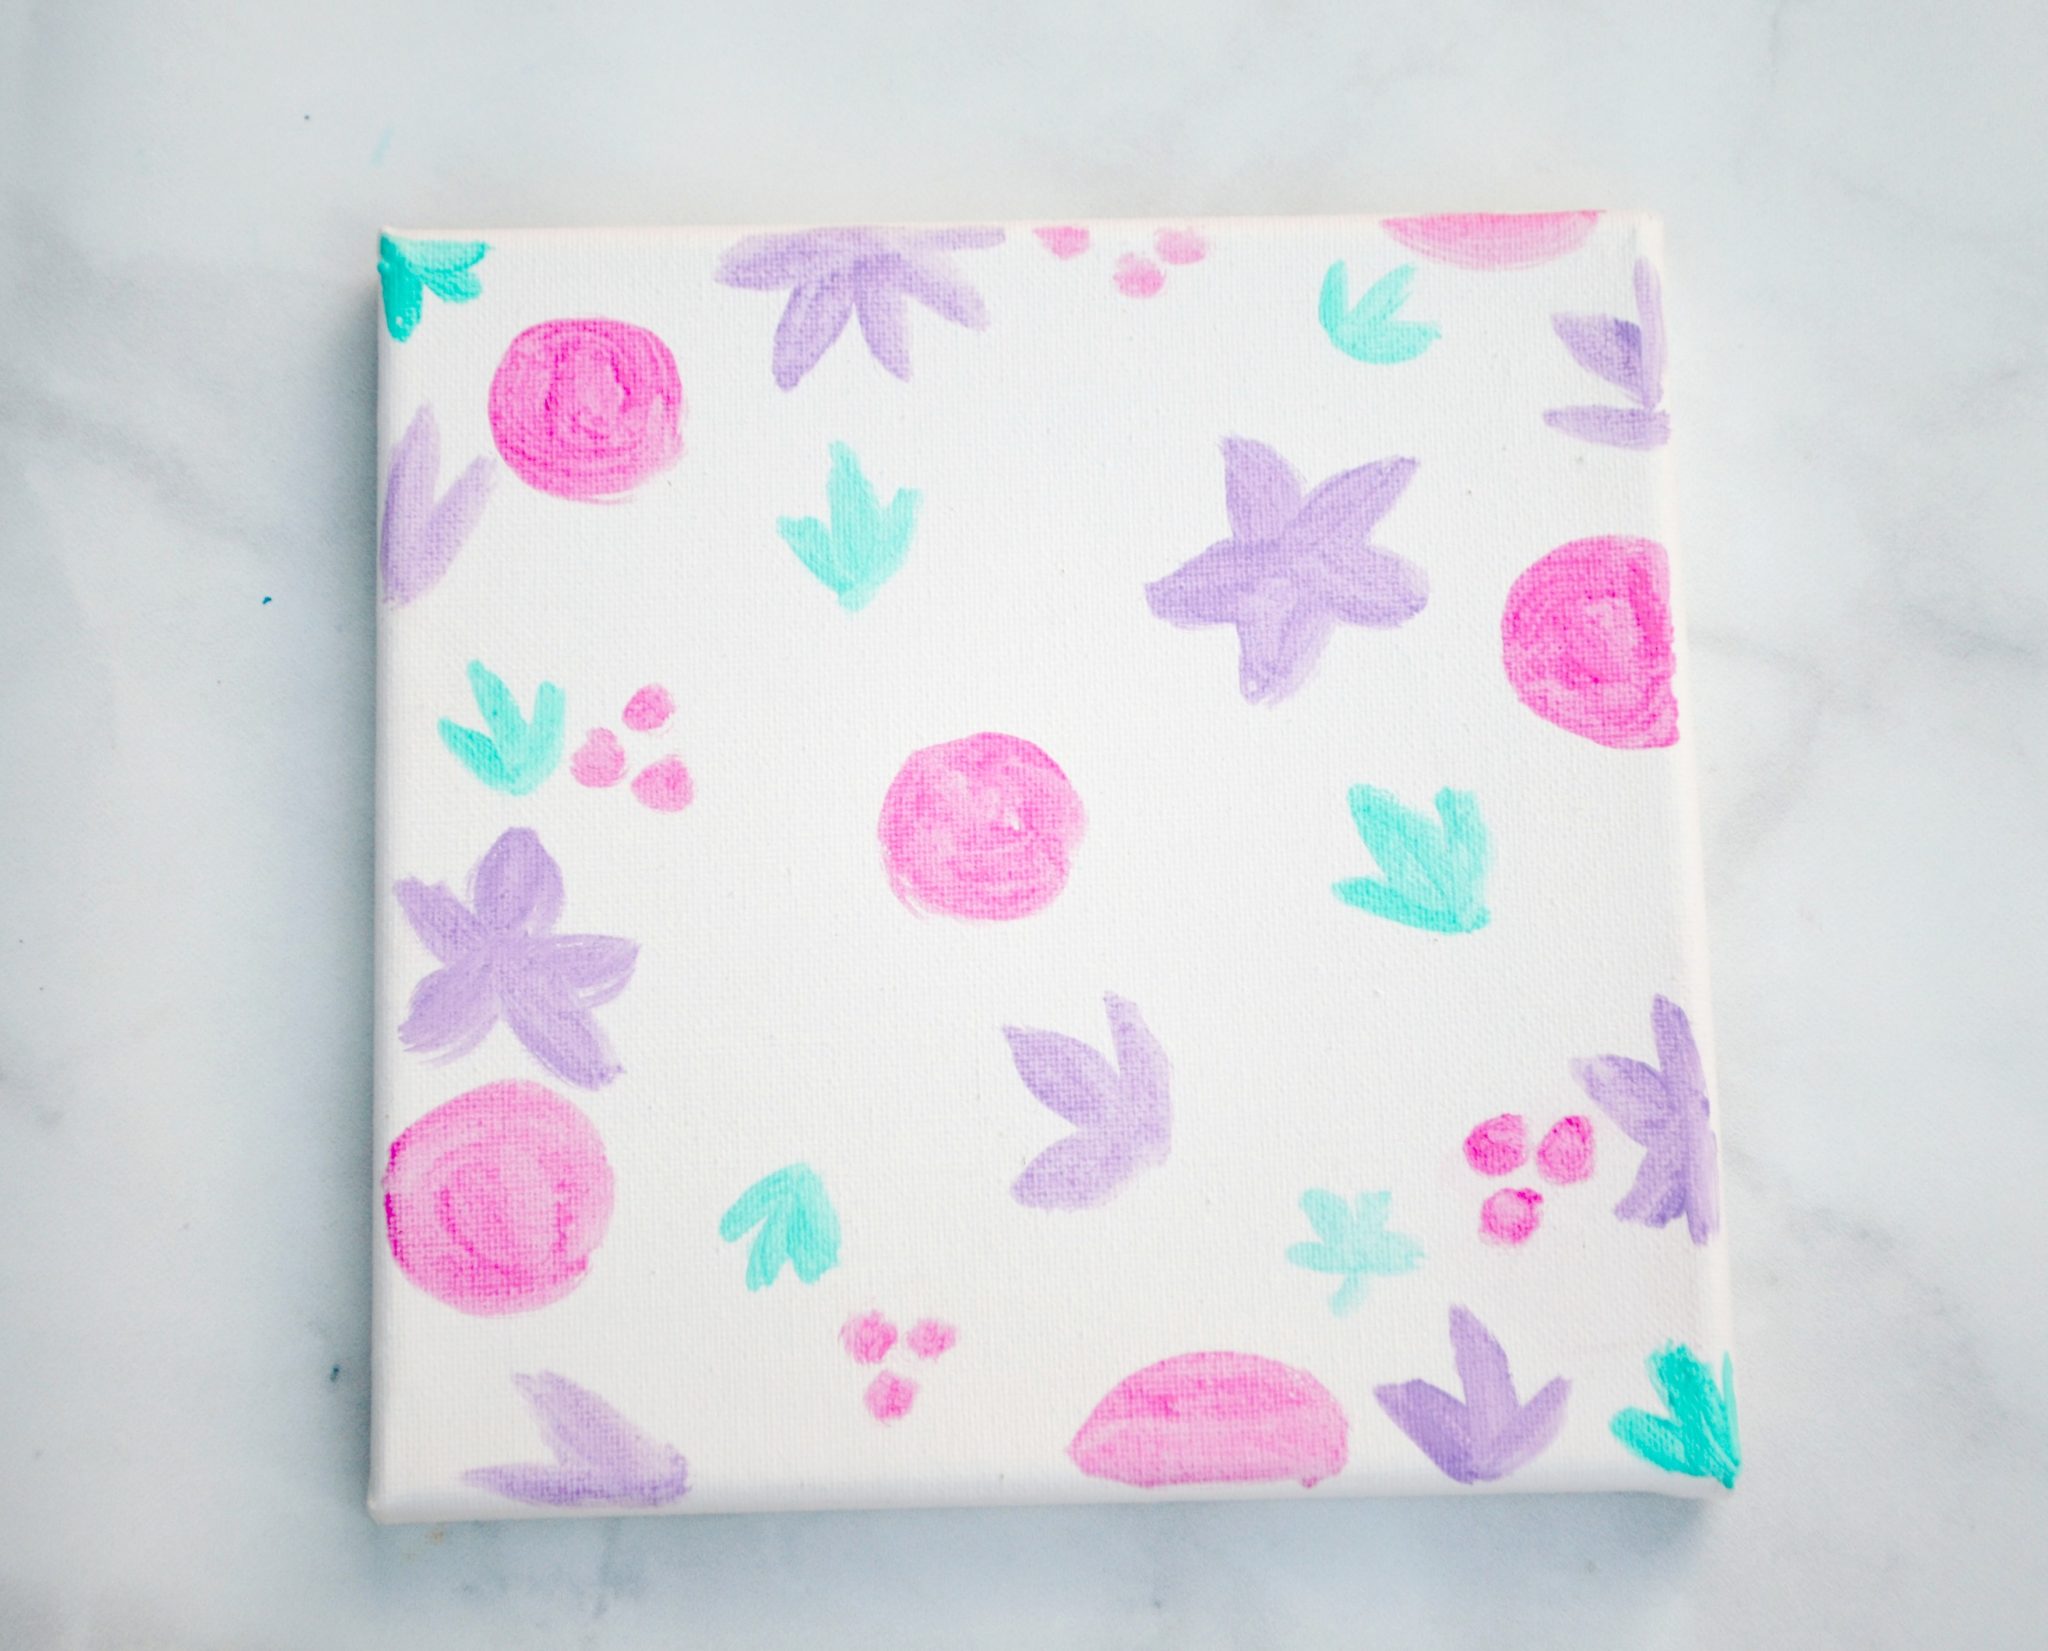
Step 3: Paint some leaf shapes.
You can connect them to your flower shapes, make sets of several leaves, let them stand alone, or do some of each.
Allow all of your painted shapes to dry completely. This will ensure that the paint is permanent and won’t cause your marker to smudge in the next step.
Step 4: Use your fine tip marker to doodle floral details on top of your watercolor shapes.
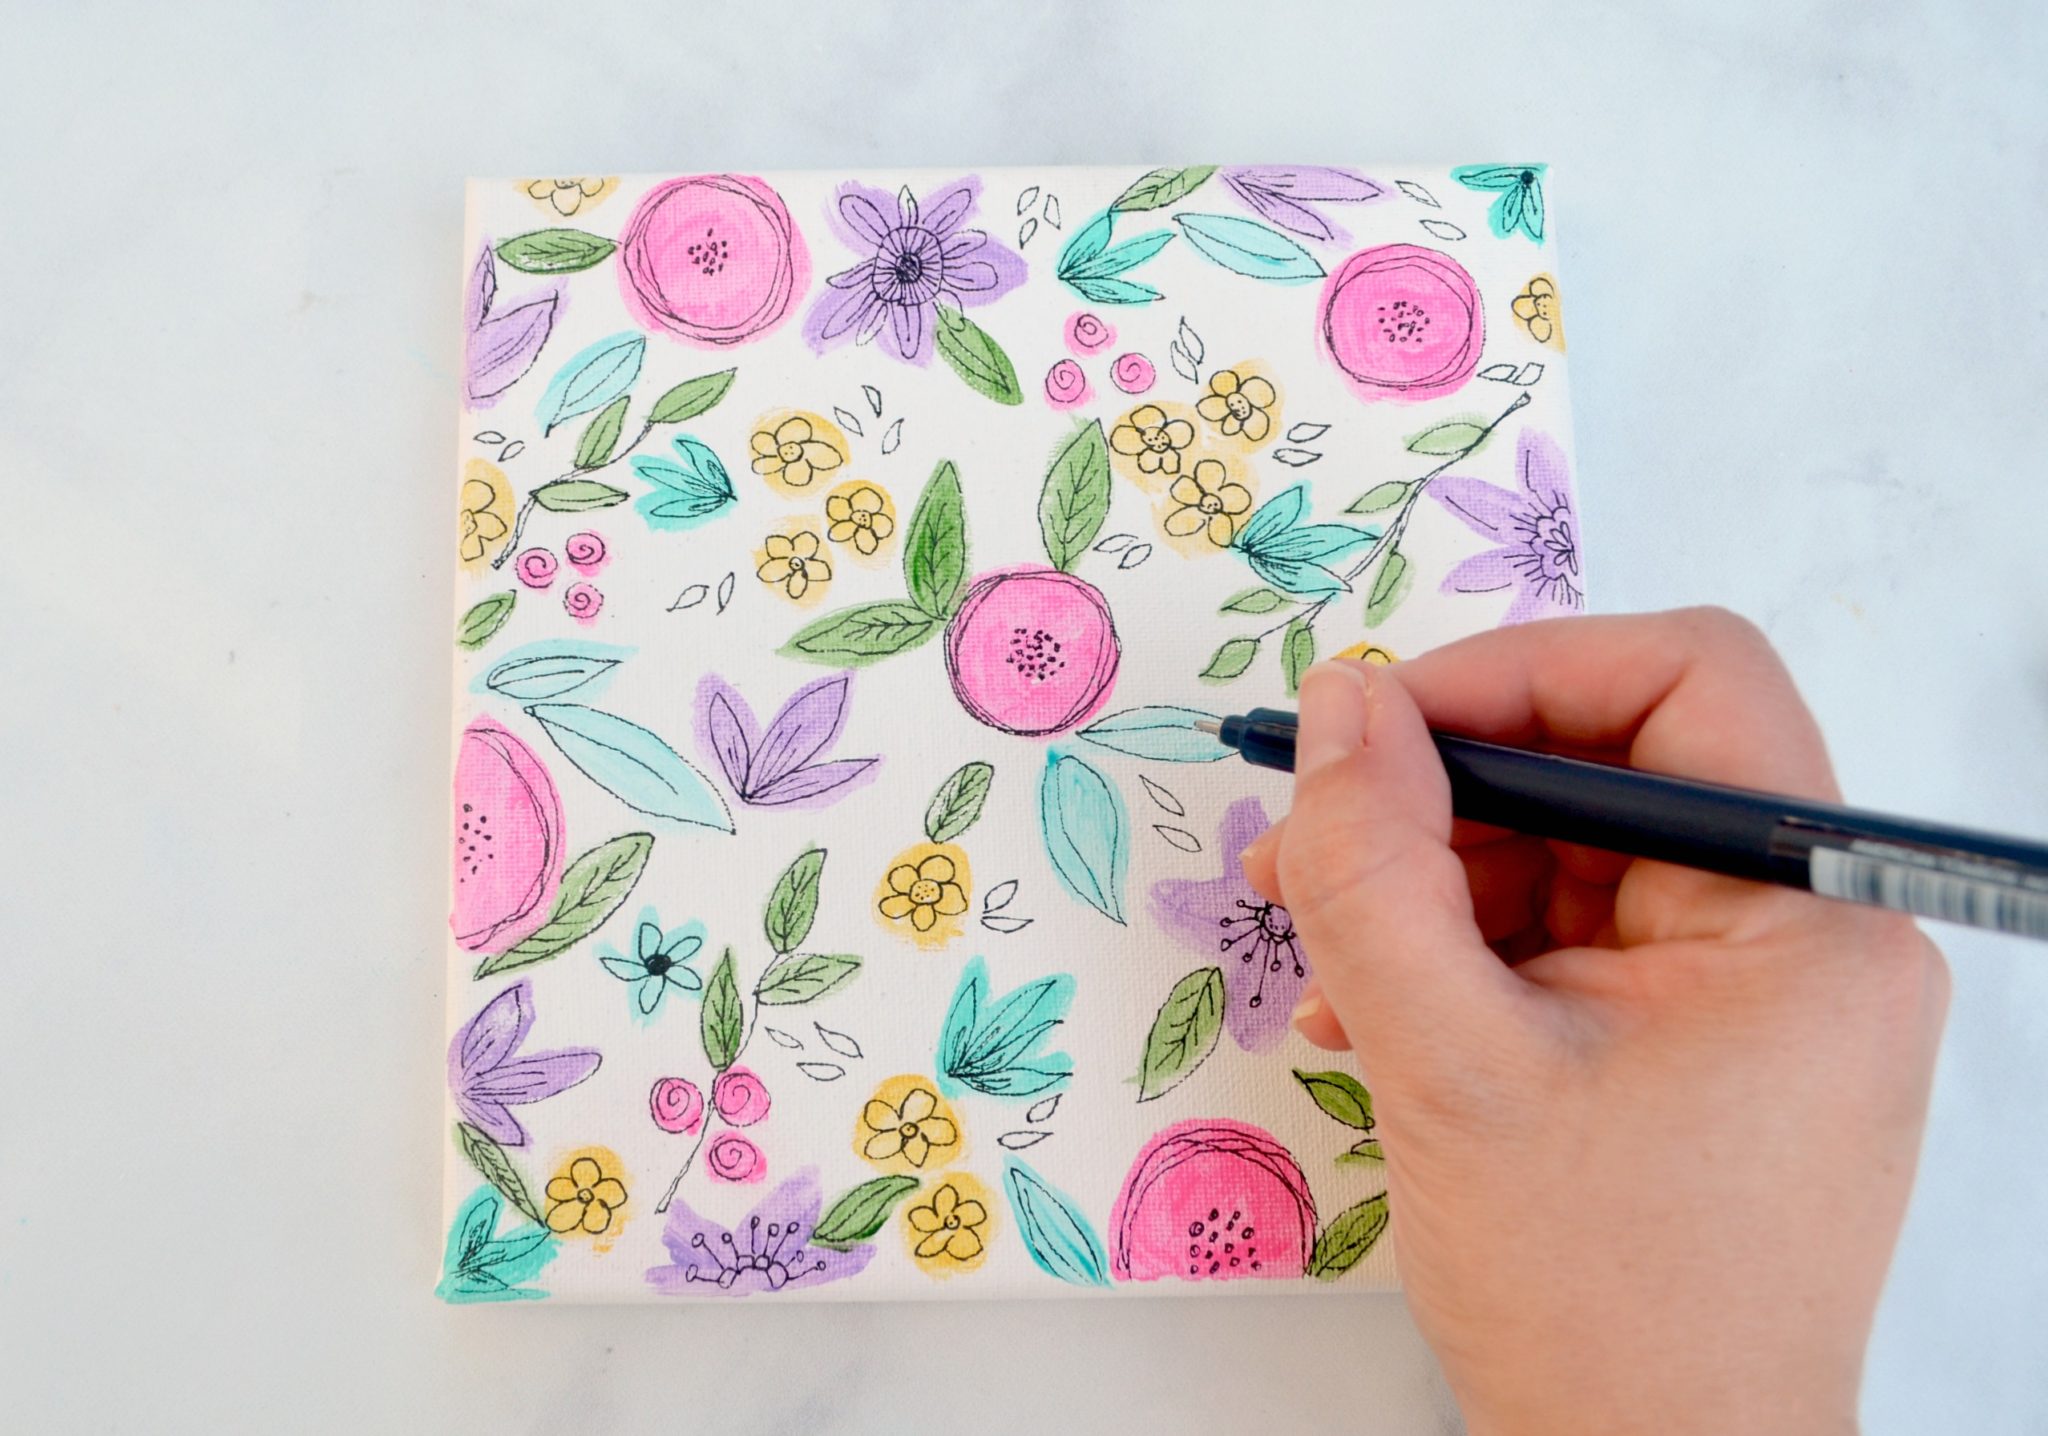
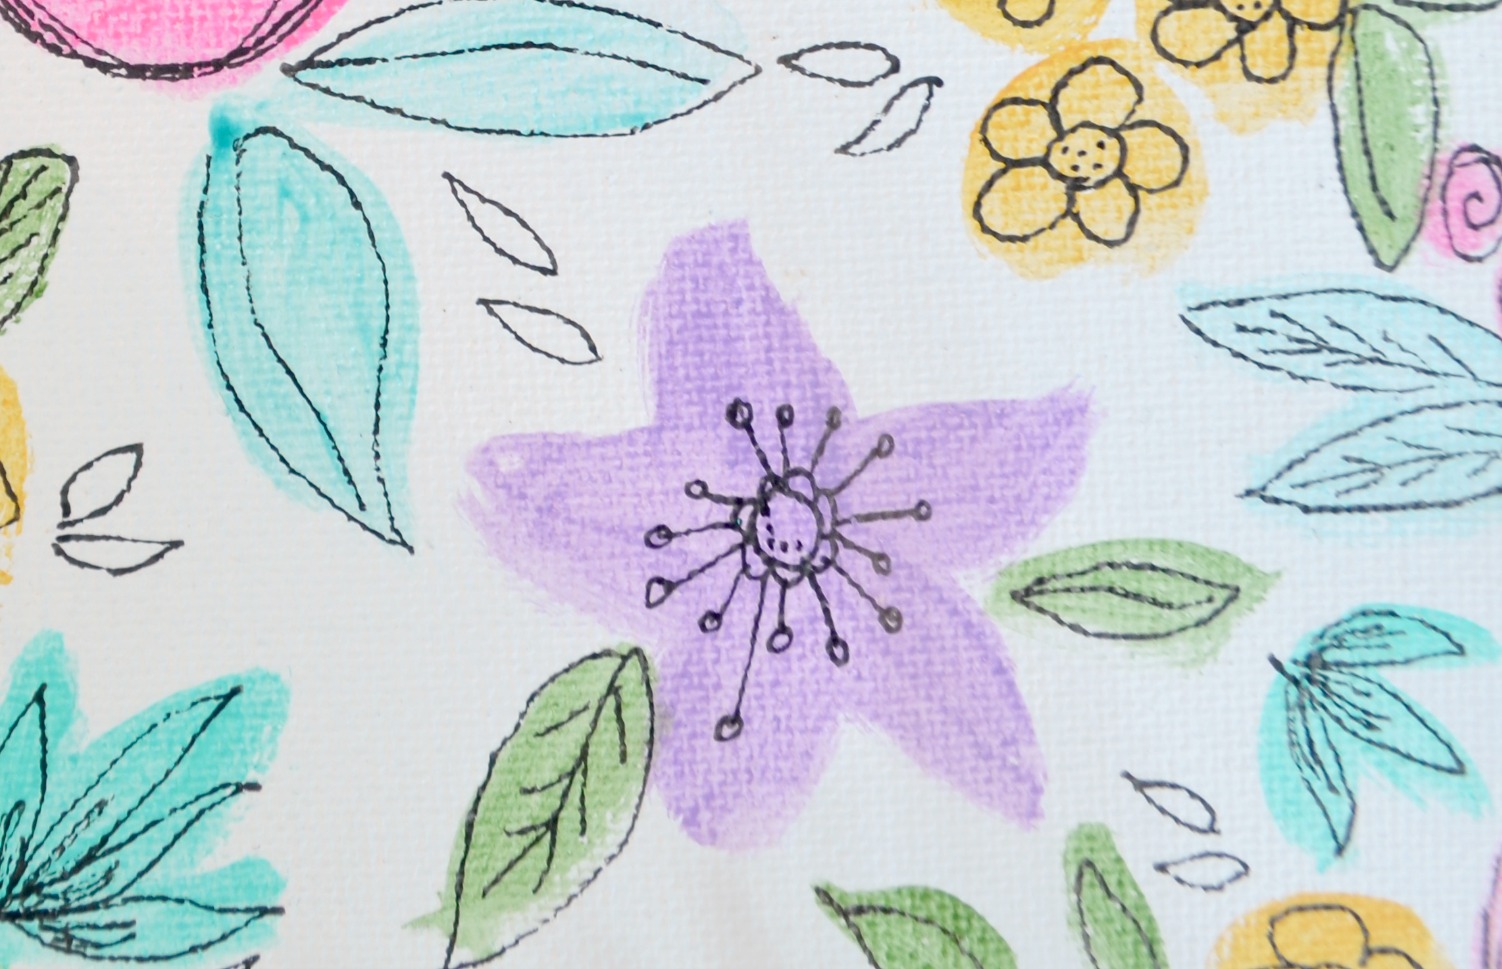
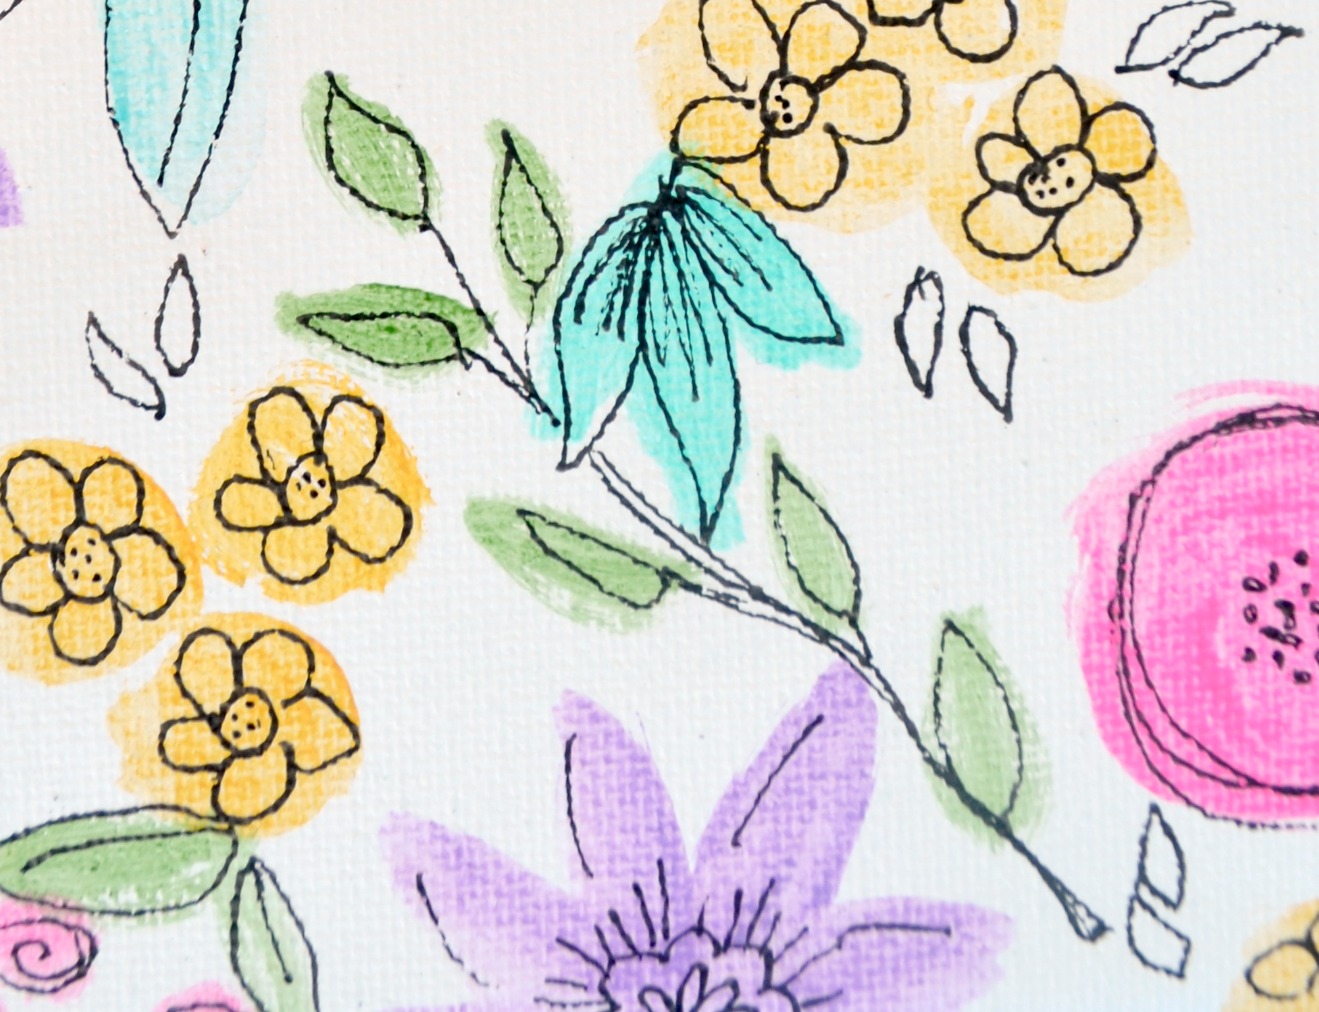
The fun part about this is that you can draw any details you can imagine! We’re going for a doodle-like effect, so just let yourself play. To give you a little inspiration, here are a few doodles I like to create. Let’s start with our circles. One option is to make “messy circles” around the outline of a circle and fill the center with dots. Another option is to make a spiral, which looks like a rosebud. You can also draw a small petaled flower on top of a circle for a totally different look.
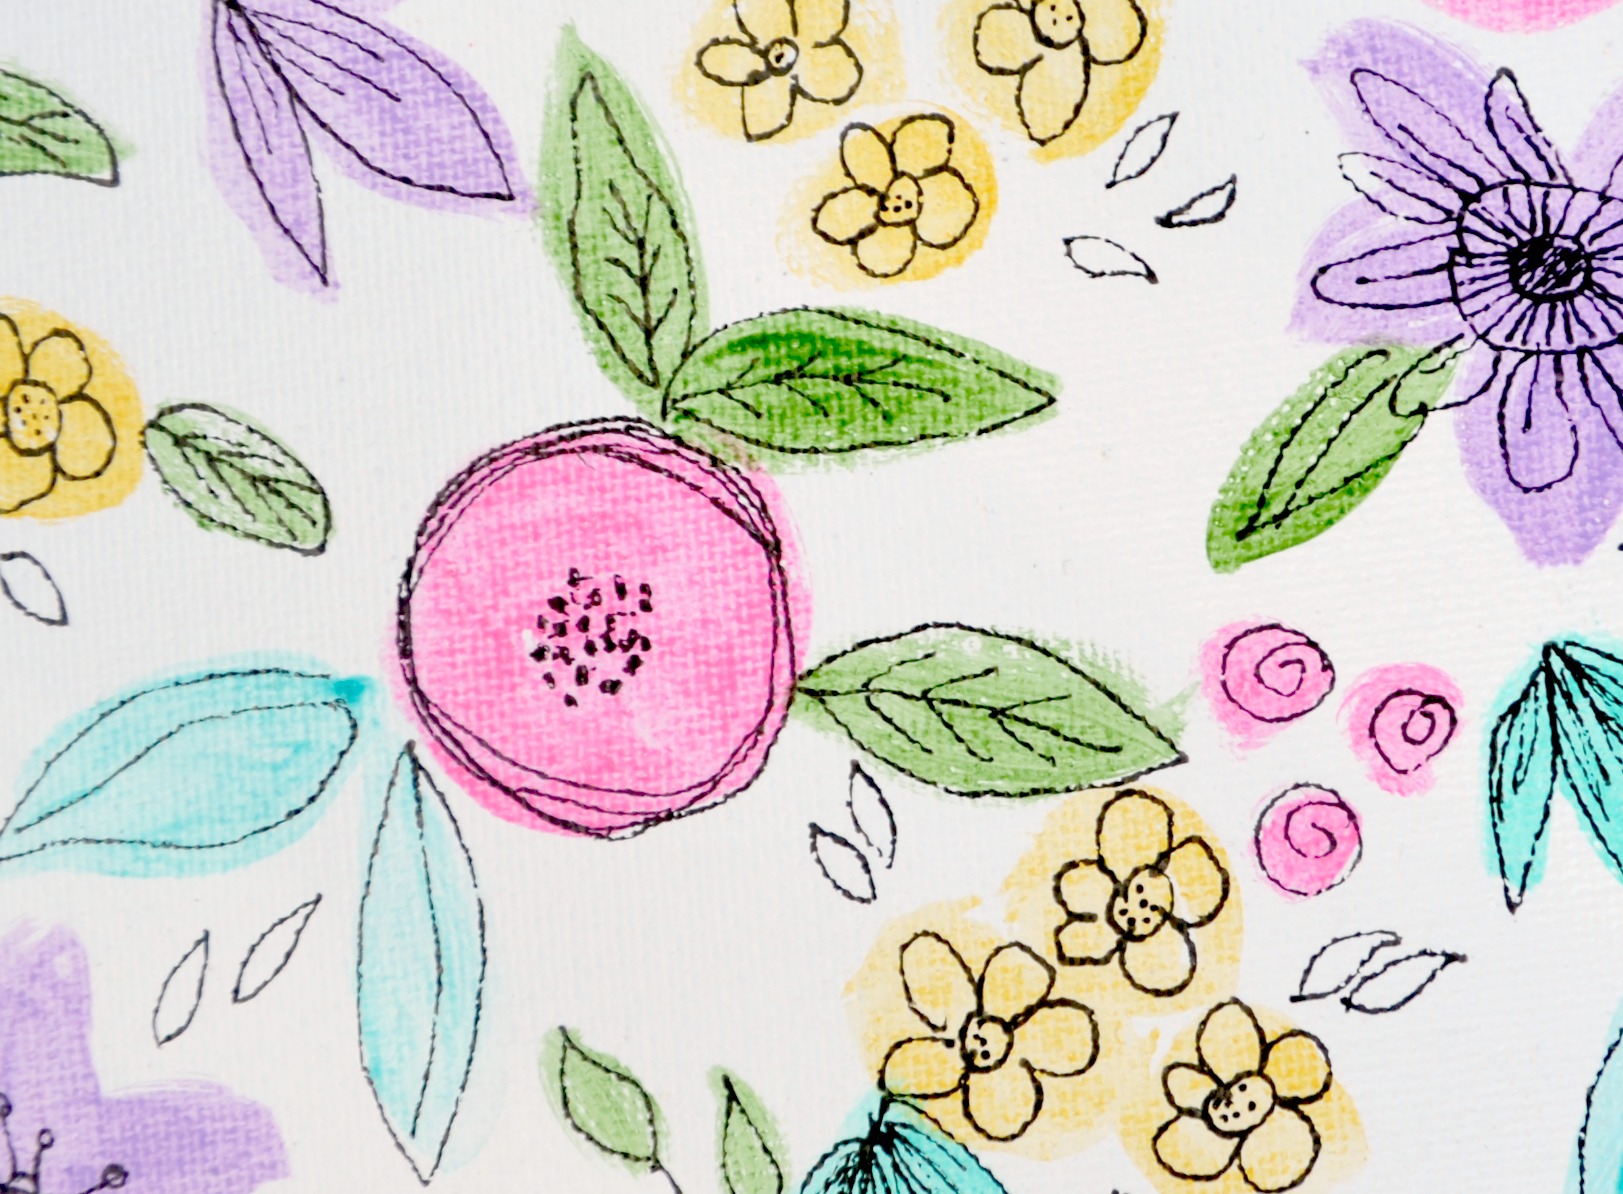
For the petal-shaped flowers, use your marker to define where the petals really are. Allow your lines to be inside or outside of the colored areas rather than trying to get a perfect outline. This is part of the charm of the hand-painted look we’re going for.
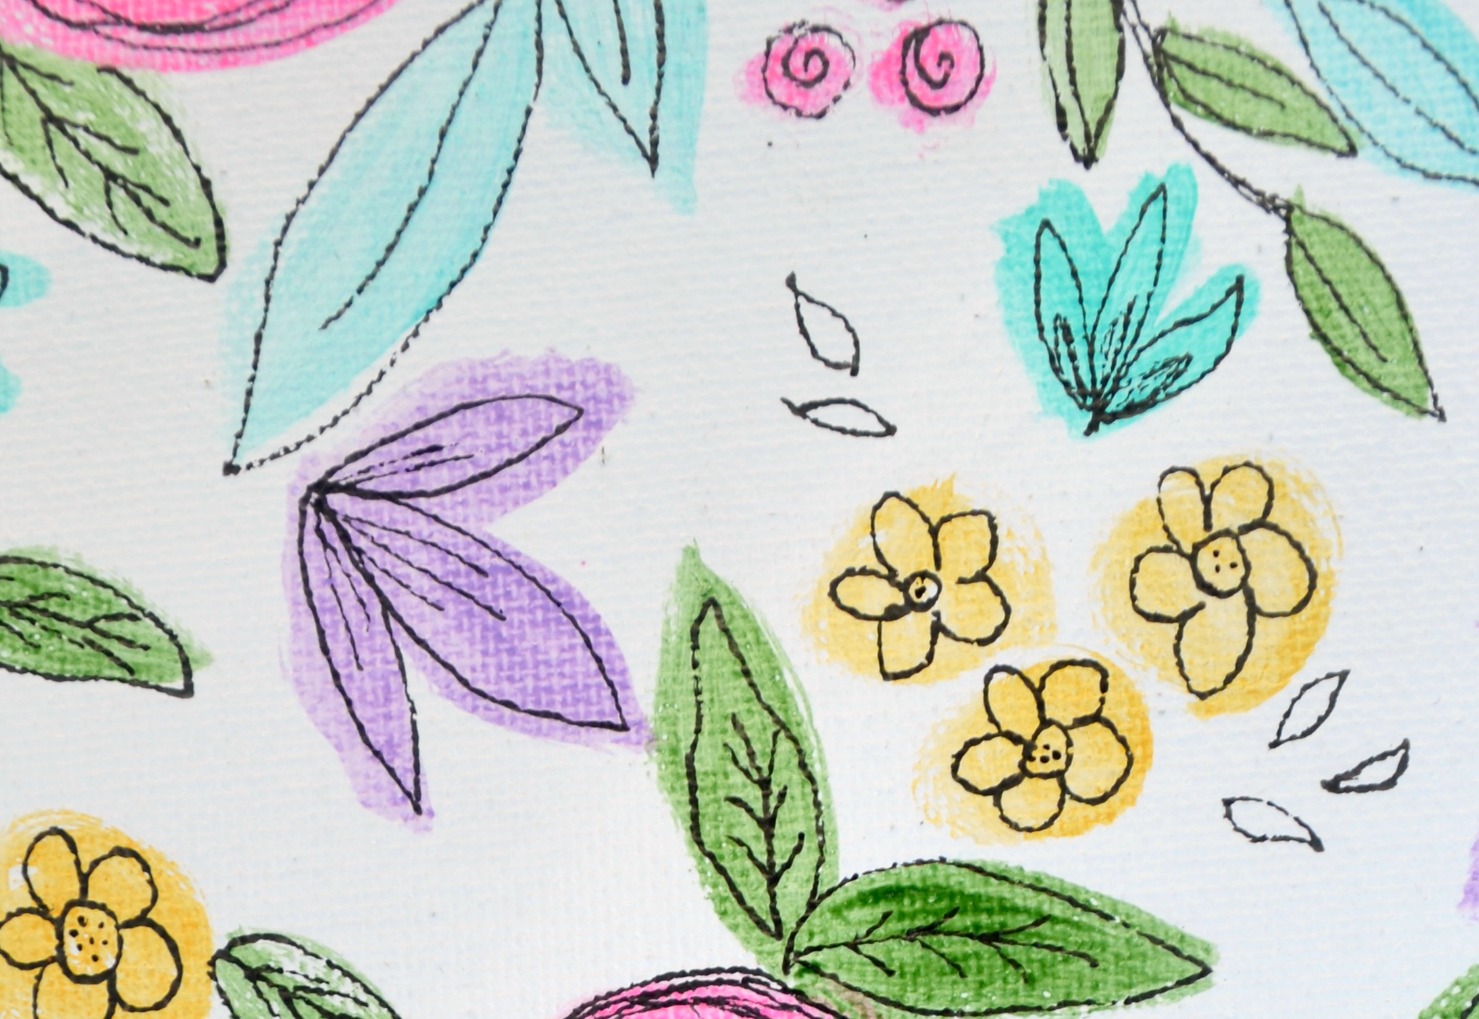
Another option for the petaled florals is to draw a detailed center, then leave the outer petals as they are, soft watercolored shapes.
Finally, add outlines and vein details to your leaves, as well as any stems or branches you want to create. Don’t be afraid to draw some outlines for flowers and leaves you haven’t watercolored too! If you see an empty spot, fill it in with a little leaf or two.
That’s all there is to it! It couldn’t be easier and the fact that it’s meant to look imperfect allows you to just relax and enjoy painting instead of worrying about precision. Play around with the colors and shapes and have fun creating! Experiment with the watercolor paints and see what happens with more or less water mixed in.
This project is an easy and fun one for artists of all skill levels and ages. Don’t believe me? Try it with your kids and see what masterpieces they create! What are you waiting for? You can find the awesome watercolor kit on Amazon and all the paint and tools at Plaid Online!”
If you like it, don’t forget to put a pin on it!
I love this! I have a few small canvas boards in my stash and they need some pretty-ing up! A fun activity for a rainy afternoon. Thanks!
Have fun!
So pretty!
This is so pretty…It is happy…