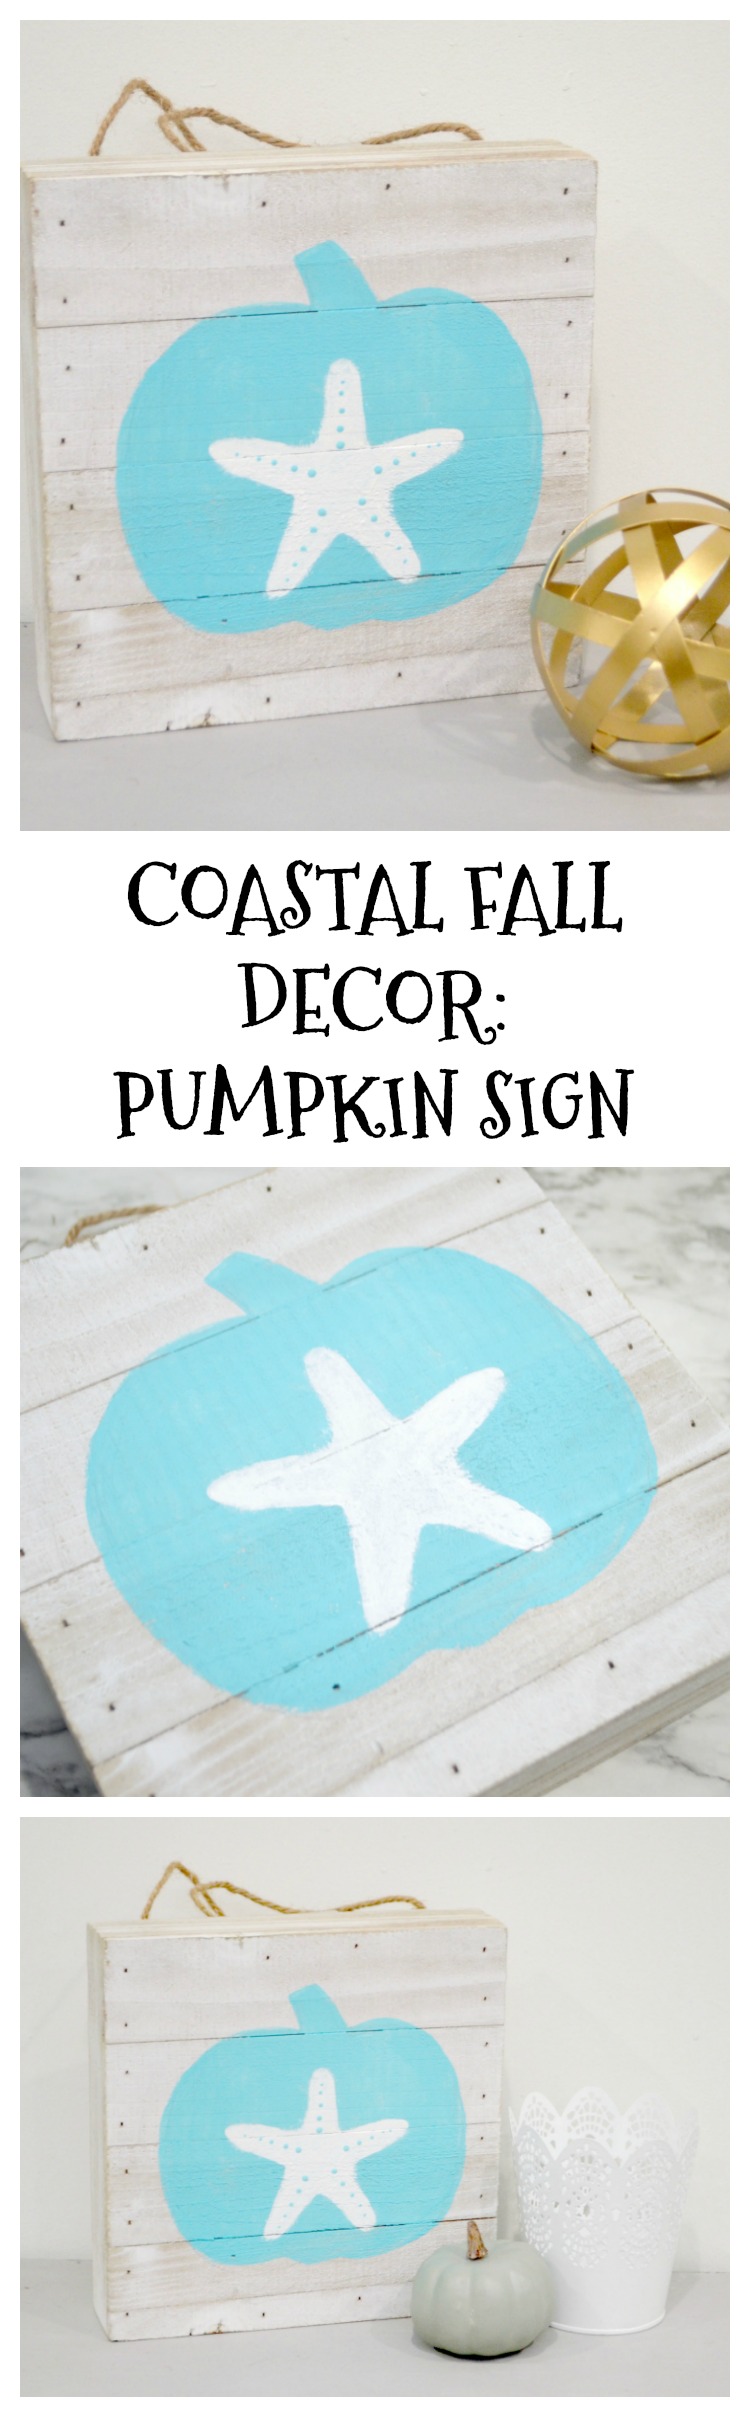
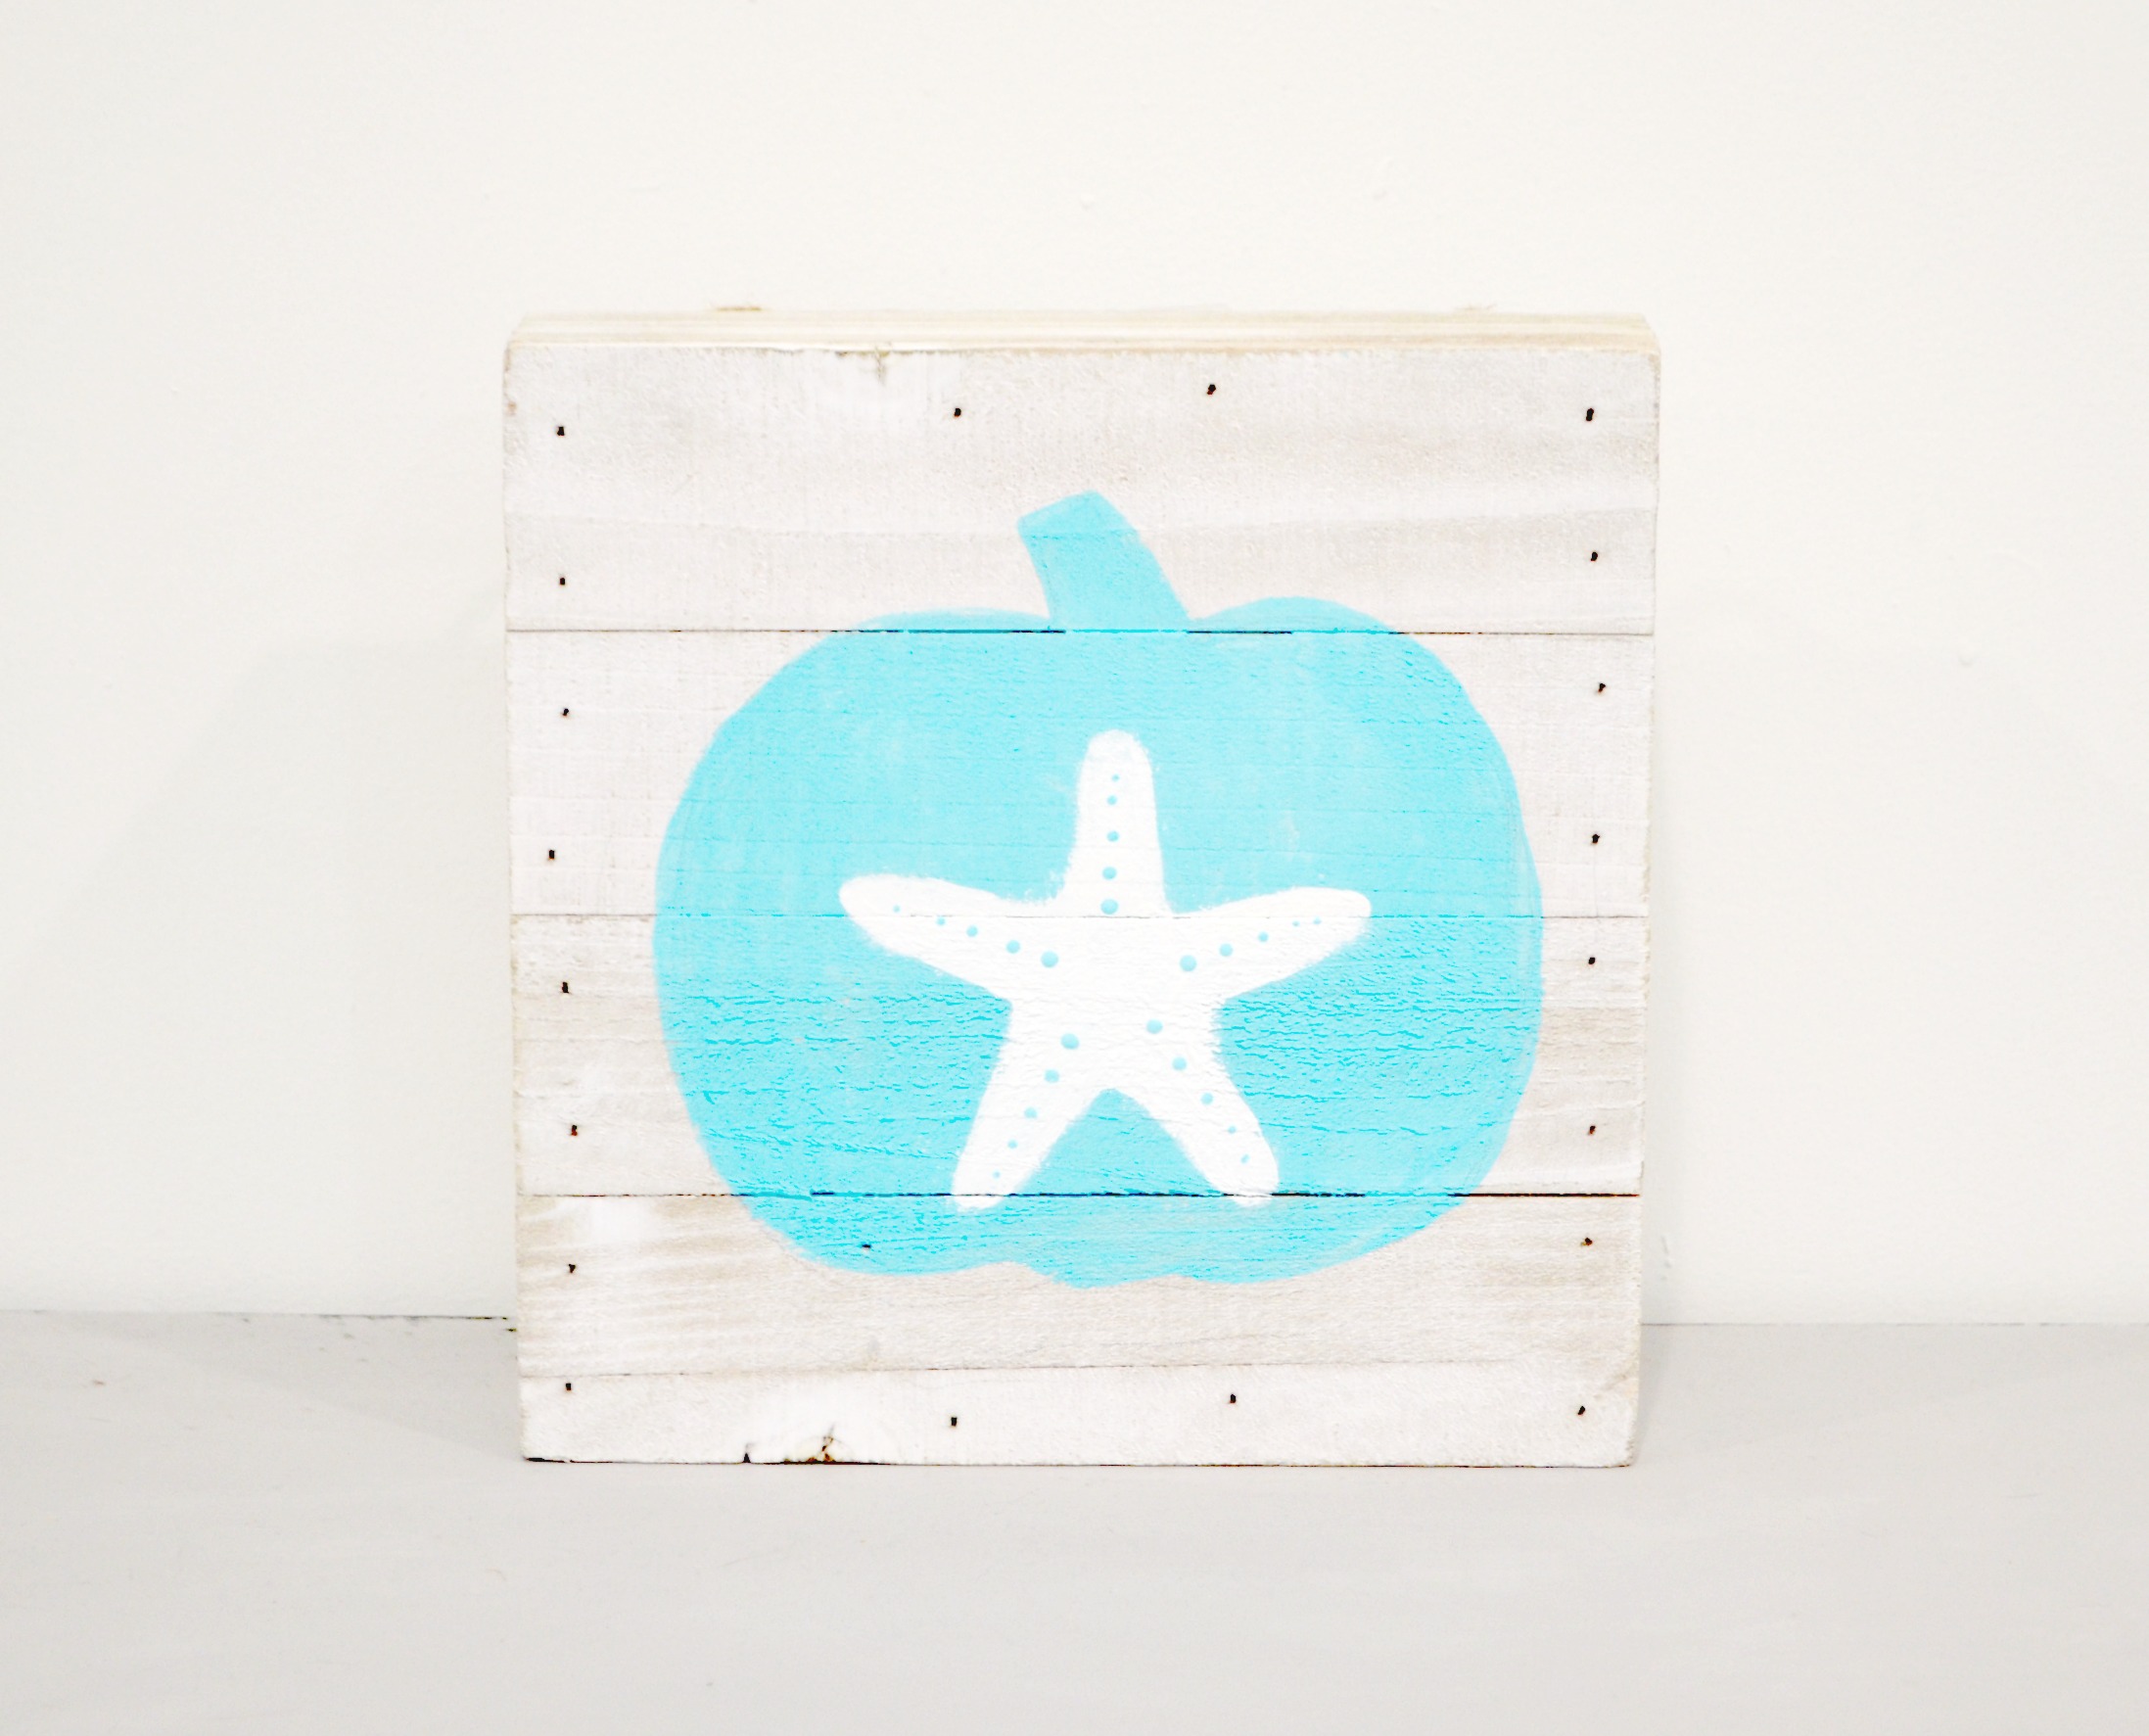
Coastal Fall Decor: Beach Themed Pumpkin Art
There’s nowhere I’d rather be than the beach! Even though we don’t live there (yet!), I like to incorporate beach-themed elements into our home decor to remind us of our favorite place. The decor style of our house is best described as “Coastal Farmhouse.” It incorporates all the things I love about farmhouse decor, like painted furniture, simplicity, lots of white and neutrals, and a slightly worn/distressed look. Then, I add in coastal elements and colors to finish off the look. So, when it comes to decorating for fall, it can be a little tricky since the traditional colors don’t mesh very well with the rest of the home decor. This year, I was excited to find that some retailers (including Target and Home Goods) are carrying some teal pumpkins, but I also like to create a few unique pieces that combine my love of the beach with the fall season. Here’s how I made my own Beach Themed Pumpkin Art and you can too.
Beach Themed Pumpkin Art
Materials:
Wooden sign (mine came already stained a weathered white)
Acrylic Paint: Teal and White
Pencil and eraser
Small paintbrush
Stencil brush
Starfish or other coastal stencil (I used Martha Stewart Nautical Study)
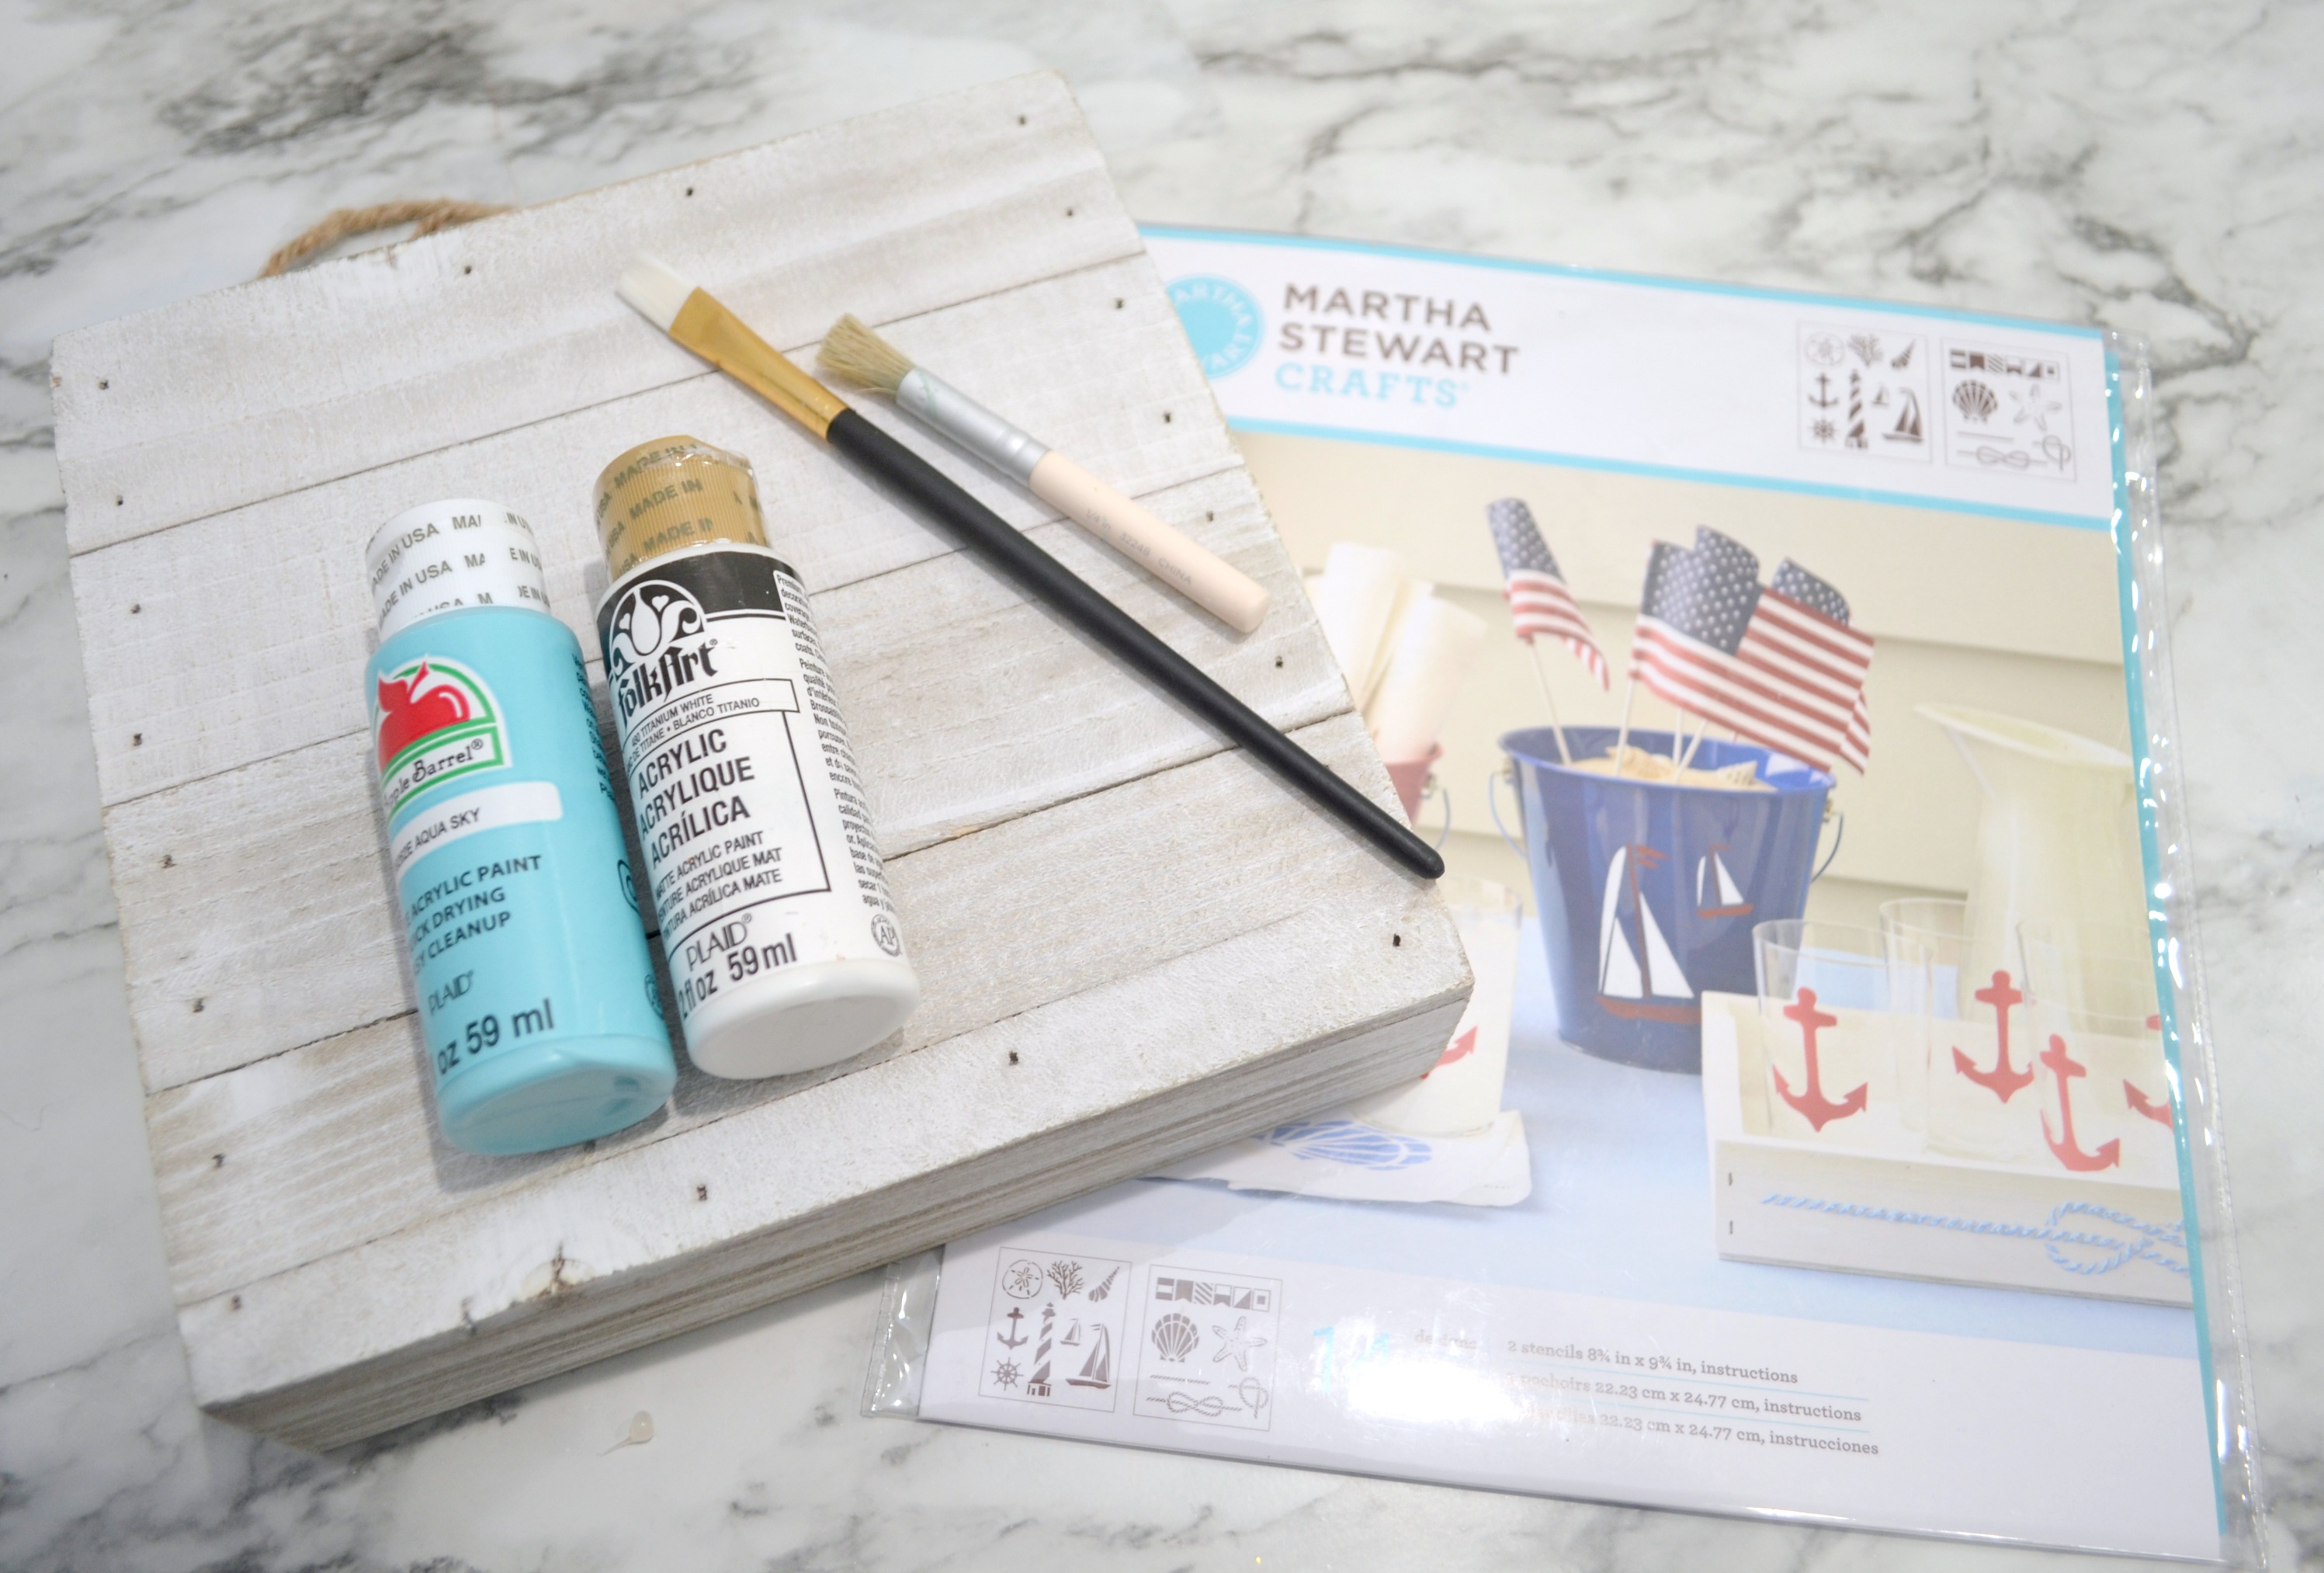
*Note: My sign was already whitewashed when I purchased it, but if you’re starting with unfinished wood, you’ll want to give it a light white basecoat before beginning step one.
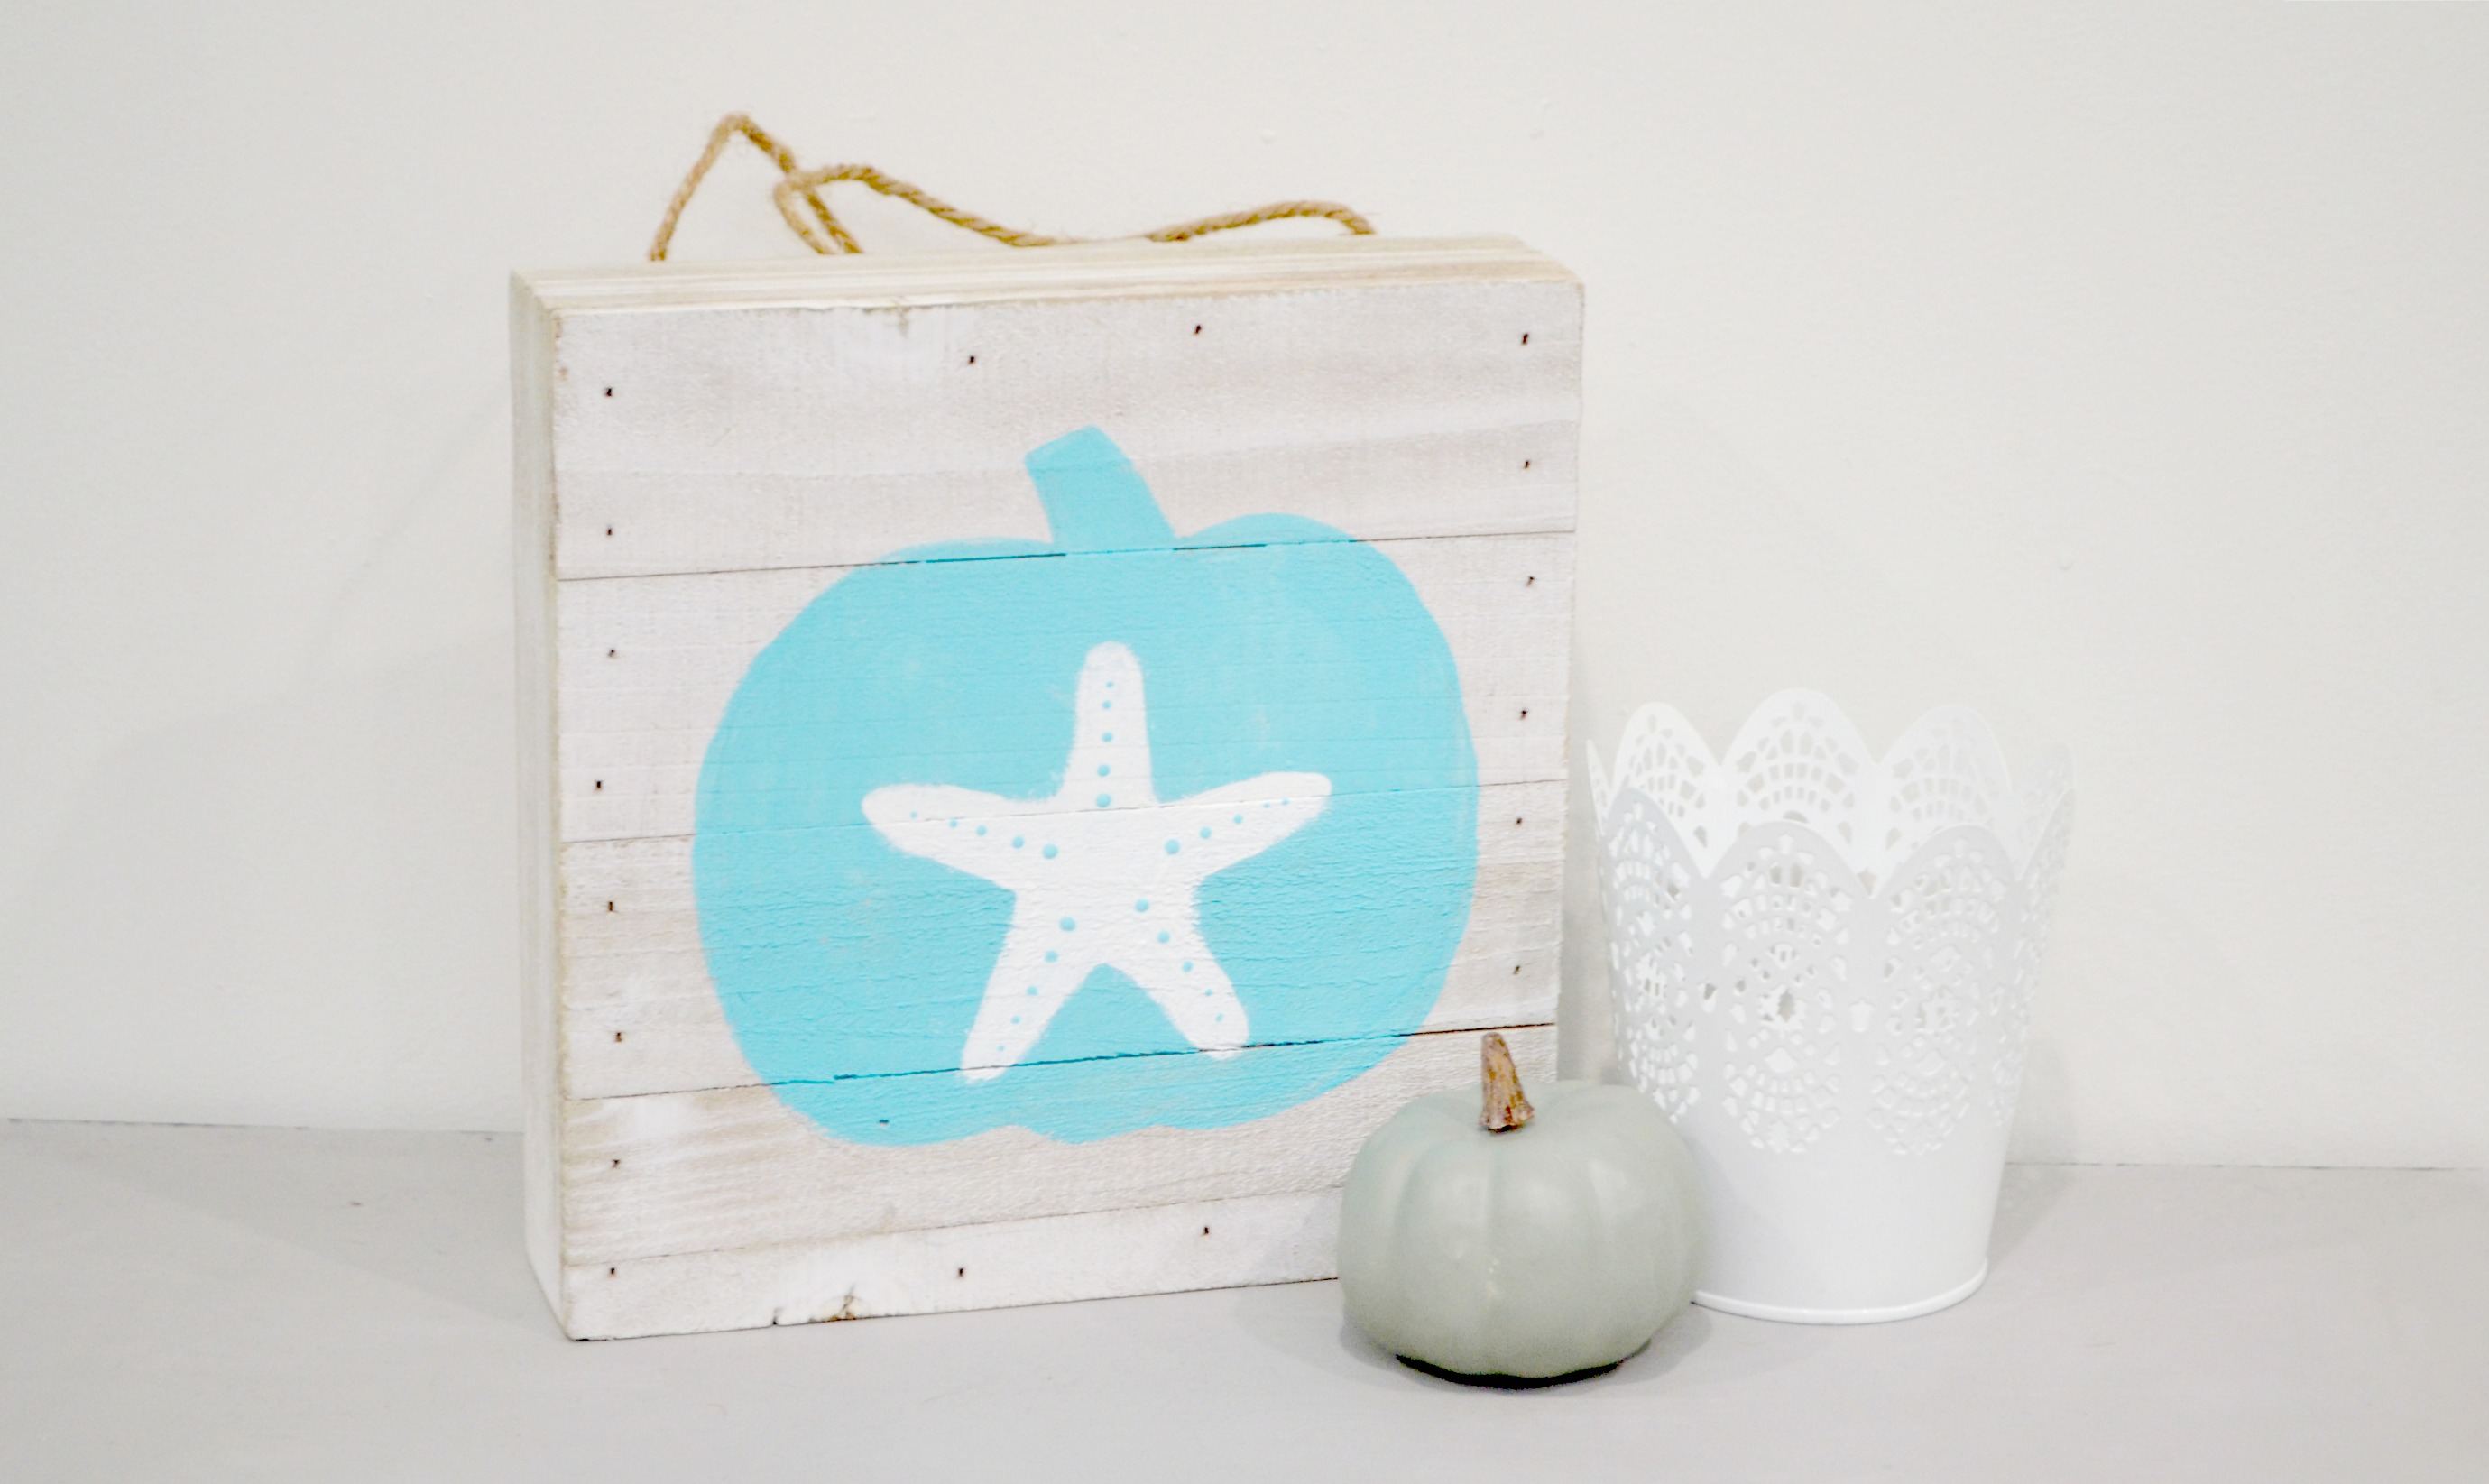
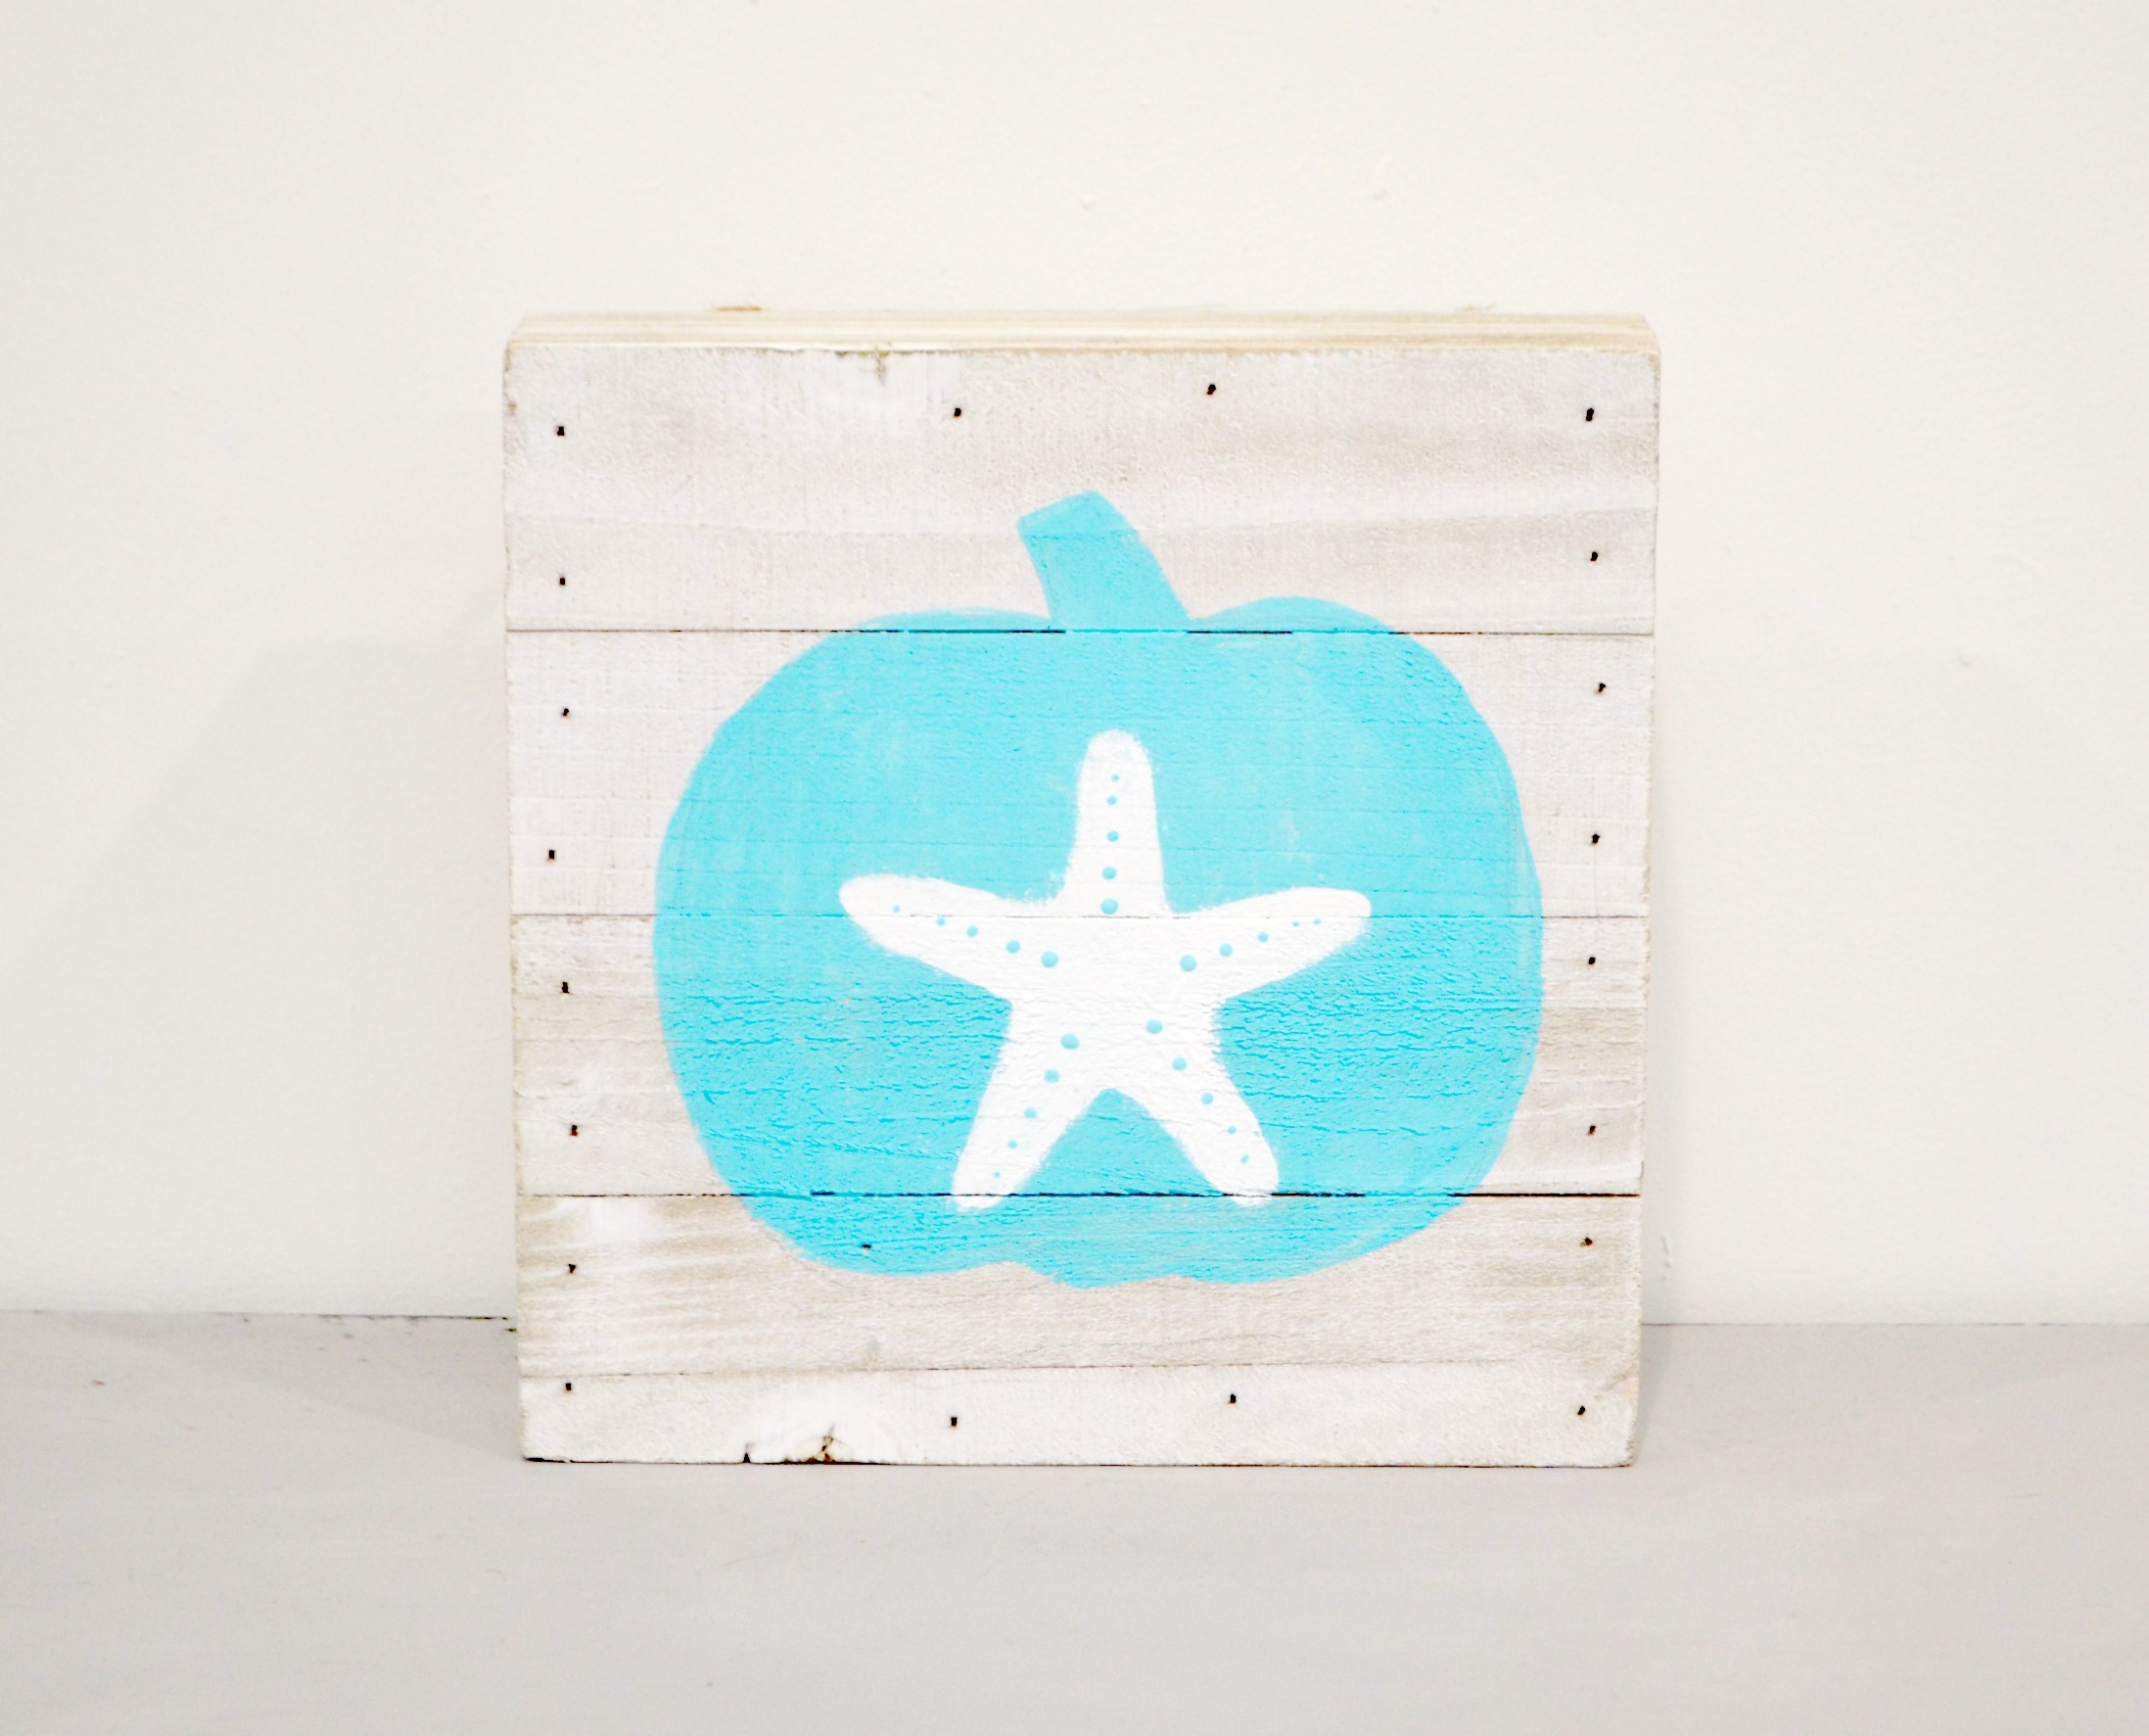
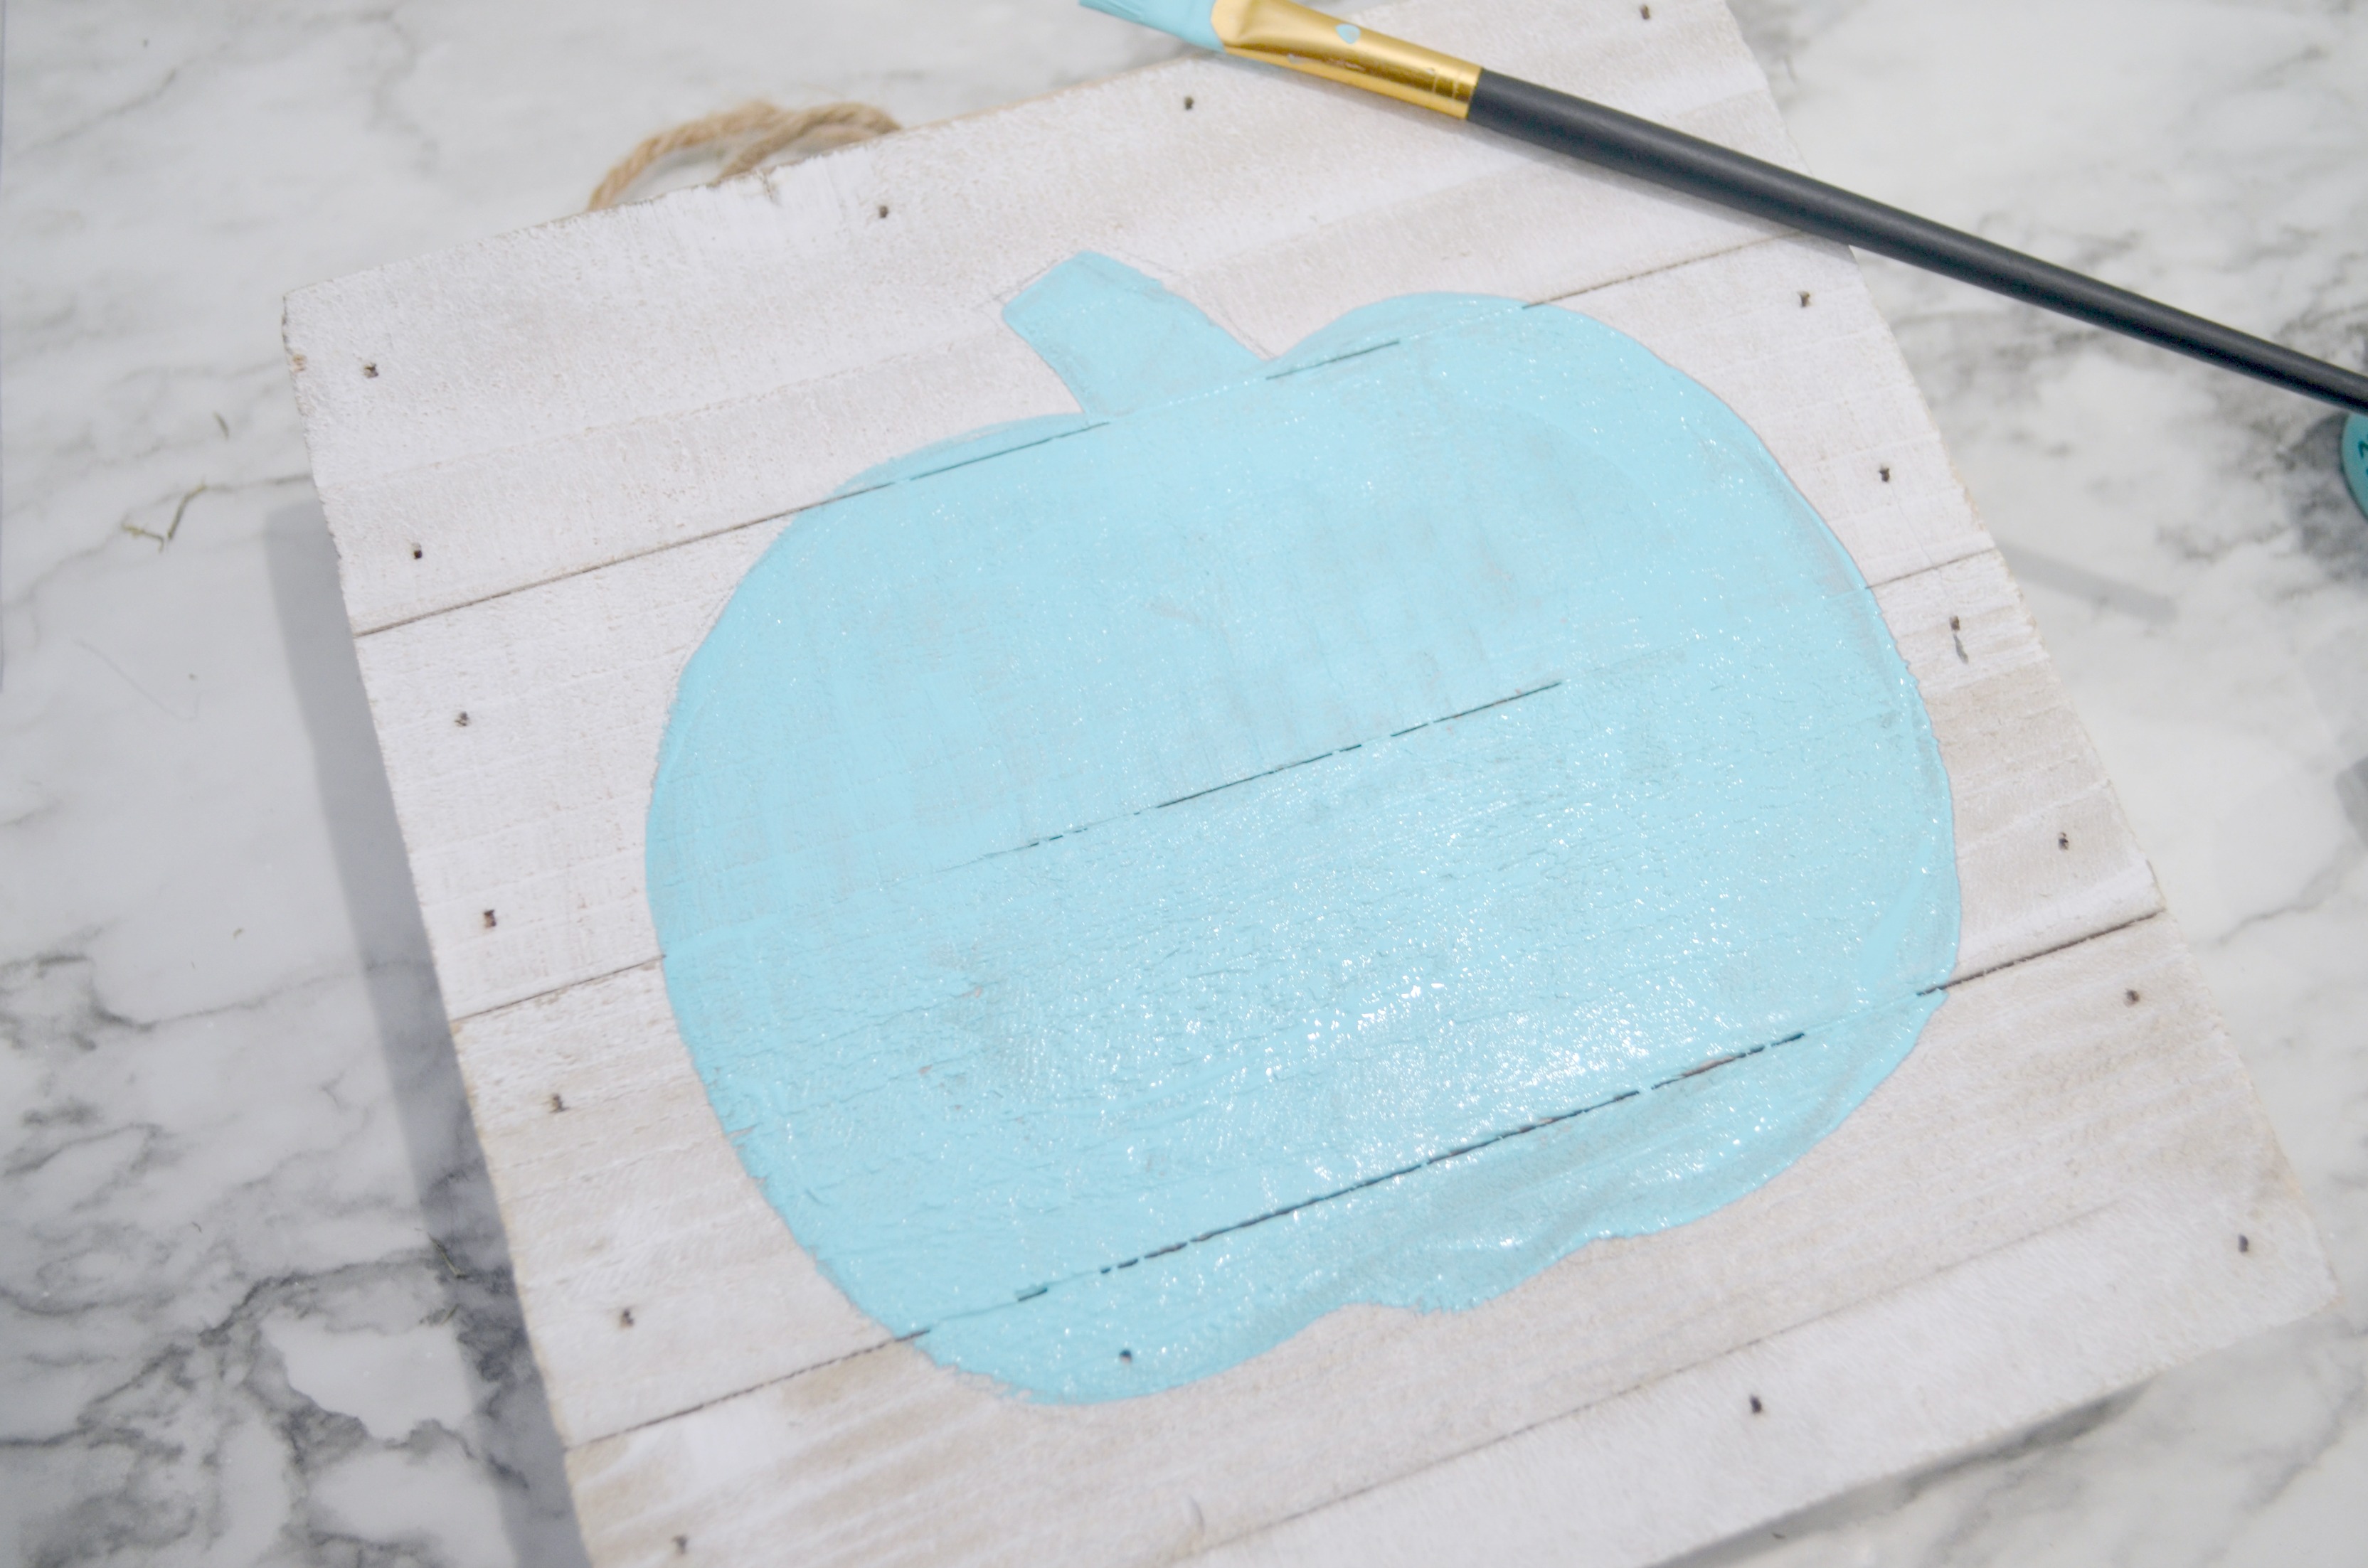
Step 1: Lightly sketch a pumpkin shape on your sign with pencil.
If you don’t feel comfortable free-handing a pumpkin, you can find a shape online and trace it.
Step 2: Paint the pumpkin shape light teal.
Of course, you could also use a darker teal, navy blue, grey, or any other color you like. Let the paint dry completely before moving on.
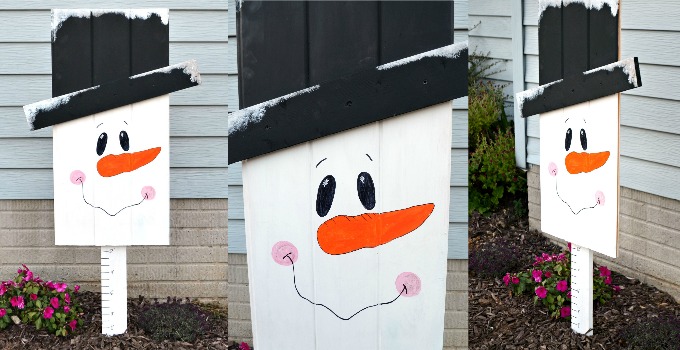
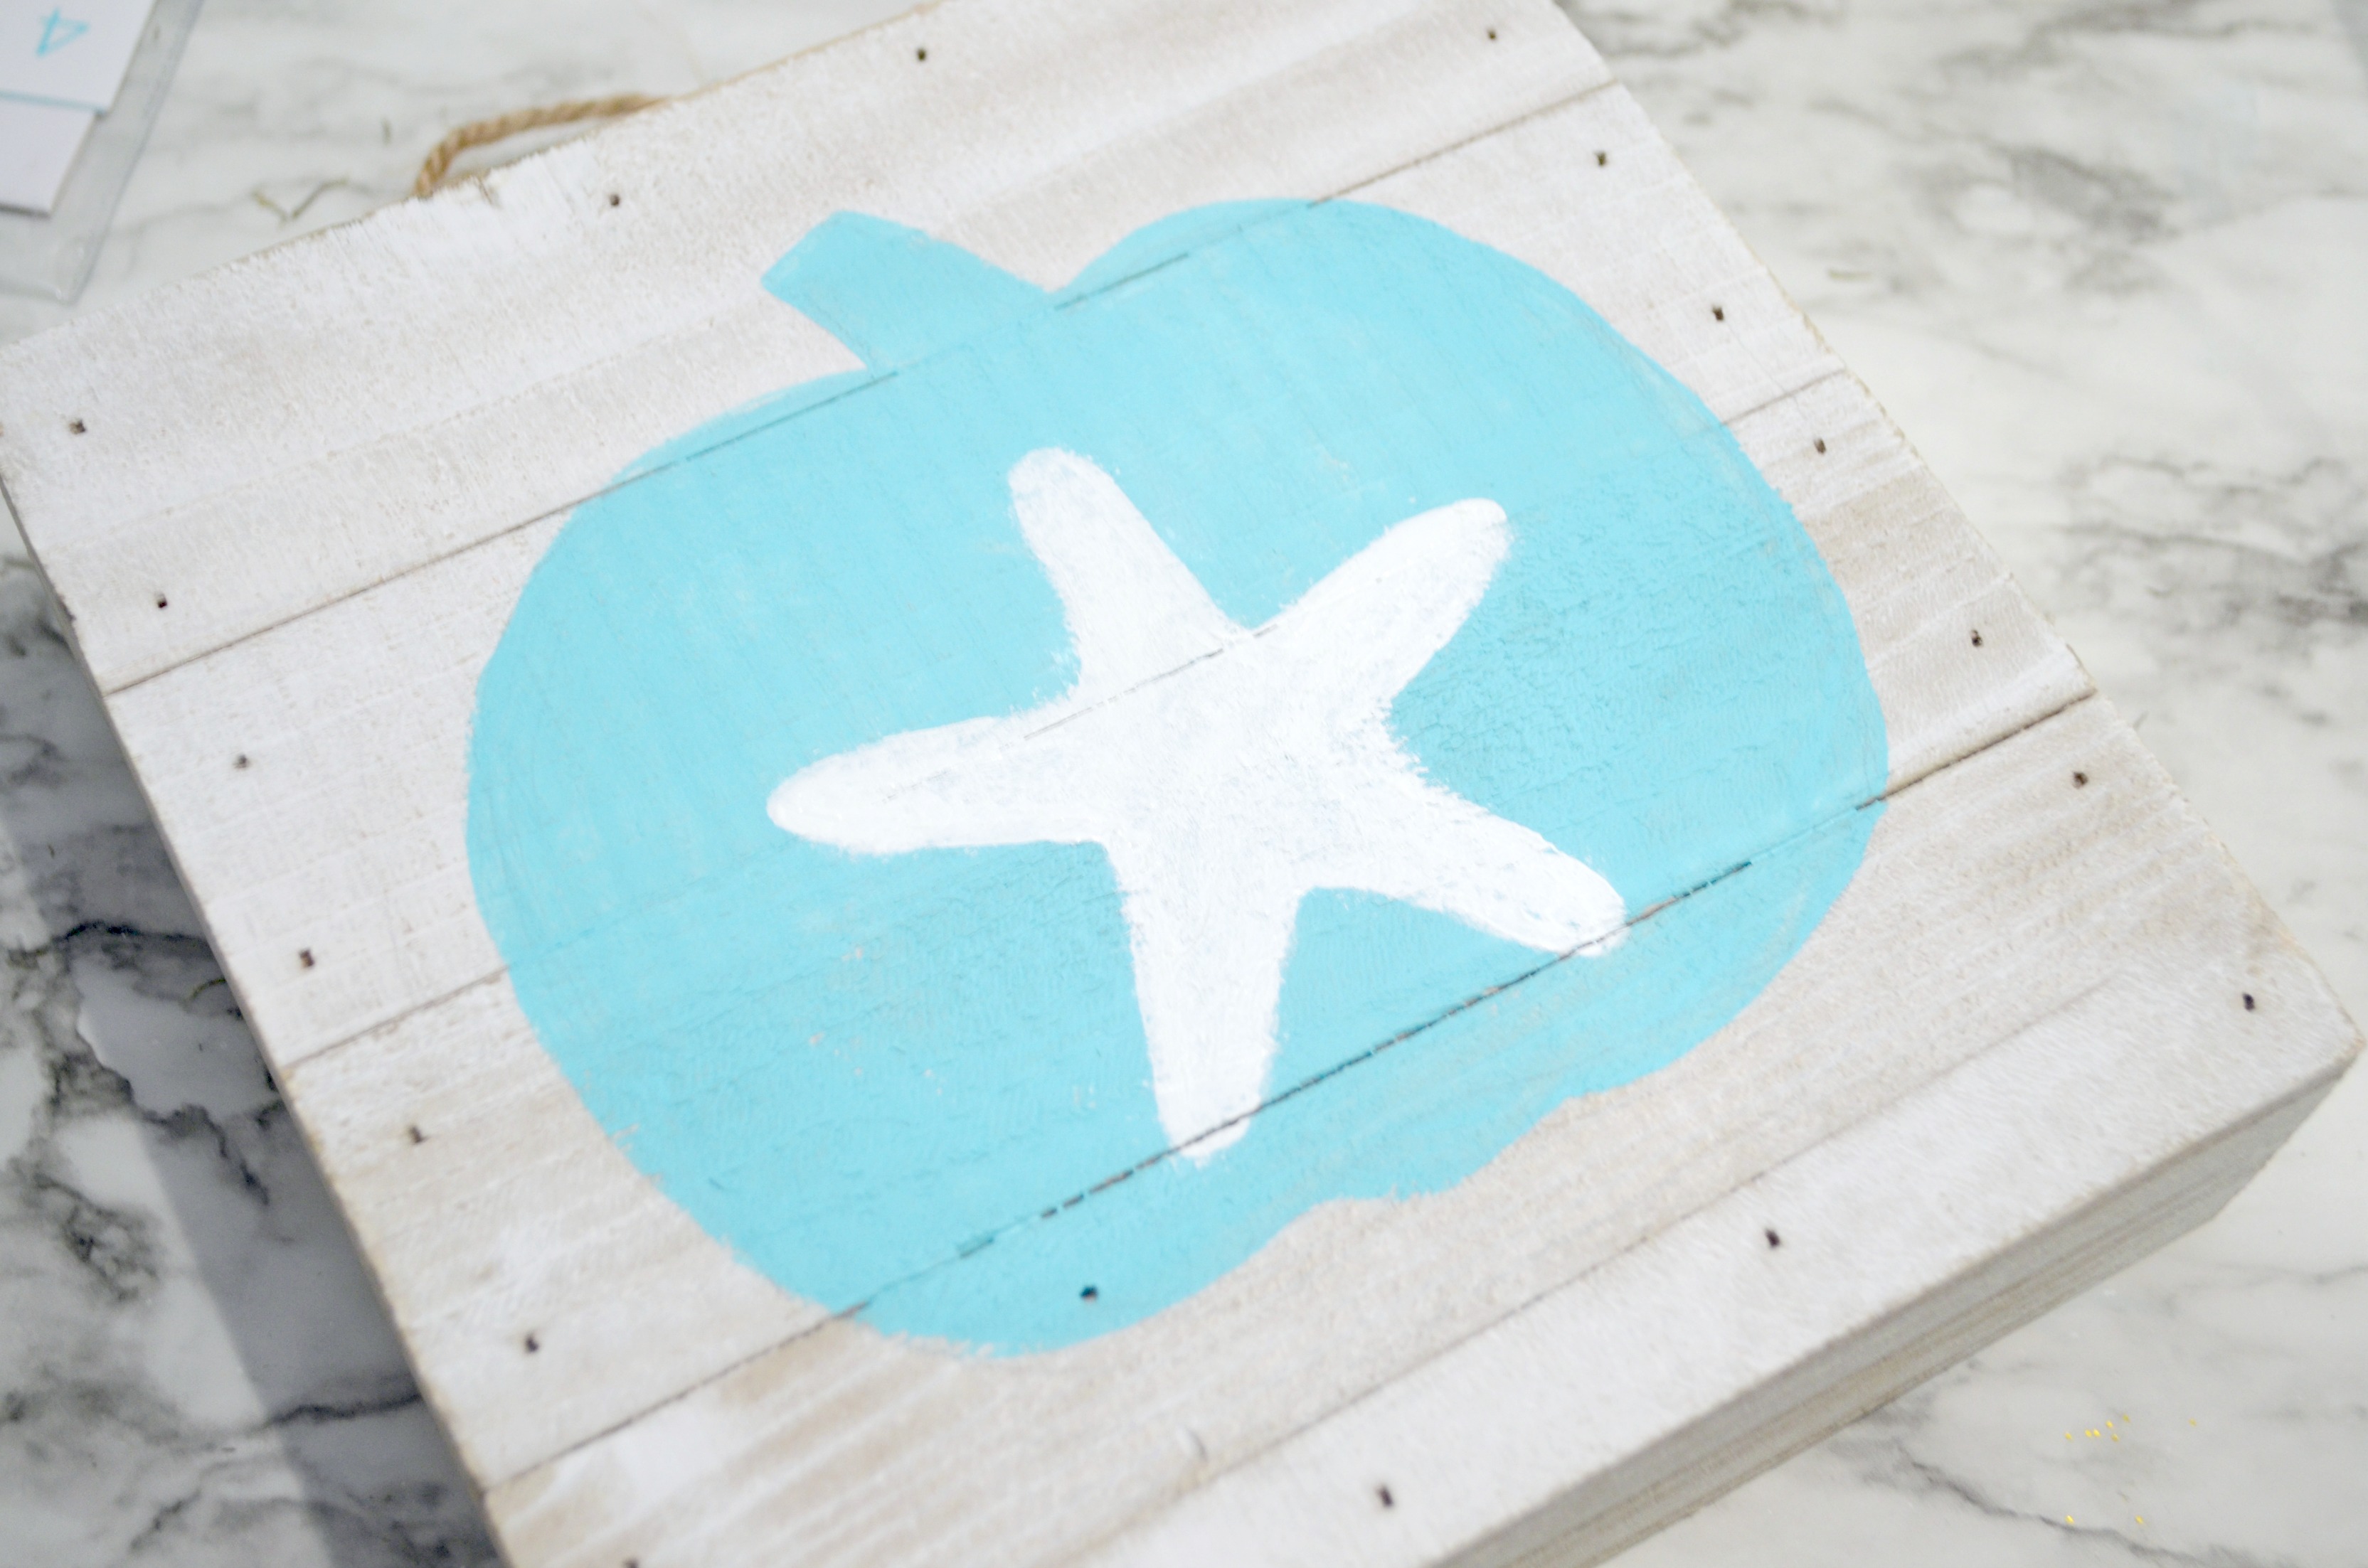
Step 3: Stencil your nautical symbol with white paint on top of the pumpkin.
I chose a starfish, but you could also use an anchor, a seahorse, a shell, or other coastal images. To get a clean stenciled image, you’ll want to use a stencil brush rather than a standard paintbrush. Gently tap the brush into the white paint, then offload the excess on a scrap of paper. Tap the almost-dry brush up and down over the cut out areas of the stencil.
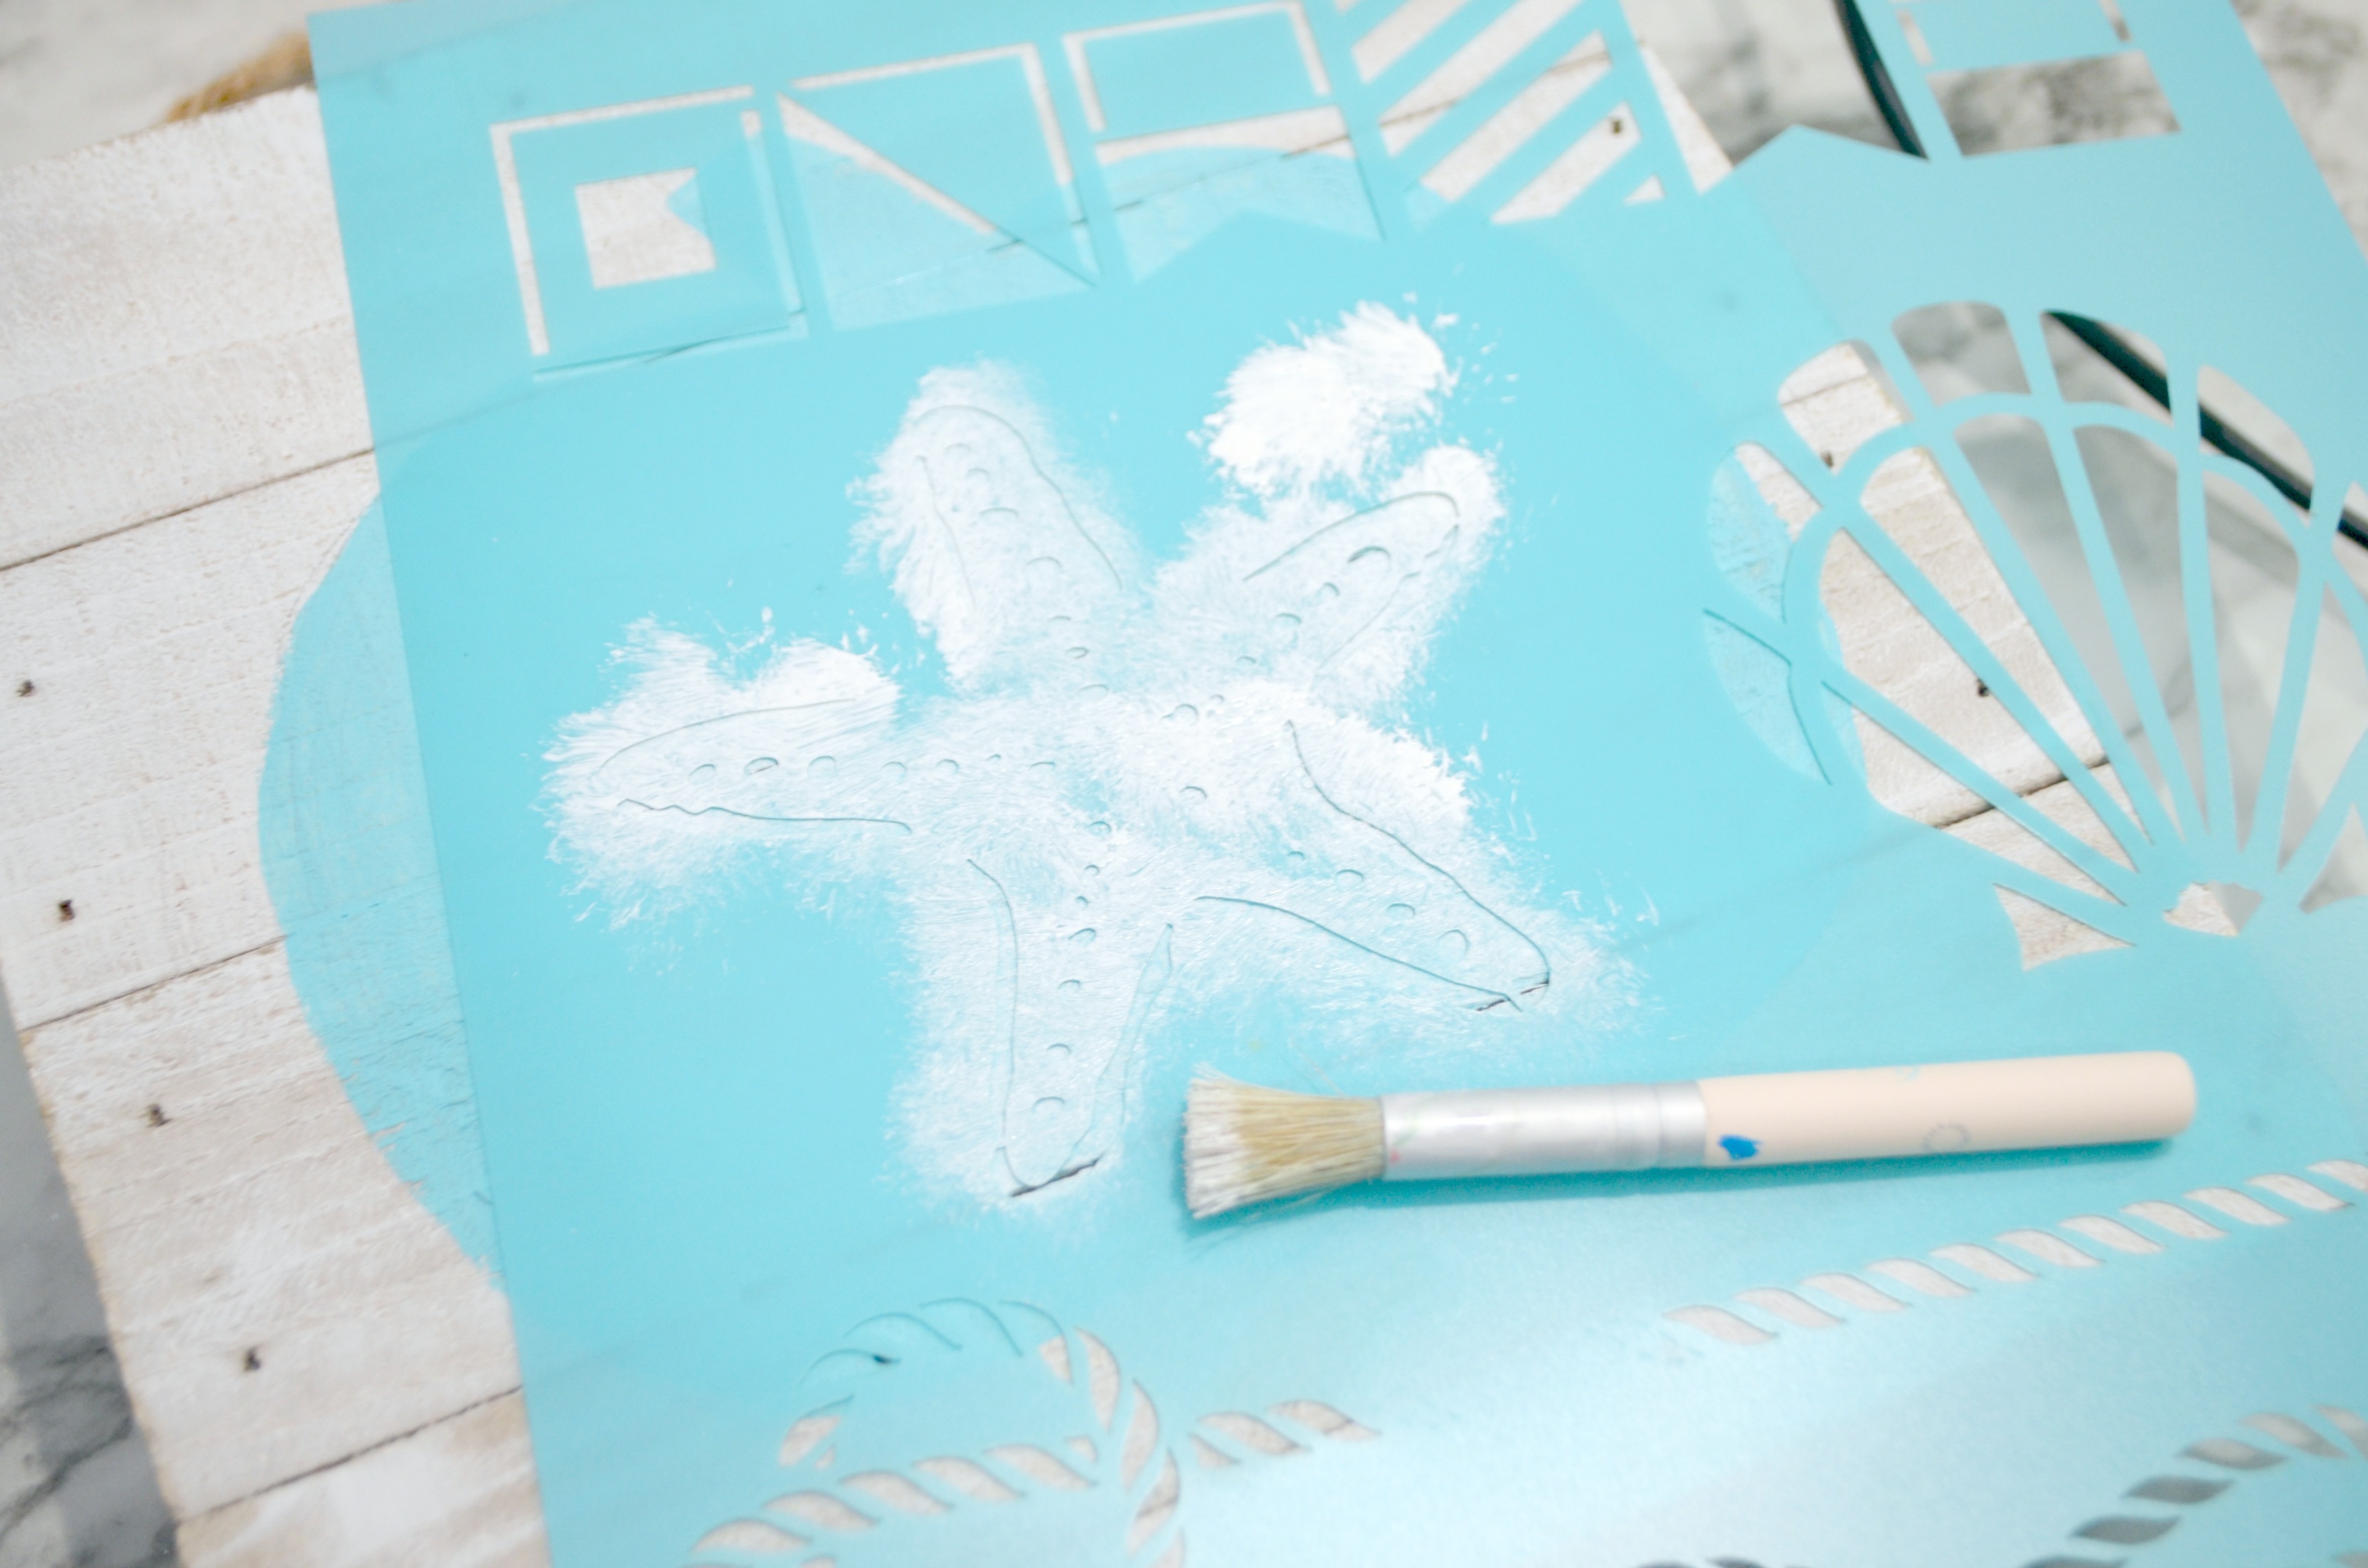
My stencil only provided the outline of the starfish, but I wanted it to be solid white for more impact. So, after I removed the stencil, I went back with my paintbrush and filled in the outline. Depending on your image and your preferences, you may not need/want to do this step.
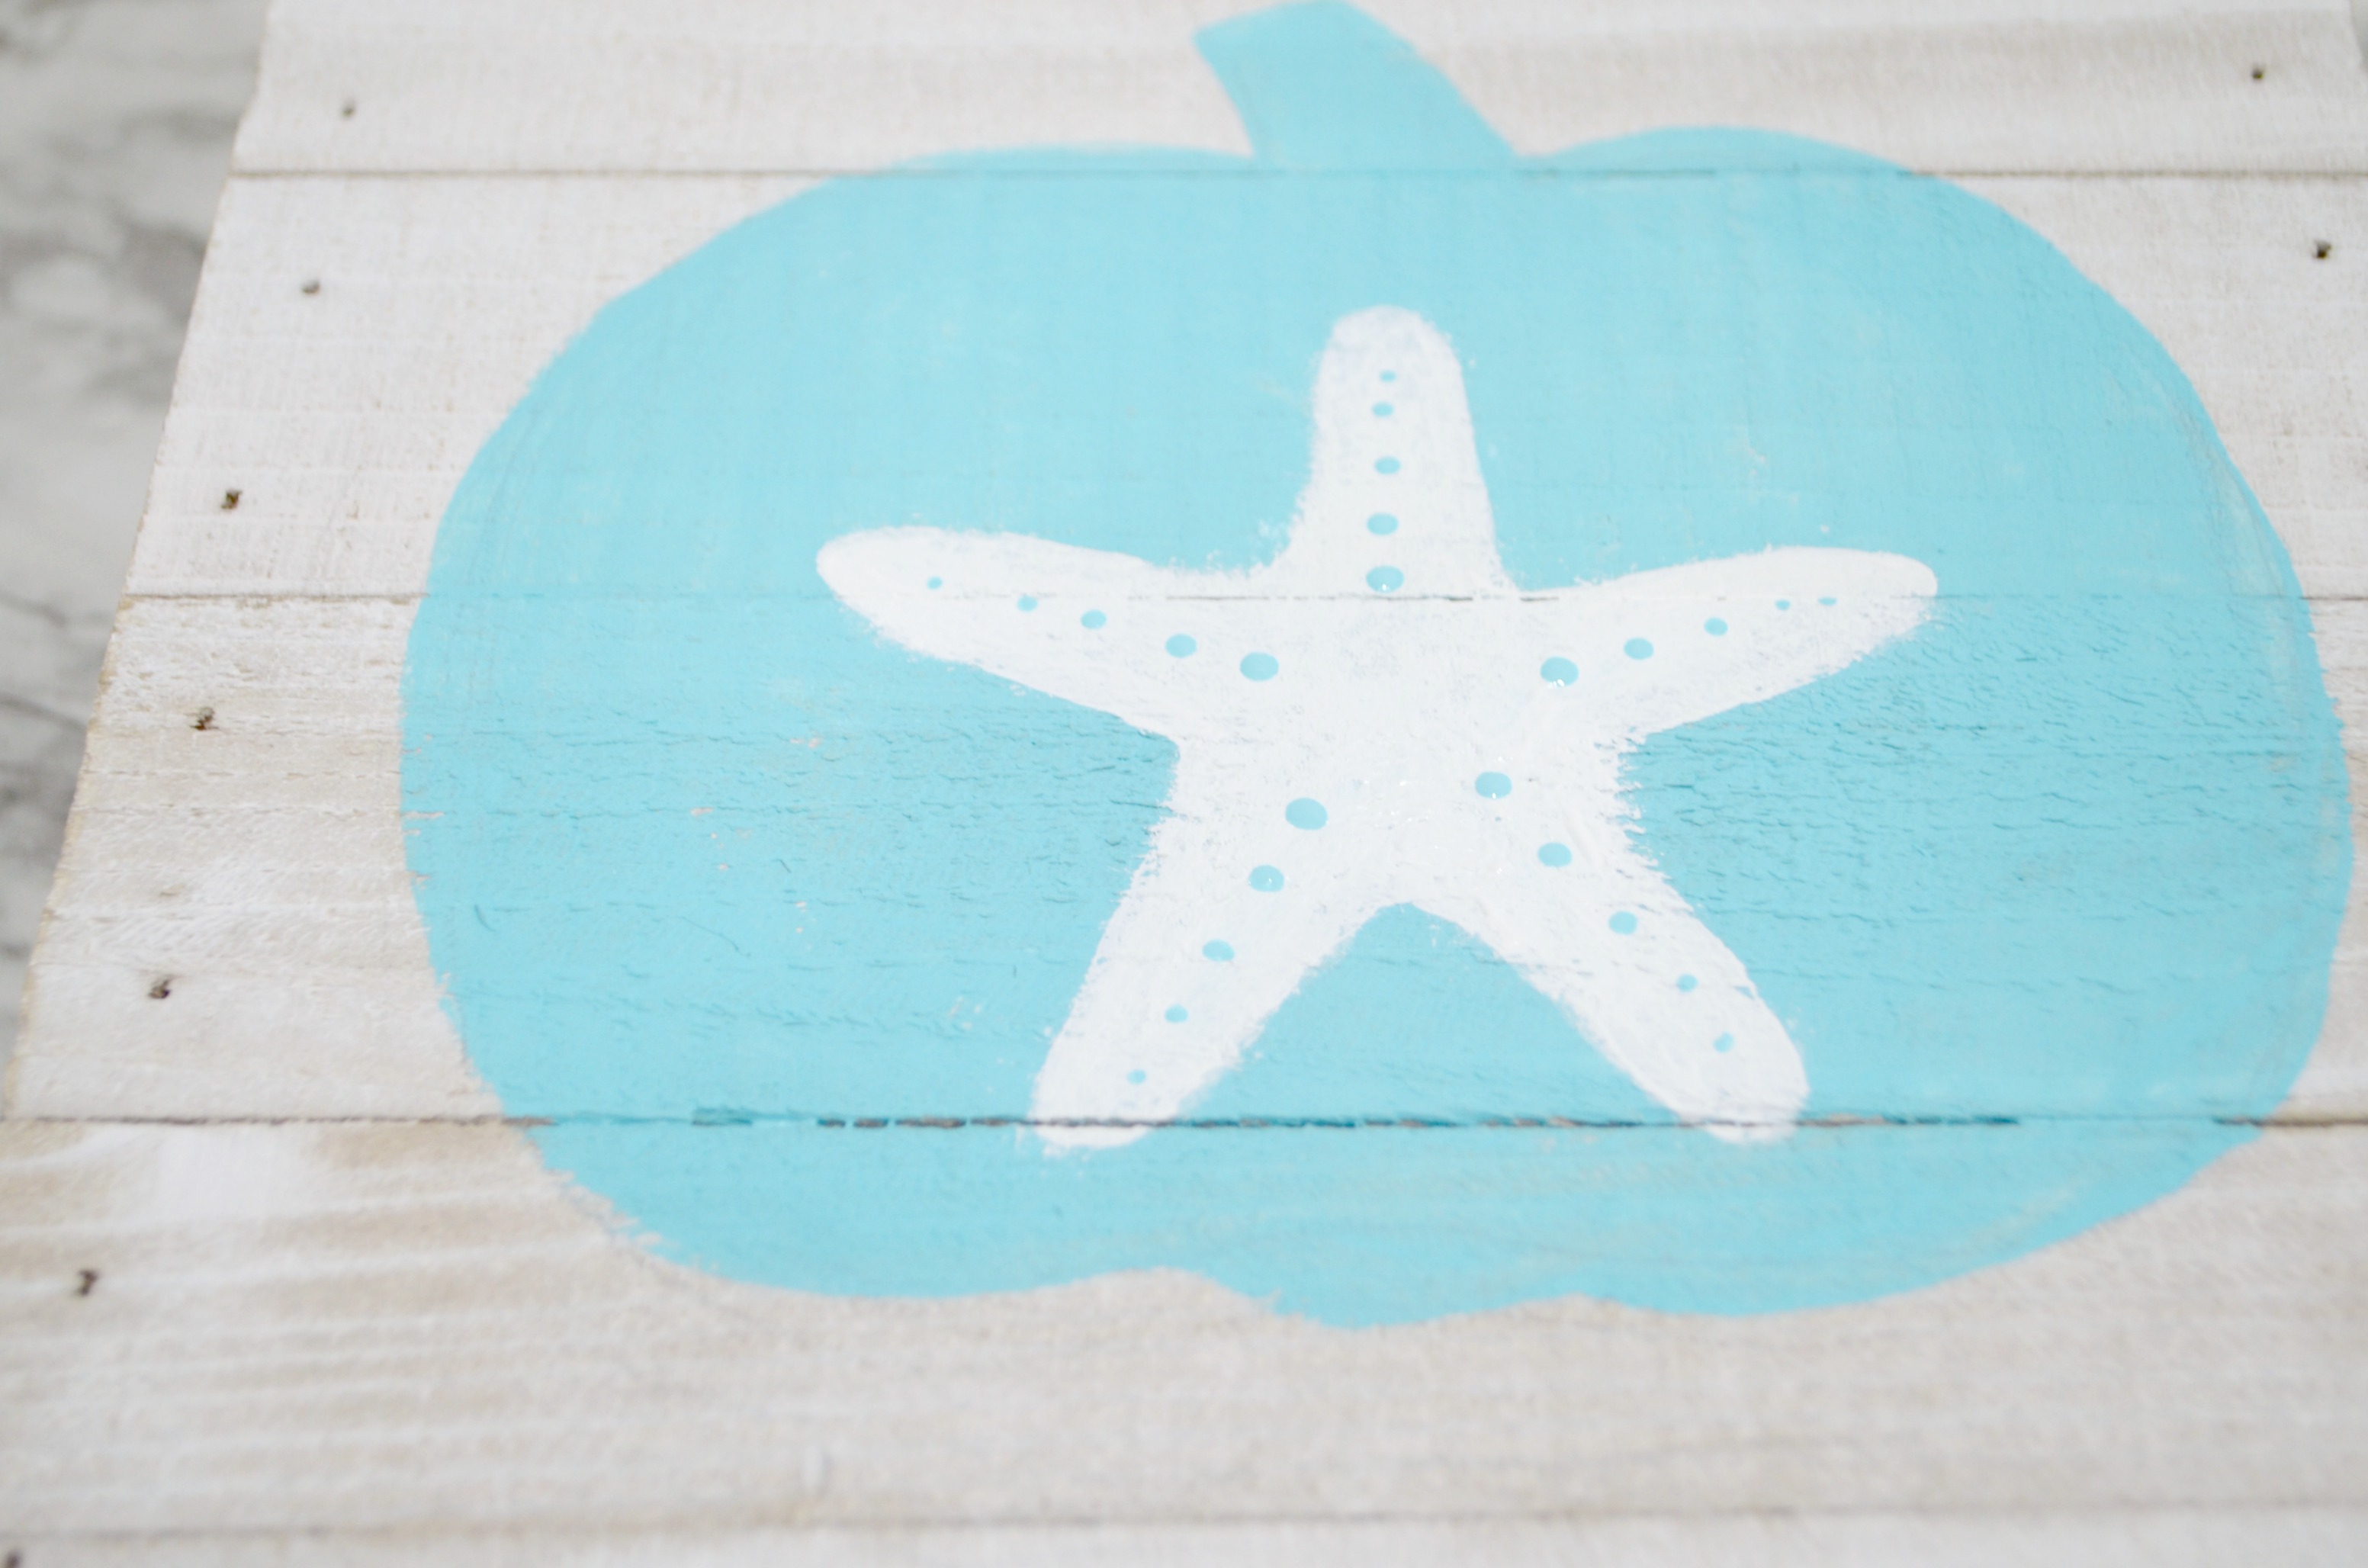
Step 4: Add details with teal paint. (optional)
I wanted to add some small dots to my starfish for some extra detailing. I dipped the wooden end of my paintbrush into the teal paint, then tapped it on top of the starfish shape to create these dots. I started at the part of each “arm” closest to the center and continued out toward the edges, which made the dots gradually decrease in size.
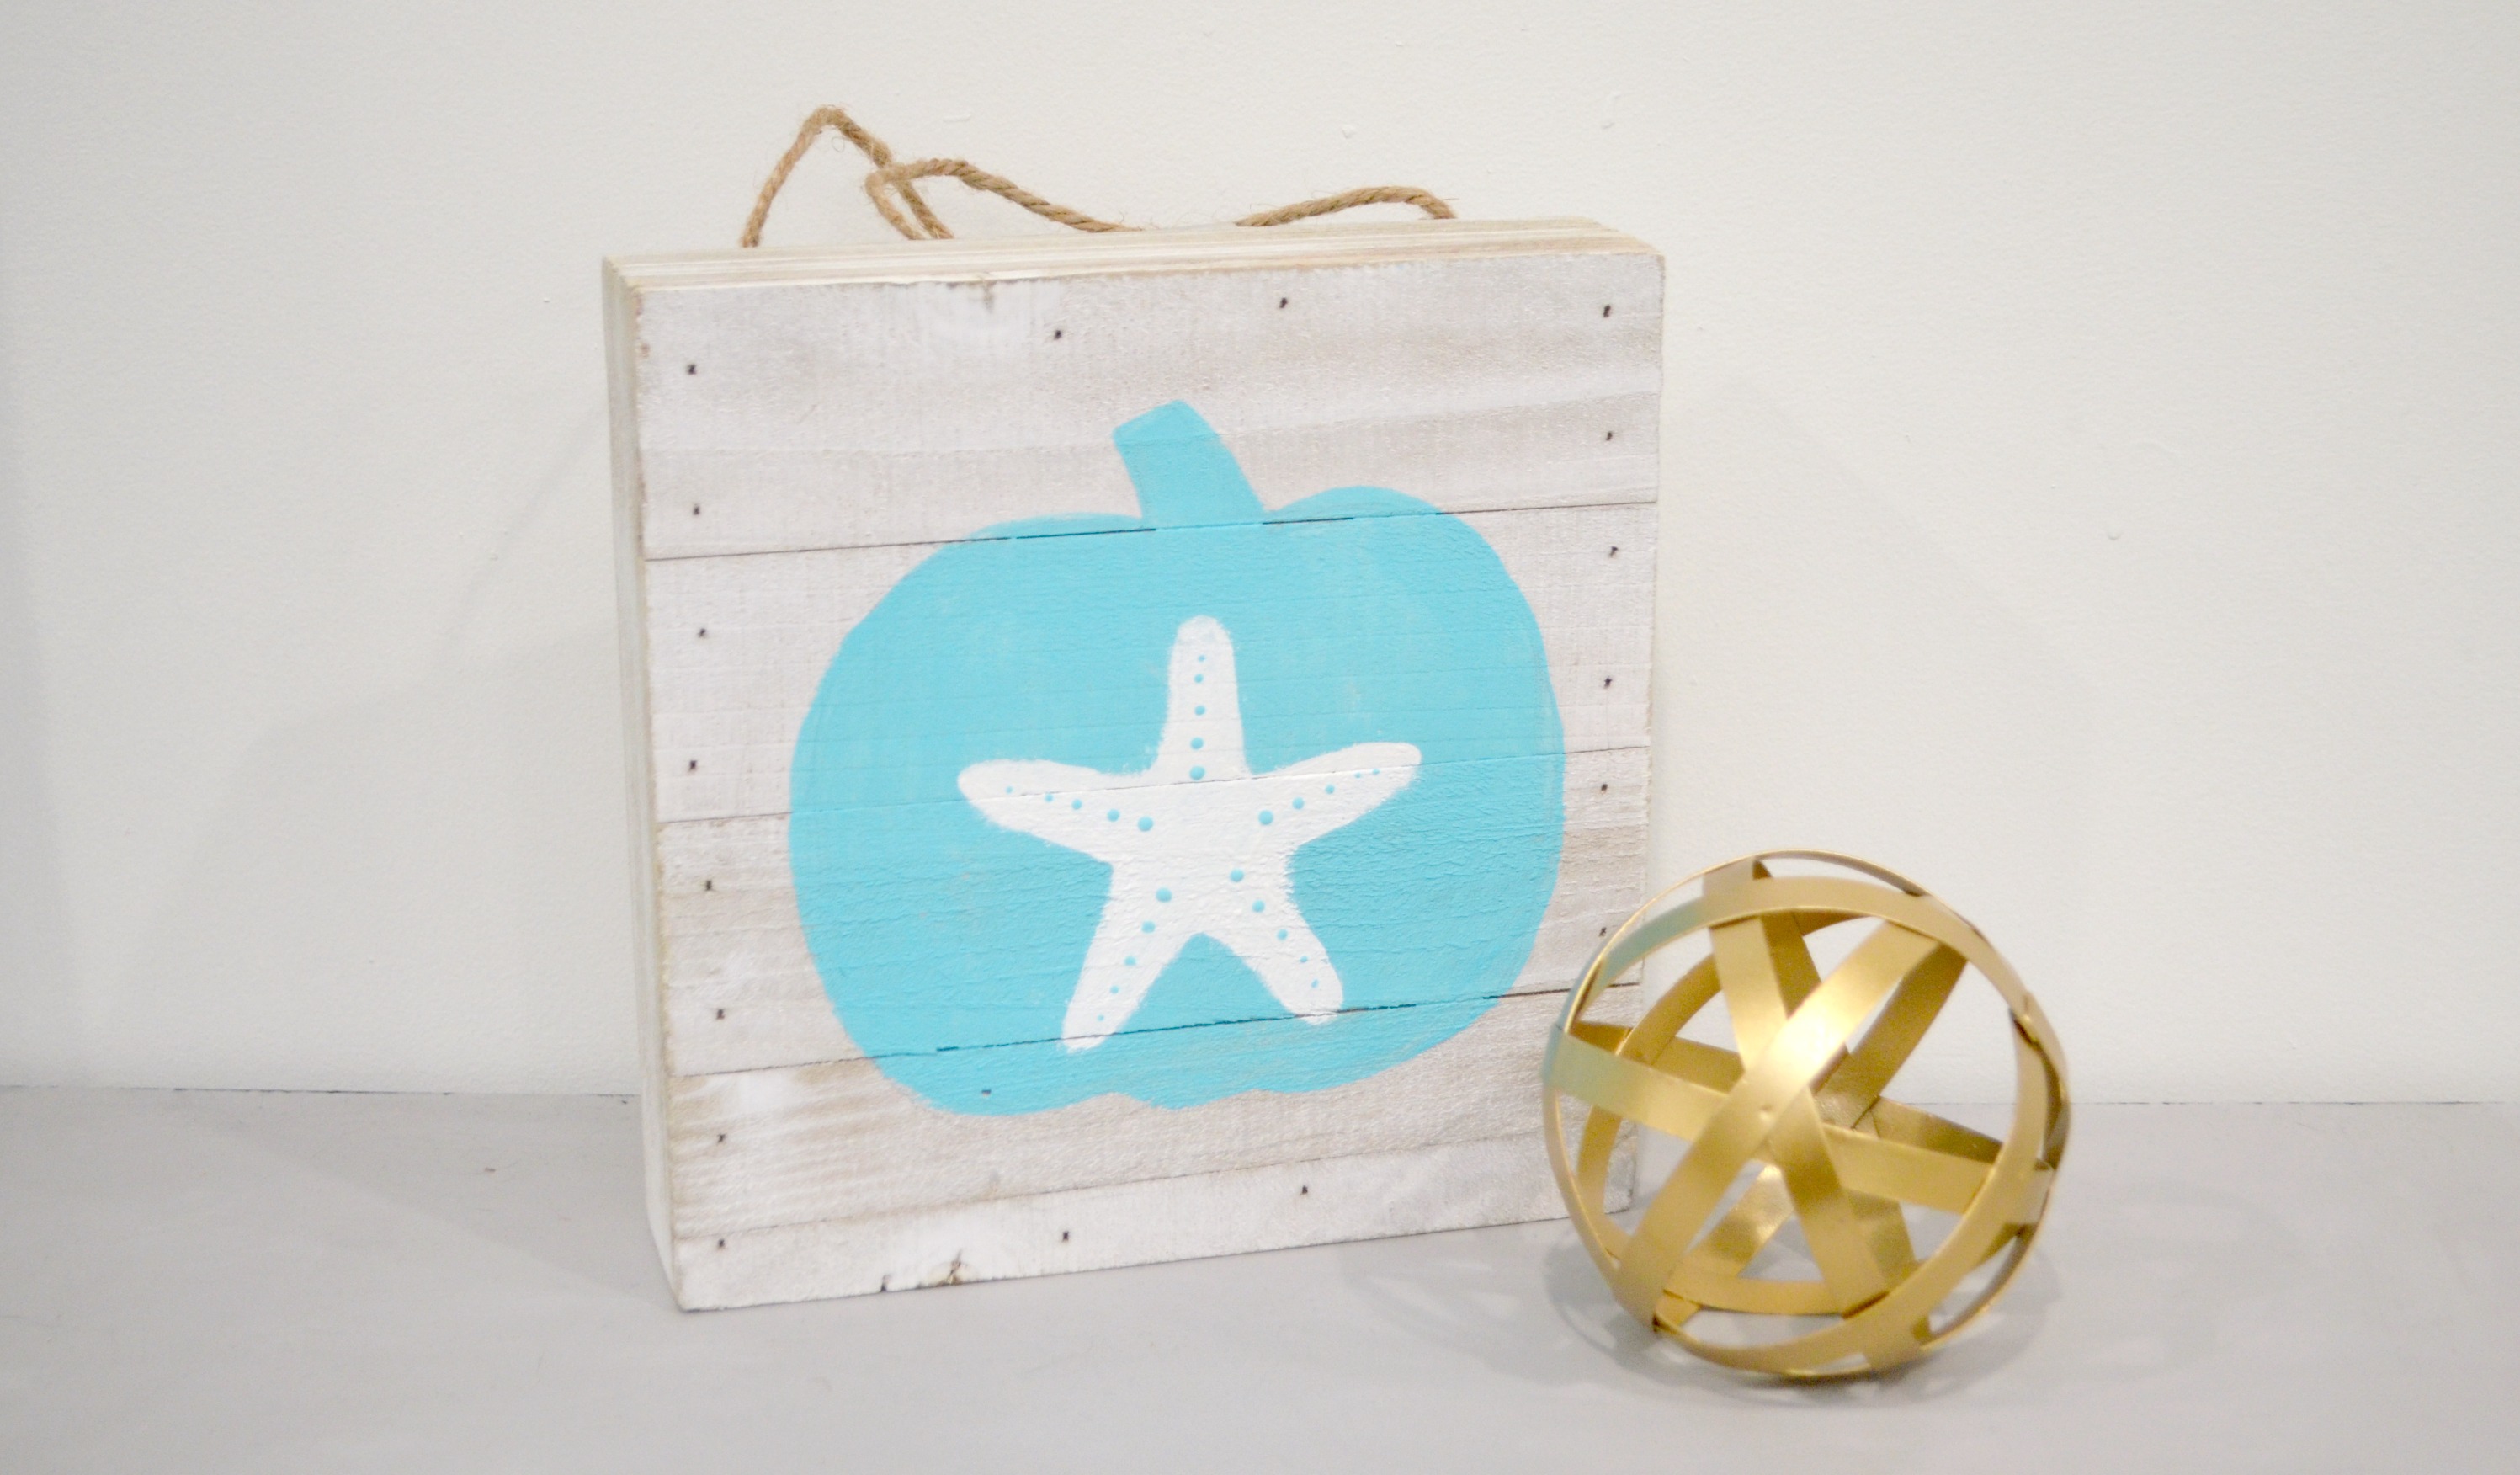
Once your paint is totally dry, your sign is finished and ready to display to make your home festive for fall!
What do you think? Are you a lover of the coastal look? Would you enjoy a sign like this in your home? You can also personalize this project in any way you like by changing the colors and stencils to represent your favorite things. Instead of a coastal symbol, you could use a monogram letter, a spider, or whatever stencil you prefer. The project can be as unique as you are!
Be sure to check out these other fall projects by clicking on the Holiday Ideas page and scrolling down to Fall/Halloween/Thanksgiving. Here are a few specific projects you might enjoy:
Thankful Pumpkin
And don’t forget, if you like today’s project, be sure to Pin it for later and to share with a friend!