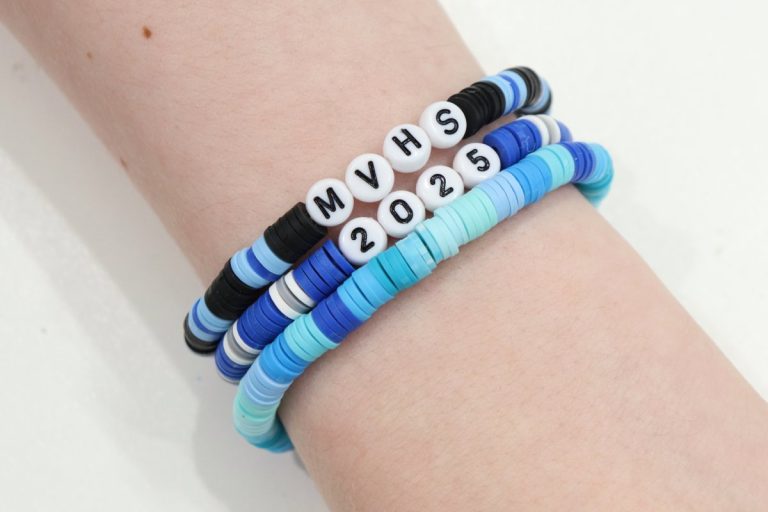
Beaded Backpack Charms
Backpack charms are a great way to personalize your back to school bags. It’s fun and easy to create your own, and each one can be totally unique!

How to Make Beaded Backpack Charms
All you need are a few basic supplies and your creativity to make your own DIY Beaded Backpack Charms. Let’s get started.
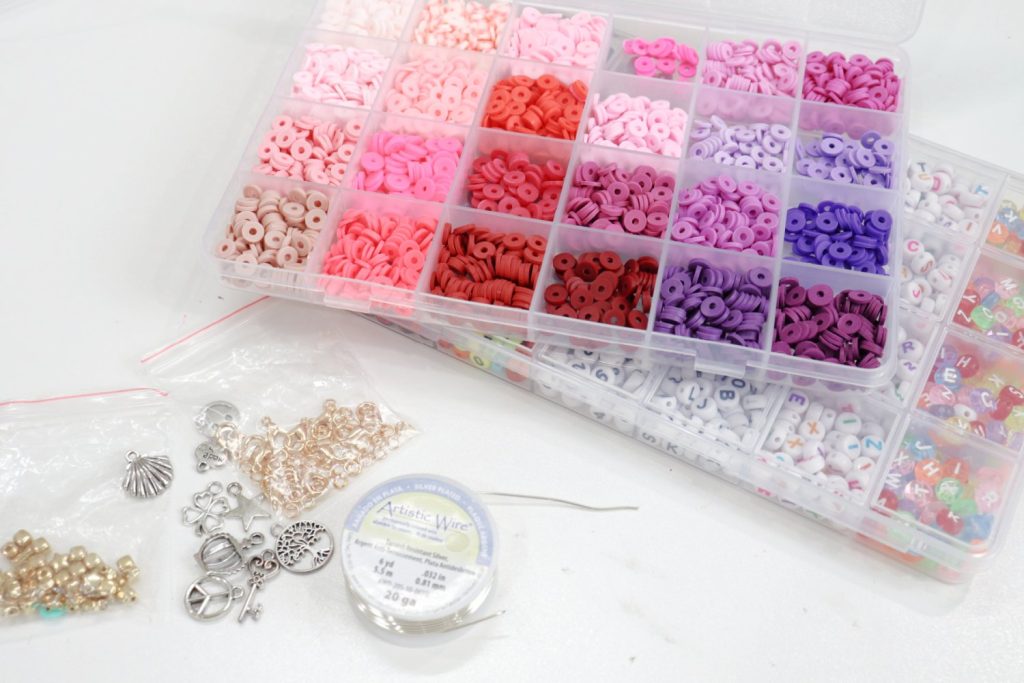
Materials
- assorted clay beads
- number and/or letter beads
- small charms
- lobster clasp
- 20 gauge wire
- round nose pliers and wire cutters
My clay beads, letter beads, clasps, and charms all came in this kit from Amazon.
Instructions
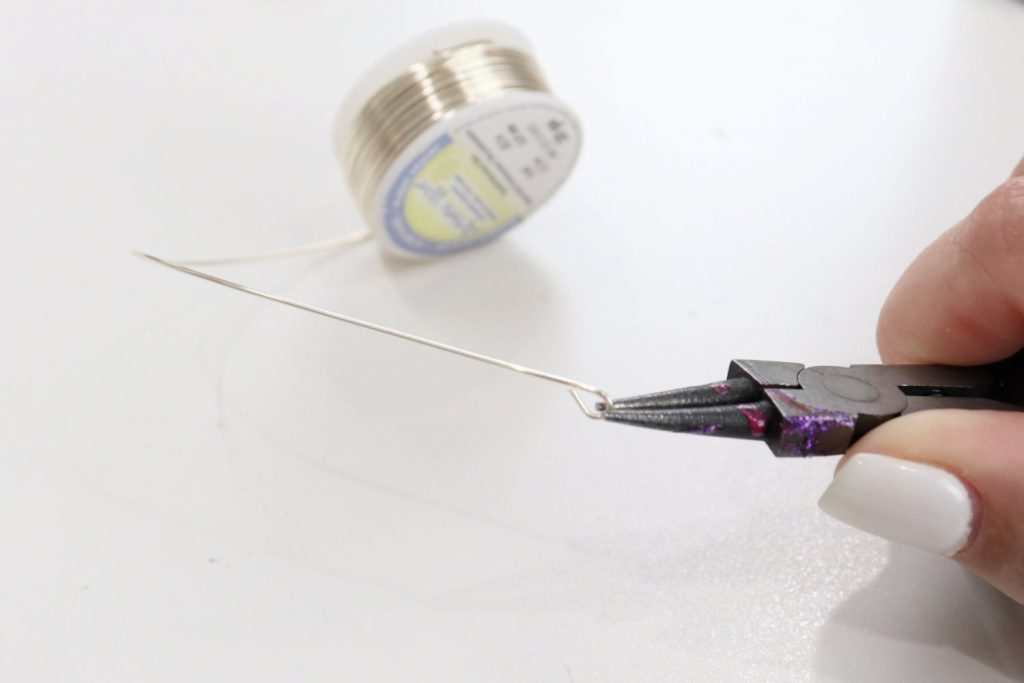
Create a small wire loop.
Using your round nose pliers, grab the end of the wire and wrap it around one side of the nose to form a loop. Leave a bit of open space to slide a charm on in the next step.
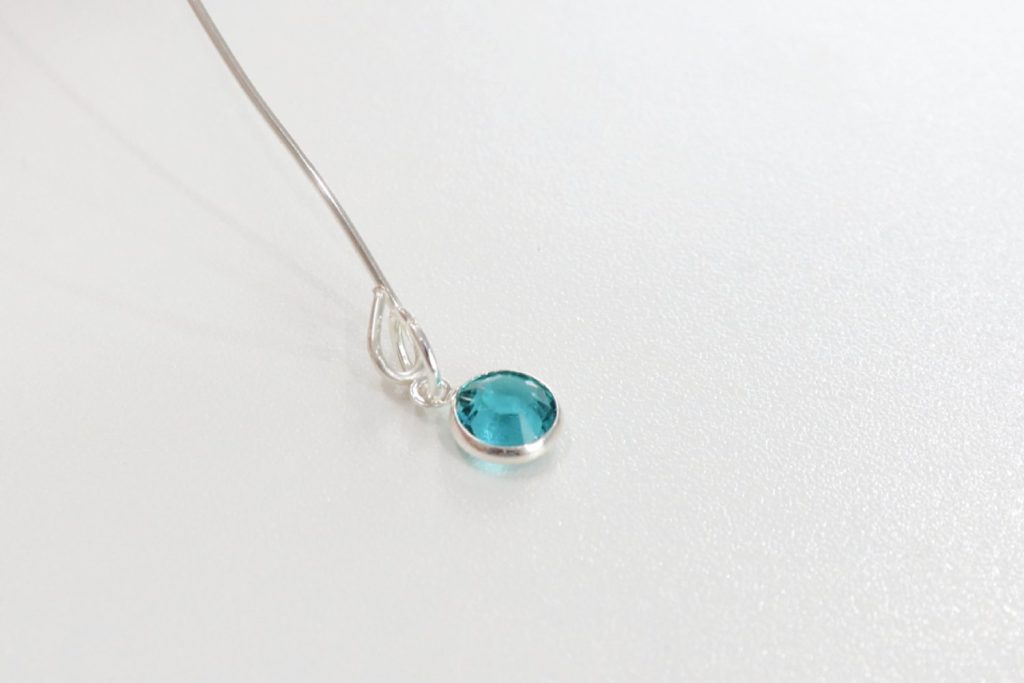
Add a charm.
Choose the charm you’d like to have dangling at the bottom, and slide it onto the loop you just created. Once the charm is in place, use your pliers to make sure the loop is tightly closed.
Cut your wire.
Cut the wire slightly longer than you want your finished backpack charm to be. (I suggest somewhere between 3-4.” You can always cut off the excess at the end.)
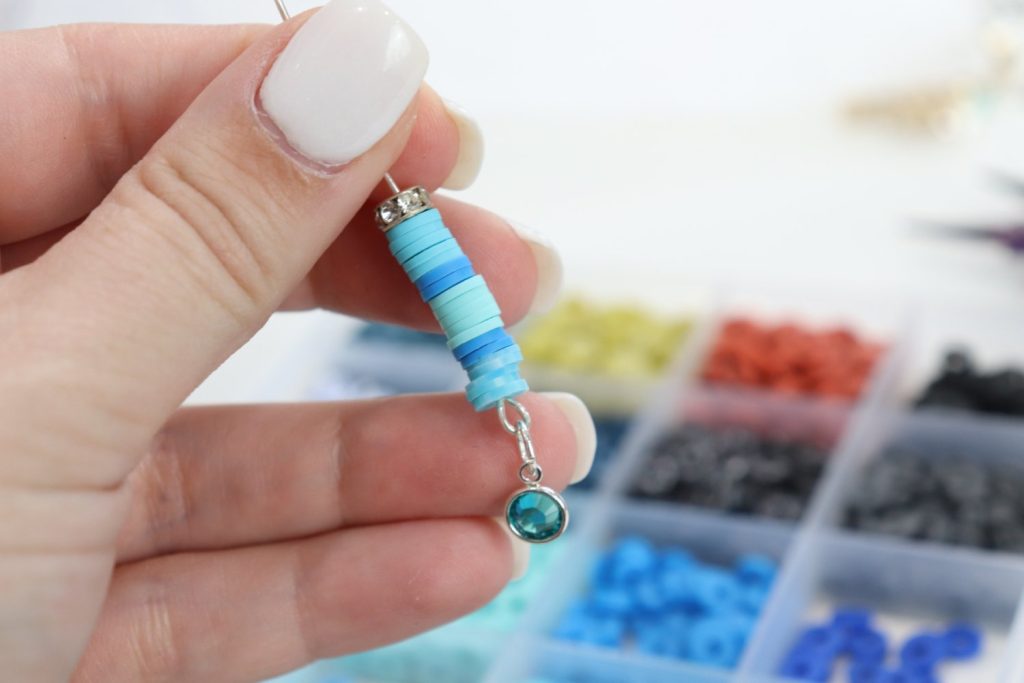
Add clay beads.
Start threading clay beads onto the wire in any pattern and color scheme you like. Feel free to add spacer or decorative beads, too.
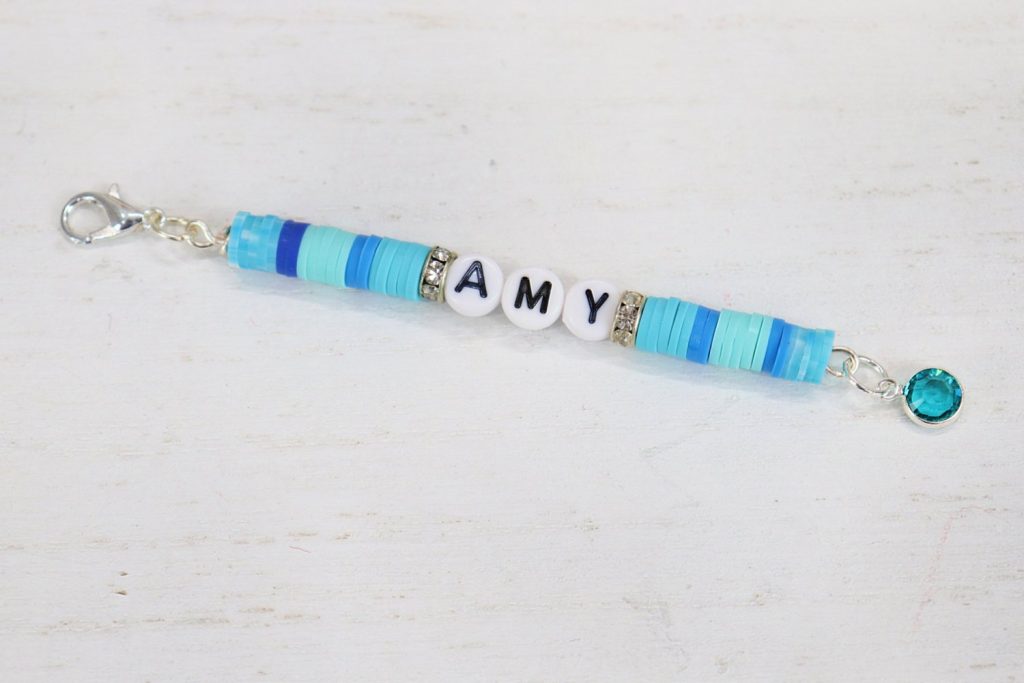
Add letter/number beads.
This is a great way to personalize your charm, using a name, graduation year, school acronym or name, or any other message you like.
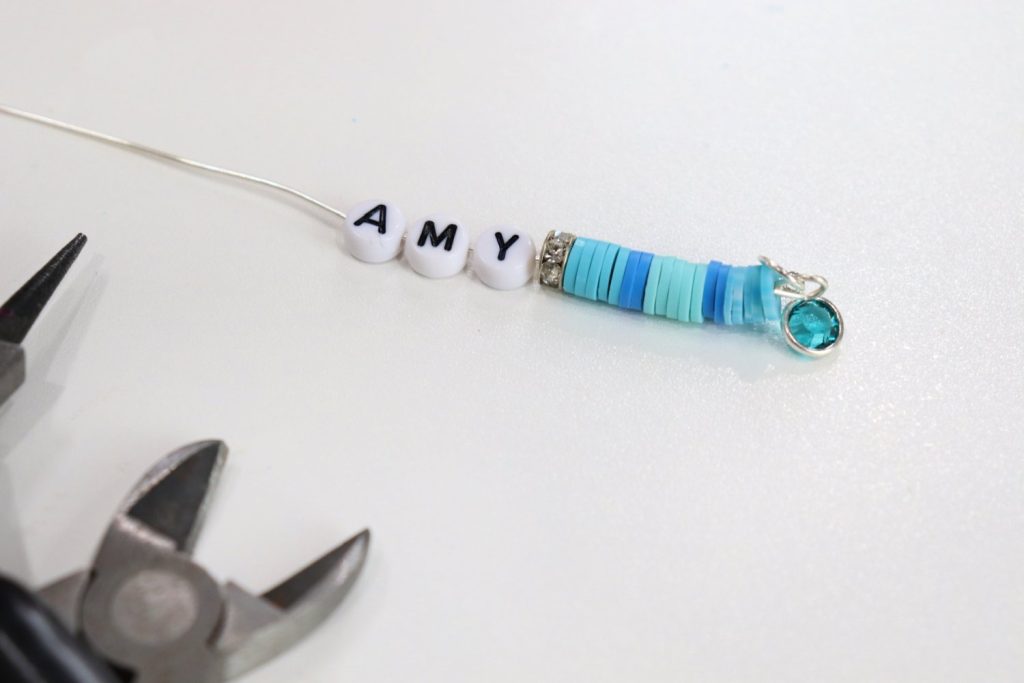
Finish adding clay beads.
Add clay beads on the other side of your word/message to complete the charm.
Form a wire loop at the top, and cut off any excess wire.

Add a lobster clasp to the top loop.
Now your charm is completed and ready to attach to the zipper pull of a backpack or other bag!
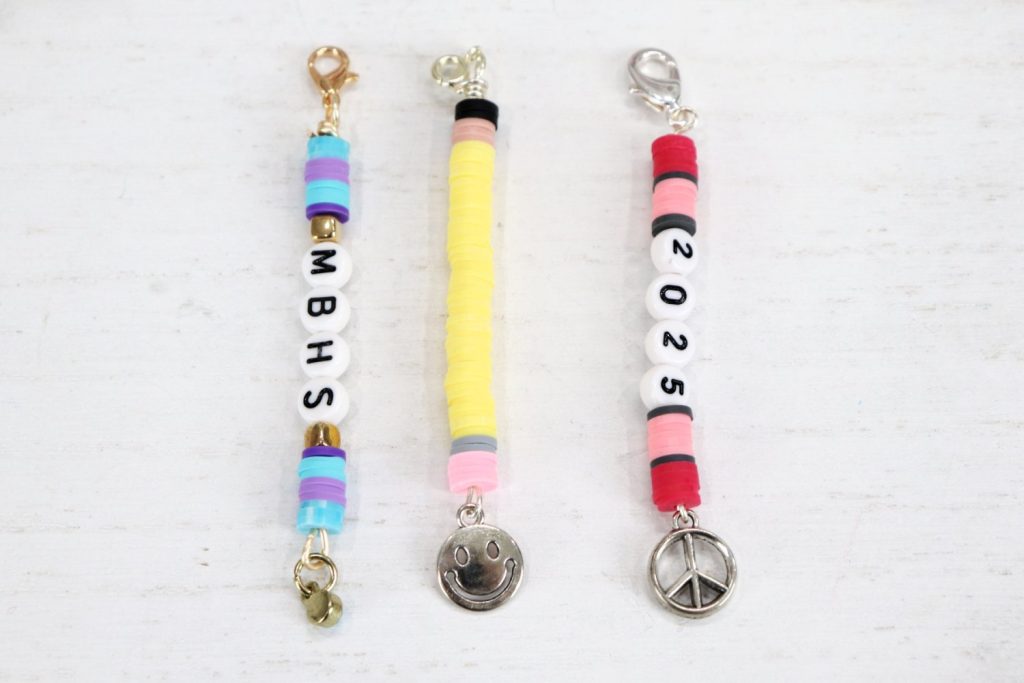
Here are a few ideas to inspire you as you come up with your own unique designs. I think the pencil made from black, brown, yellow, grey, and pink beads is particularly fun for back to school.
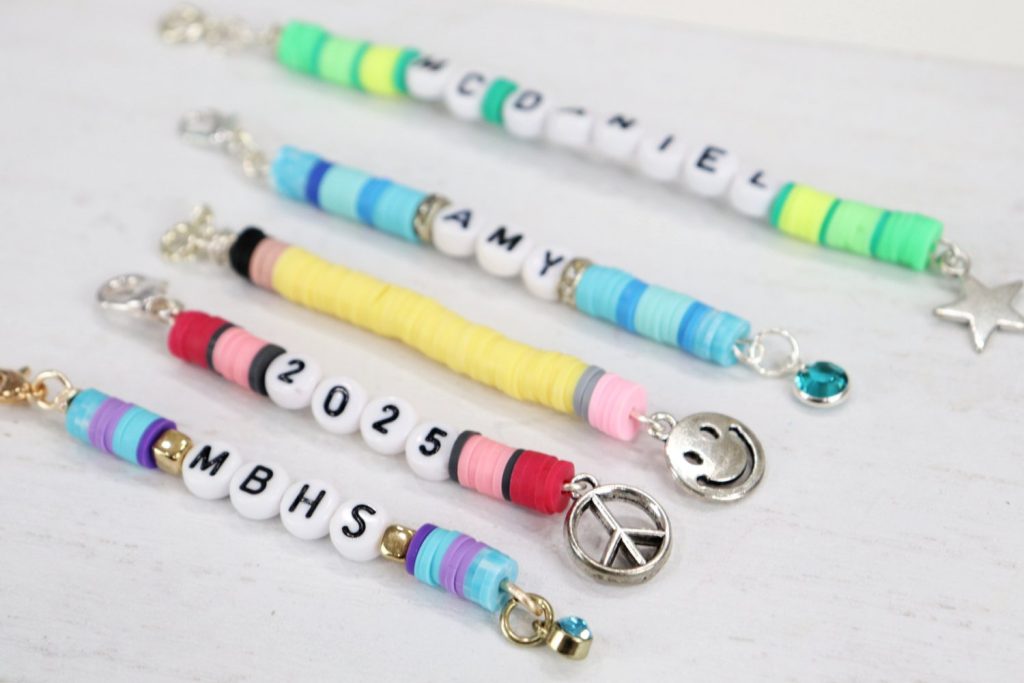
These charms are simple to create for yourself, and they also make great gifts for students, teachers, and anyone else headed back to the classroom.
Crafting Tips
- While you can collect all of the supplies individually, it’s even more convenient and cost efficient to grab a kit! This Quefe one from Amazon contained clay beads, letter beads, charms, and clasps, as well as spacer beads, so it had almost everything I needed.
- If you aren’t interested in working with wire, you can also use string or twine as the base for this project, as long as it’s thin enough to fit through the holes in the beads. Just tie large knots at the top and bottom to take the place of the wire loops.
Frequently Asked Questions
You can make your charm any length you like! Most of mine are between 3-3 1/2”, but feel free to make yours in your own style.
Using your round nose pliers, grab the end of the wire and gently twist it away from you. To close the loop, twist the end back toward you and into place.
More Back to School Projects
If you enjoyed this project, check out these other fun and easy back to school crafts for all ages!


If you try this project, I’d love to see how your backpack charms turn out! Make sure you’re part of the Amy Latta & Friends Group on Facebook so you can share your photos and we can all be inspired. Hope to see you there.

Beaded Backpack Charms
Equipment
- round nose pliers and wire cutters
Materials
- assorted clay beads
- letter and number beads
- small charms
- 20 gauge wire
- lobster clasps
Instructions
- Form a loop on one end of your wire.
- Add a small charm to the wire loop.
- Cut your wire to a length between 3-4".
- Thread clay beads, spacer beads, and letter/number beads in any pattern.
- Form a wire loop at the top of the beads and cut off the excess wire.
- Add a lobster clasp to the top loop.

Thank you! The Beaded Backpack charm is such a cute idea. I have hundreds of the alphabet beads my mother left me when she passed & this is a great idea for my grand daughter, which I can also adapt for my grandson.