Friends, I have something so super-duper special to show you today…that is, if I can get through it without melting into a big Mommy-puddle first.
Remember the
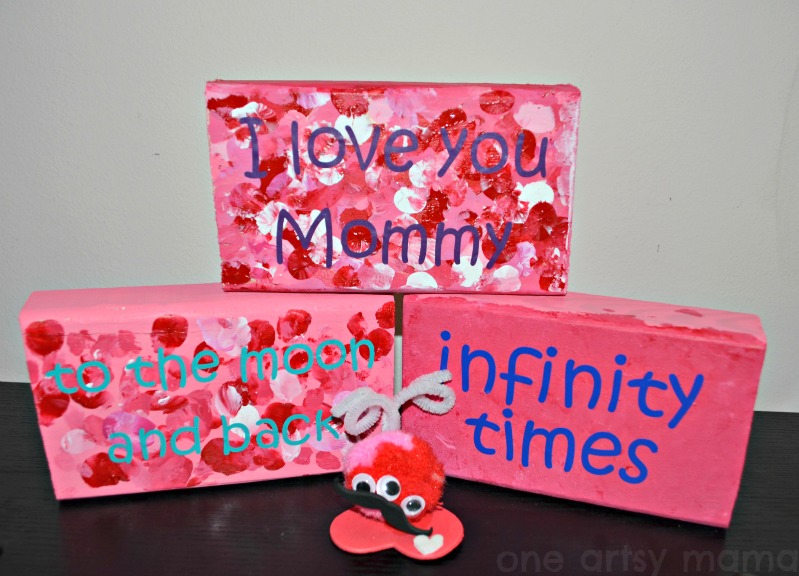
Valentine blocks my crafting group made a few weekends ago? Well, what I didn’t tell you in that post was that Little Crafter was mad at me. He was furious that he had to go to bed while we were making a craft. He was quite insistent that he needed to make a block too. So, while I insisted on a proper bedtime that night, a few days later, I let him have his choice of blocks and told him he could make them say whatever he wanted. At first, he chose just one small block. Then, our conversation went something like this.
Me: “Do you want to make it for Valentine’s Day?”
LC: “Yef.” {his way of saying yes}
Me: “What do you want it to say?”
LC: {thinking for a moment} “I love you, Mommy. To the moon and back infinity times.”
Me: {I melt} “Aw, thank you, buddy! I don’t think that will all fit on your block though.”
LC: “Then I need more blocks.”
And so, he painted three. Three sweet and beautiful blocks I will cherish always. Here’s how he did it.
Materials:
wooden blocks {ours were 2×4’s cut into 6″ pieces
acrylic paints
adhesive vinyl
Silhouette Cameo {although you could cut by hand}
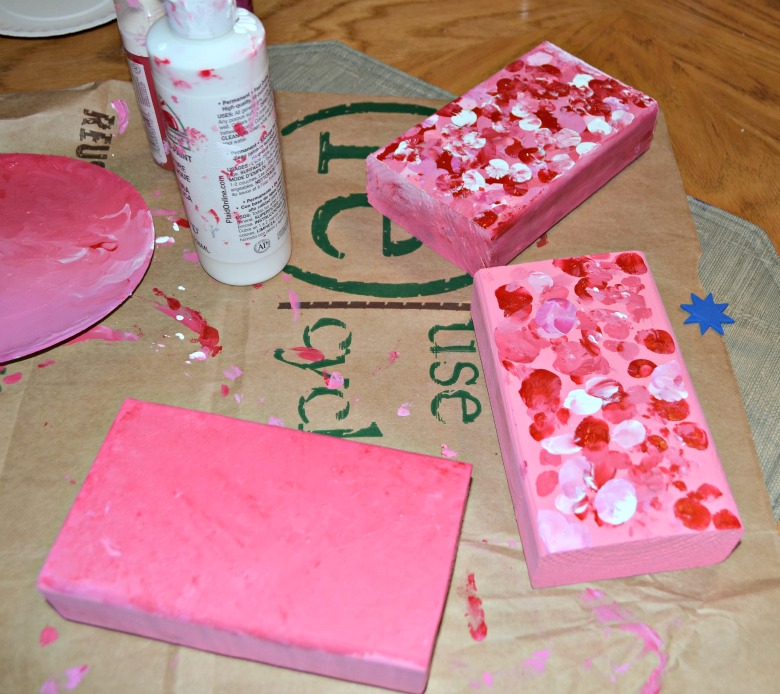
STEP 1: Paint your blocks.
Two of these already had a base coat of light pink. I had painted them during Crafting Night but couldn’t decide what to do with them. Little Crafter took it from there, using the finger painting technique he perfected on his photo frame the day before. He loved mixing the various shades of red and pink and trying to create “peppermints” on the first two. When he got to the third block, he started mixing all the colors and just painting with his entire hand.
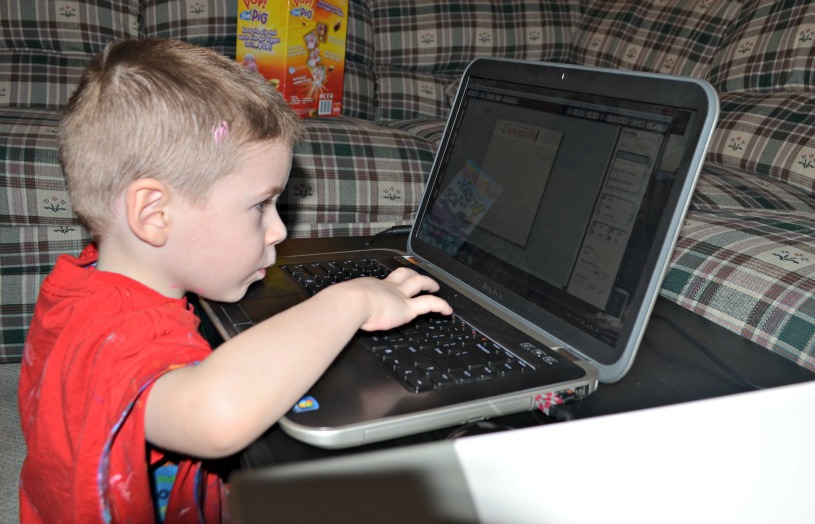
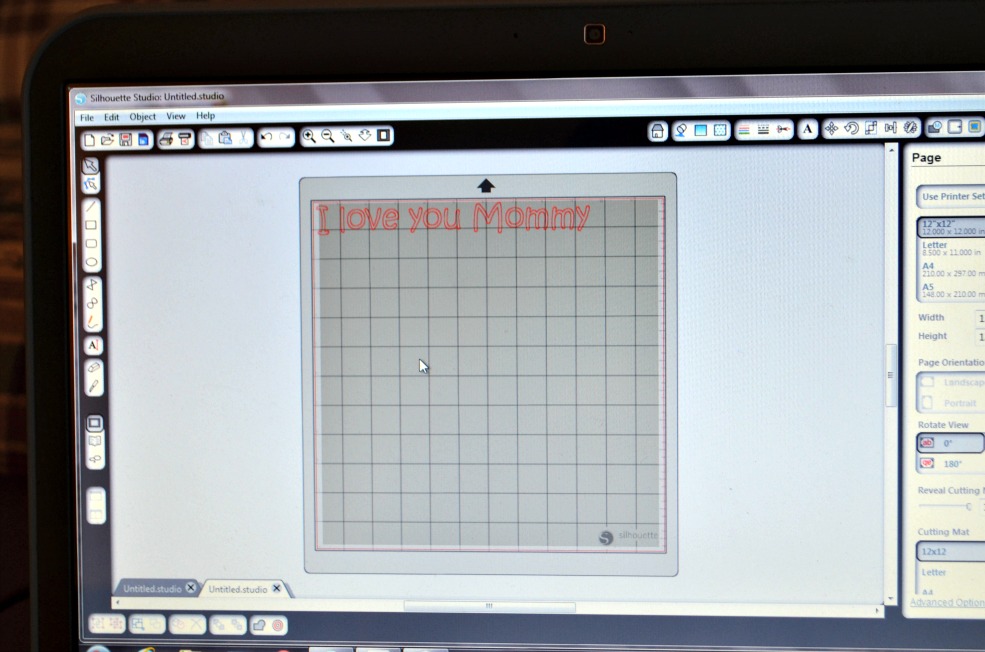
STEP 2: Cut out your design.
Ok, this is the part where those of you who emailed me after I got “Cammie” and told me you have a Silhouette Cameo sitting unopened in your house somewhere should get a kick in the pants. Look at this. Little Crafter is literally using the Silhouette Studio software and typing in his words.
I helped him to sound them out and spell them correctly {it was actually good practice for him!}. Then, we clicked “Send” and Cammie cut the adhesive vinyl for him.
I let him choose his colors for each set of words, and he picked purple, “green”, and blue. Everything cut perfectly. He’s four, friends. You. Can. Do. This.
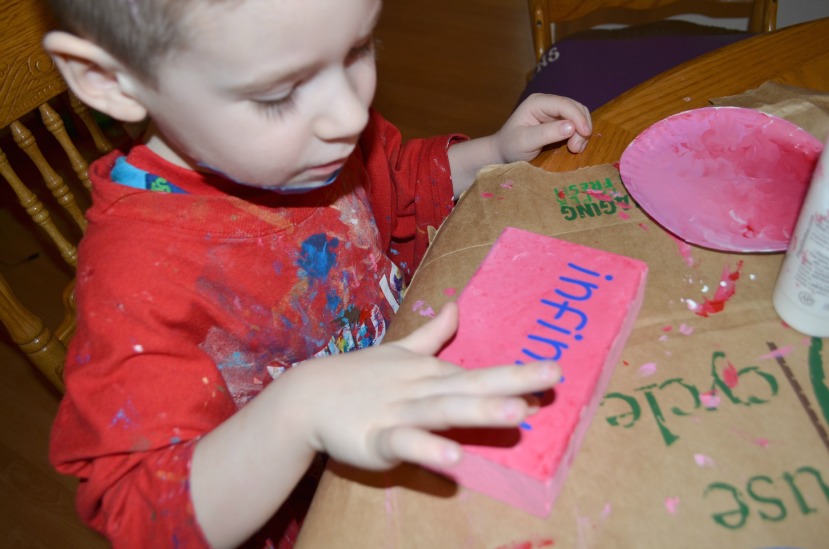
STEP 3: Adhere your letters onto the blocks.
We used blue painter’s tape to help us keep the letters straight. LC helped push them down so they were stuck really well.
STEP 4: Make someone’s day.
I told him {several times} that this is probably THE sweetest gift anyone has ever made for me. He had such fun making it and the sentiment was straight from his own little heart. It’s the kind of thing you cherish forever. I’ll be putting it out every Valentine’s Day, even when he’s fifteen and says, “Moooom, put that baby stuff away!” And even when he’s fifty. Sigh. My baby.
What’s your most treasured gift?
Hugs & Glitter,


So sweet. A gift to cherish always. Love the pink paint in his hair in the computer picture!!!
What a great gift! Love it!
– Dawn
Precious!