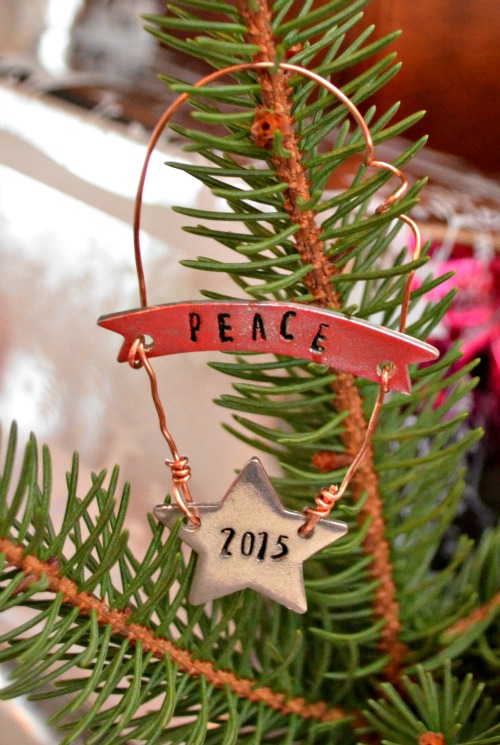
Metal Stamped Star Ornament
Thanks to ImpressArt for sponsoring today’s post. All opinions are my own.
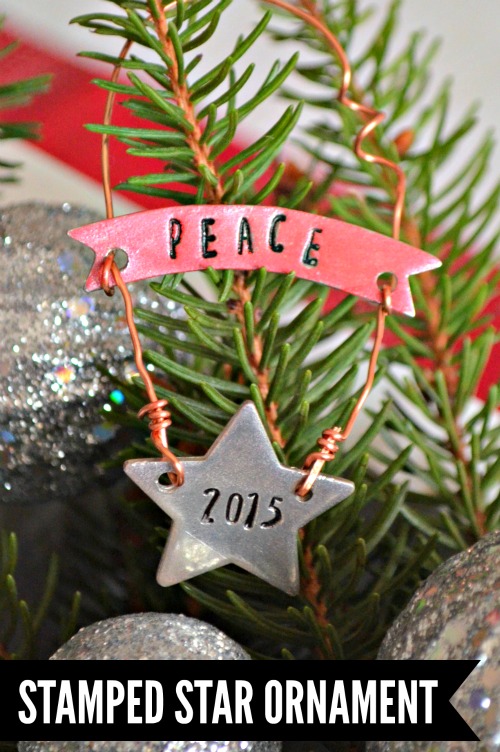
Friends, you all know that one of my favorite ways to create is with metal stamping! More often than not, I use it to make all different kinds of jewelry projects, but that’s not the only thing you can create with these tools. Since the holidays are right around the corner, I decided to create a pretty little stamped ornament…and I thought while I was at it, I’d show you how you can make one too!
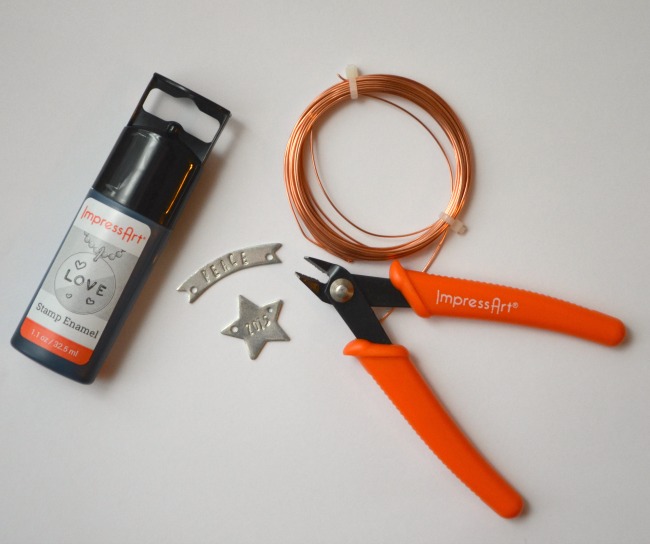
Materials:
ImpressArt Juniper Uppercase Alphabet and Number Stamps
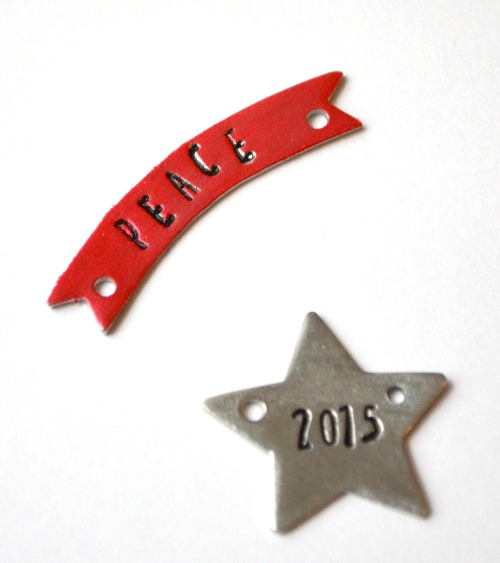
ImpressArt Soft Strike Pewter Stamping Blanks: Banner and 1″ Star
Metal Stamping Hammer
Steel Stamping Block
Stamp Straight Tape
Metal Hole Punch
ImpressArt Stamp Enamel
Soft cloth or paper towel
DecoArt Metallic Lustre, Red
Wire Cutters
20 Gauge Copper Wire
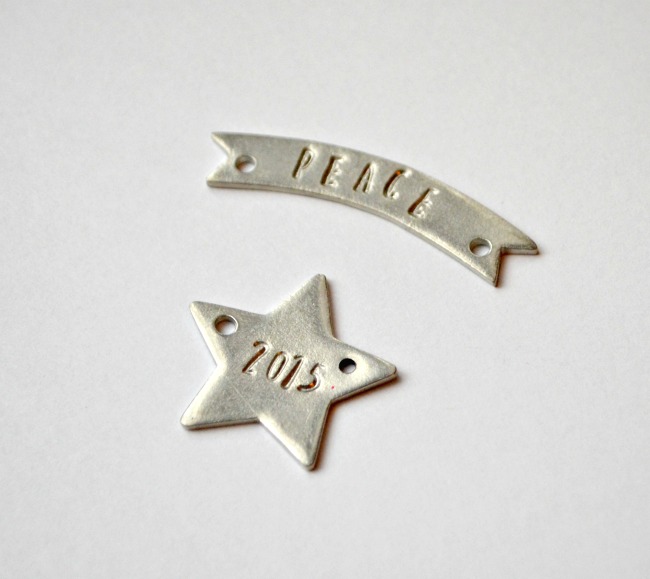
Step 1: Punch a hole in your star blank.
It comes with one hole pre-punched. Rotate it so that hole is on the left, then punch a matching one on the right.
Step 2: Stamp your blanks.
To do this, tape them one at a time onto your steel stamping block. Beginning with the center letter/number, hold your stamp vertically and give it a firm tap to create an impression on the blank. Continue stamping, working your way outward. I chose the word “peace” along with the year, but you could stamp anything you like.
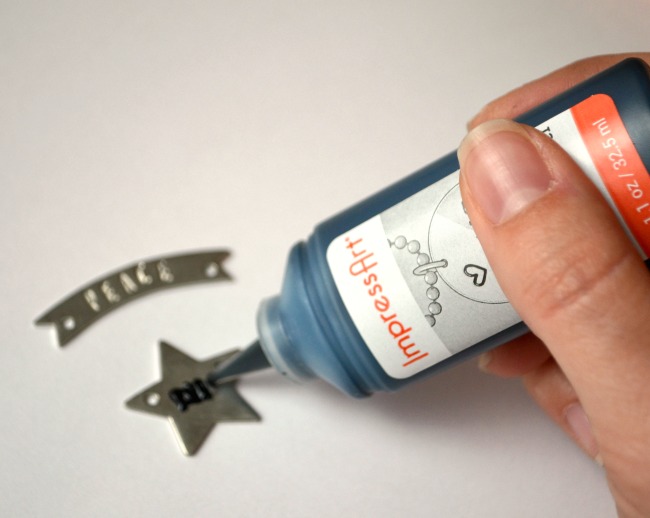
Step 3: Fill in the impressions with Stamp Enamel.
Lightly squeeze the bottle and make sure you cover each letter and number with enamel. Allow it to dry for about 30 seconds, then wipe the blank with a soft cloth or paper towel. The extra will come off easily, leaving the enamel down in the stamped parts only.
Step 4: Apply Metallic Lustre to your banner.
This is a water-based metallic wax that is really easy to apply. Just get some on your index finger and gently rub it onto the surface of your blank. Make sure not to apply too much pressure, because you don’t want it to go down into the letters themselves.
Step 5: Connect your blanks with wire.
I started on the right side of my star and did a bit of wire wrapping to cover up my sharp end. Then, I threaded it through my banner, wrapped it once, and continued it up to form the ornament hanger.
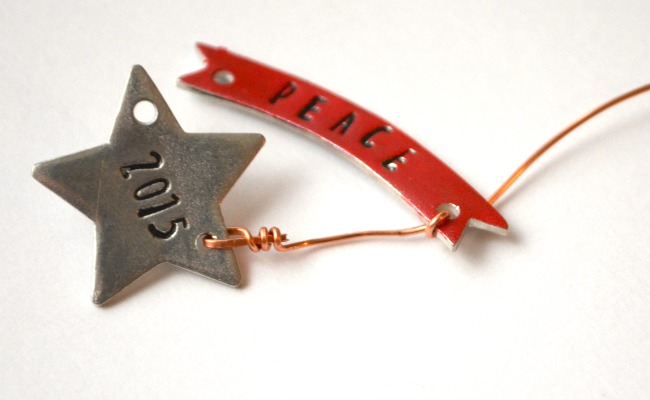
I twisted the wire around a paintbrush to get a spiral just for fun, bent it around and threaded it back down through both blanks. Finally, I cut the end and wrapped it to match the other side.
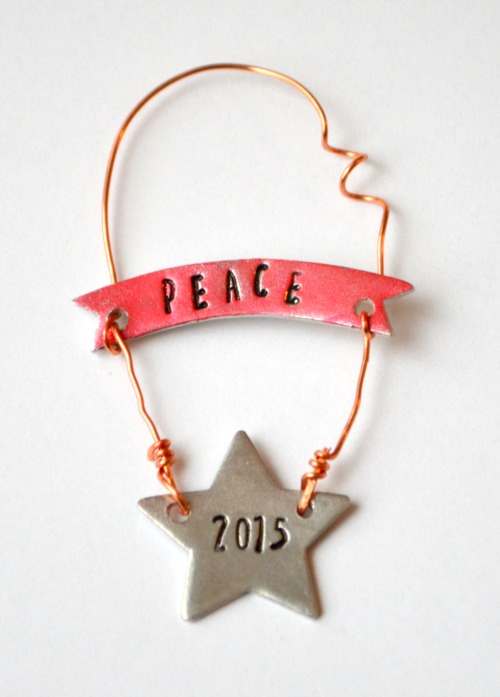
Now your ornament is ready to display! You won’t even need a hook because it has its own hanger. I’m loving the way it turned out; what do you think? Is this something you’d create for your tree?