Personalized Snowflake Name Kits from Craft Cuts
Thanks to Craft Cuts for sponsoring today’s post. All opinions are honestly my own.
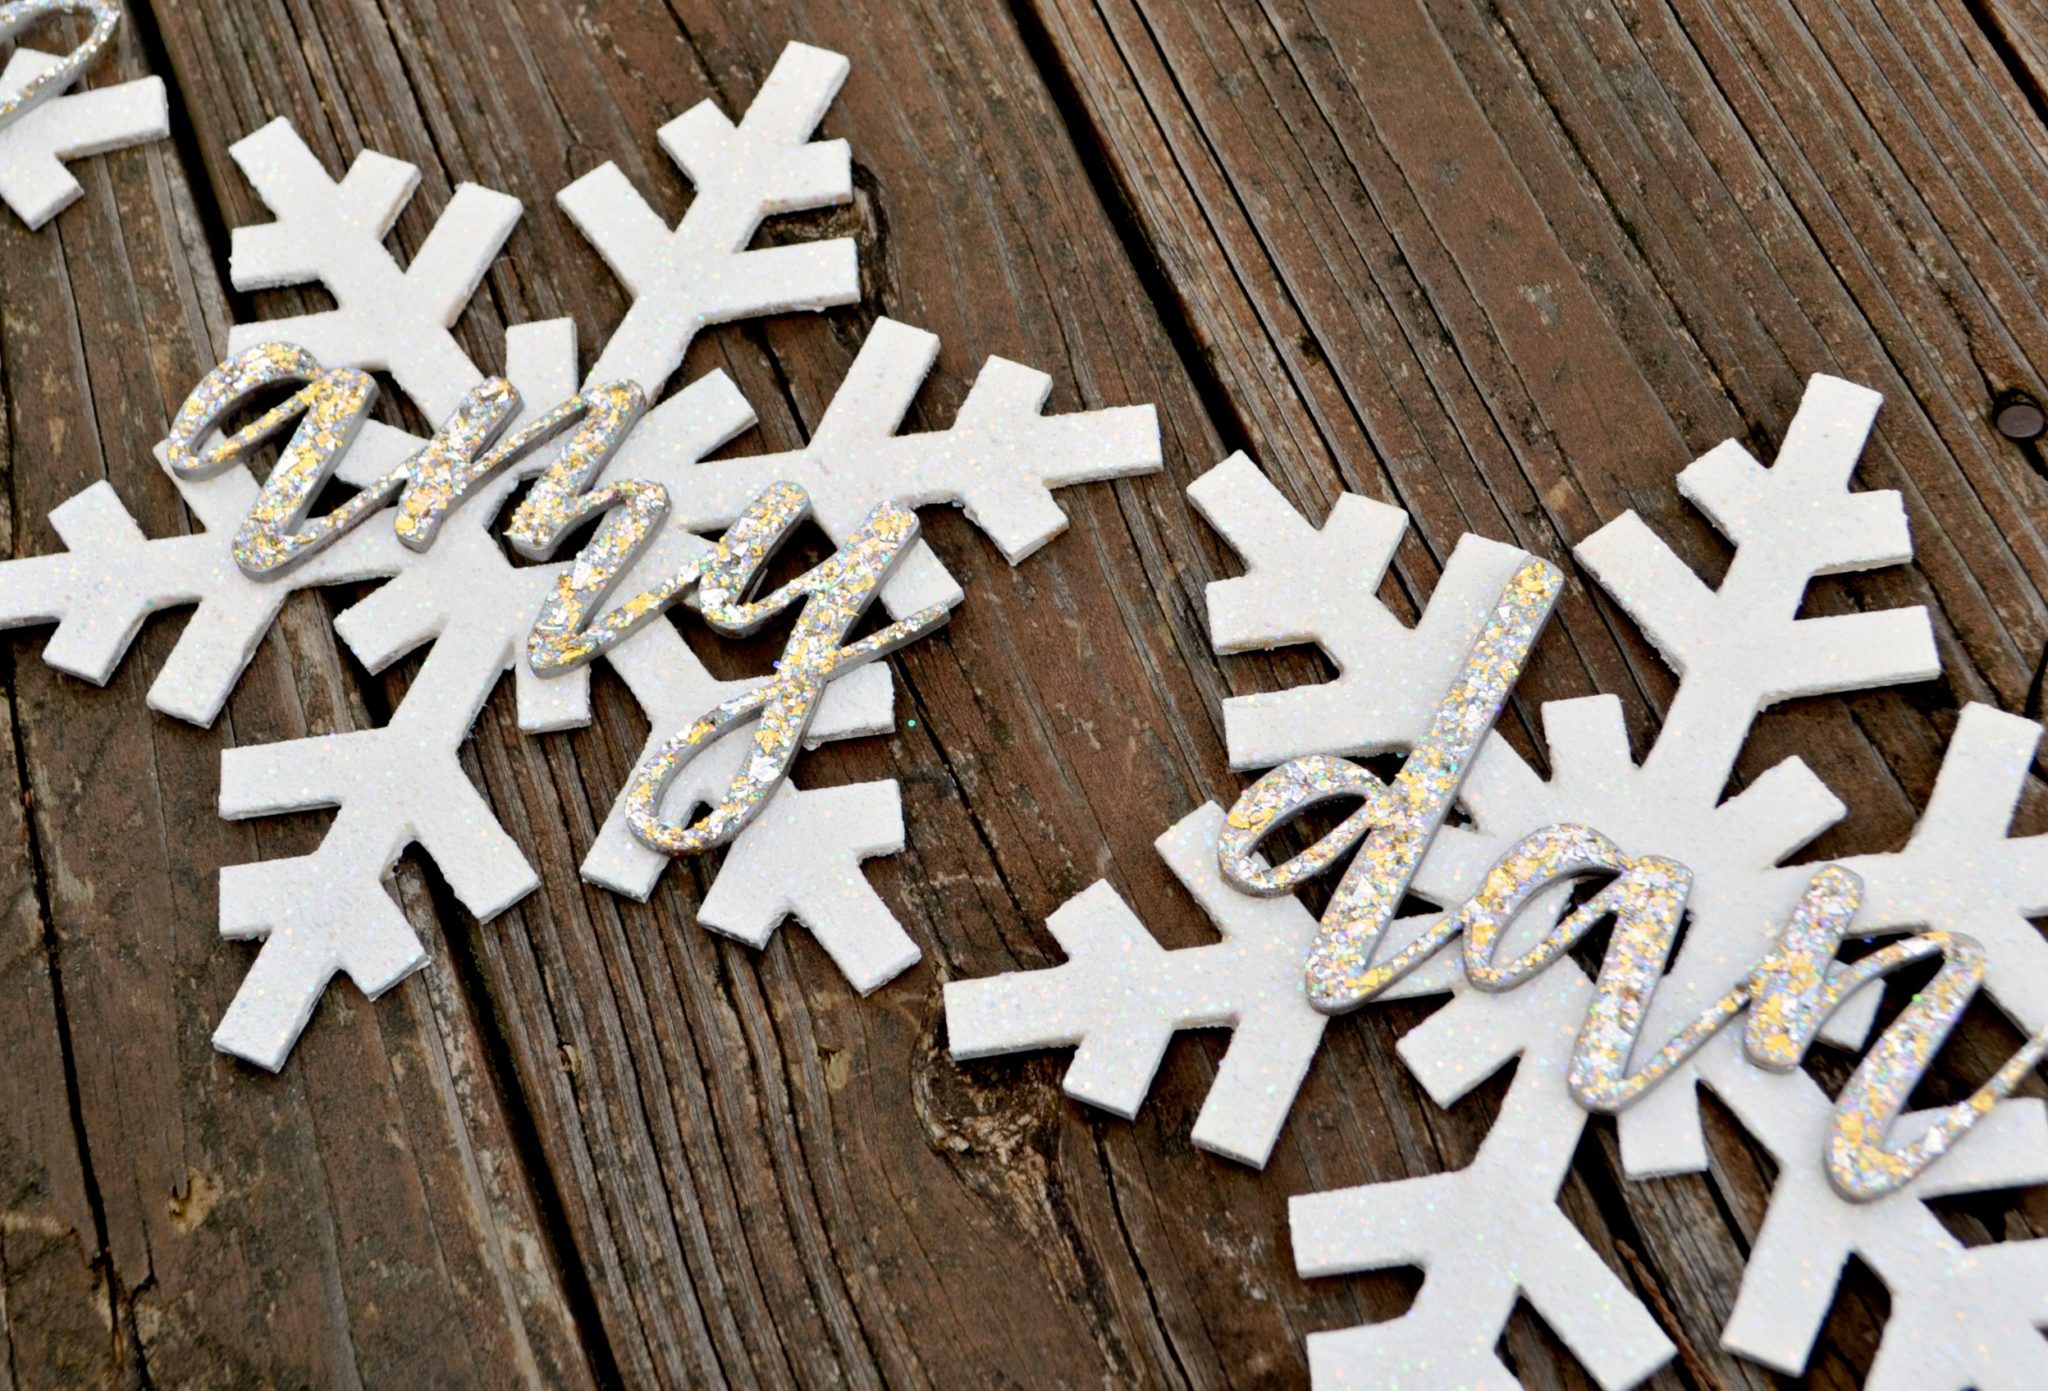
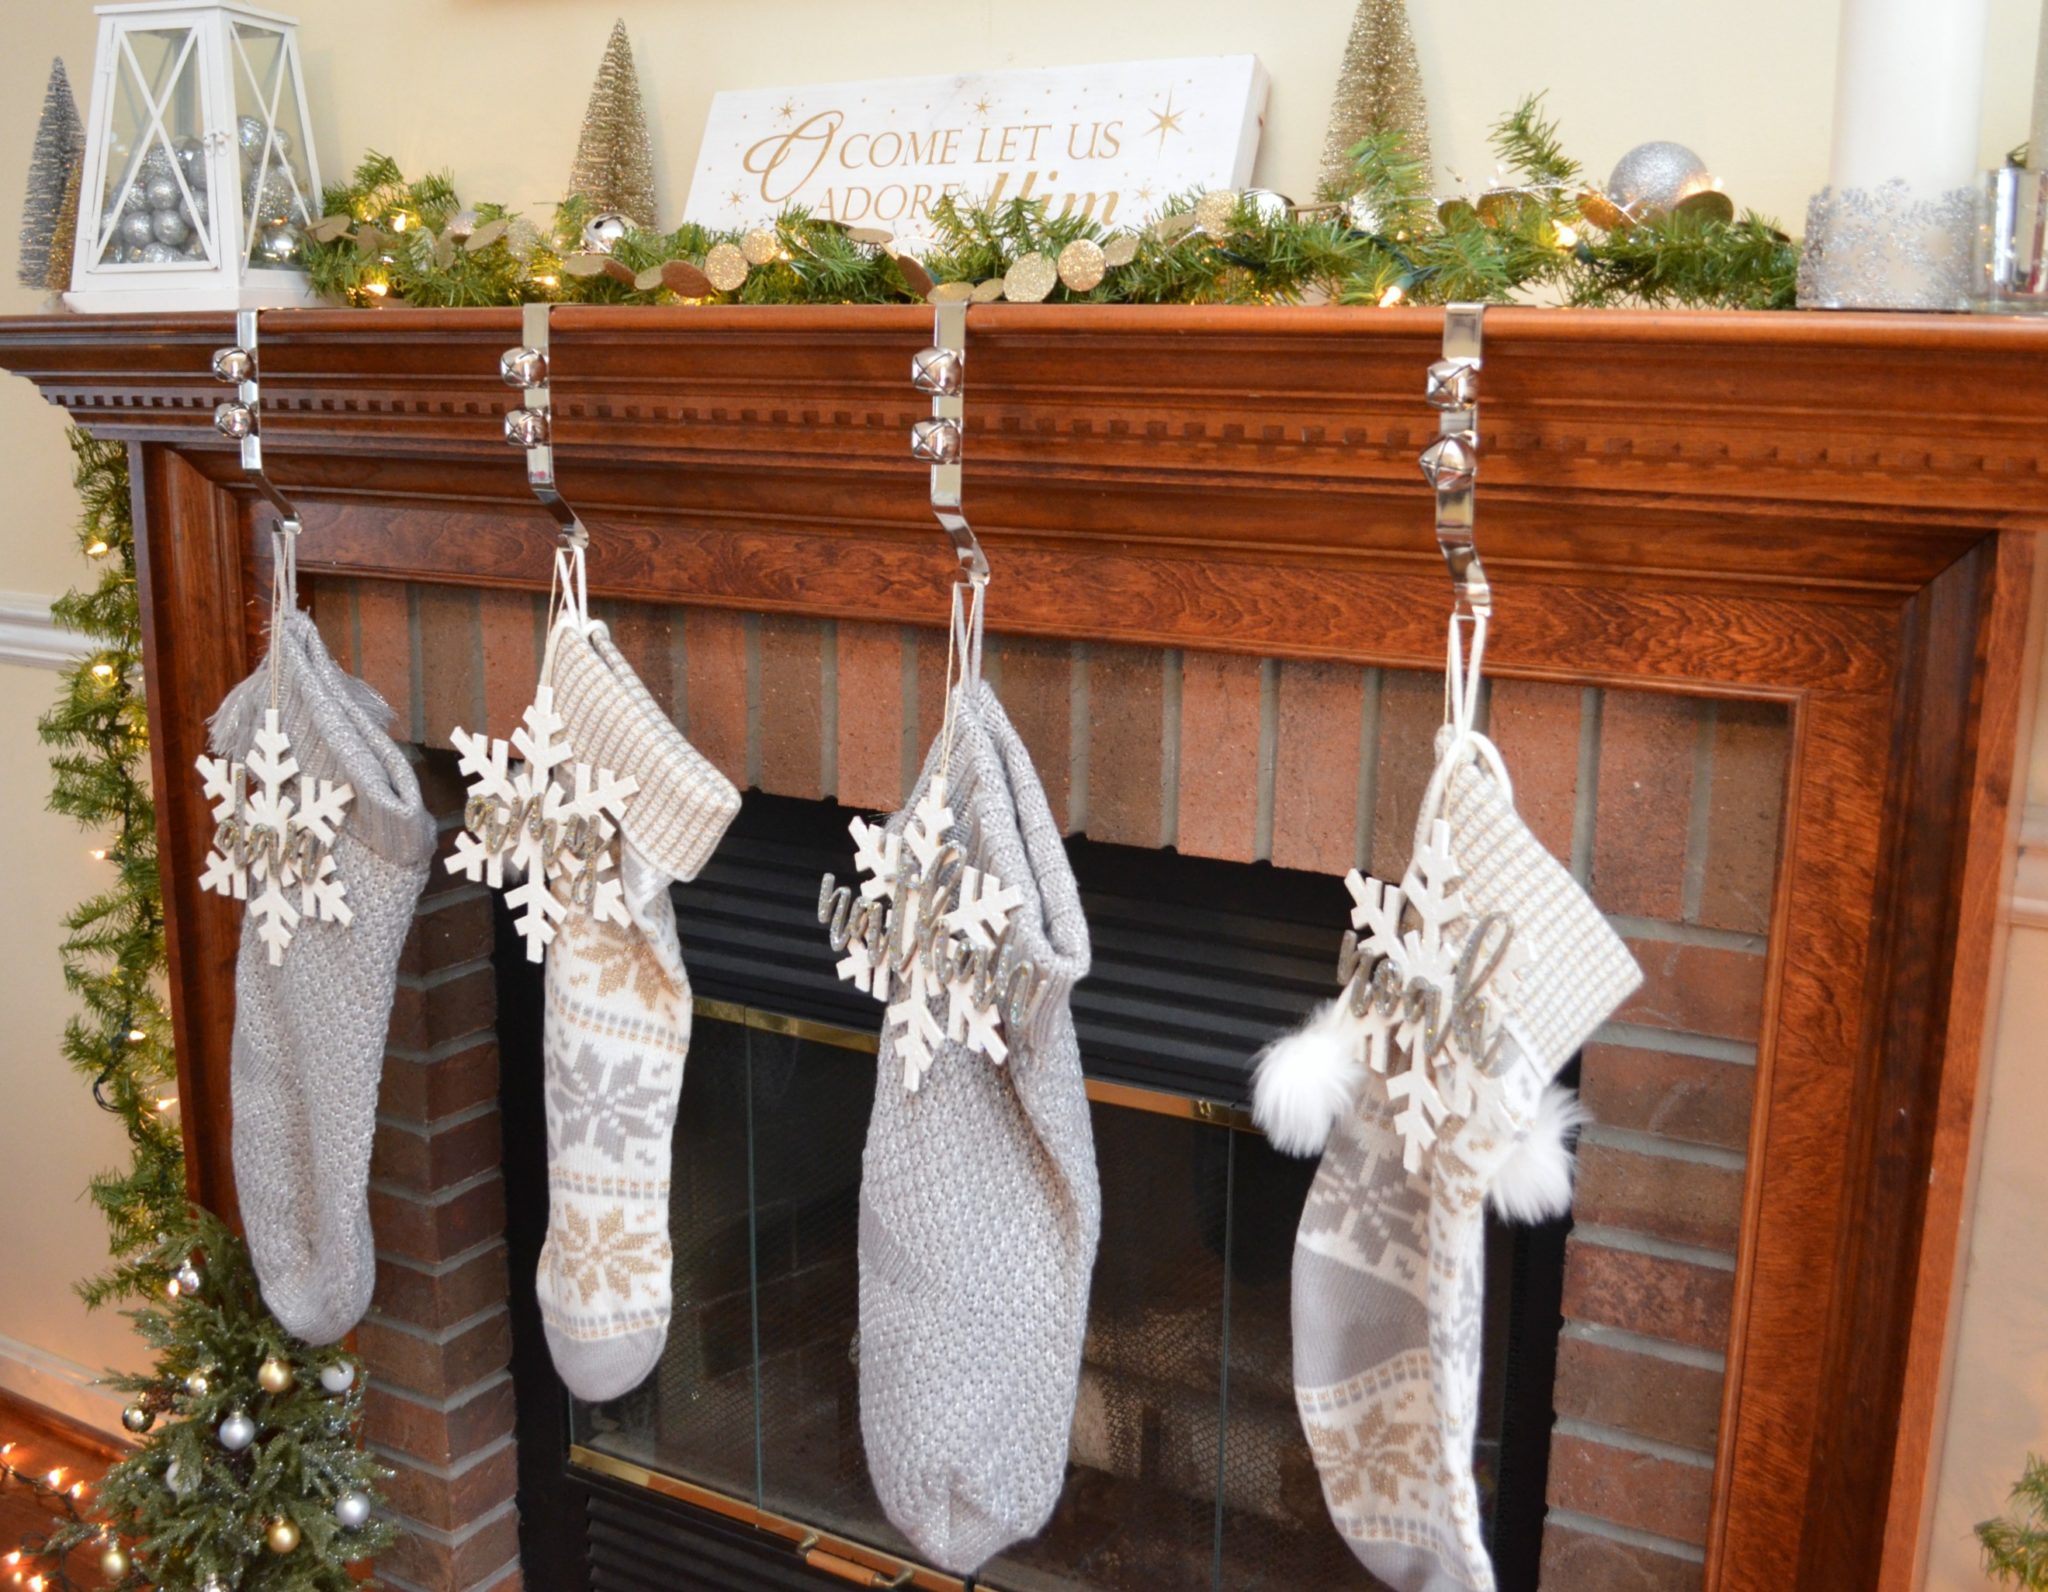
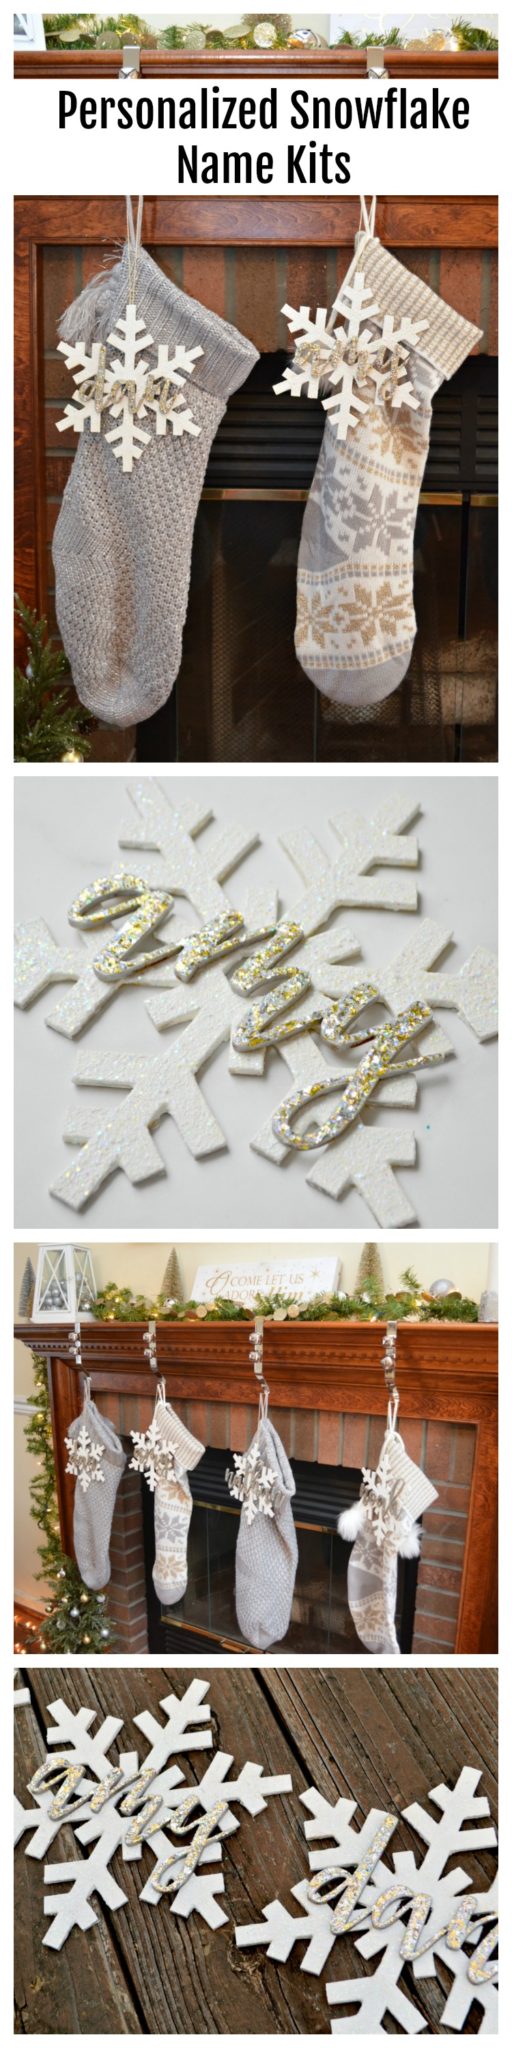
How do you display your stockings? Ours are hang on the mantel, and this year I added something extra special; snowflakes with each of our names on top to remind us whose stocking is whose! Today, I want to show you how I created these glittery masterpieces and you can too. Take a look…
You’ll need:
Craft Cuts Snowflake Name Kits
White paint {I recommend FolkArt Coastal paint in Sand Dollar}
Mod Podge Mega Glitter: Hologram
FolkArt Brushed Metal Paint
FolkArt Glitterific
Paintbrushes
Yarn, Twine, or Ribbon
Craft Glue/Hot Glue
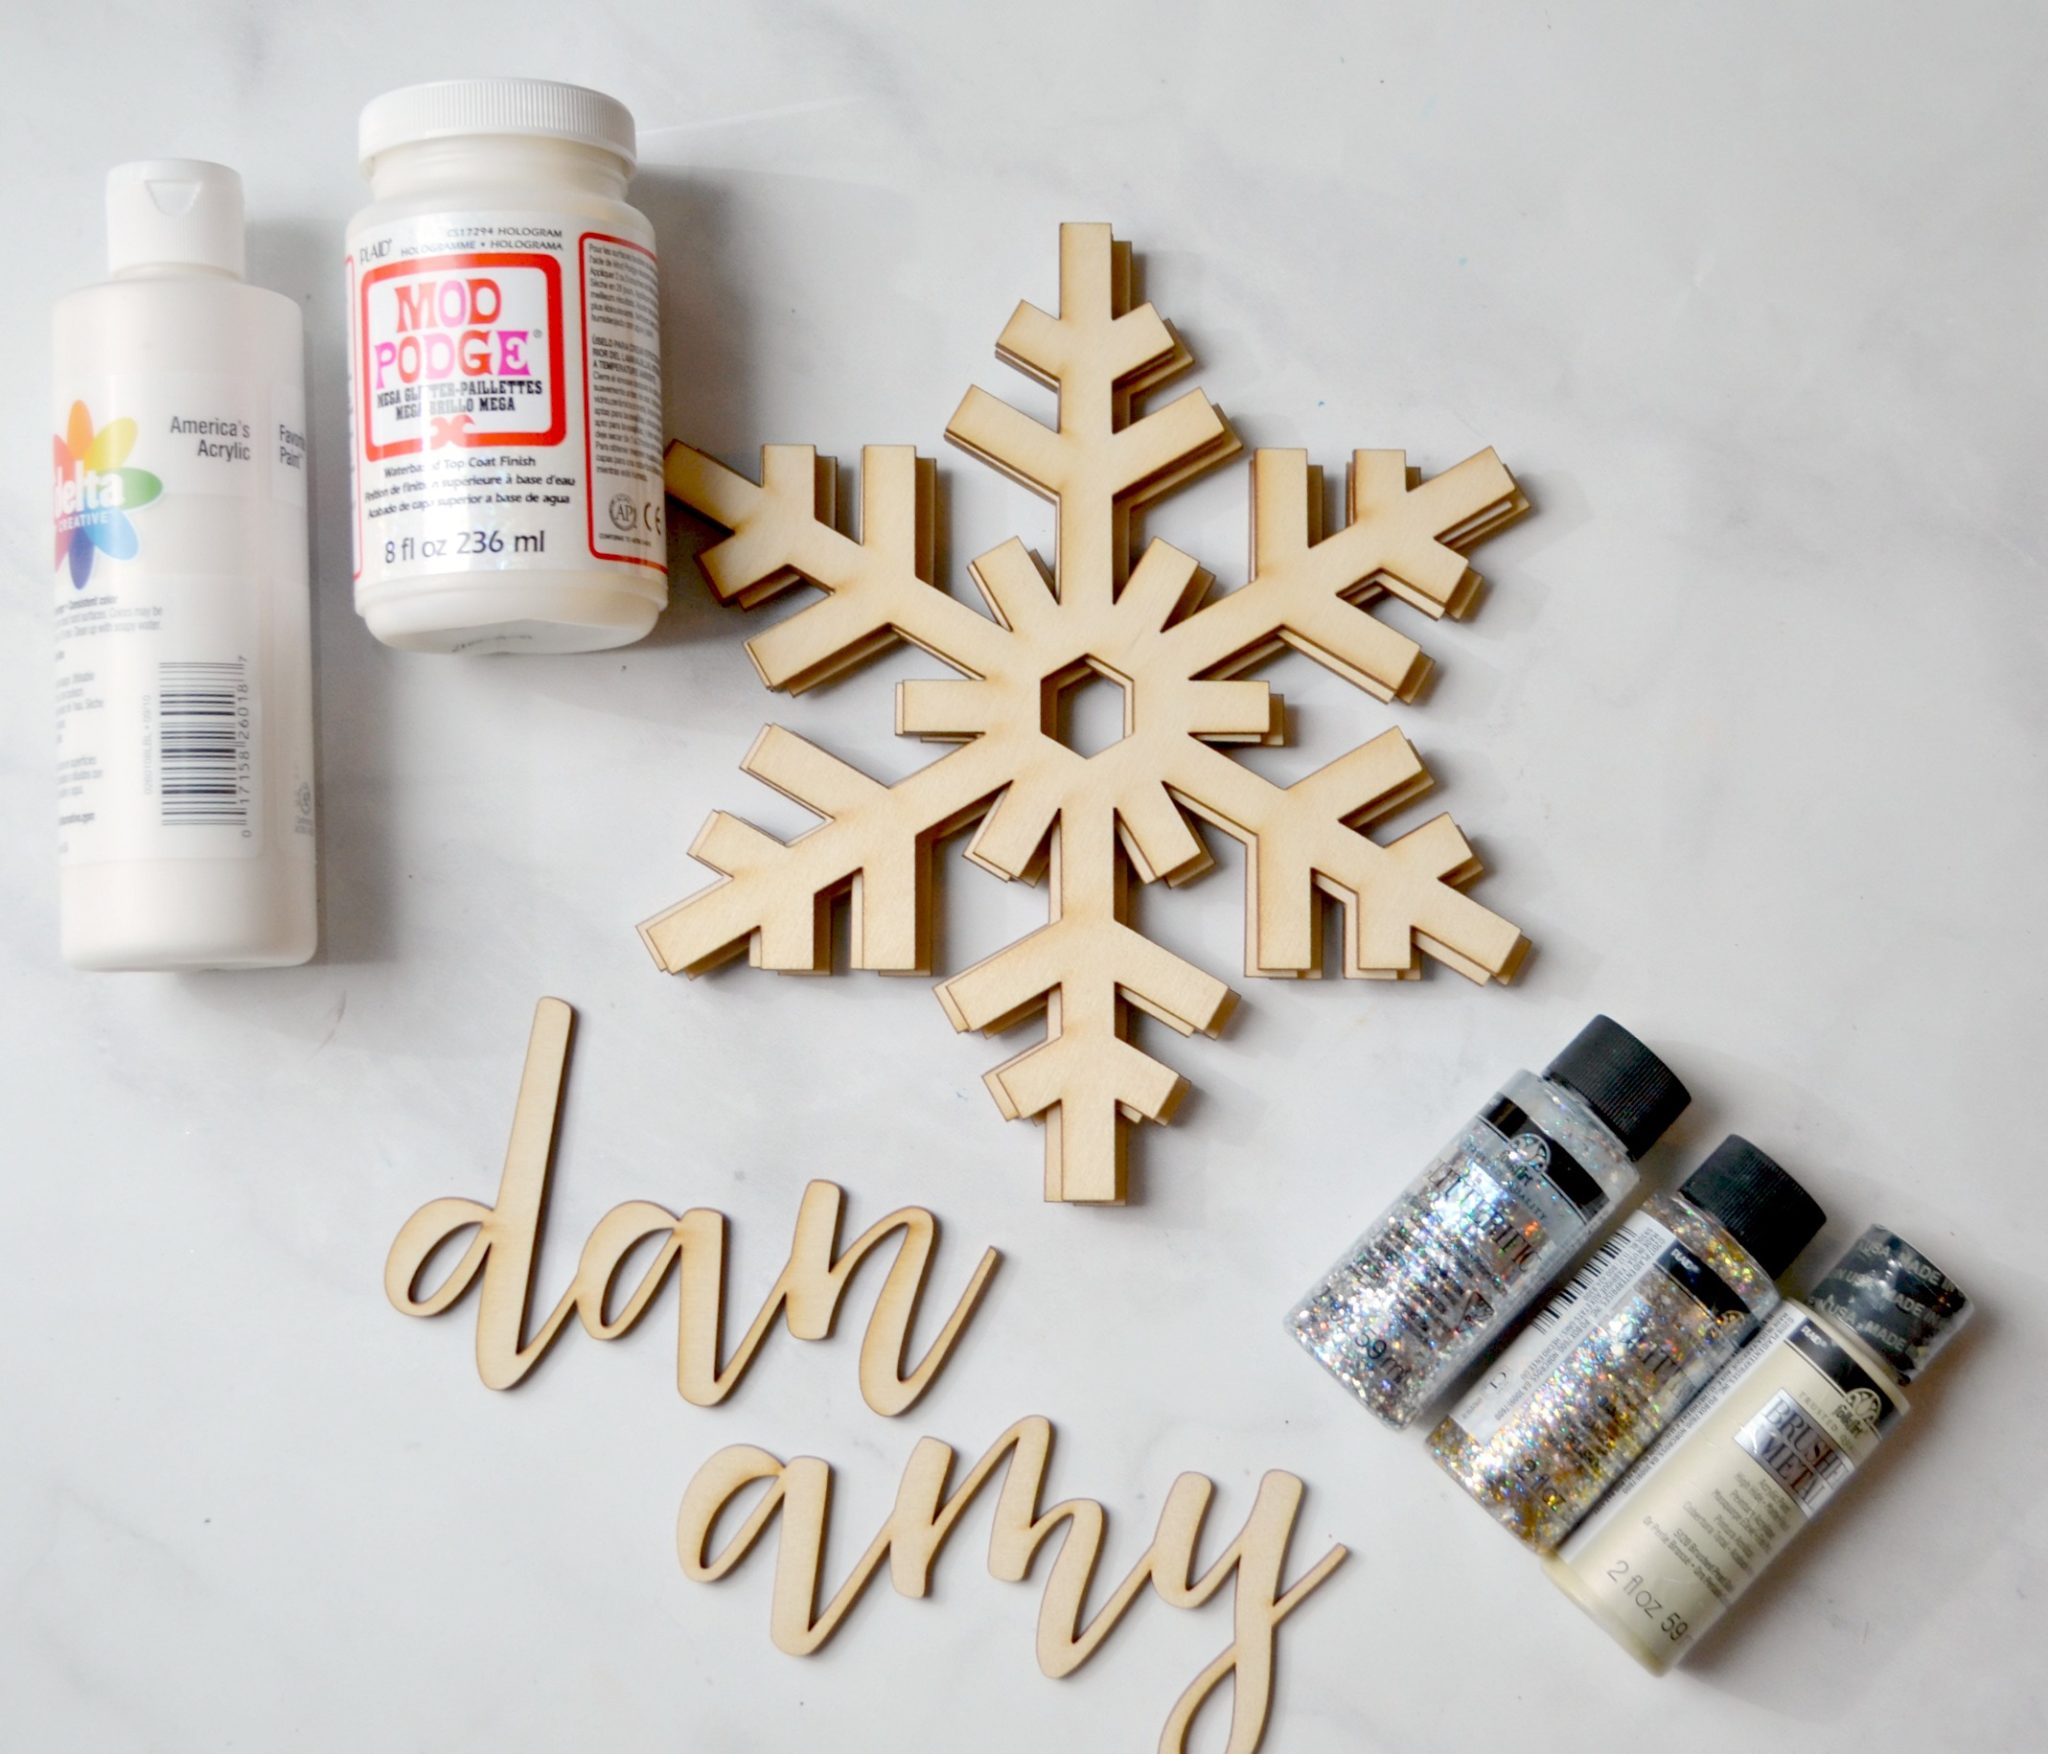
Step 1: Order your personalized Snowflake Name Kits.
You get to choose from a variety of fonts for the names; I liked the one called Weekday Script because it reminds me of my lettering.
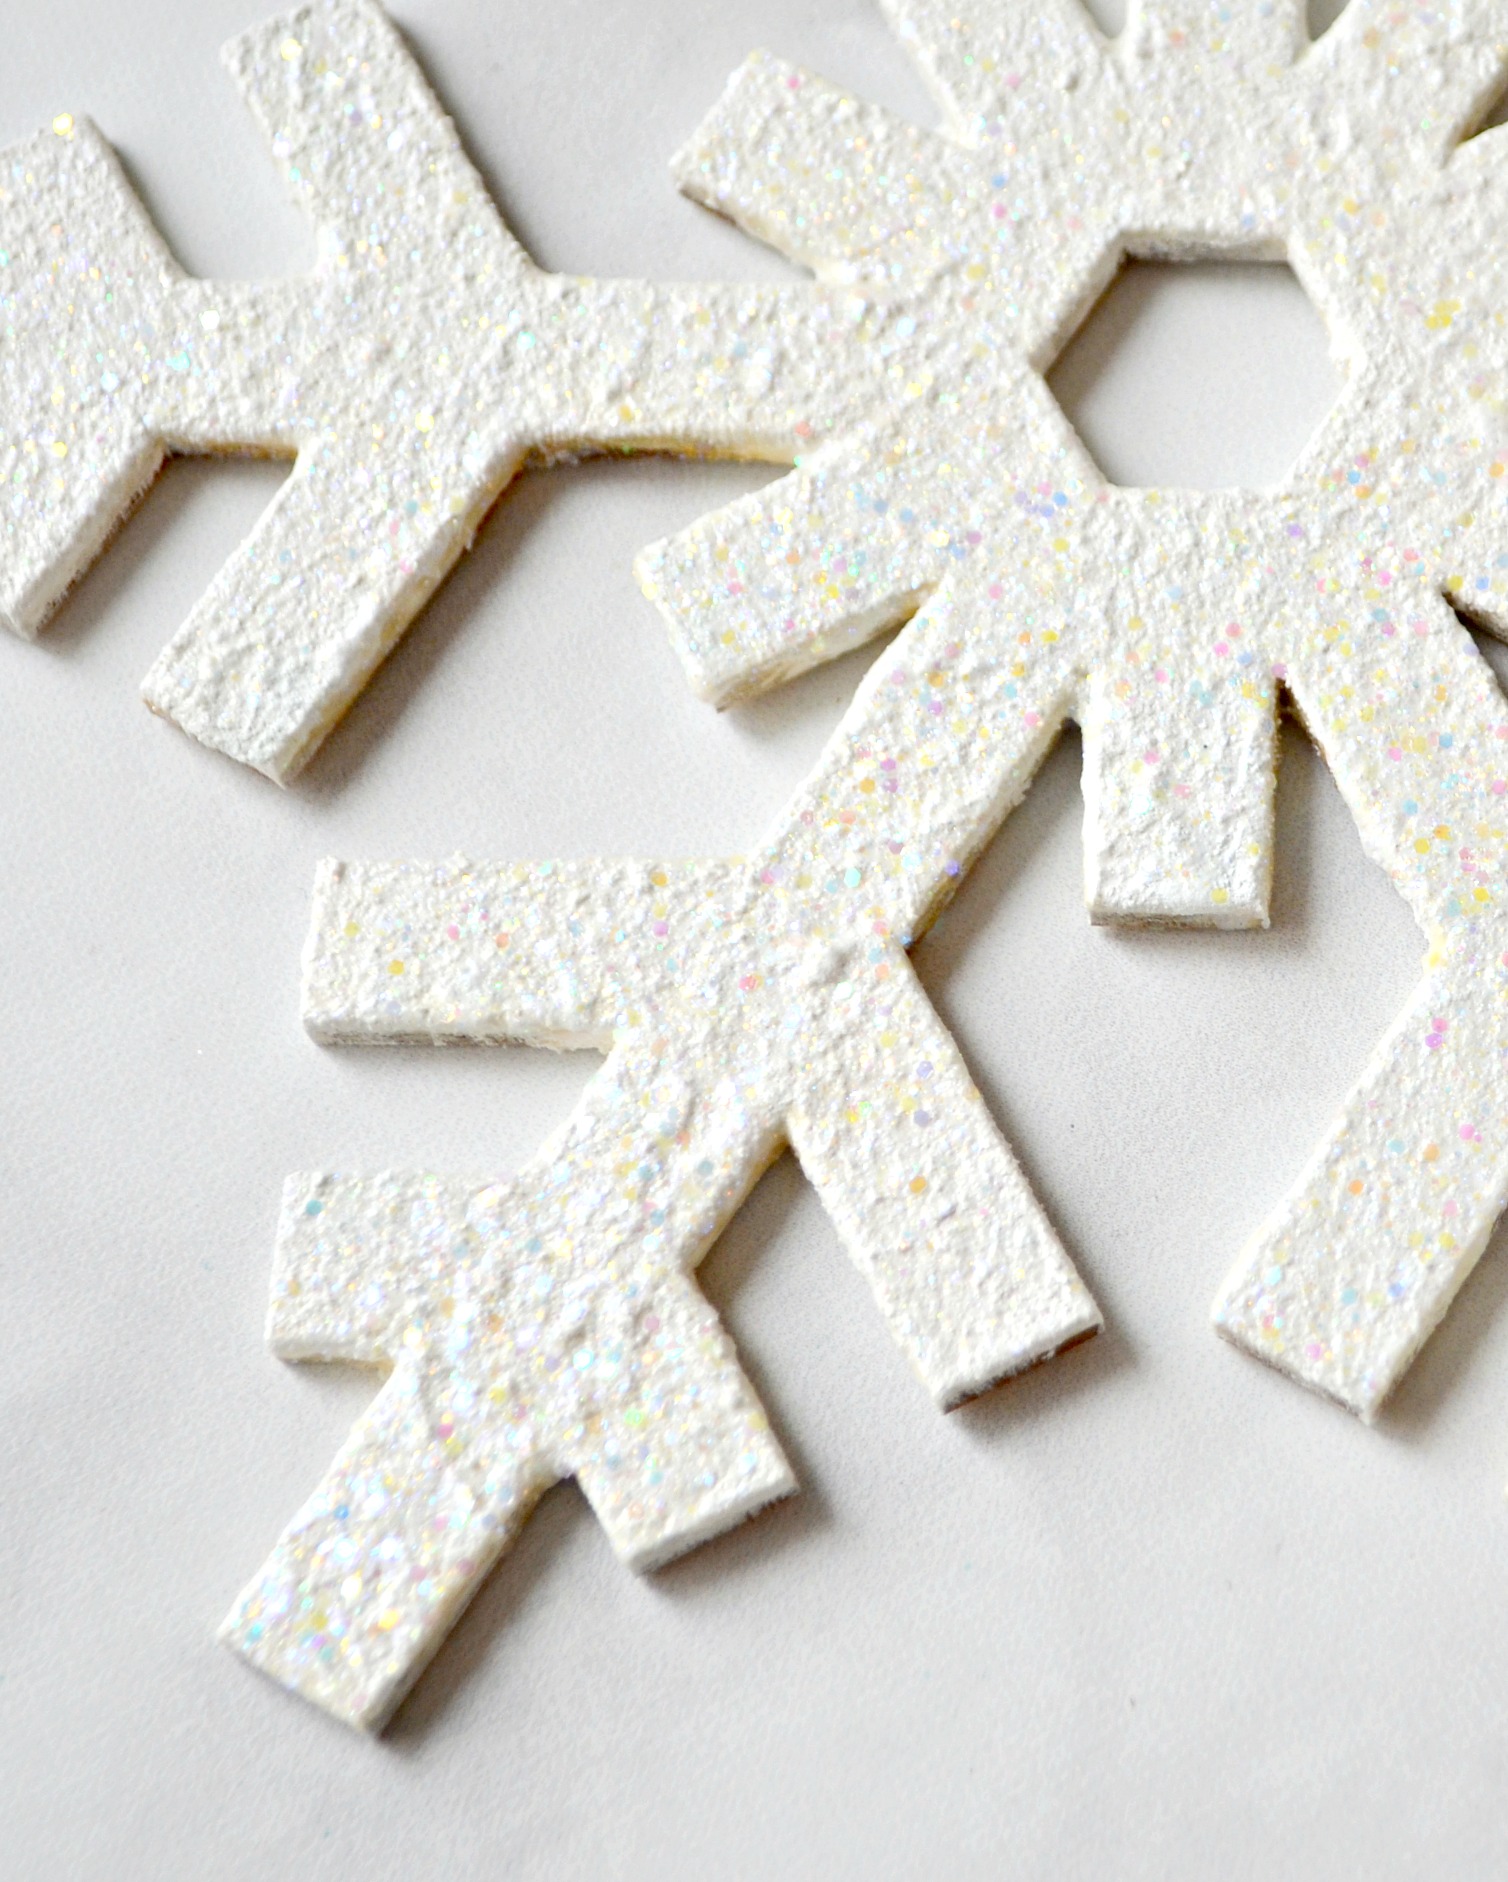
Step 2: Paint your snowflakes white.
I gave mine a base coat of white acrylic paint, then applied a coat of FolkArt Coastal texture paint because it helped create a “snowy” look. I applied it by tapping my brush onto the surface of the wood to enhance the textured look, rather than using smooth brush strokes.
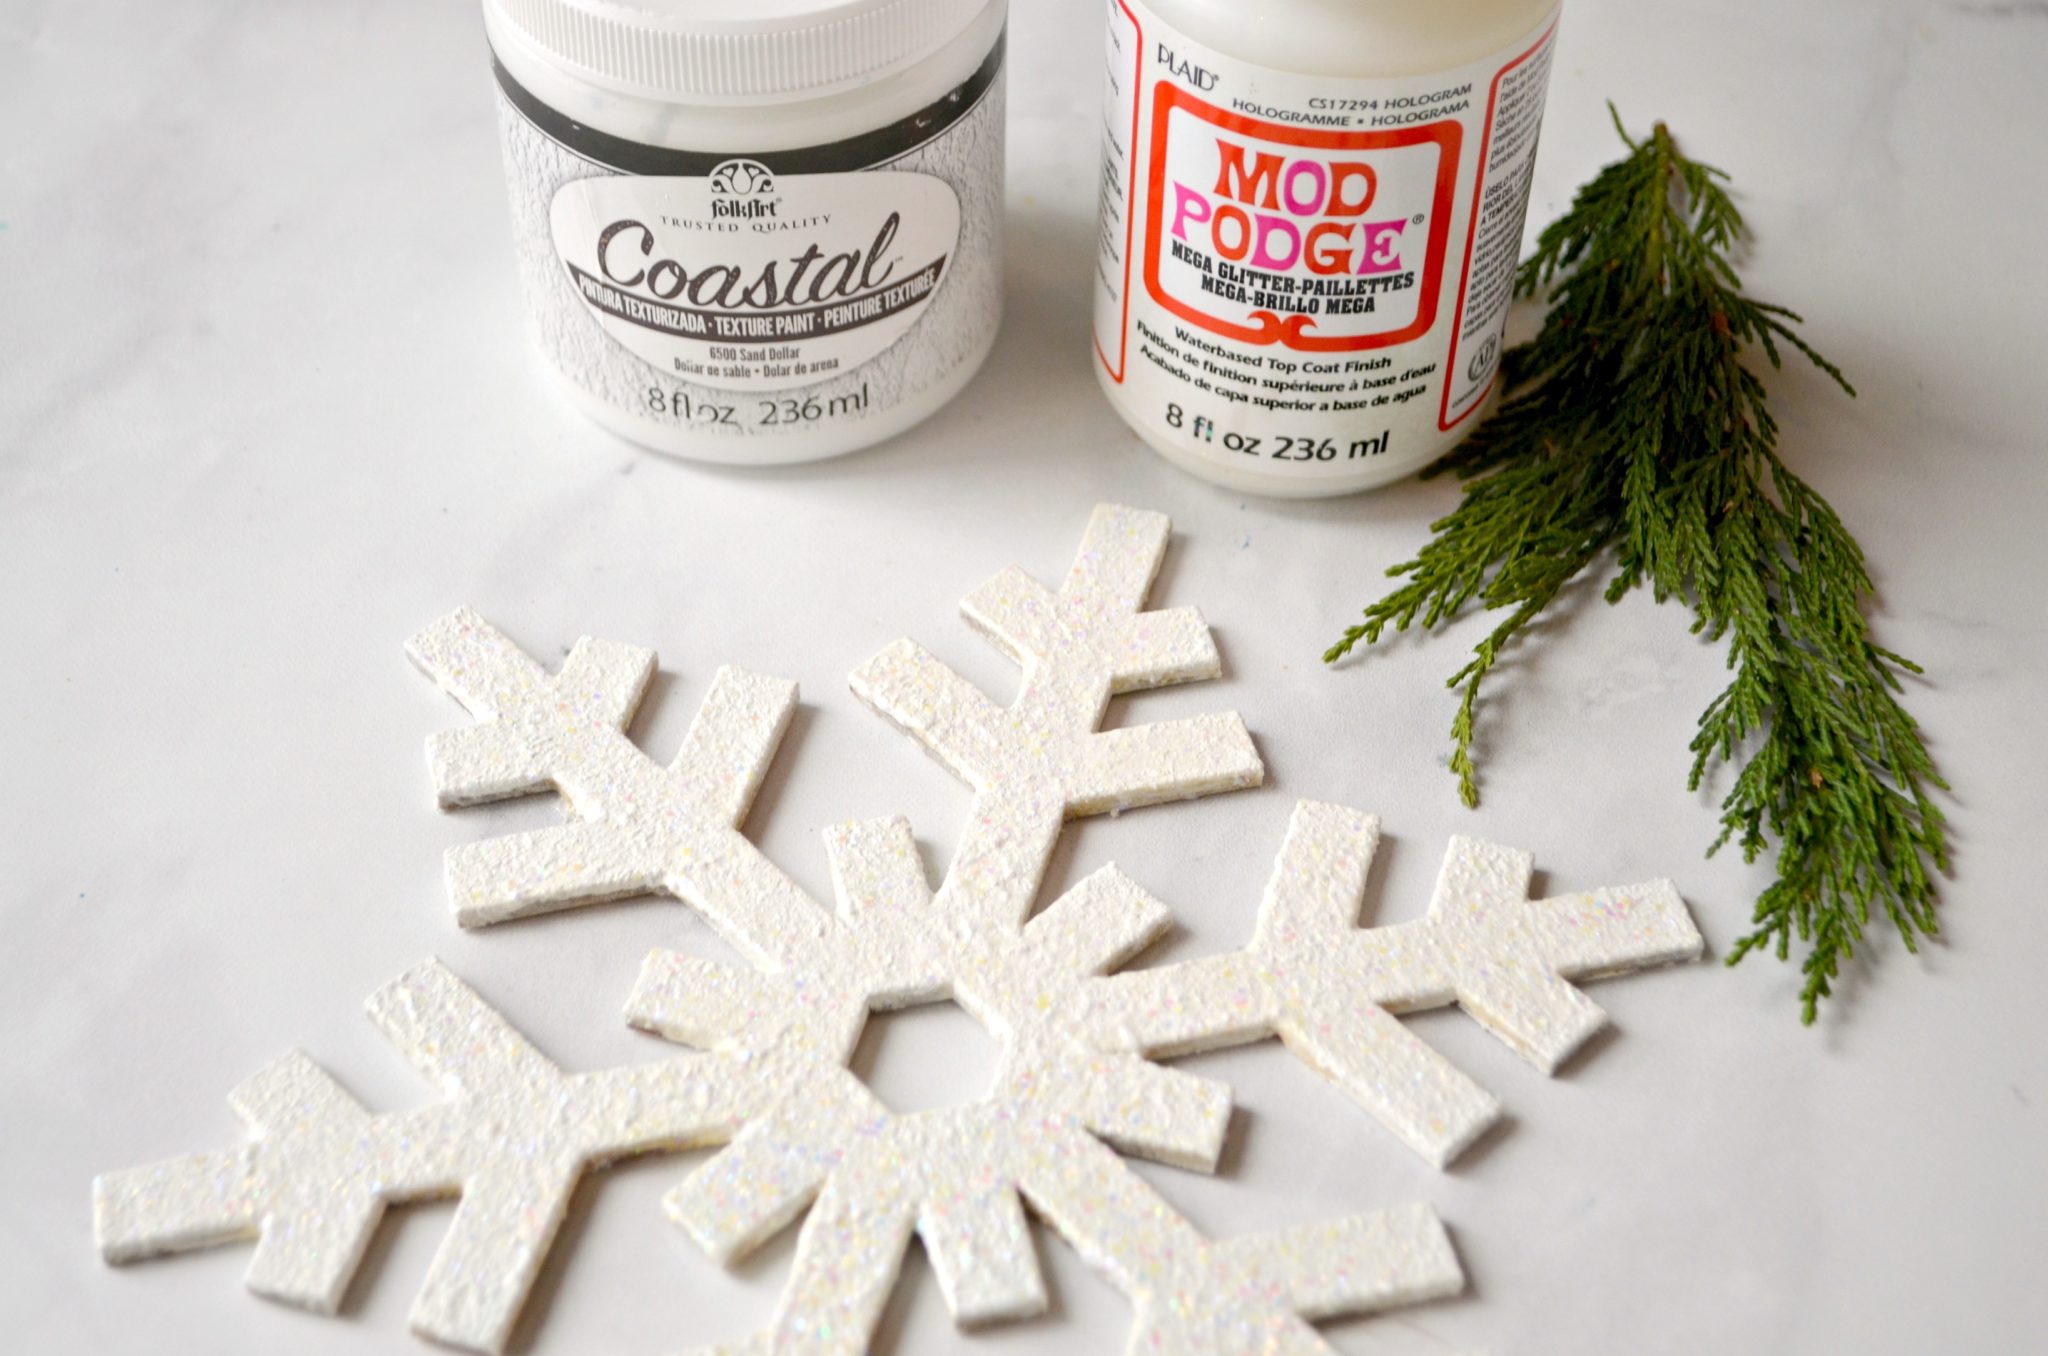
Step 3: Apply Mod Podge Mega Glitter.
Make sure the white paint is completely dry before you move to this step. The more coats of Mega Glitter you apply, the more your snowflakes will sparkle and shine in the light. I applied three coats and I love the way mine twinkle.
Step 4: Paint each name with FolkArt Brushed Metal in your choice of color.
I chose to use Brushed Pale Silver. Most of this base coat will get covered by the Glitterific, but you’ll see a bit in between the sparkles. One coat should be enough for good coverage.
Step 5: Apply FolkArt Glitterific.
Once again, you can use any color you like best. You’ll want apply this as a very thick coat, placing the glitter where you want it to go and making sure it completely covers the surface. I only did one coat, but if you apply less the first time and want more sparkle, you can go back and do a second application.

Step 5: Glue each name to a snowflake.
I chose to position my snowflakes so that there was a vertical line running from top to bottom. This makes them easy to hang in the next step, because there’s a definite top center.
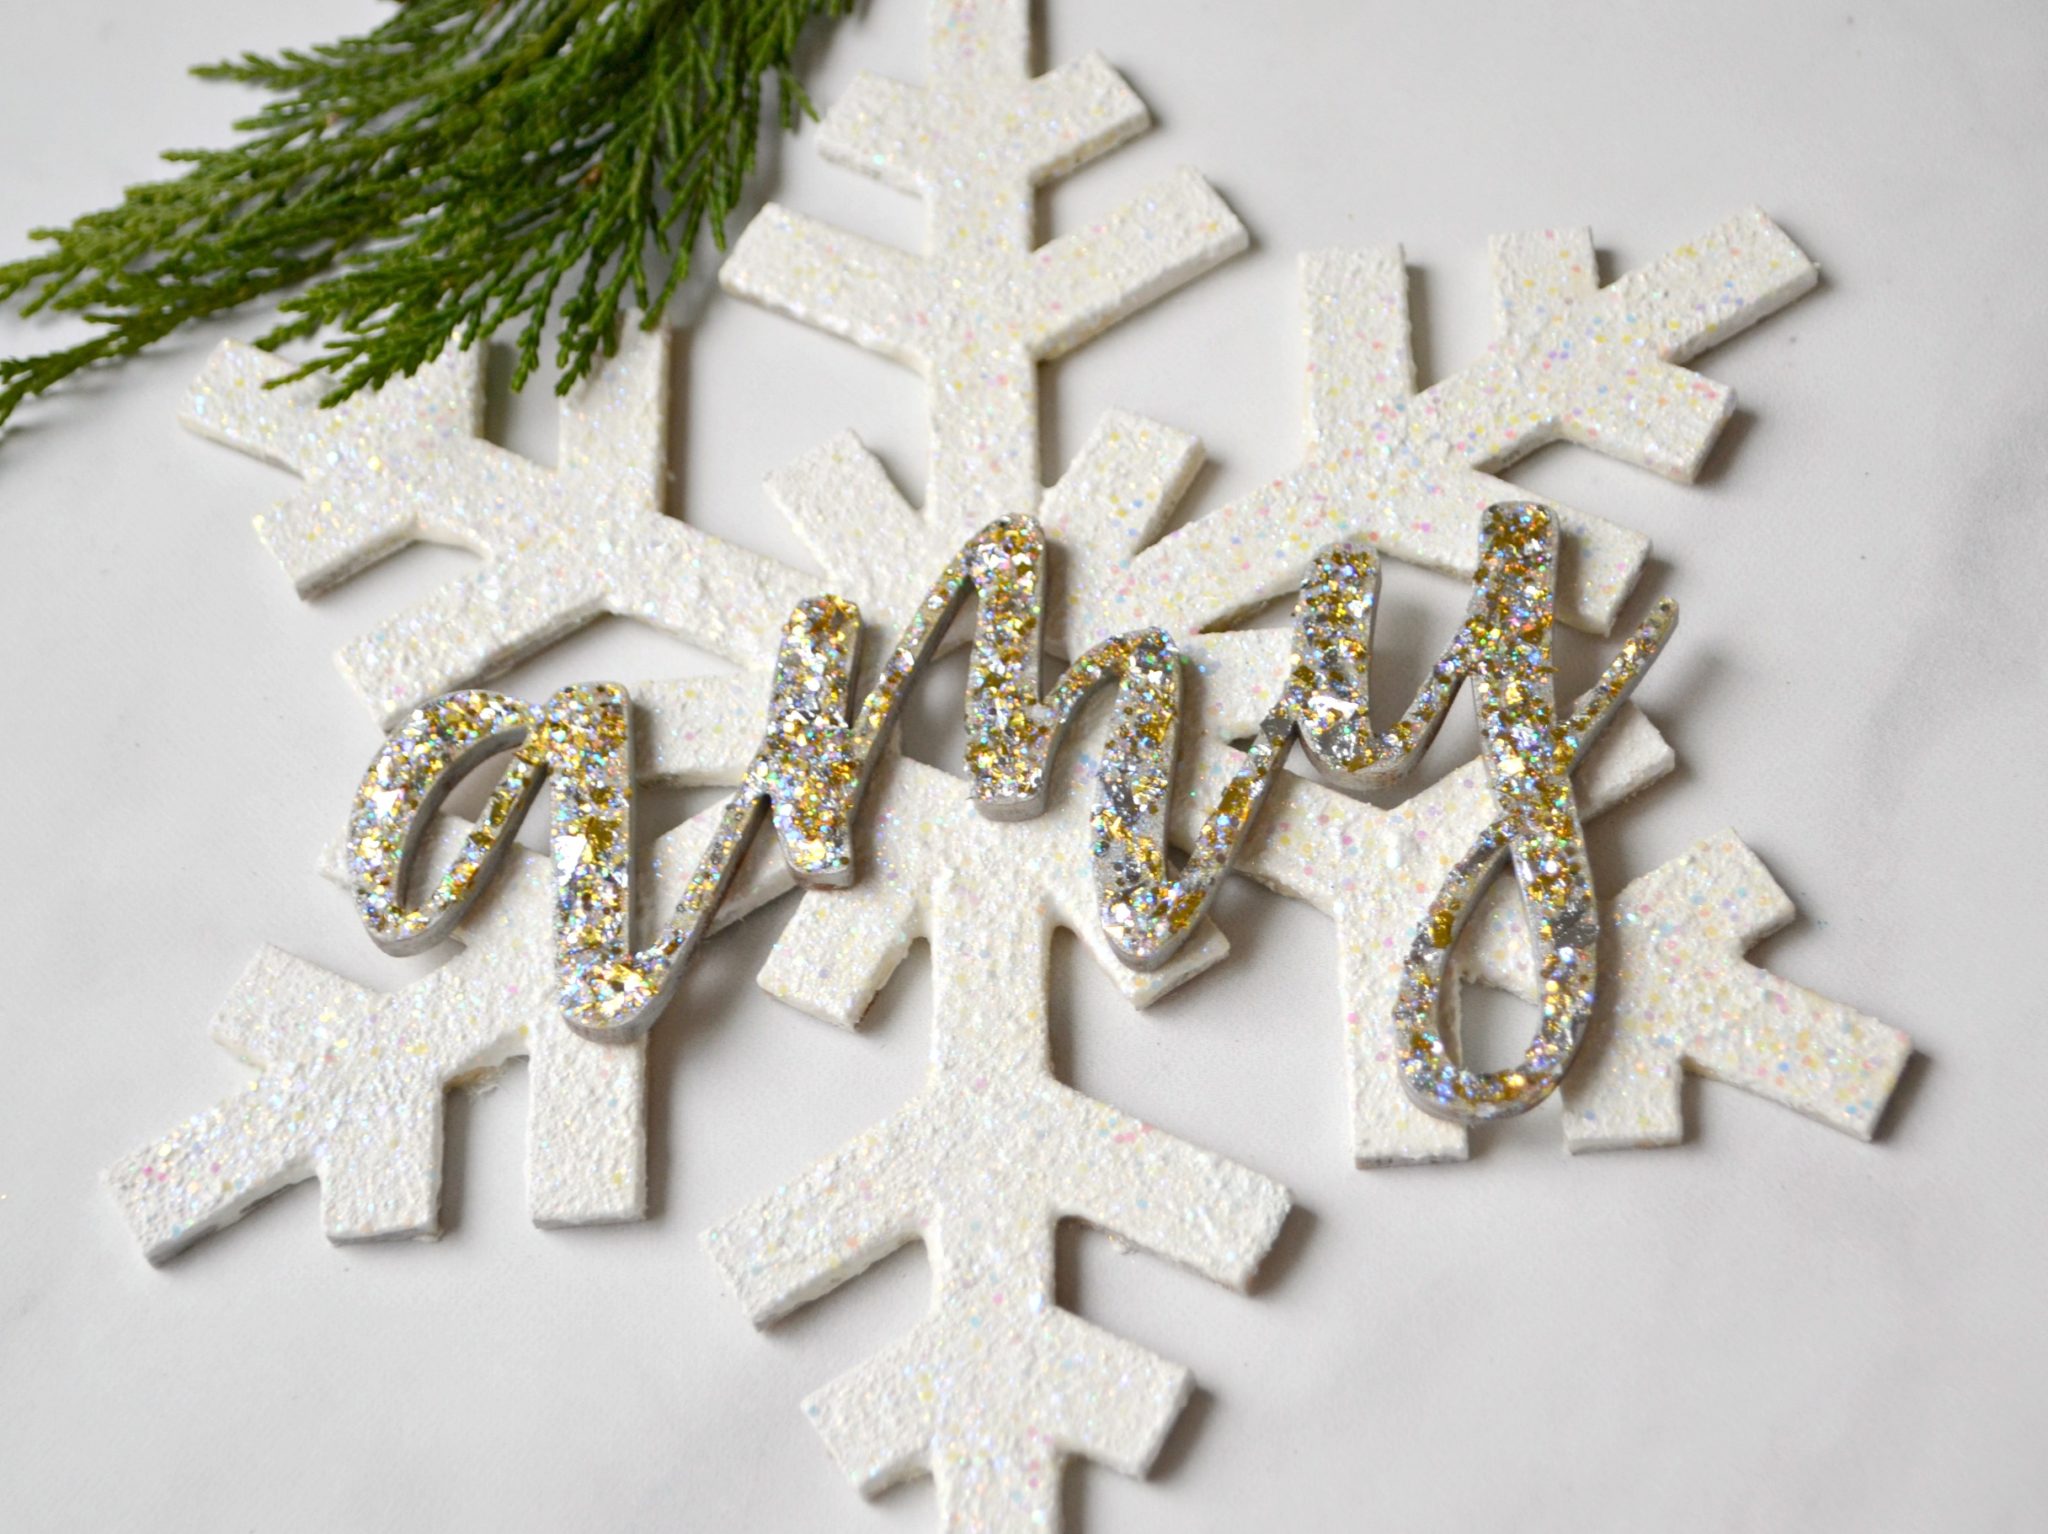
I glued the names right in the center of the snowflakes, but you could position them more toward the top or the bottom if you prefer.
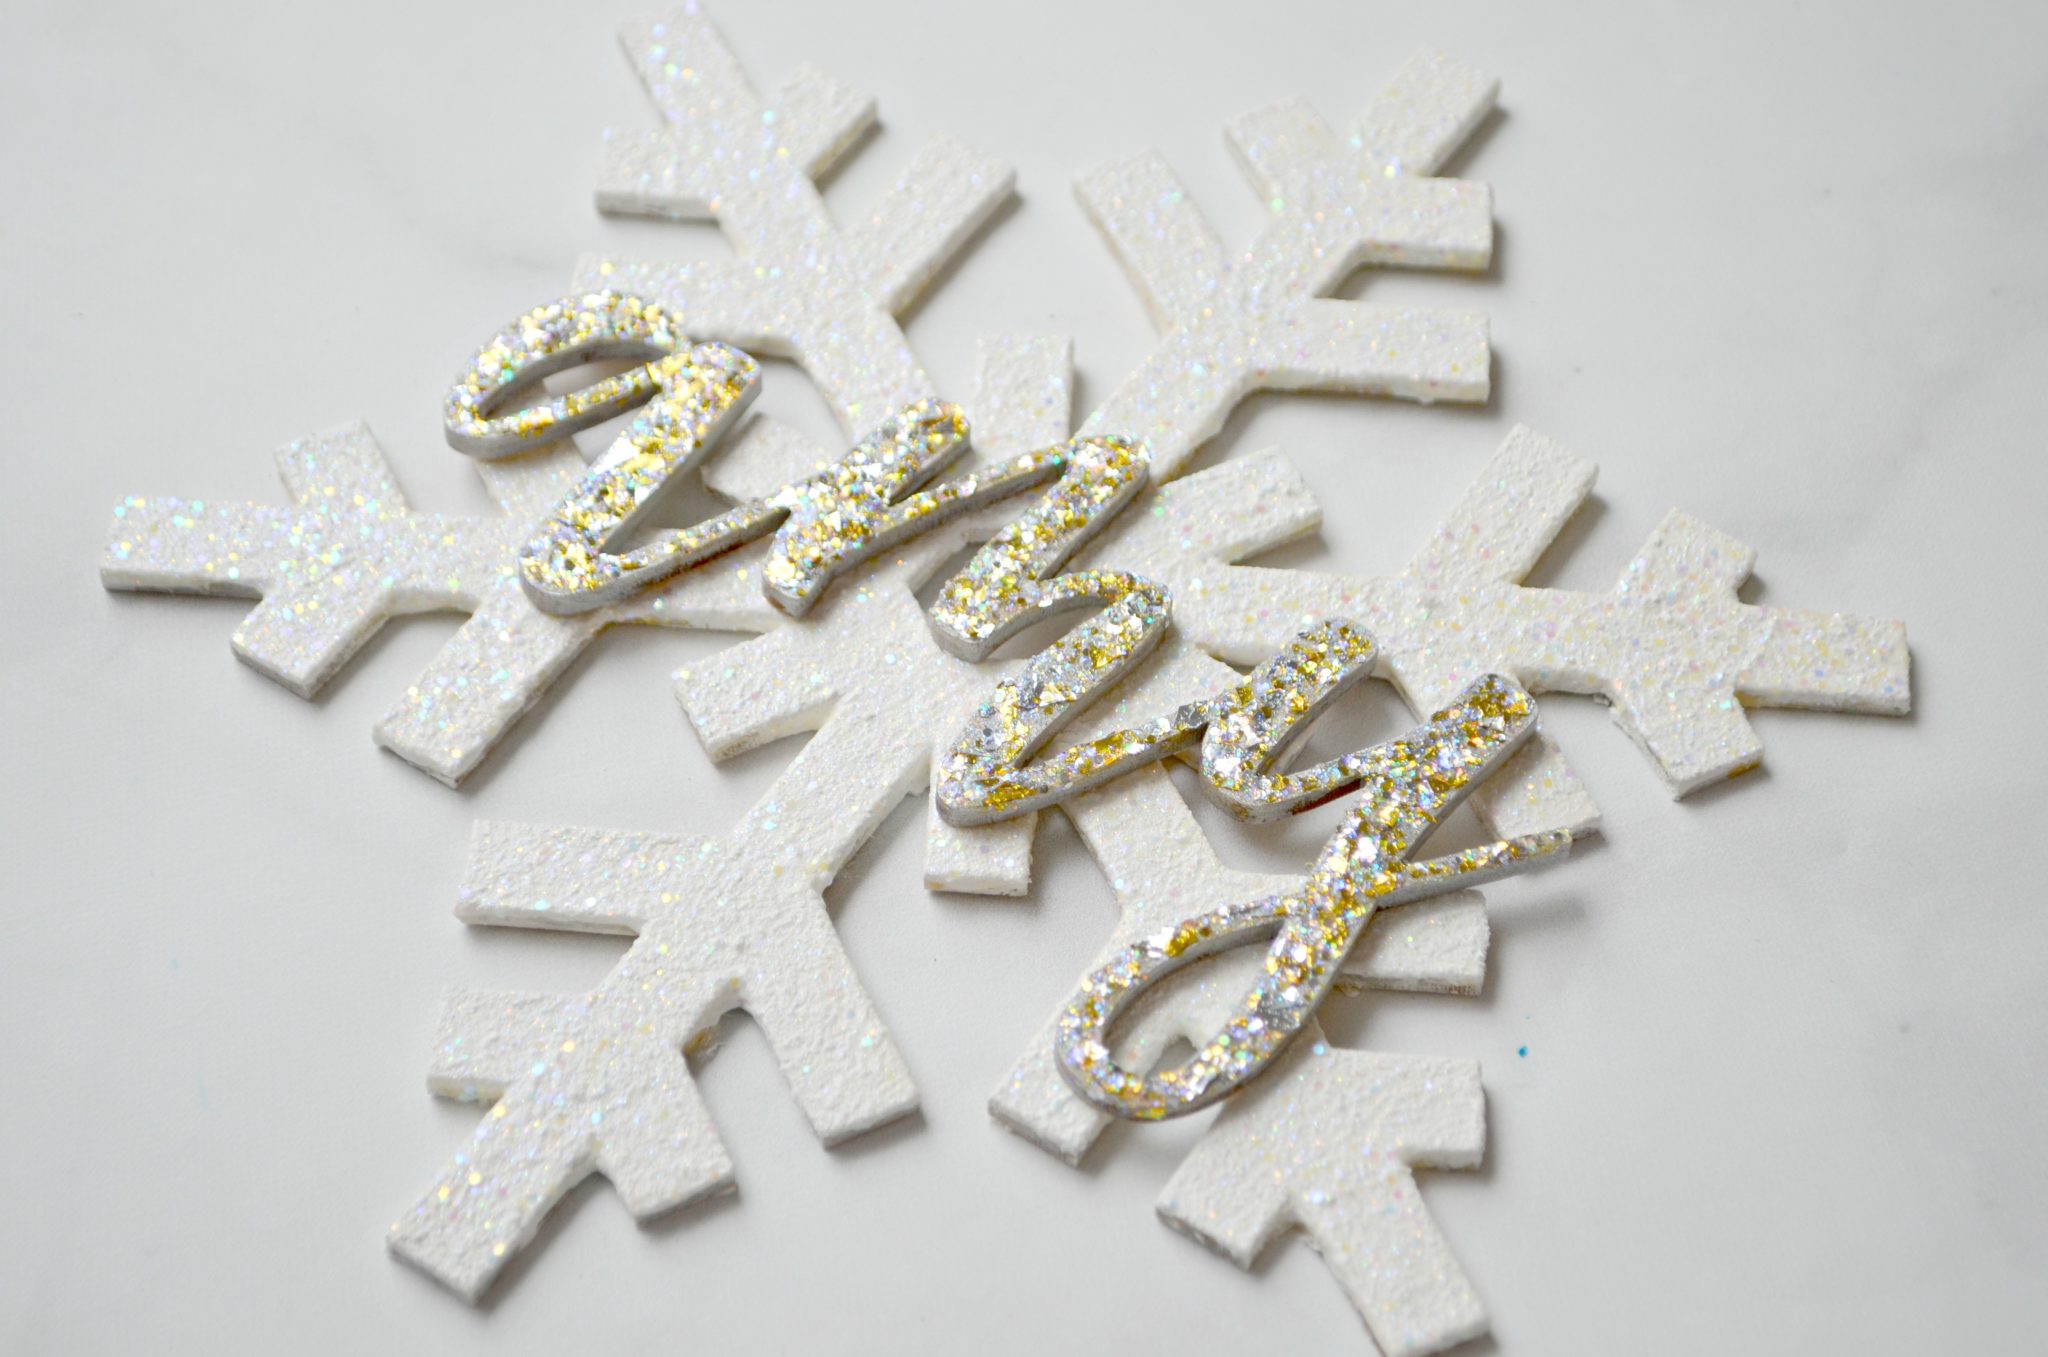
Step 5: Add hangers.
I cut pieces of twine and used them to form loops that I hot glued to the back of each snowflake.
Then, they were ready to hang on top of our stockings!
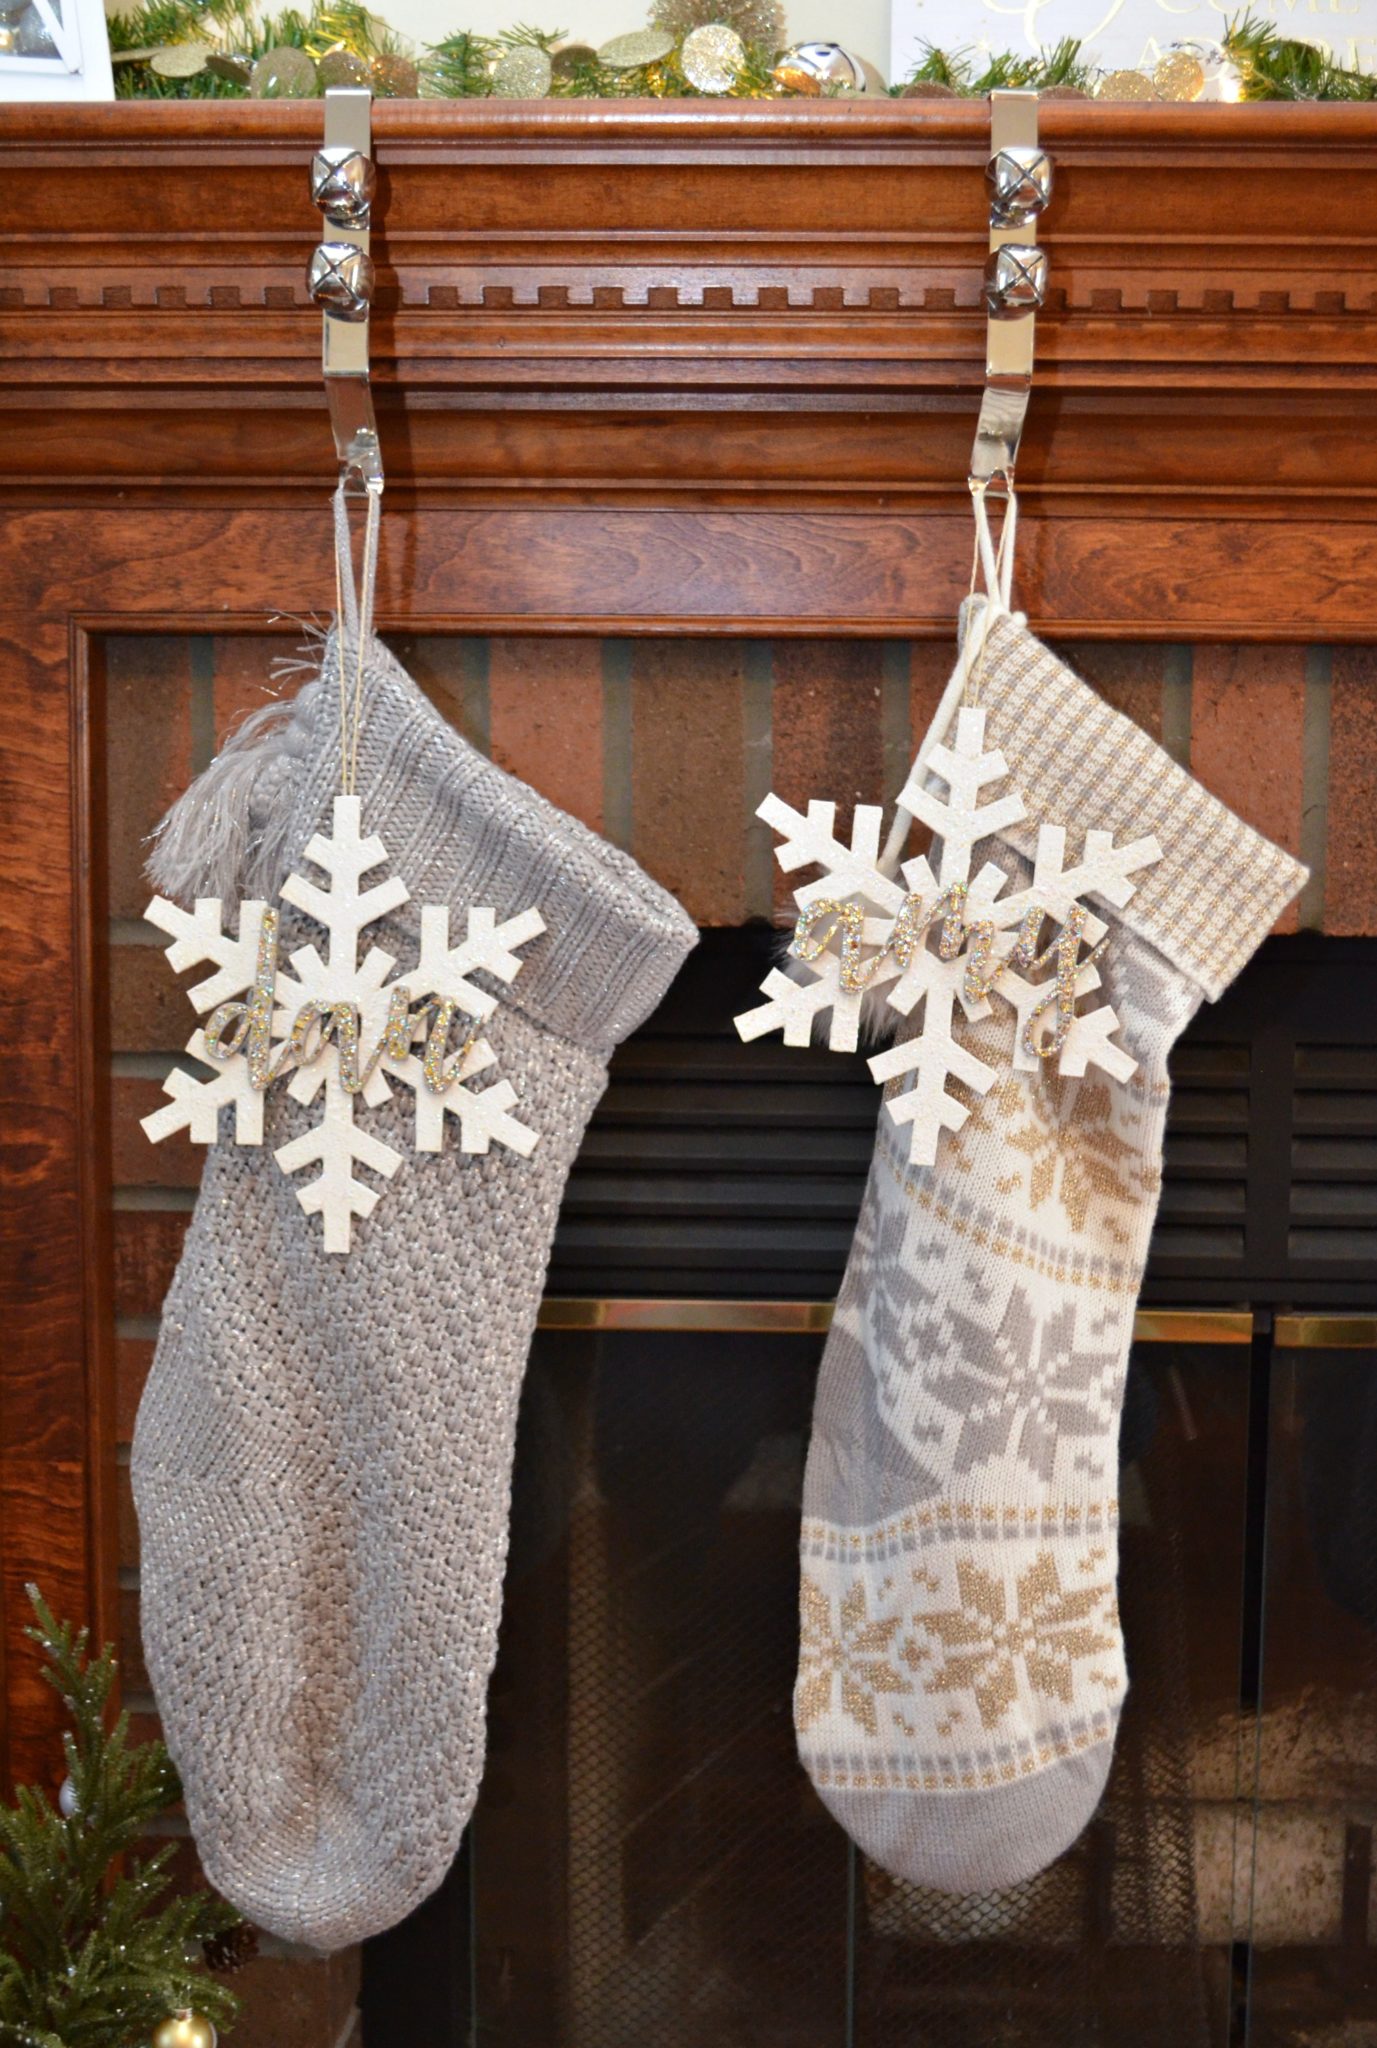
I love how fun and festive they look, and they’re a perfect match for my metallic and sparkly decor! The best part about this project is that you can customize your own snowflakes and names with whatever colors of paint and/or glitter you like best. You also get to choose your favorite font, making them perfectly fit your style.
What do you think? What colors would you use for your family? Would you use glitter or stick with a more rustic look?
Don’t forget, if you like it, then you oughta put a Pin on it!

These are so pretty!
Just beautiful…they look so nice with your stockings…