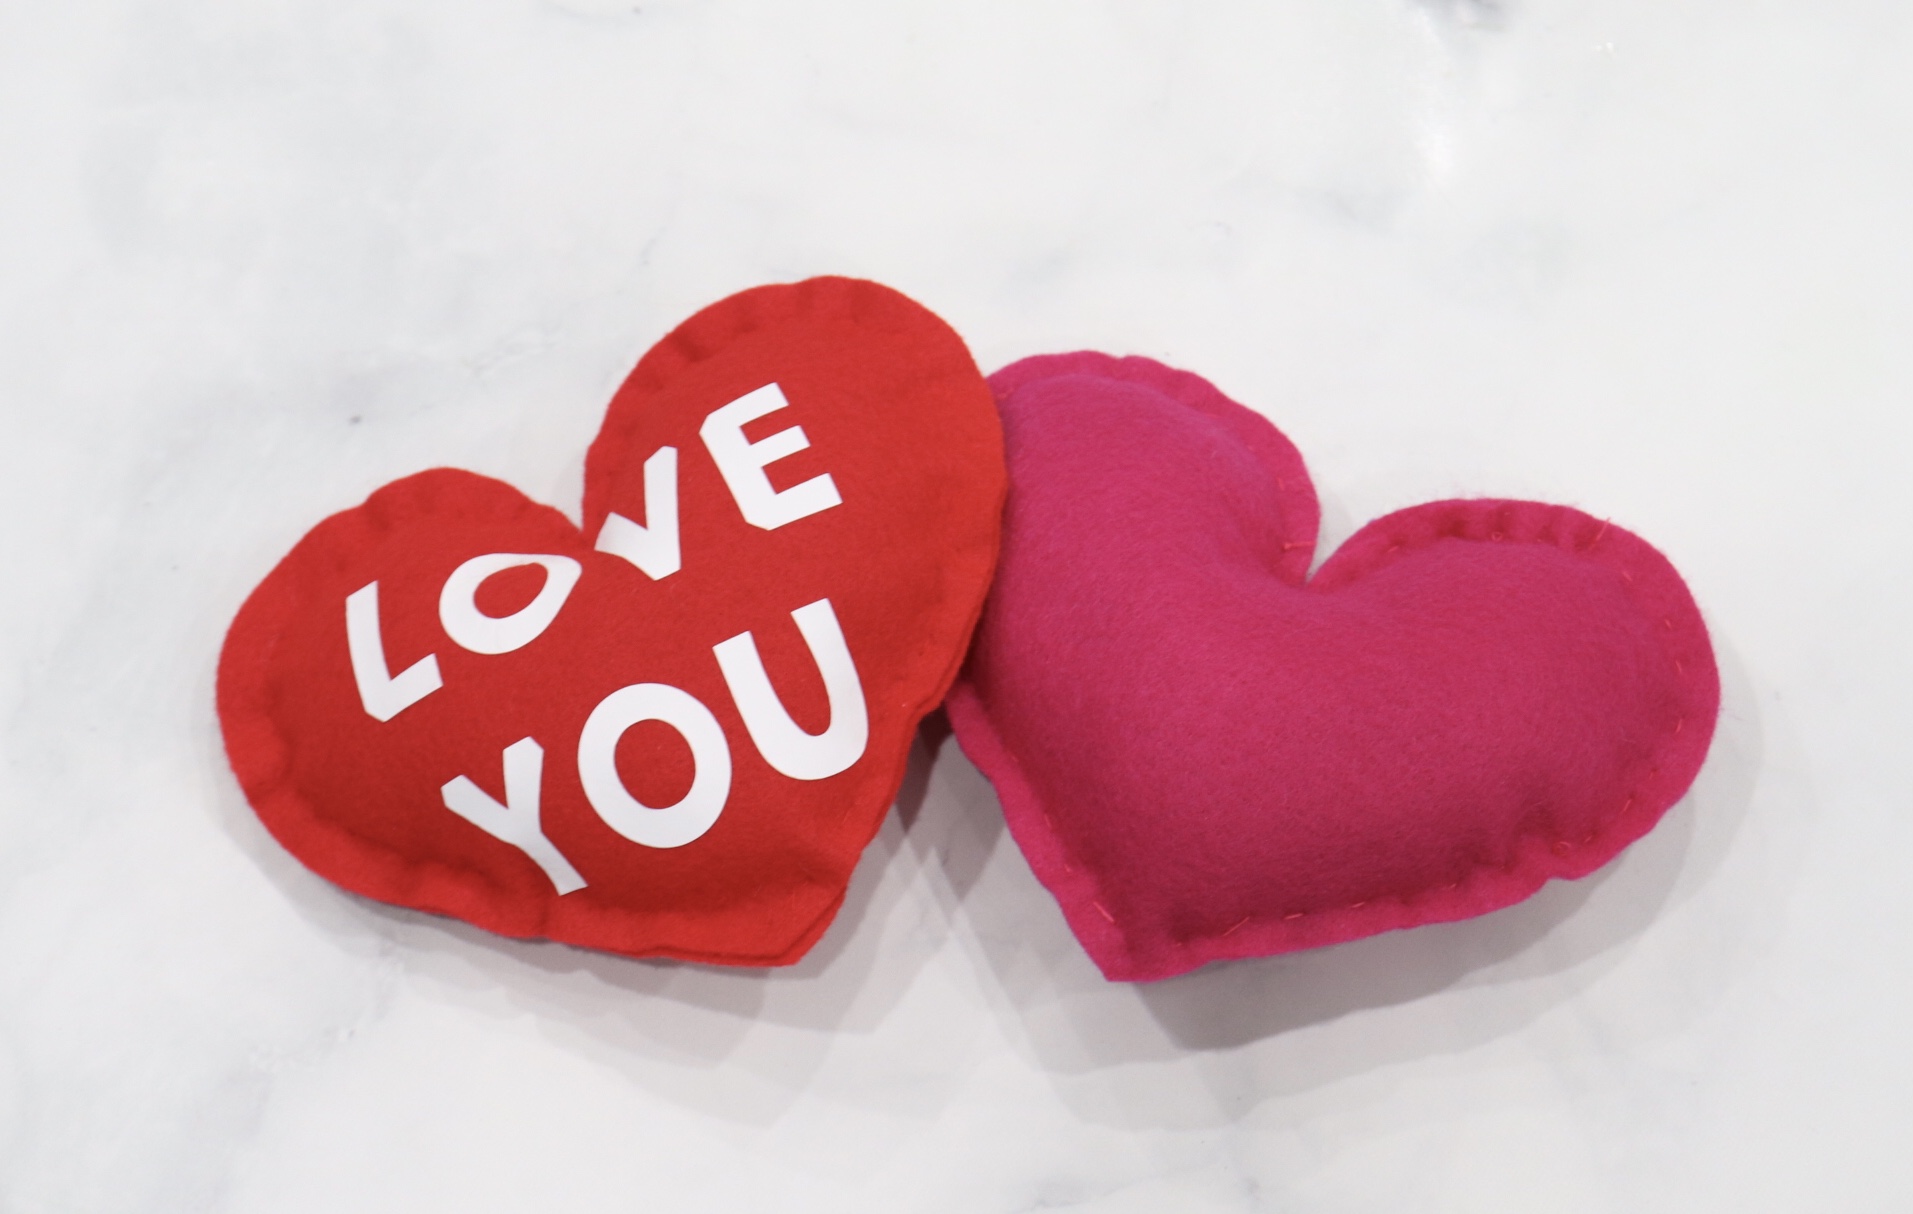
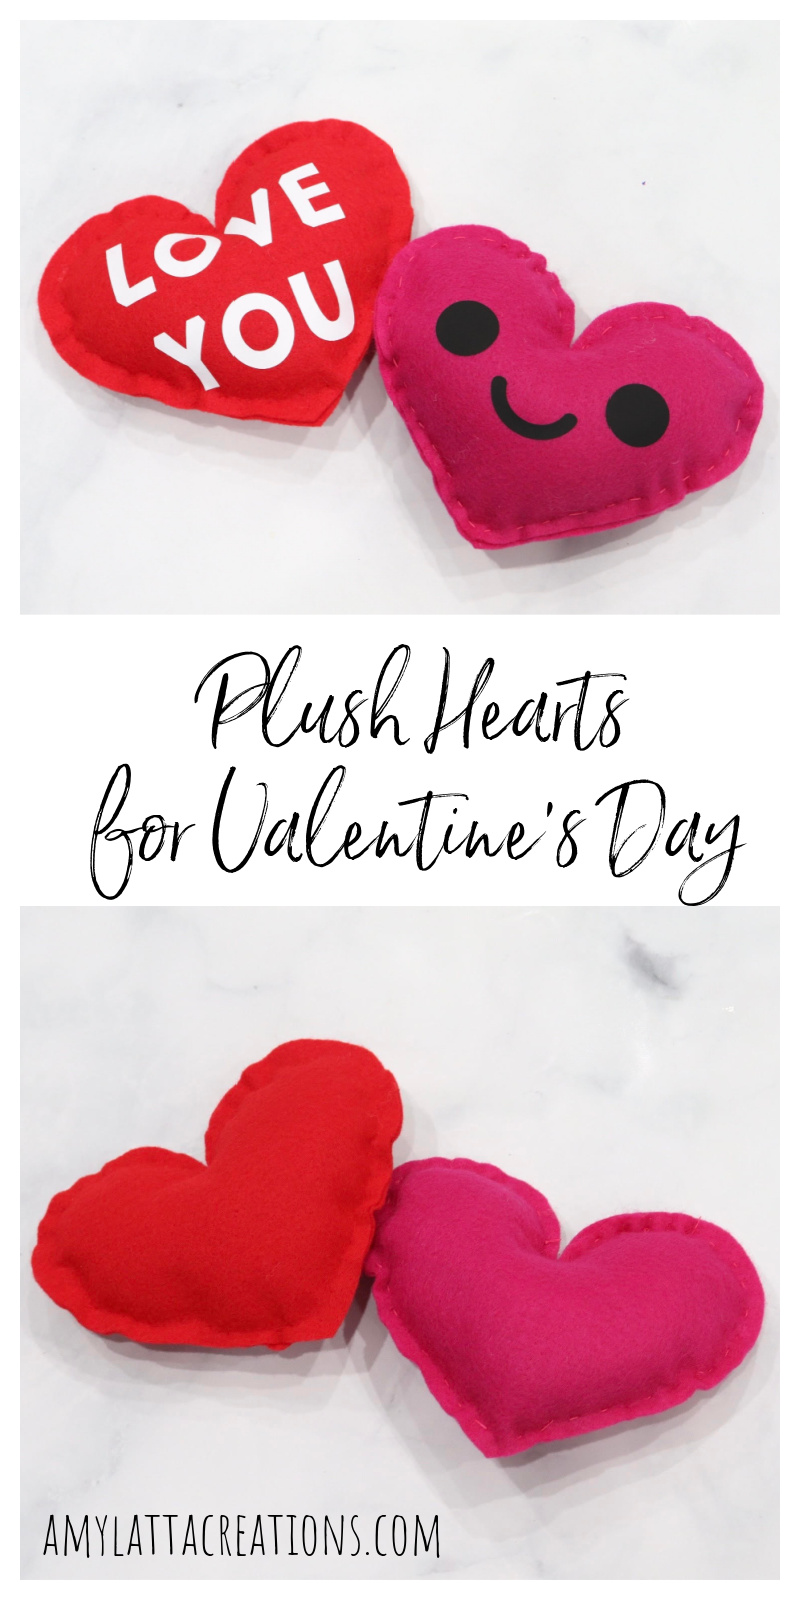
Plush Hearts for Valentine’s Day
Valentine’s Day is fast approaching, so it’s time to start thinking about little ways to show our love to the special people in our lives. Here is a sweet and simple little Plush Hearts project you can make that takes just a few basic supplies and less than half an hour. In fact, it’s easy enough that little crafters can join in the fun; my 12 year old and I made ours together; he made the red one while I worked on the pink. Here’s how you can create your own:
You’ll need:
felt (red and/or pink)
sewing thread (to match felt)
sewing needle
scissors
Optional:
Rotary Blade
Cutting Mats (fabric grip and standard grip)
Iron-On Vinyl (we used white and black)
EasyPress 2 or Iron
EasyPress mat or folded towel
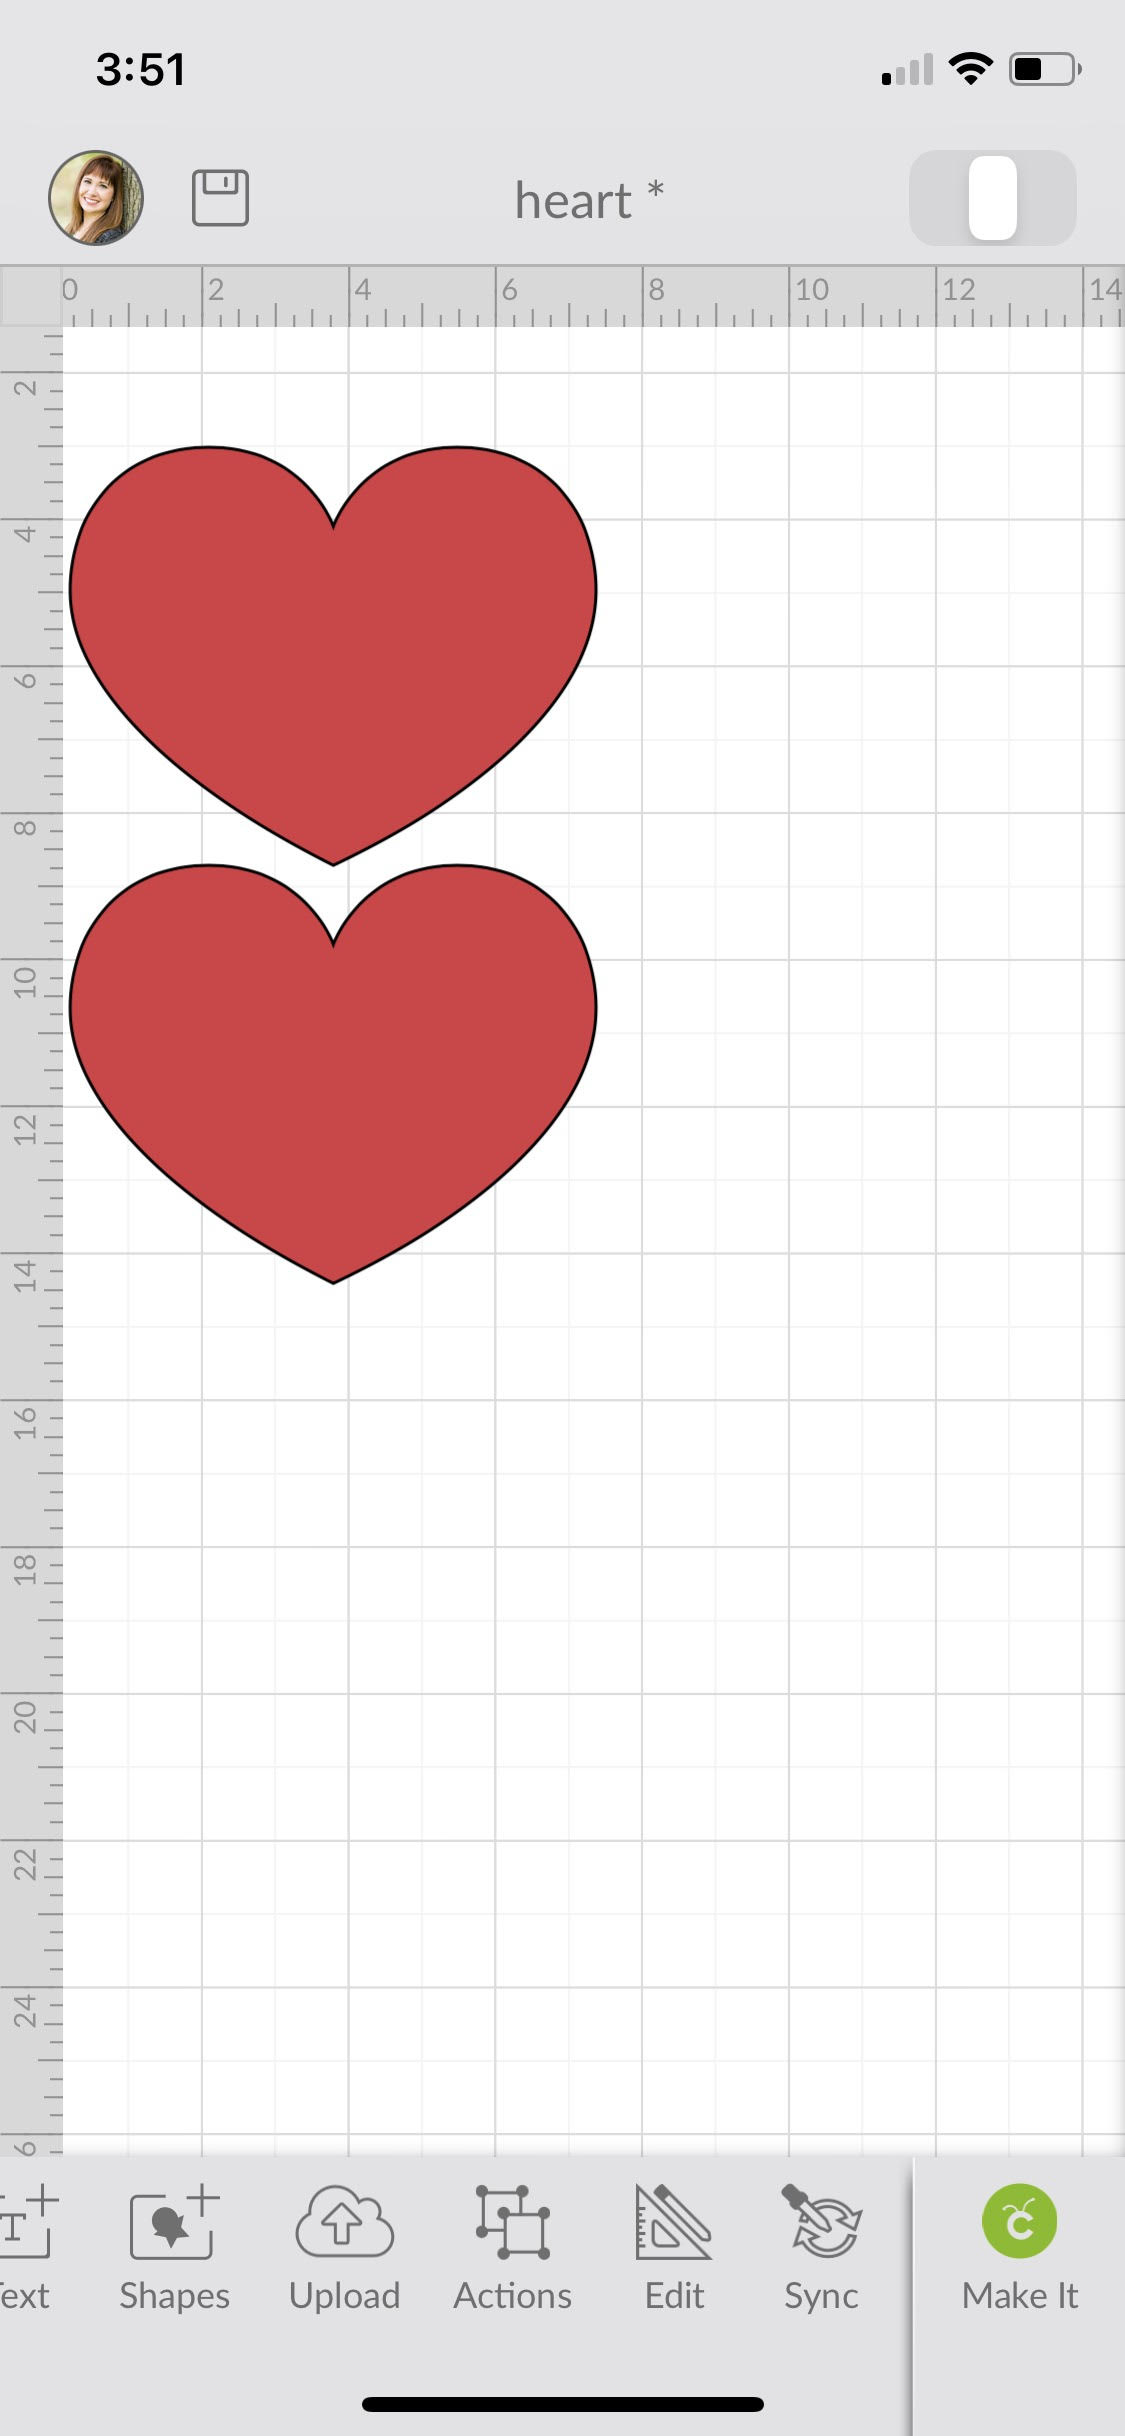
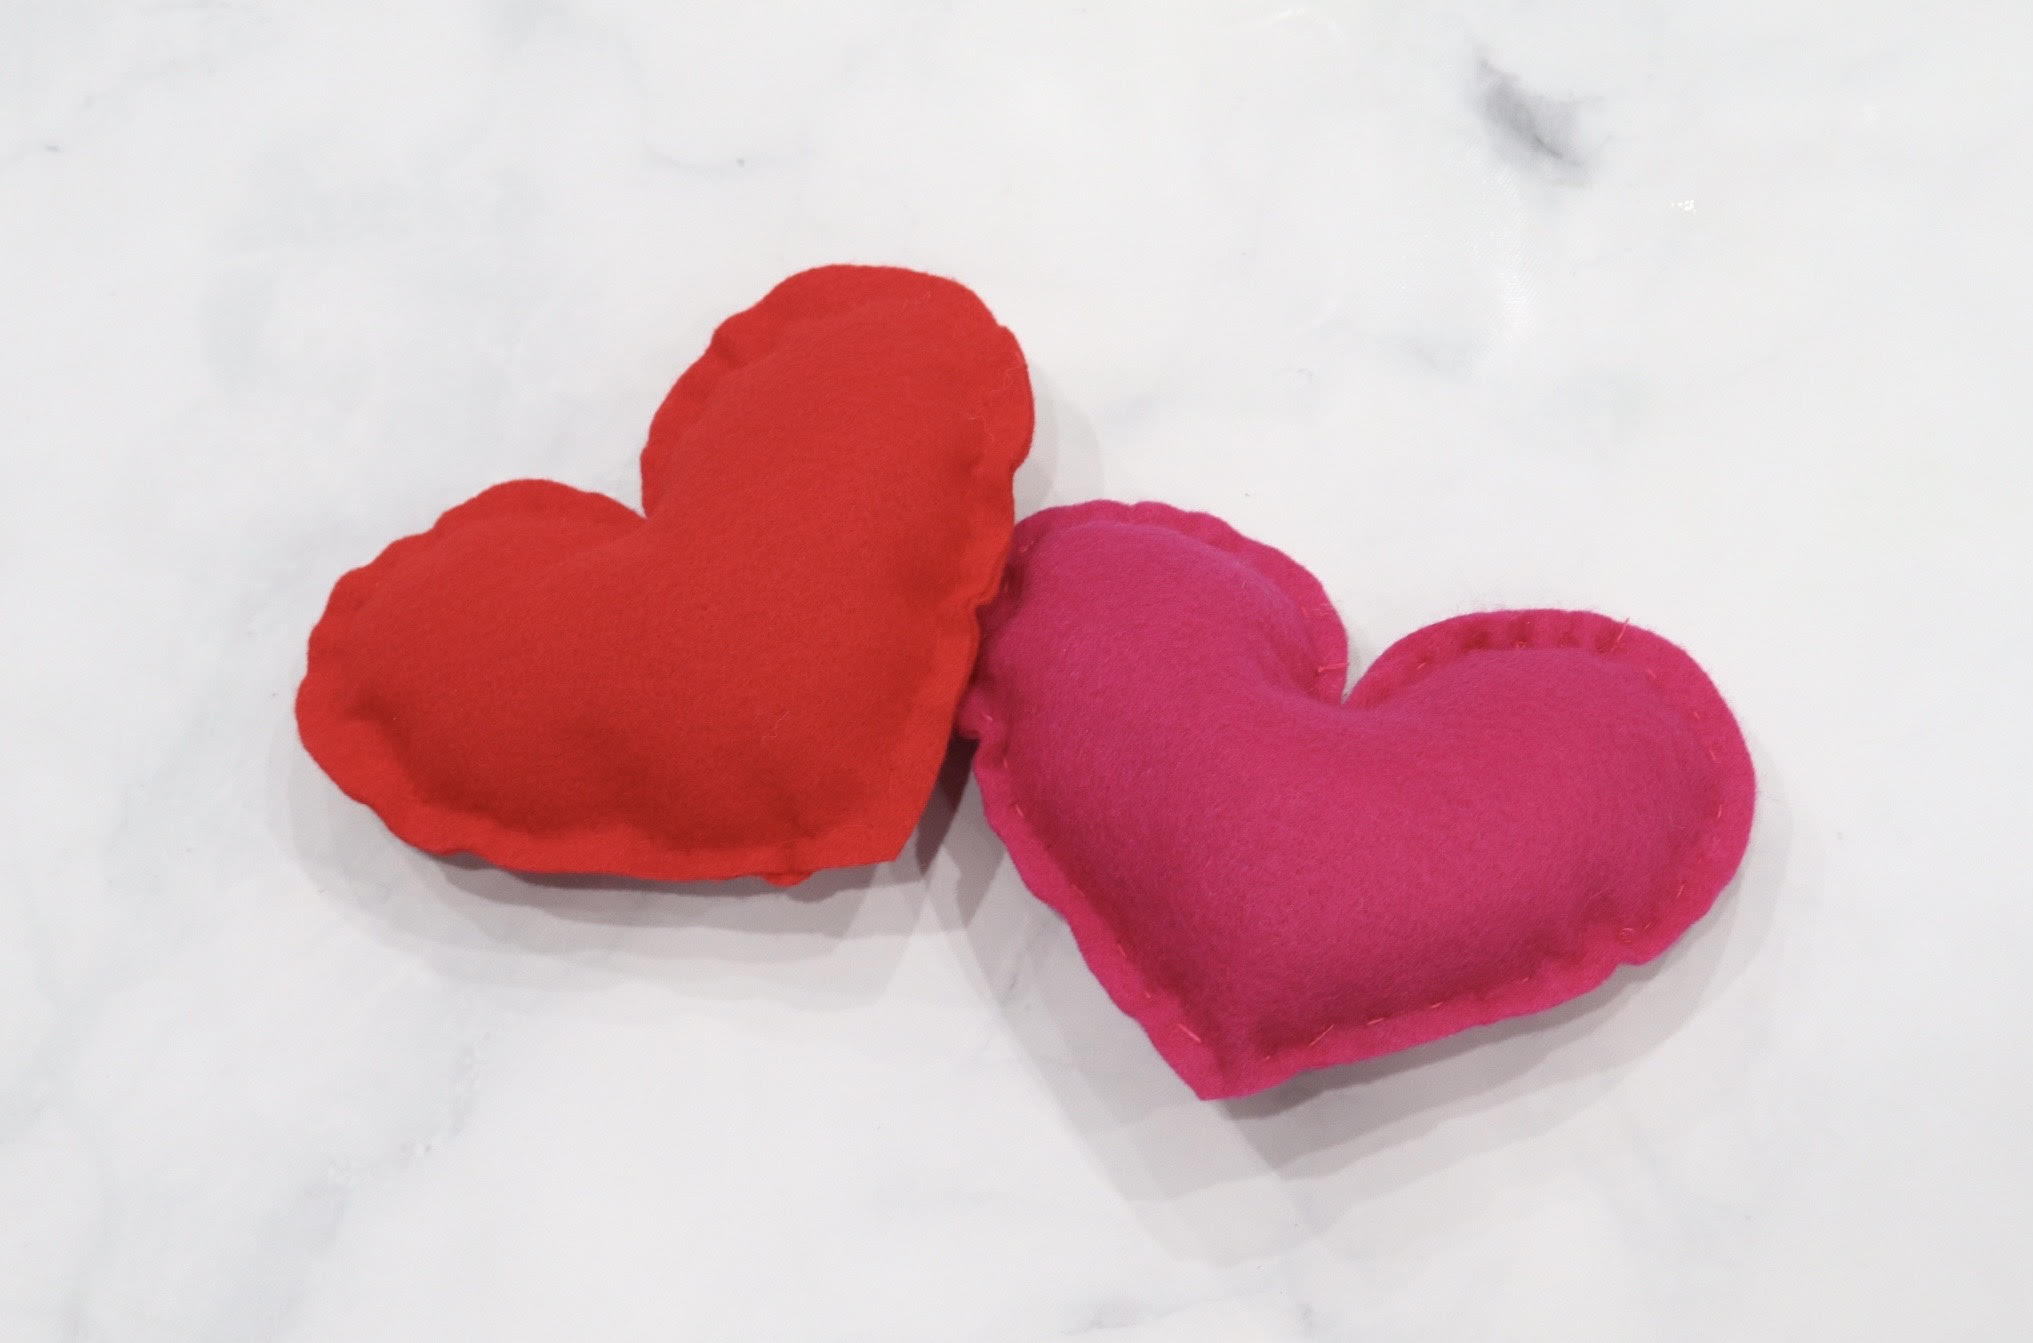
Step 1: Cut two identical heart shapes from felt.
We used the Cricut Maker for this step. Little Crafter chose the image “Heart” #MD3232499 in the Cricut Design Space app and resized it to be approximately 6″ x 5.5.” Then, he duplicated it and sent the design to the Cricut Maker. He loaded the Maker with a rotary blade and a piece of red felt on a fabric grip mat, then the machine did the cutting. Of course, if you don’t have an electronic cutting machine, you can always just cut two heart shapes from your felt by hand.
If you’d like to add something to your hearts, go on to step 2. If you prefer plain, solid-colored plush hearts, you can skip to step 5 now.
Step 2 (optional): Choose and cut a message or face from Iron-On Vinyl.
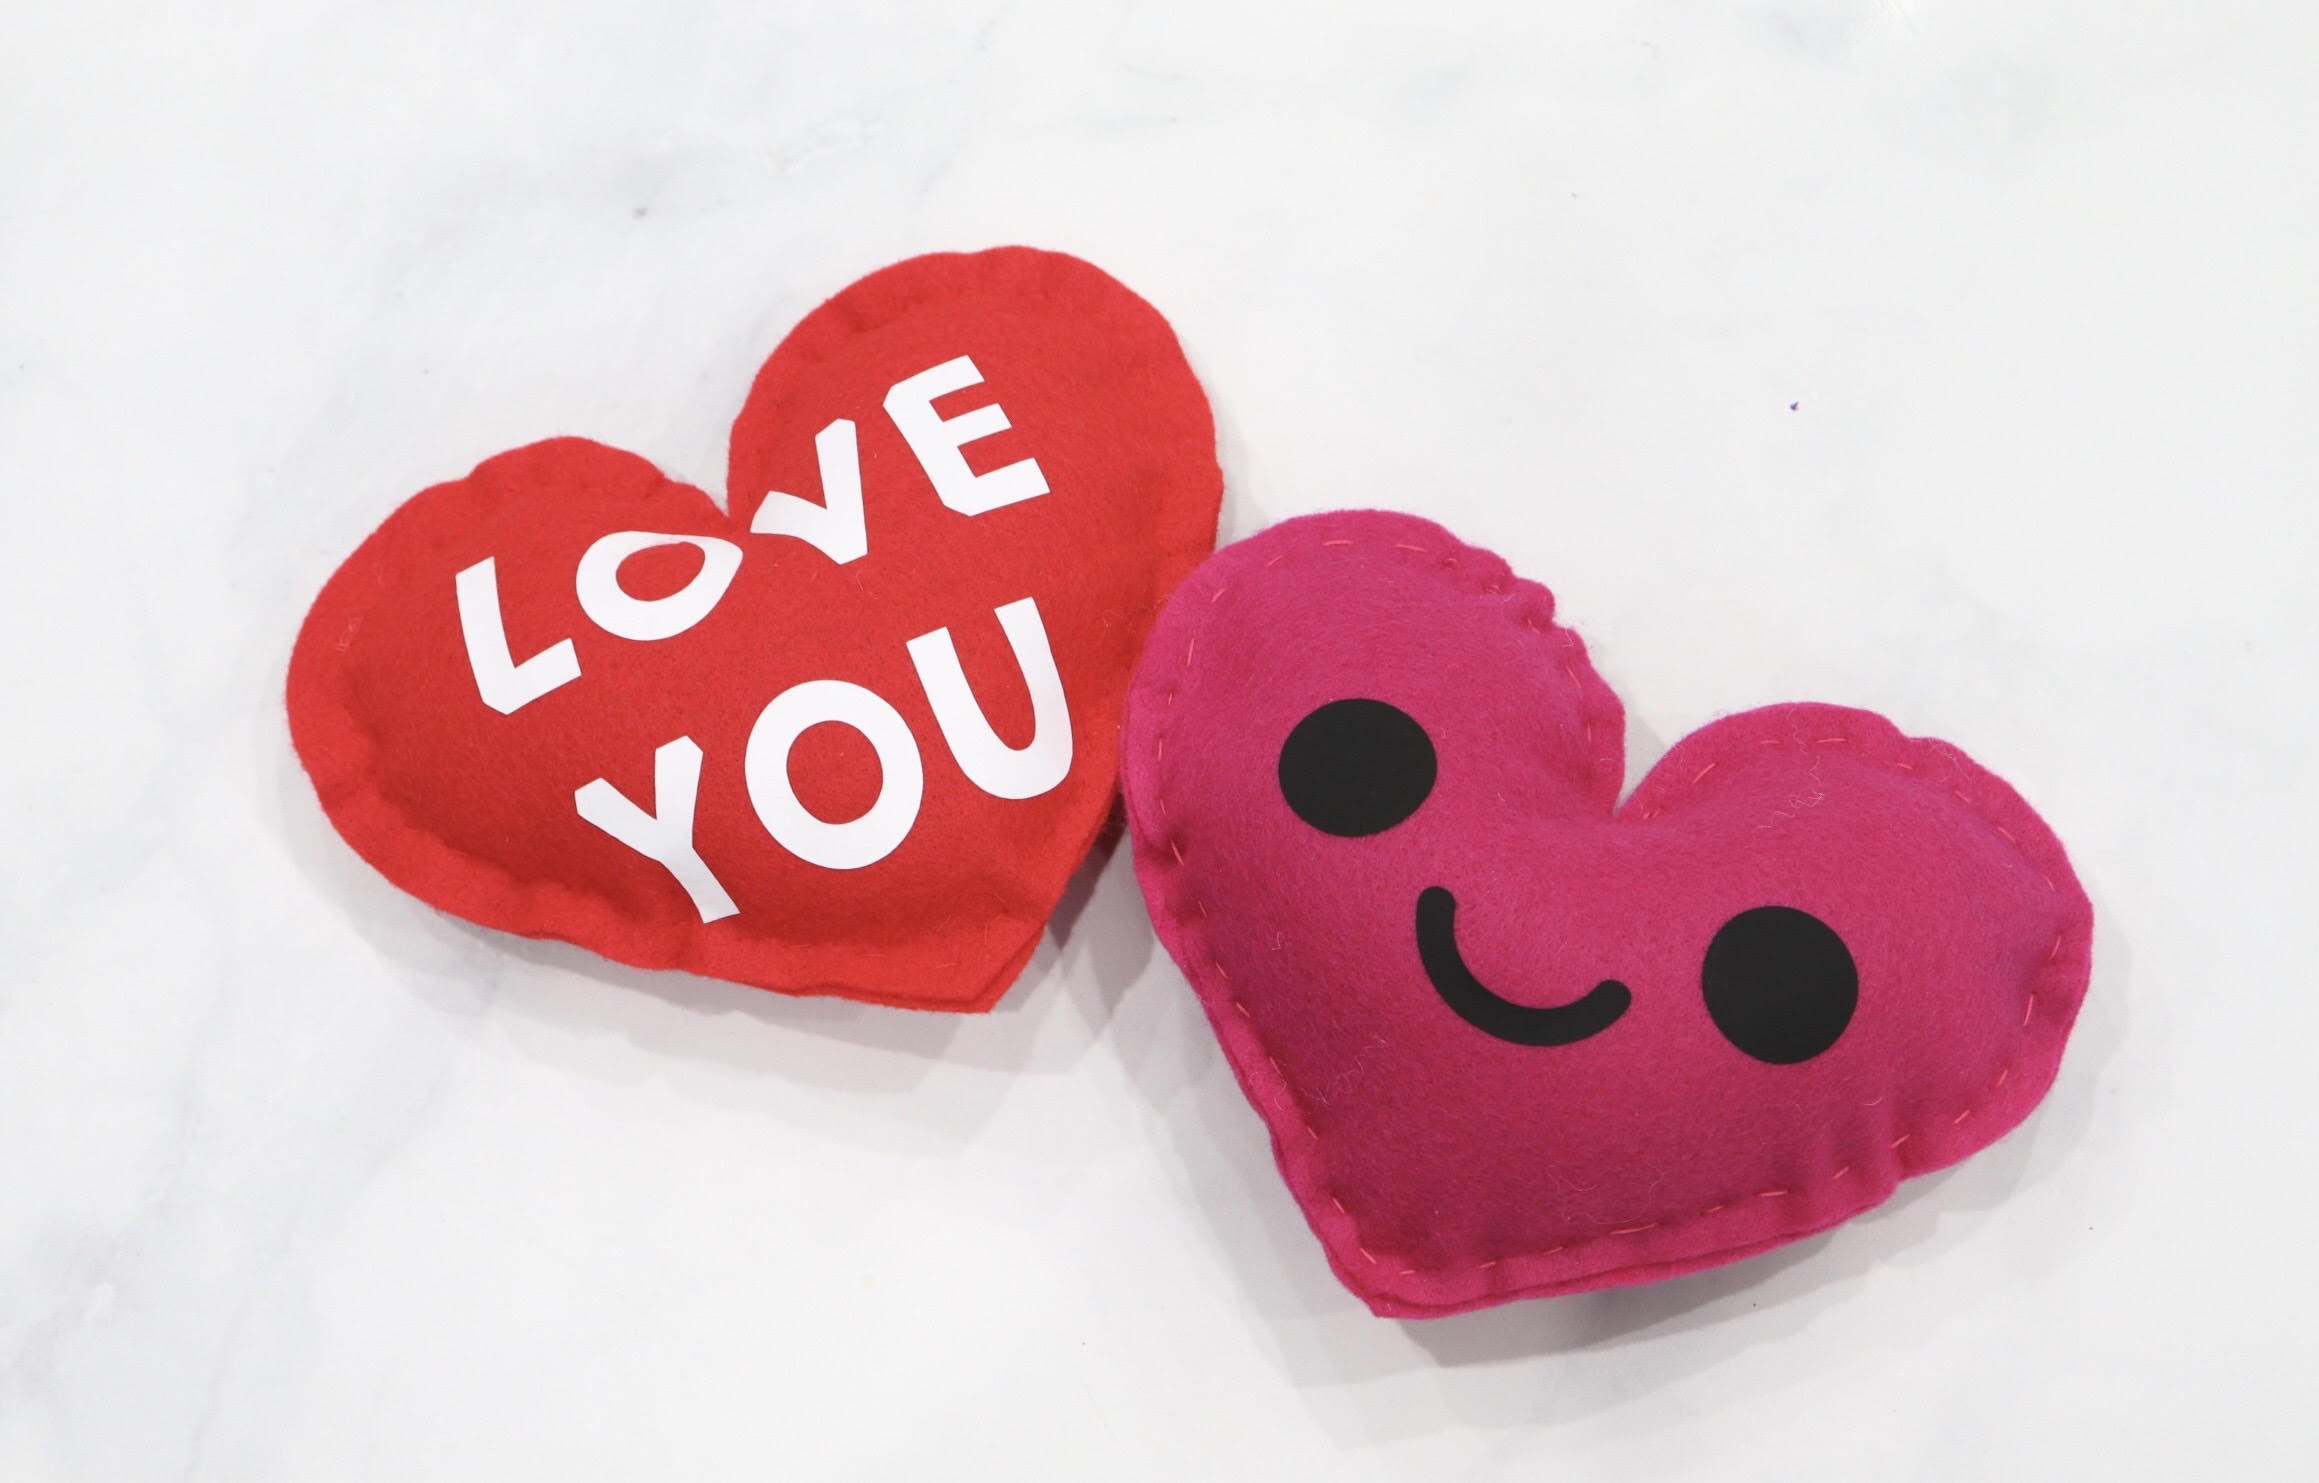
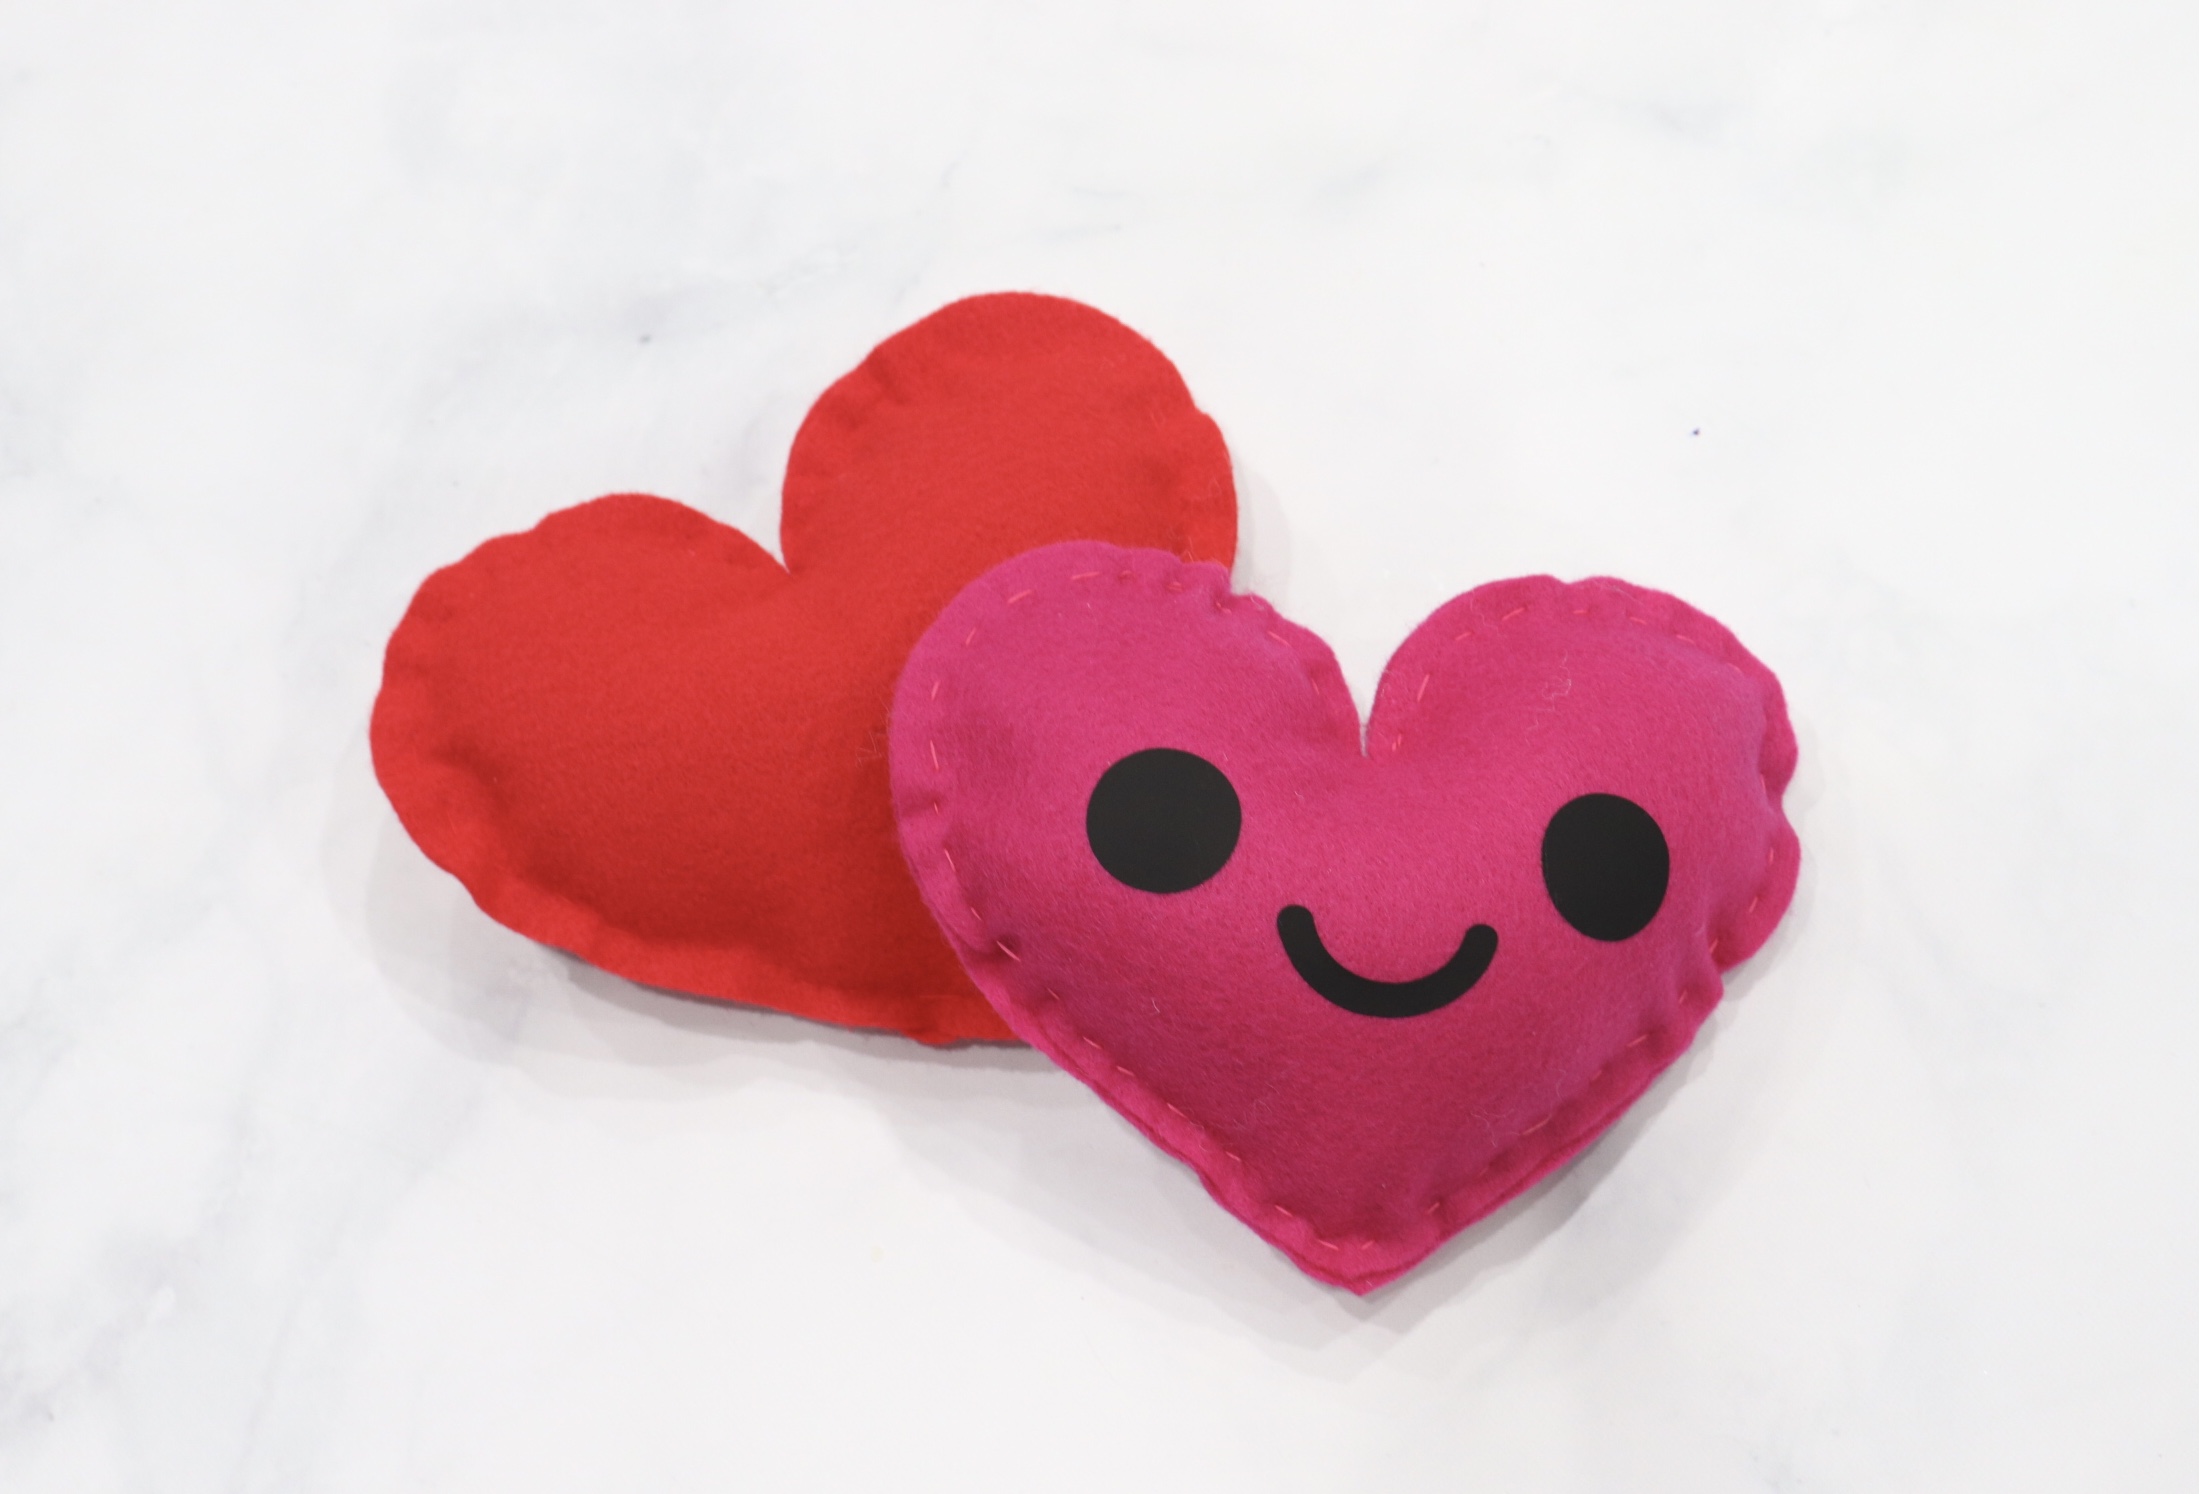
Little Crafter chose to write the message “Love You” for one heart and give the other a smiling face (Image: Smiling Kawaii Face #M11CA33E4 in Cricut Design Space). He sized them to fit his hearts and sent the designs to the Cricut to cut from Iron-On Vinyl. When working with Iron-On, it’s important to remember to mirror your design and load the material with the shiny side facing down.
If you don’t have a Cricut yet, but want to add something extra, you can use fabric paint, google eyes, and other basic craft supplies you have on hand.
Step 3 (optional): Weed the vinyl design.
This means getting rid of all the vinyl that isn’t part of what you want to put on your heart. Don’t forget to remove little areas like the insides of closed letters (o, e, a…). You can do this with your fingers or use a tool like tweezers to help.

Step 4 (optional): Adhere the vinyl to one of the hearts with heat.
Check the Cricut Heat Guide for an exact recommended temperature and time for your materials. Ours was 30 seconds at 280 degrees Fahrenheit. Place the felt heart on top of an EasyPress Mat or folded towel, then position the design in the center of the heart. Apply heat, then allow the vinyl to cool before peeling off the clear paper.
Step 5: Place one heart on top of the other and stitch around the outside edges.
Little Crafter wanted to hand sew, but you could also do this on a sewing machine. Make sure to leave an opening for stuffing the inside!
Step 6: Add Poly-fil.
You can make your hearts as puffy or as flat as you like.
Step 7: Stitch the opening shut.
This will finish your project!
These are so fun to create and are a great project for all ages. It’s a wonderful way to introduce kids to hand sewing and you can personalize them by adding whatever special messages you like. Little Crafter loved making them, and is now creating more for family and friends, as well as making some to sell. (If you’d like to place an order, you can email littlecrafter08 at gmail.com) If you try this project, we’d love to see; be sure to share your photos in the Amy Latta & Friends Facebook Group. Also, be sure to check out my other Valentine’s Day themed projects for more inspiration.


2 Comments