Holiday Living Room Tour Blog Hop
Christmas is my favorite holiday, and I absolutely love having the opportunity to decorate our home for the season! I confess, I also love to see how other people decorate too…everyone has a unique style, and it’s so much fun to see all the trees and other decor on display! Today, I’m joining with a group of friends for a very special blog hop where we all invite you into our homes for a tour of each of our living rooms.
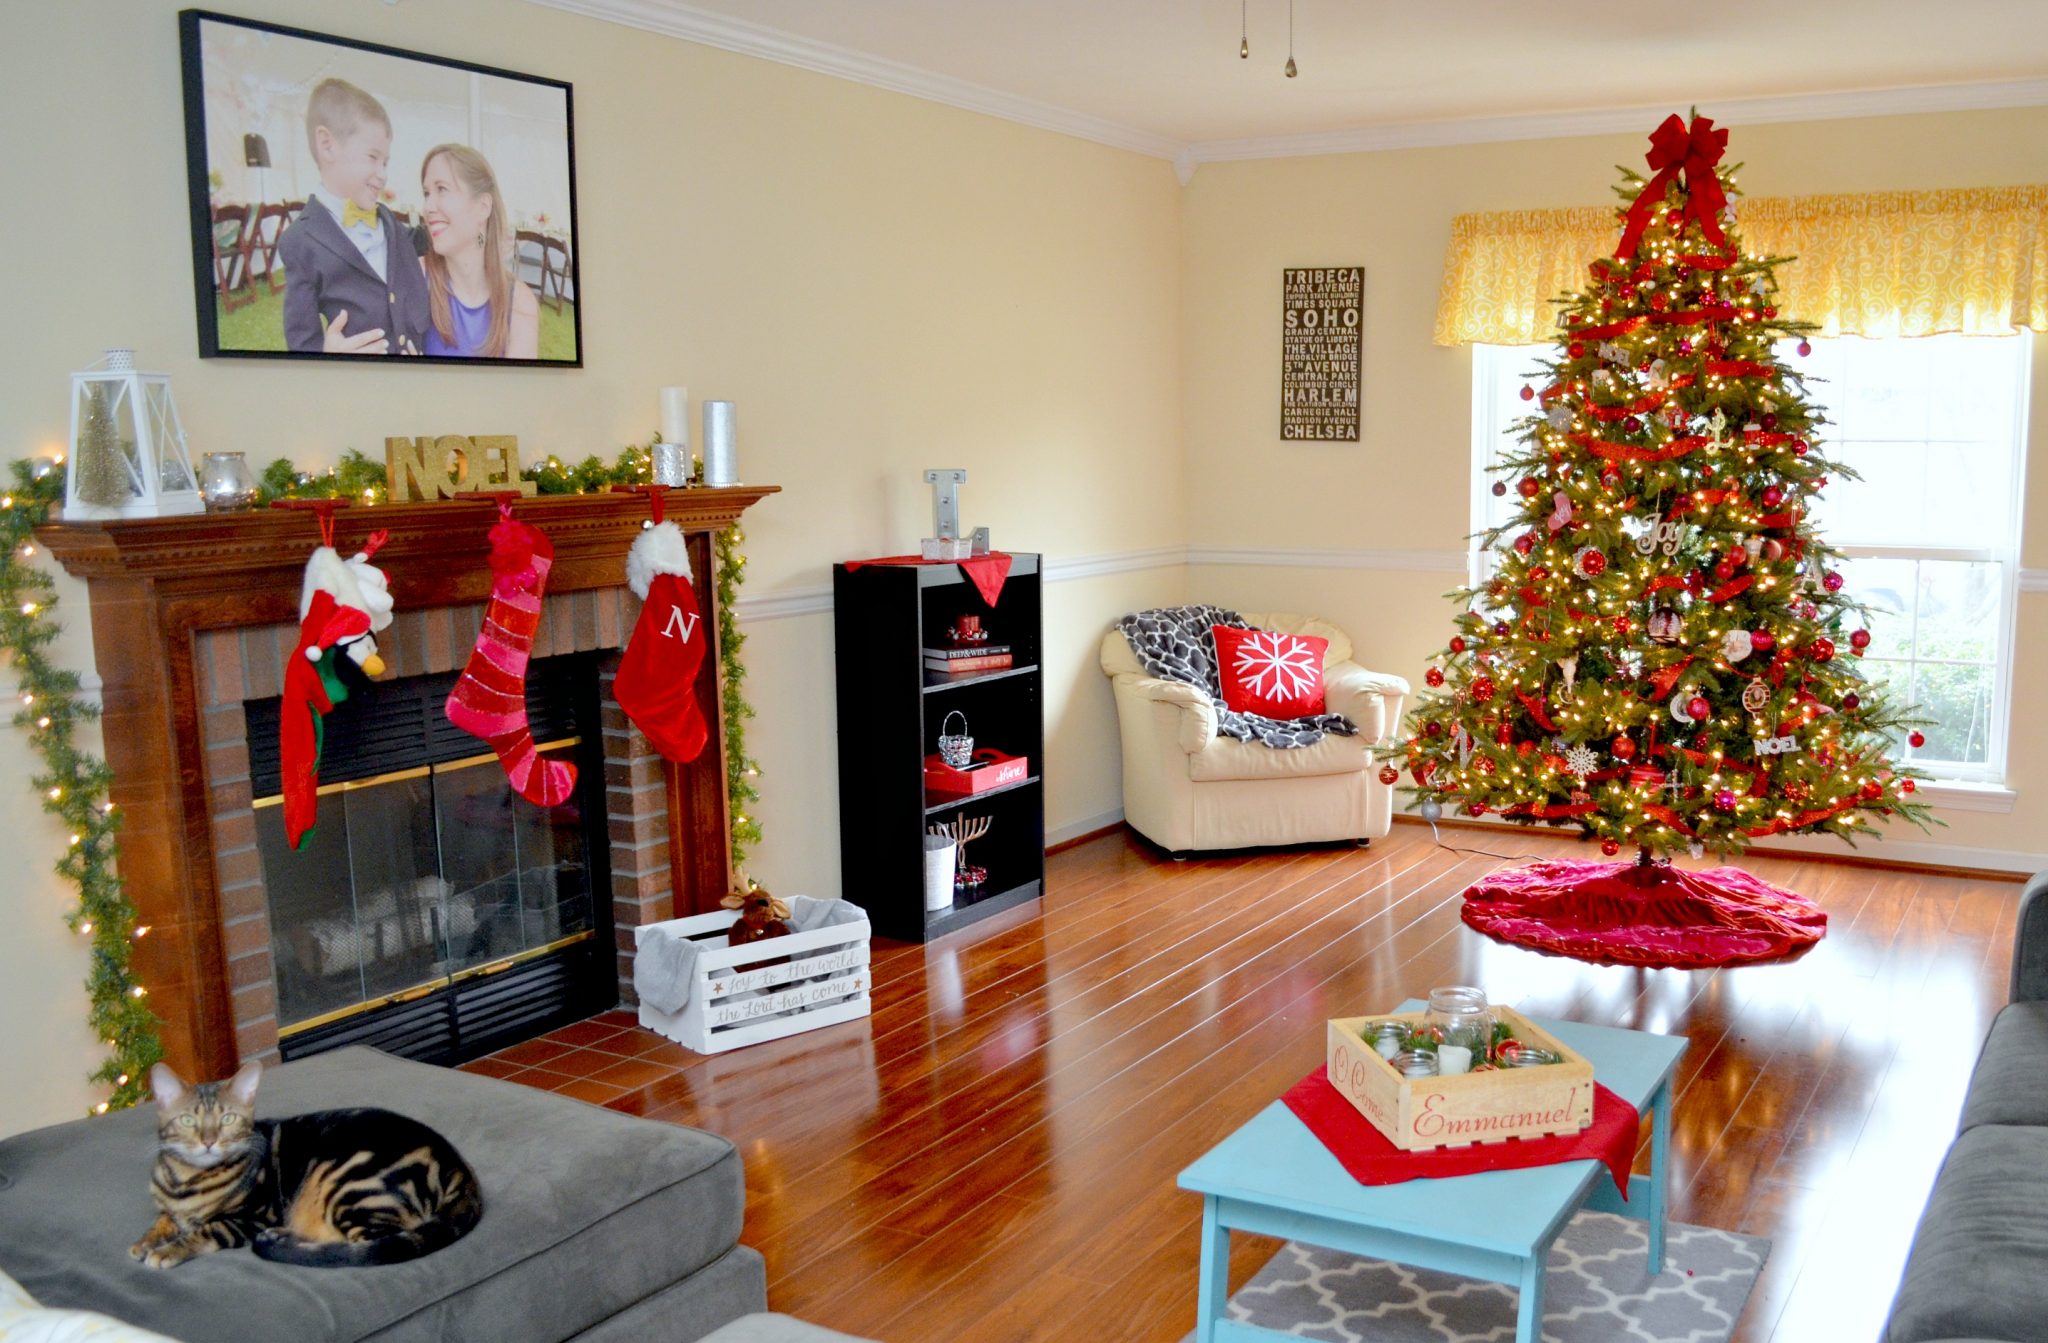
So…welcome to mine! Technically, I guess it’s our family room rather than our living room, but we actually refer to this as the “beautiful room” all year round, and it’s the room that sold the house. When we first saw it a year and a half ago, we fell in love with the flooring, the fireplace, and just the space itself. We knew it would allows us to do all kinds of hosting, especially around the holidays, and I couldn’t wait to put a Christmas tree right by the big double window. It’s everything I hoped it would be and more.
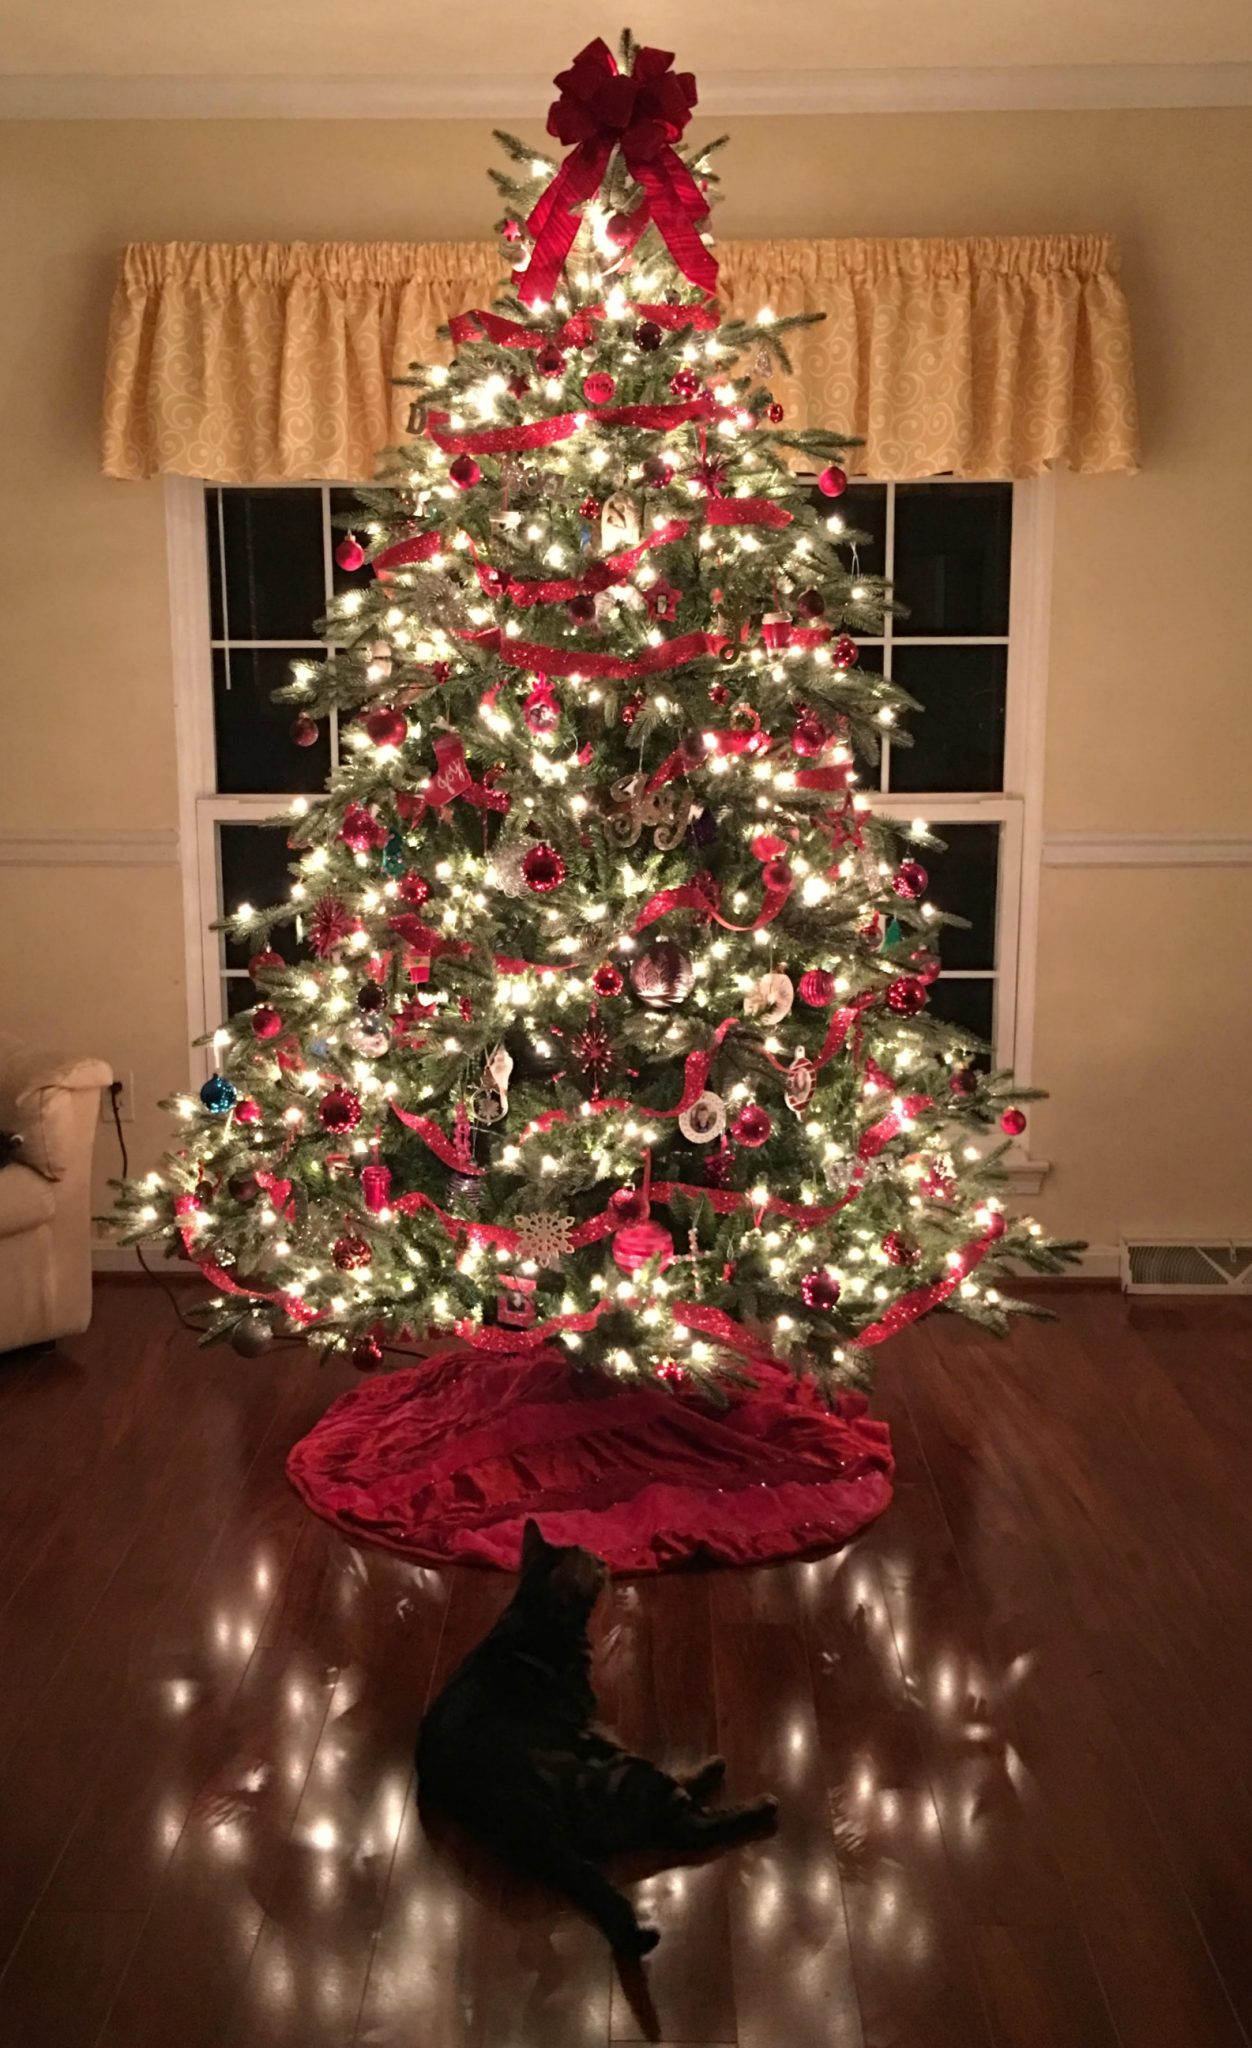
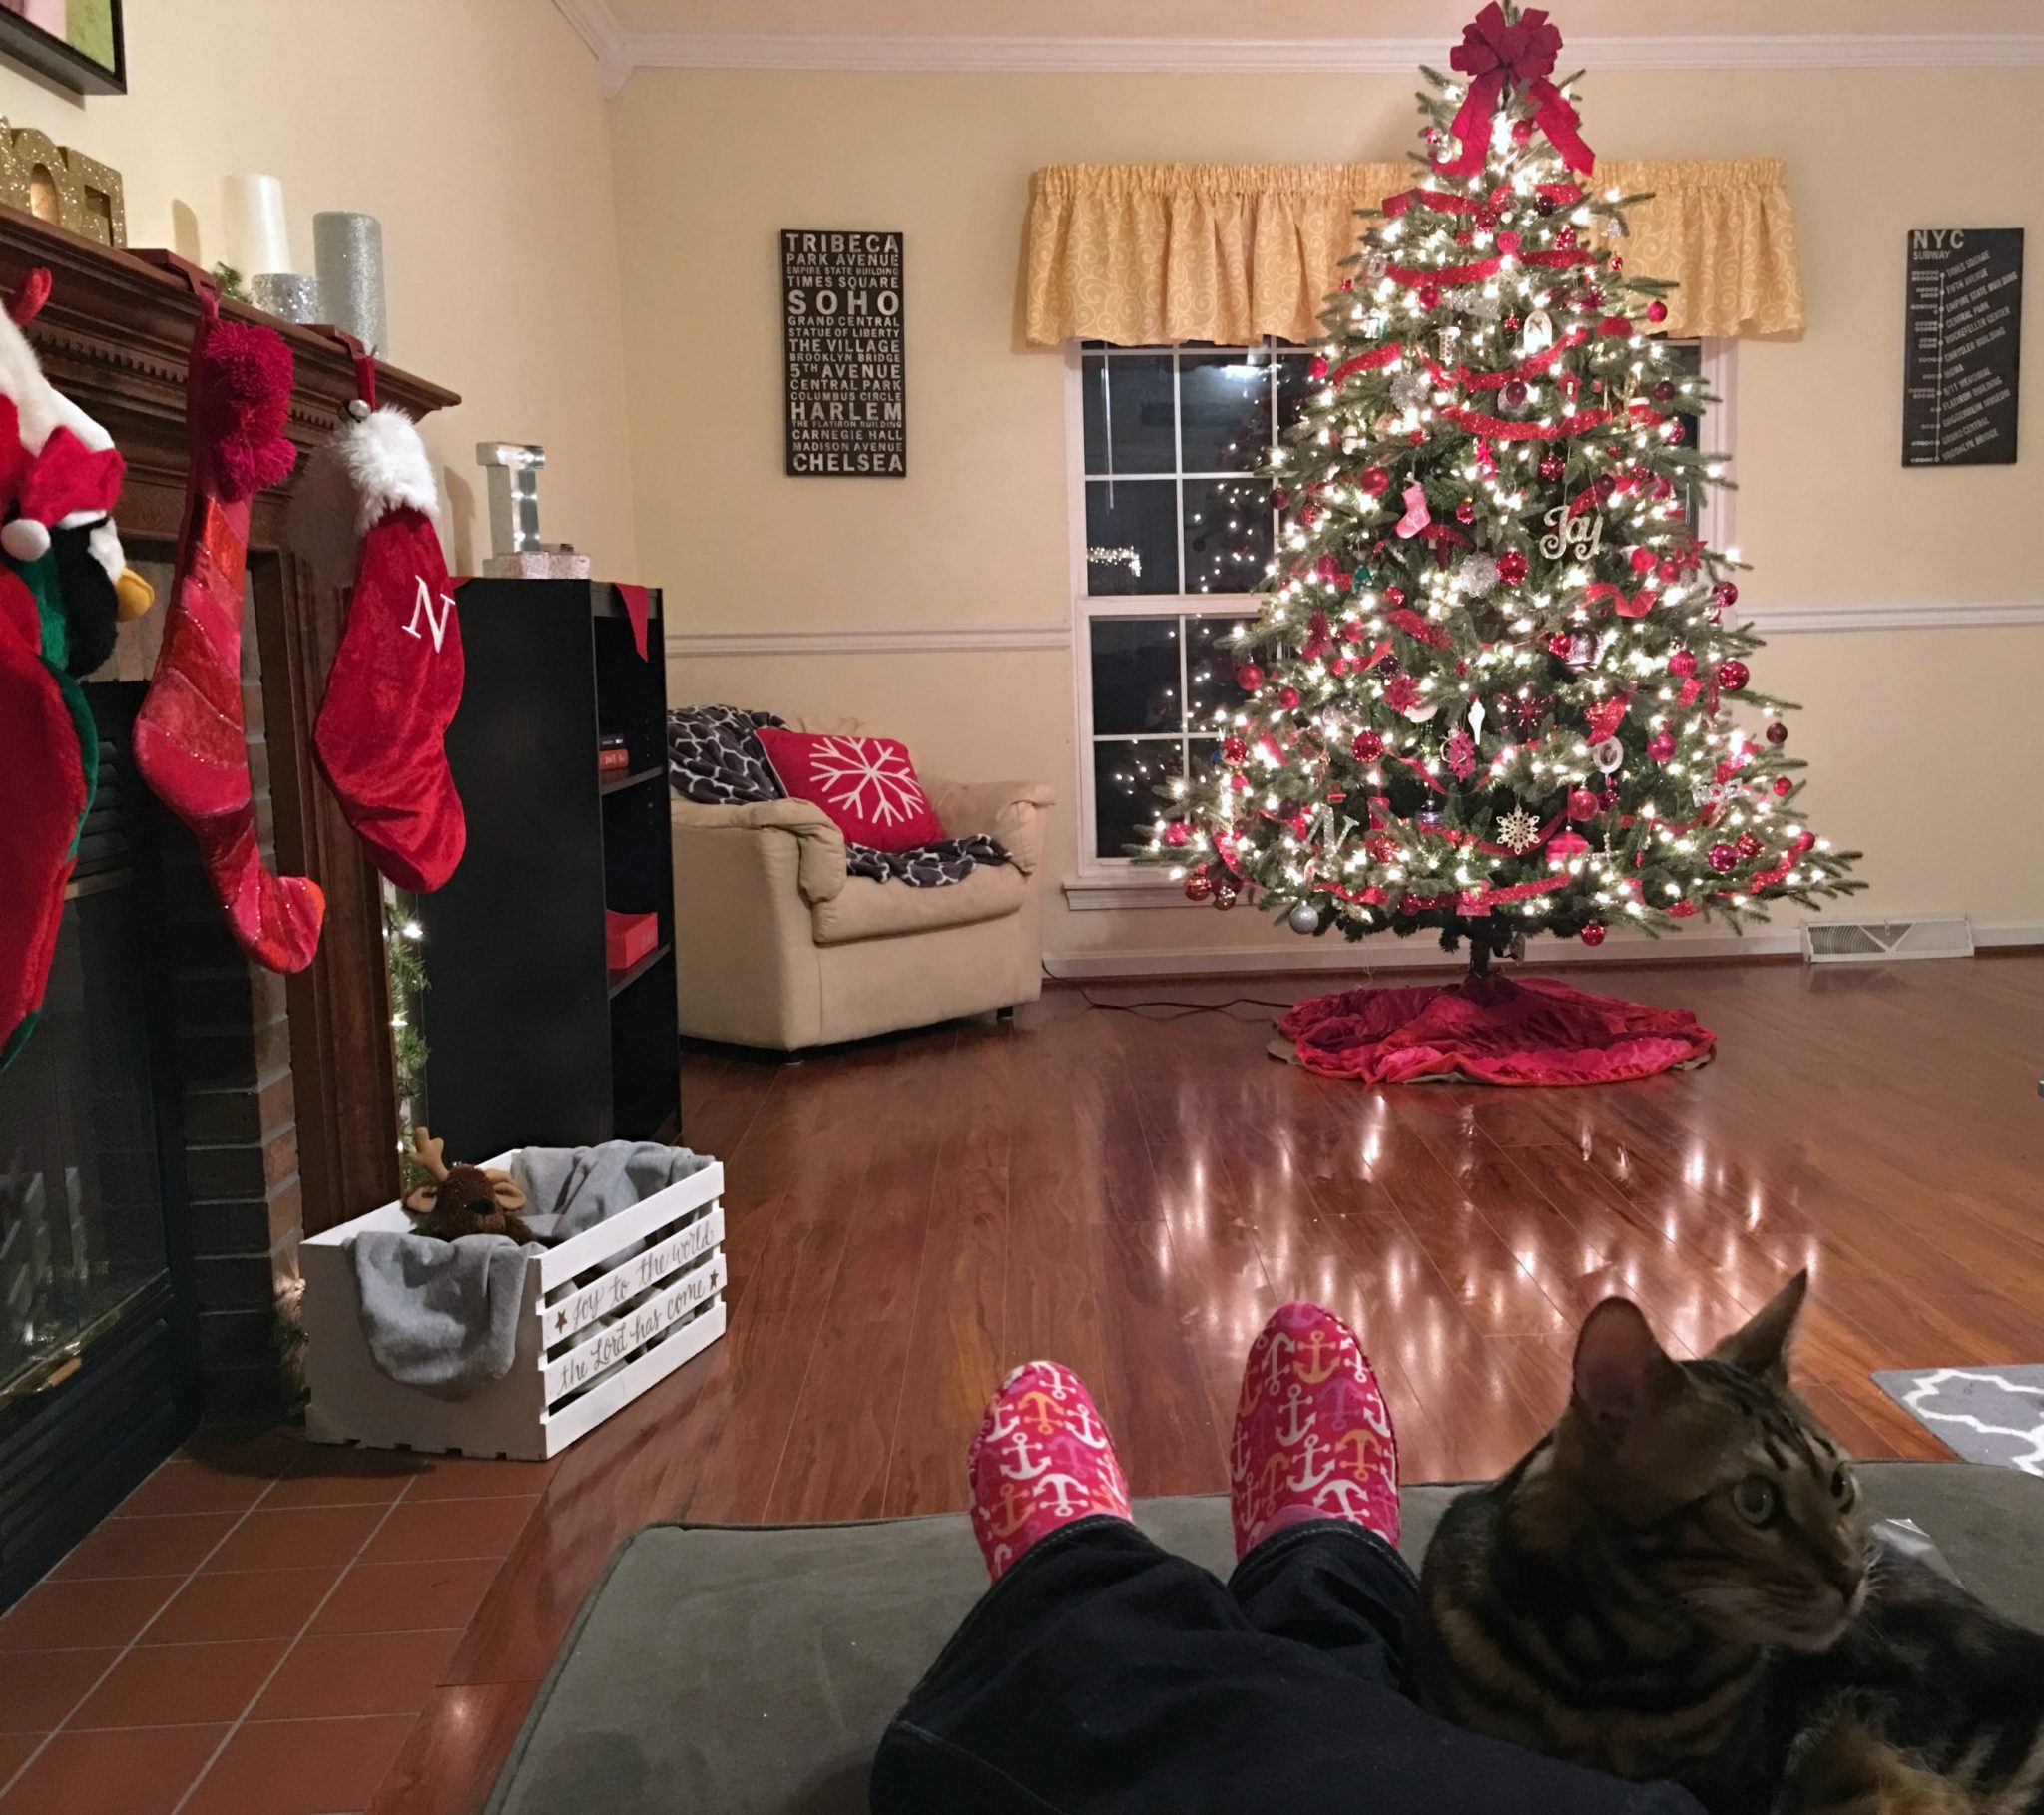
The tree itself is the focal point of the room and the central piece of our decor. It’s a 7.5′ pre-lit artificial Frasier Fir, and it’s about as full of ornaments as it can be! Many of them are personal ornaments, some of which hubby and I brought into marriage with us, and some of which were made or given to us by friends and family members. There are also a number of handmade ornaments that Little Crafter and I have created over the years. It’s gorgeous all day long, but nothing compares to a Christmas tree at night, right?
I’m always asked how I manage to make our tree look unified despite the huge variety of ornaments we have, so I wanted to share my tricks with you.
- Choose a color scheme. Mine is, as you can see, primarily red with a touch of pinks and gold/silver.
- Find a pretty garland and topper in your color and start by putting those on your tree. My garland is wide glitter ribbon I found at Walmart last year. I also made my bow from glittered holiday ribbon.
- Place your personal ornaments next, hanging them further in on the branches. You still want them to be visible, but don’t hang them right on the ends of the branches.
- Hang any of your ornaments that happen to work with your color scheme in more conspicuous places. For me, that’s anything red, metallic, or neutral. I have lots of ornaments that are one of a kind but happen to be one of those colors. Those go slightly further out on the branches.
- Purchase a pack {or several} of lightweight ornaments in your desired color. Hang them all over the tree on the ends of the branches to pull the look together. I have red ball shaped ornaments in two different sizes and a combination of shiny, matte, and glittered, as well as some small red stars.
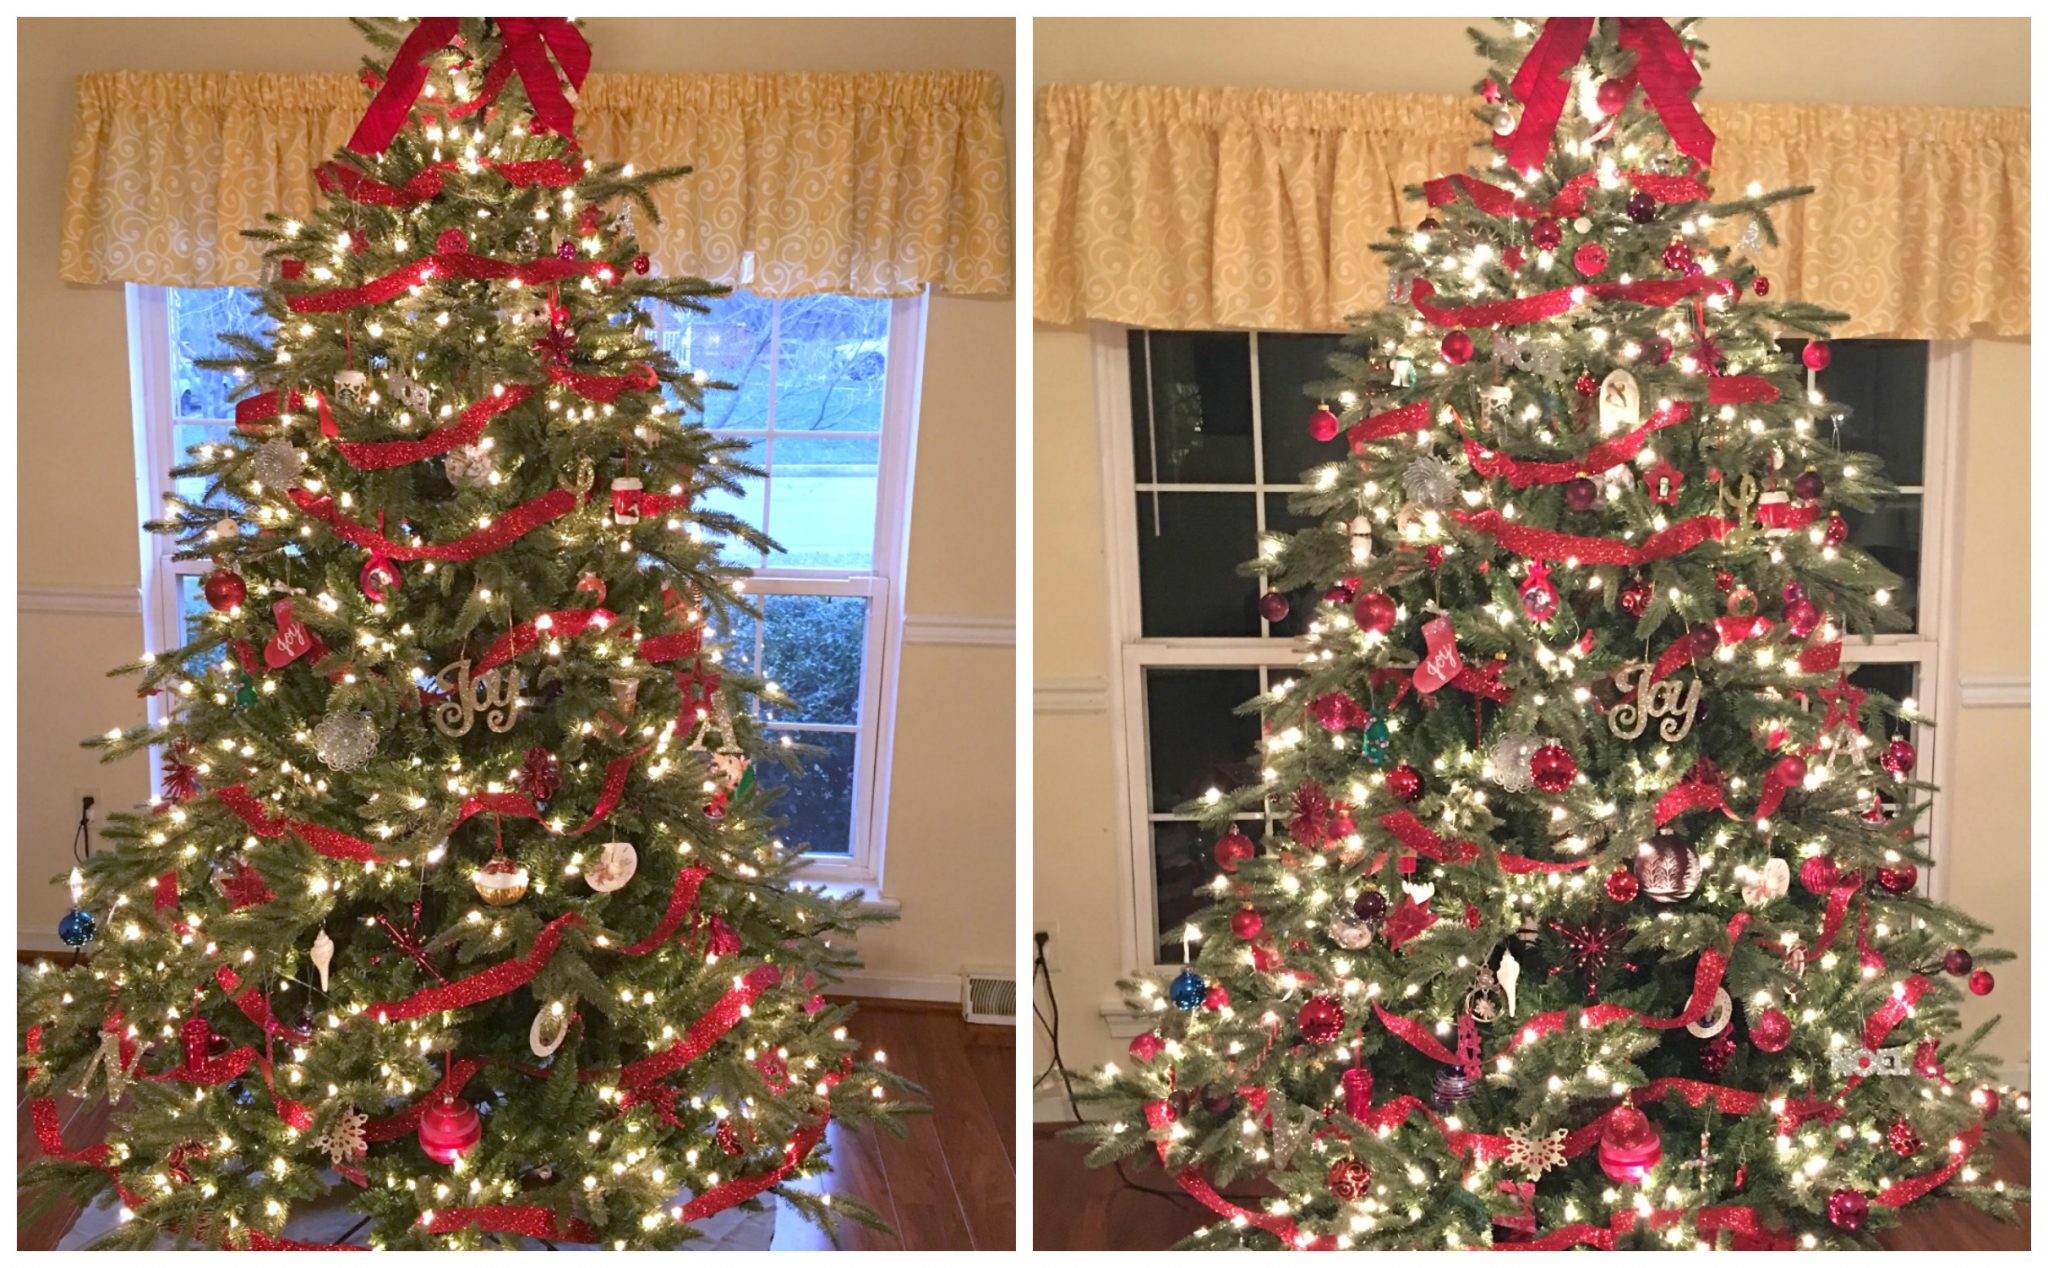
That’s all there is to it! The red is the first thing people notice when they see the tree, and it looks like a unified whole, but as they look closer, they see all the unique, individual ornaments that make up that whole. Make sense? Here’s a look at my tree after step 4 {left} and after step 5 {right}. See the difference? I love having a tree that looks gorgeous and “put-together” without sacrificing the ornaments that mean so much to us!
Next to the tree, we have a comfy chair where you can sit and enjoy it, complete with a super soft throw {Kohl’s} and a bright red snowflake pillow {Target}. Beside the chair is the same black bookcase that always sits in that spot, but its shelves got a total Christmas makeover! To see how I normally style it, check out this post.
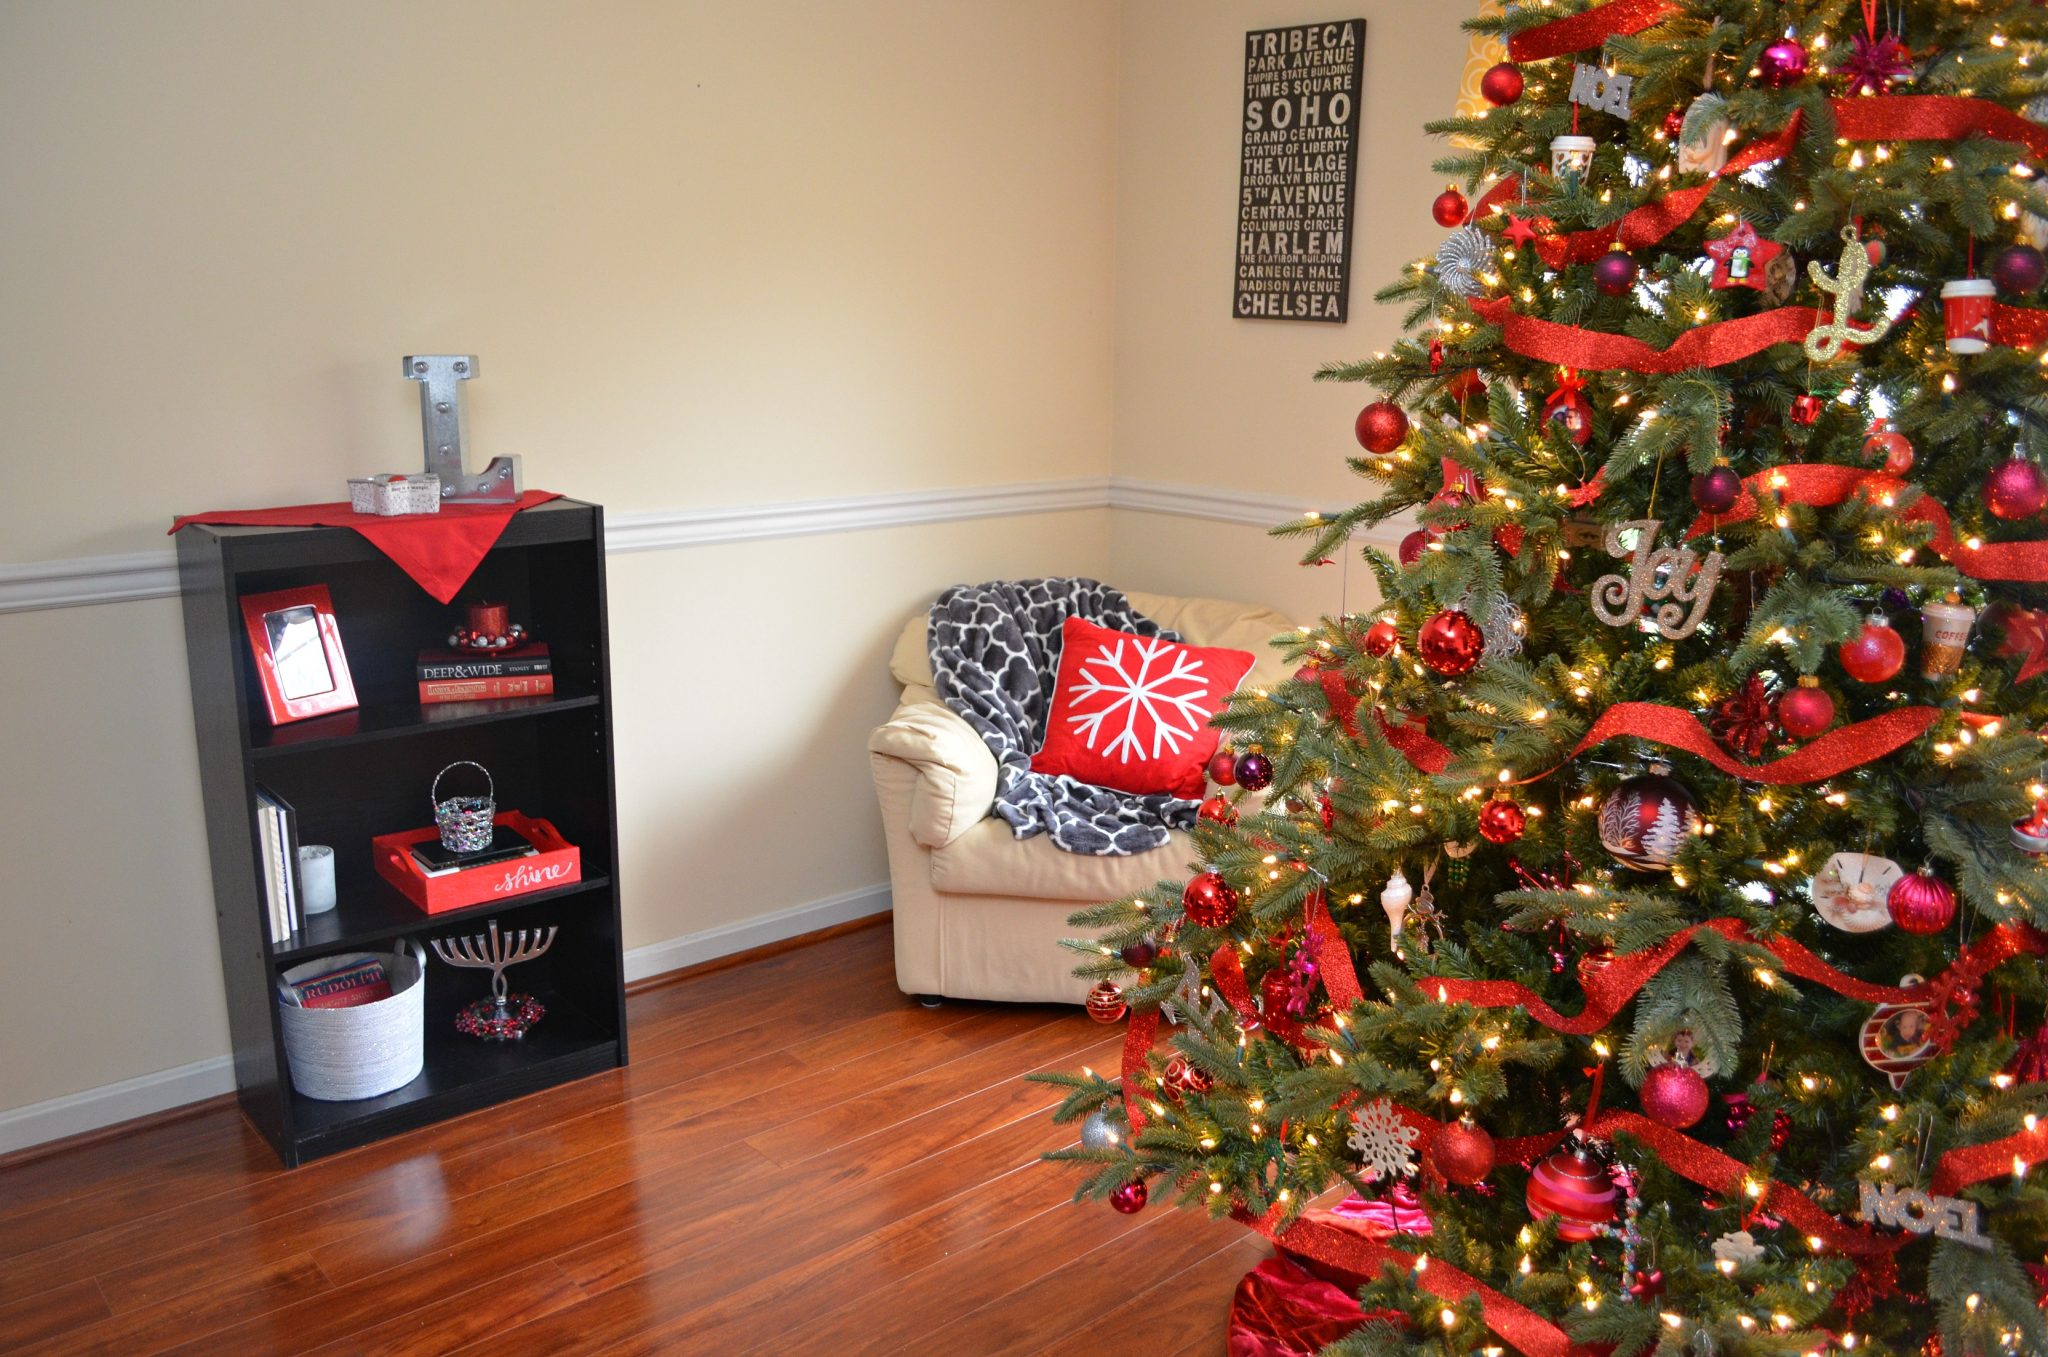
To make it festive for the season, I started with the shelves. For the top shelf, I chose two books with red and black covers and placed them under a red glitter candle. I also displayed a photo of Little Crafter on Santa’s lap several years ago in a red glitter frame. The second shelf always holds our Shutterfly photo books, and that didn’t change. I just stood them up on the left side and used a wintery votive holder as a bookend. Next to them, I placed the red wooden tray I created last year, filled with a few books and topped with a glittery basket holding tiny multicolored ornaments. Finally, on the bottom shelf, I displayed our menorah {yes, we celebrate Hanukkah too since we have Jewish family and friends} and a collection of Christmas children’s books. The books are stored in a gorgeous white and silver basket I scored for $3 in the Target Dollar Spot a few weeks ago!
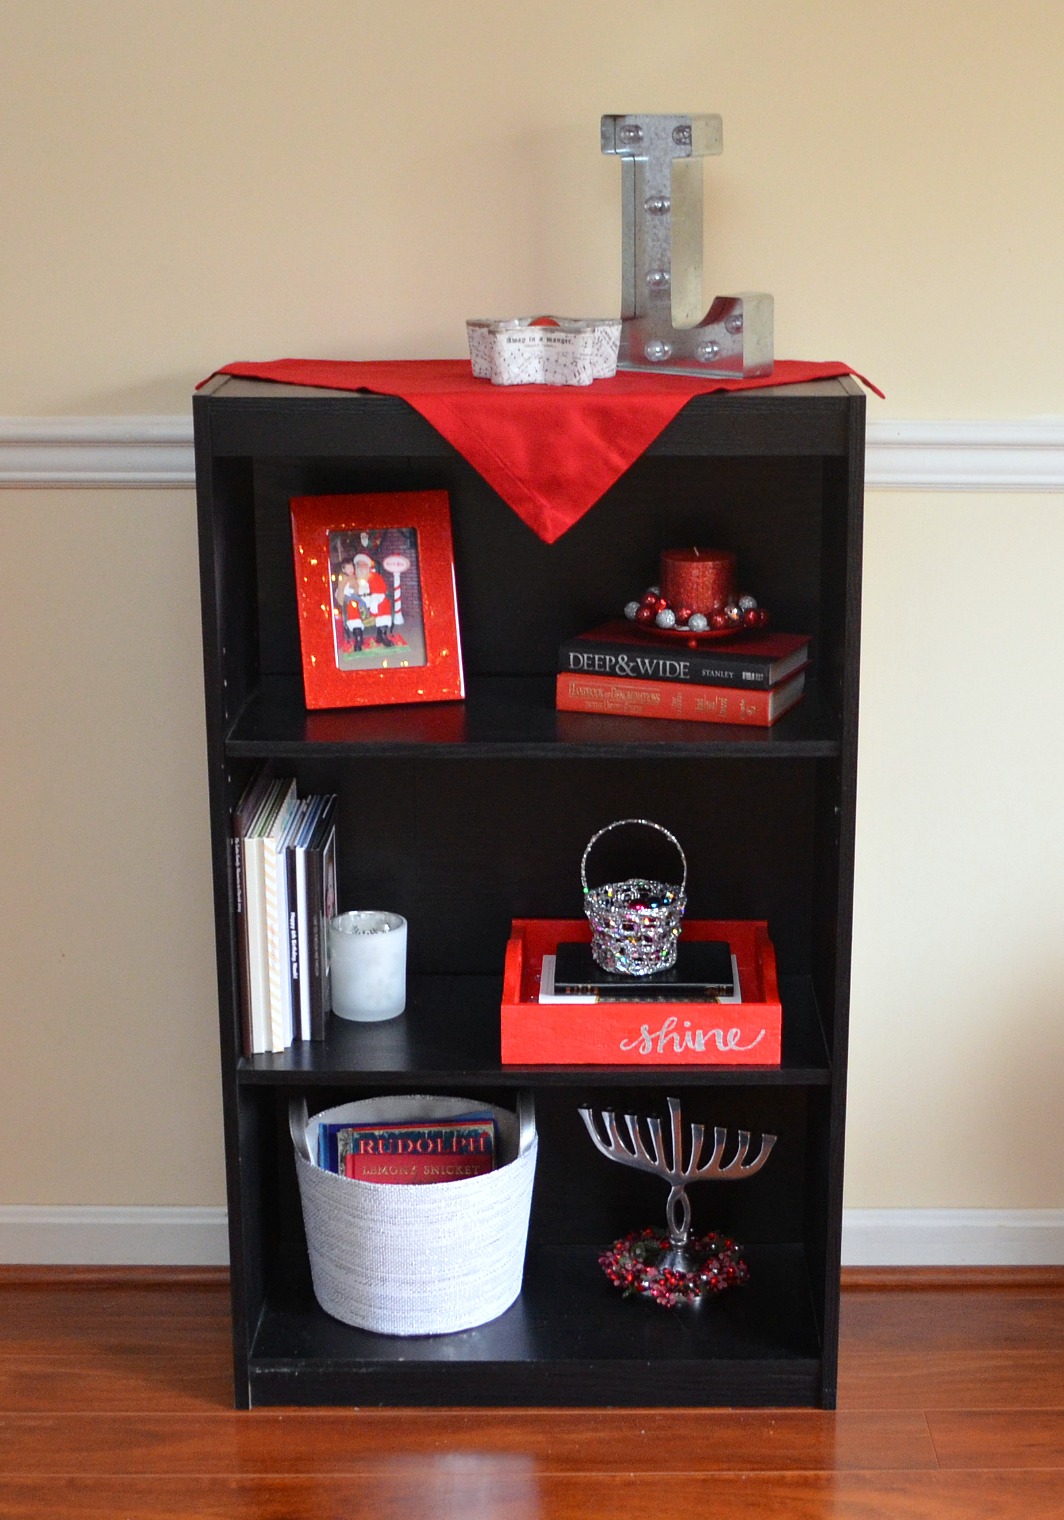
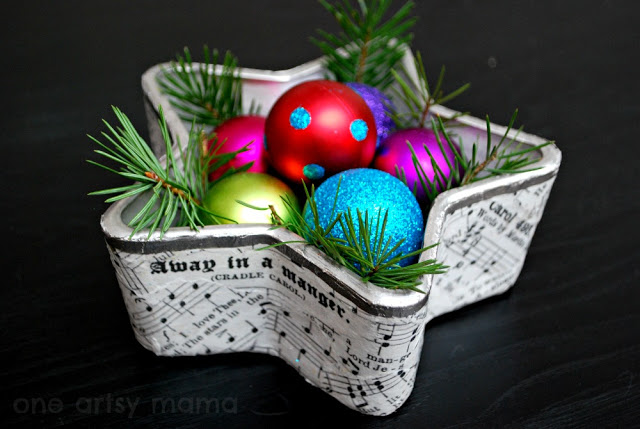
On top of the bookcase, I have a red napkin to add a pop of color, along with a marquee monogram and the Mod Podge Christmas Carol Star Dish I created back in 2012…how was that four years ago?!
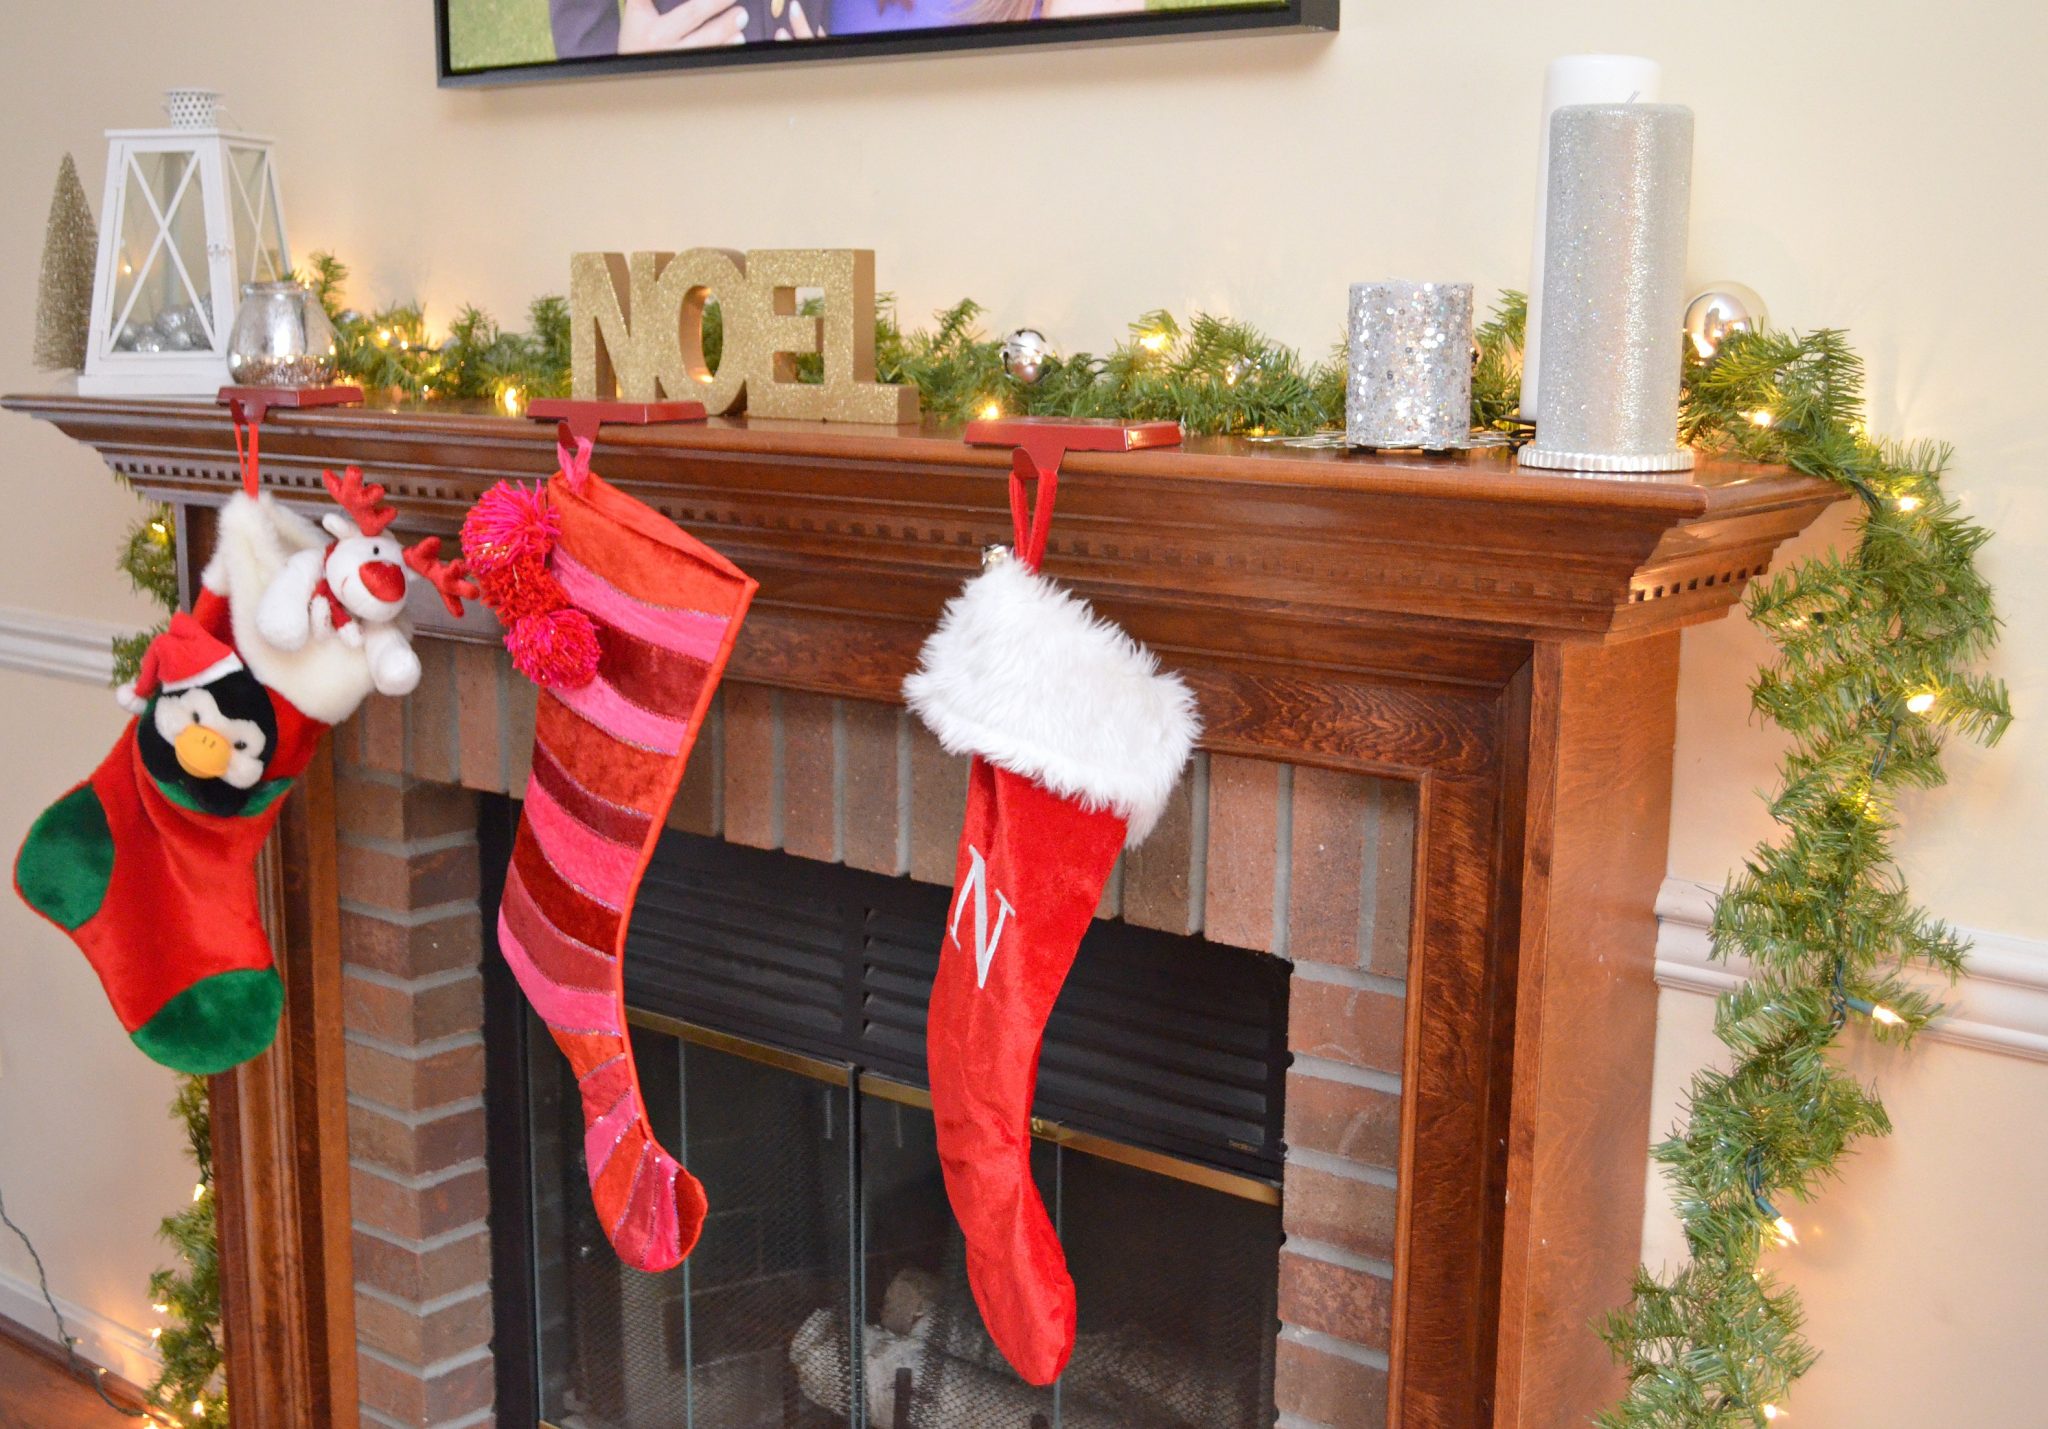
Moving along that side of the room, our next stop is the fireplace! I was beyond thrilled when we moved to this house and I finally got a mantel. I love to decorate it all year, but especially for Christmas! First, I add a pre-lit garland and tuck in some silver ornaments and jingle bells. My glittered NOEL goes in the center, then I add metallic accent pieces on either side. Our stocking holders were originally black, until I gave them a coat of Krylon Cherry Red Gloss. Guess which stocking is mine!
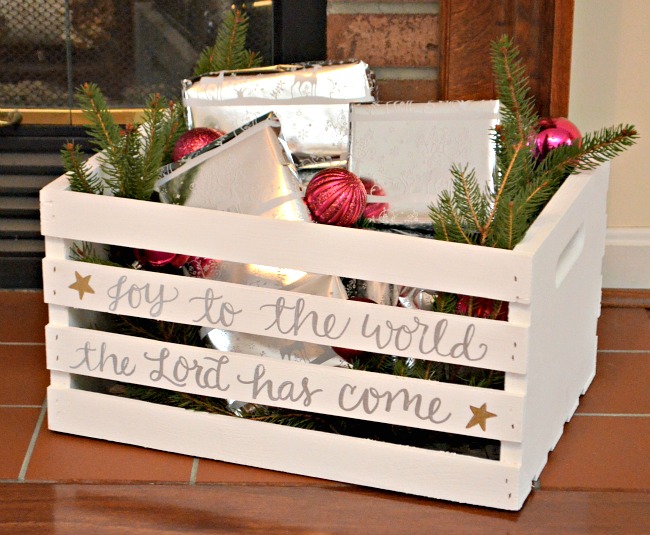
At the base of the fireplace is my DIY Advent Crate. It’s fun to fill with small gifts to open each day of December, or it’s also a great place to store a snuggly blanket.
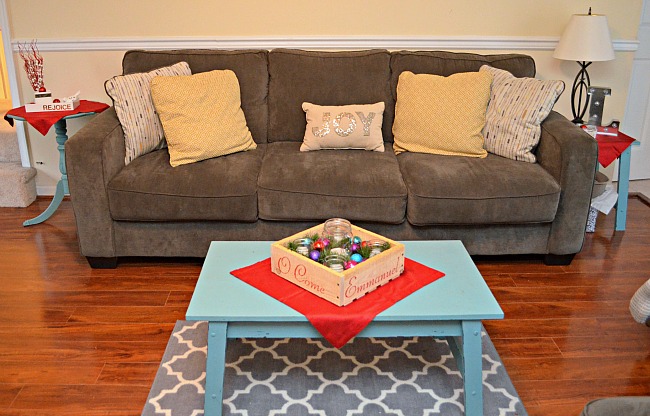
On the other side of the room is my JOY pillow as well as one of my favorite things of all, the Advent Box. It holds four small candles in mason jars, one for each of the four Sundays leading up to Christmas, and a larger Christ candle in the center. See how to make your own here.
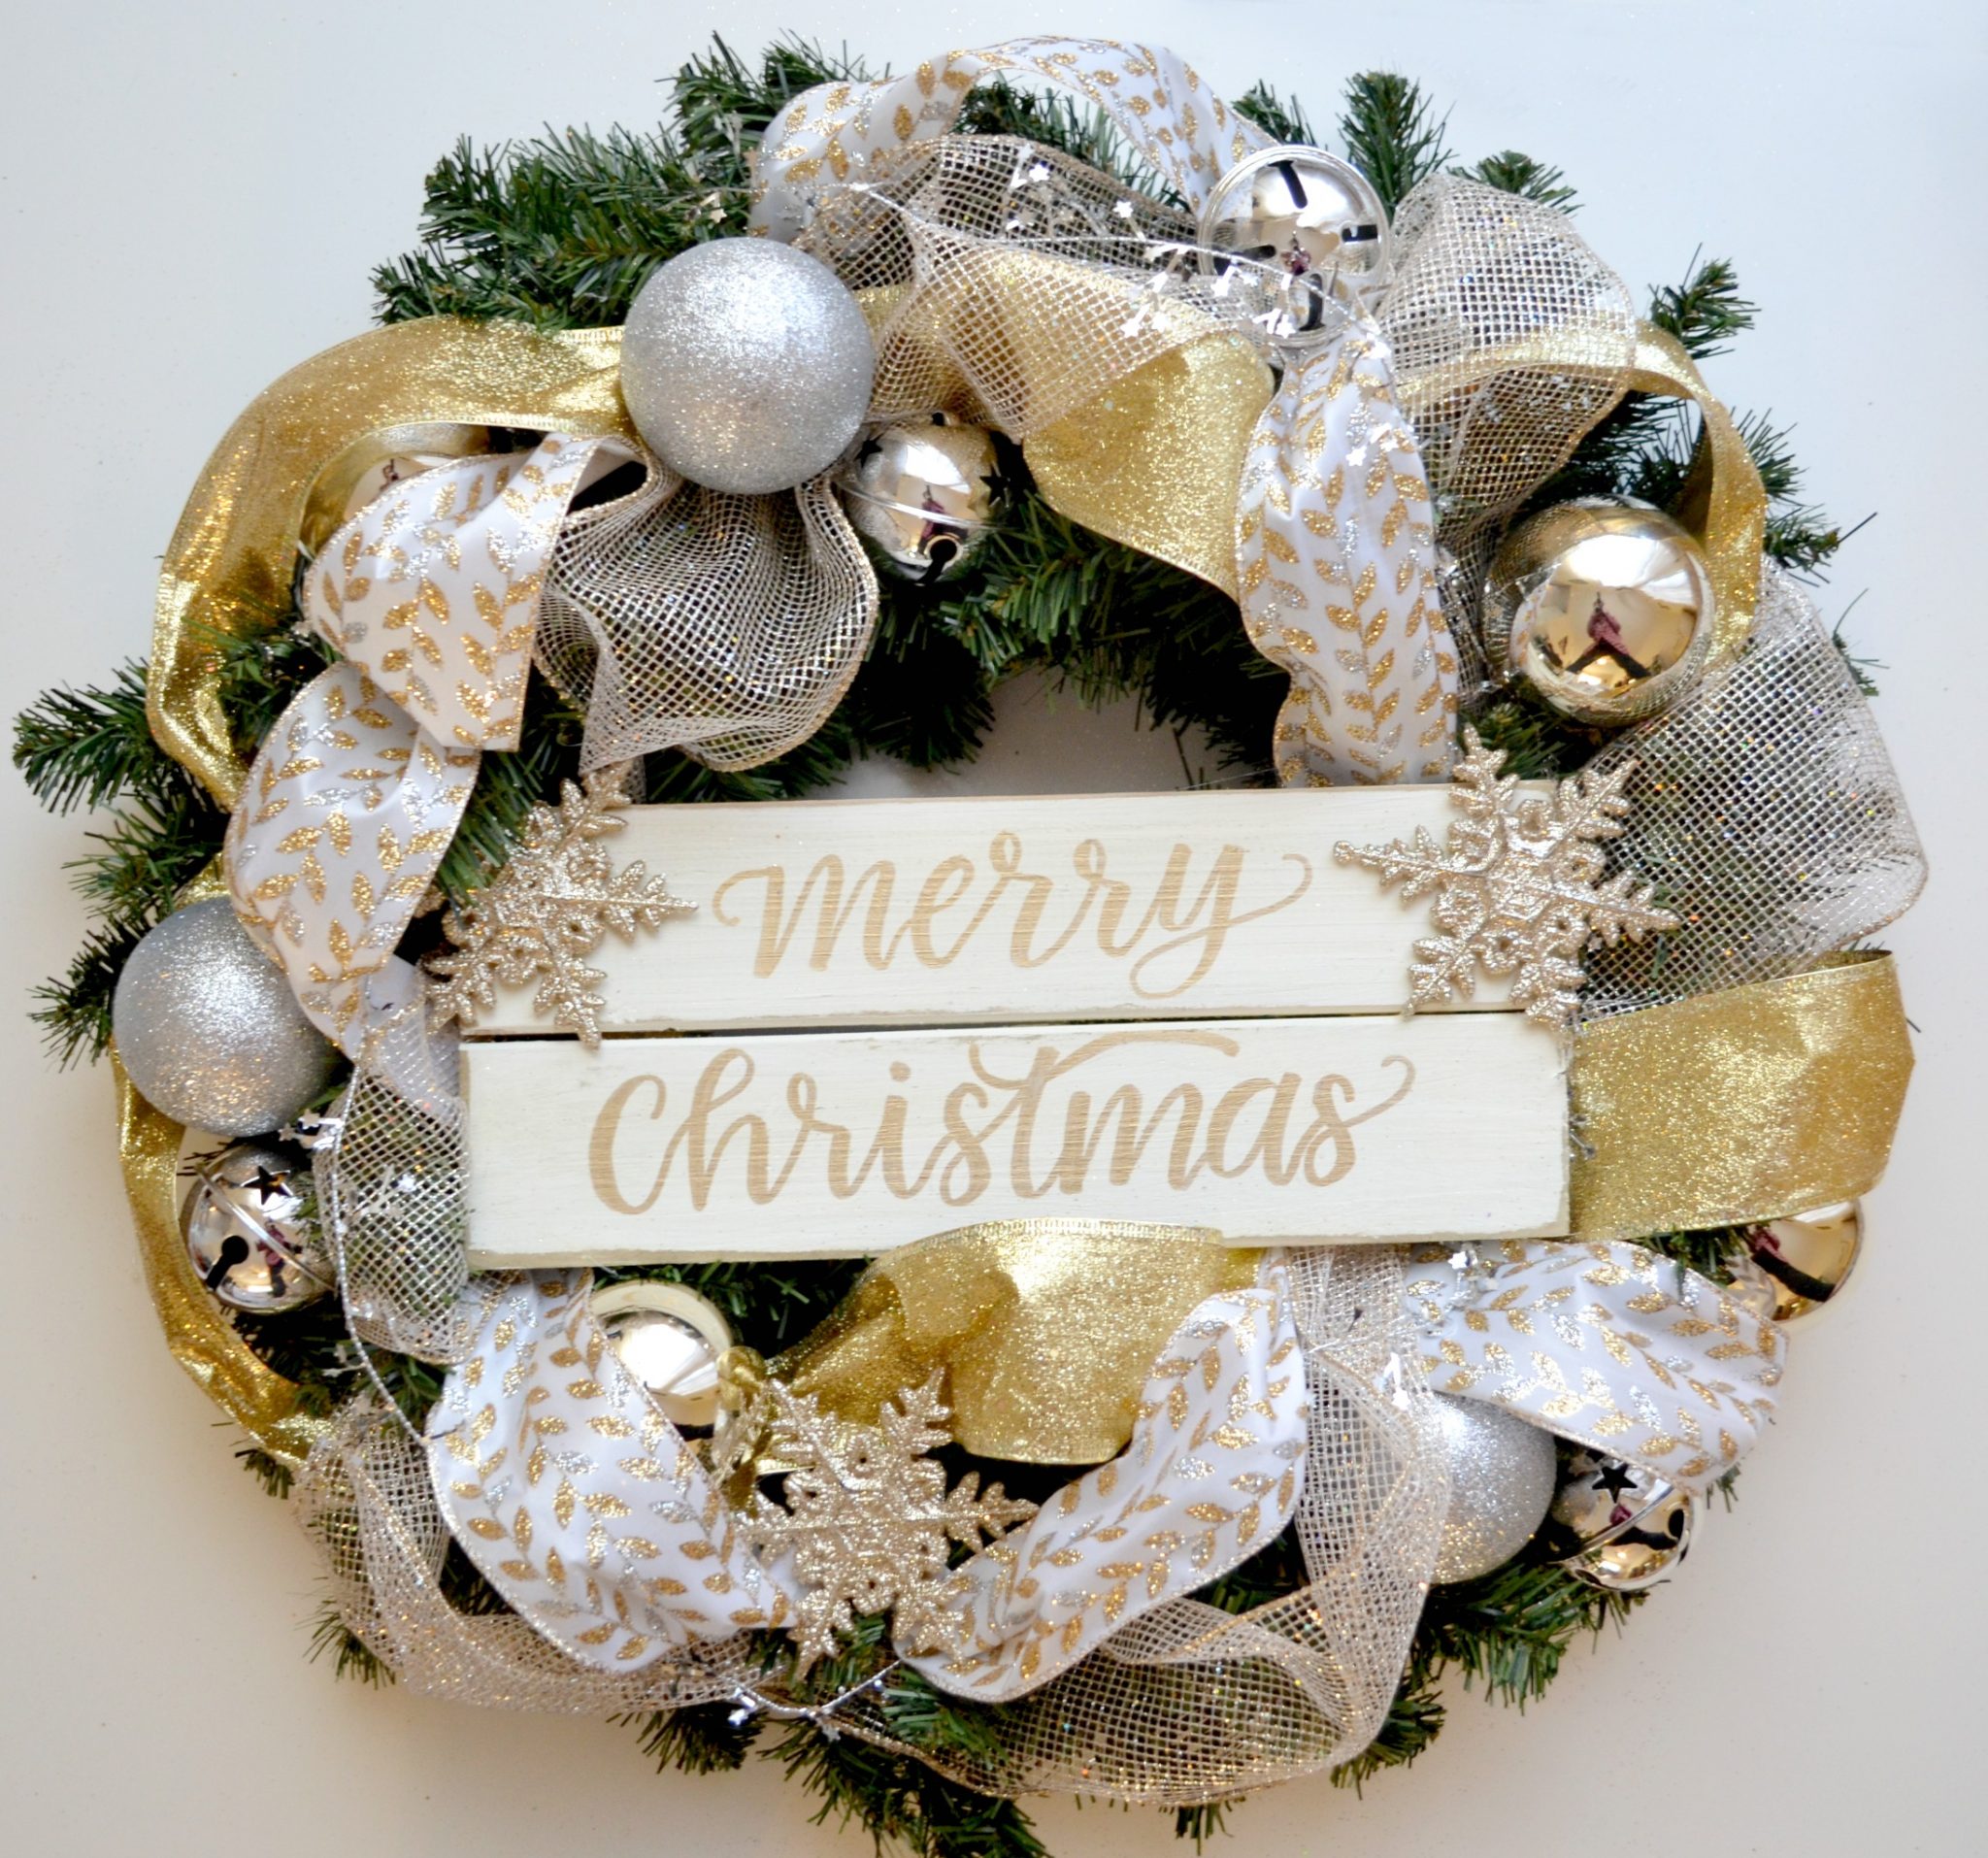
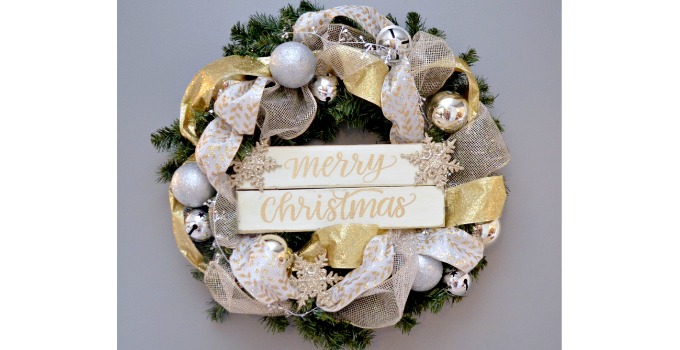
My final addition to this year’s holiday decor is this DIY Metallic Hand Lettered Wreath. I made one for our local Festival of Wreaths and loved it so much that I had to make a second one! One for me, one for them!
Thanks so much for stopping by today to tour my living room! It’s definitely my “happy place” this time of year, and I think it’s the cat’s too!
Hope you enjoyed looking around; now be sure to take a peek at my friends’ home tours as well and see how gorgeous their decor is!

Love all your red touches throughout! It’s been fun seeing everyones beautiful living rooms! Happy to be part of another blog hop with you, Amy! Happy Holidays!
I agree, it’s so fun to tour each other’s homes today! Thanks so much, Alicia!
Amy this is just so festive and fun! I see the cat loves the camera! Your tree is gorgeous and I love the presents in the crate.
Ha, that kitty is crazy but I love him so much! Thanks for having me as part of your hop, Sandra! xo
You girls with the red are making me really miss my Red! This is beautiful, Amy, and I love your tips! Brilliant advice. I love that you were so thoughtful to put out the menorah as well for your friends and family. Well done my friend! Merriest Christmas to you and your family!
Thanks so much!! I absolutely love your decor too! I have to have my red, or it doesn’t feel like Christmas…
So pretty! Loving all the red!
I’m planning to steam clean my blinds in the living room, but I recently realized that I can use some kind of cleaning spray, Can you suggest me which of these sprays is the best?
PS Your decor is great and that basket full with presents is simply awesome!
awesome tips. Many thanks! I bookmarked your blog 🙂