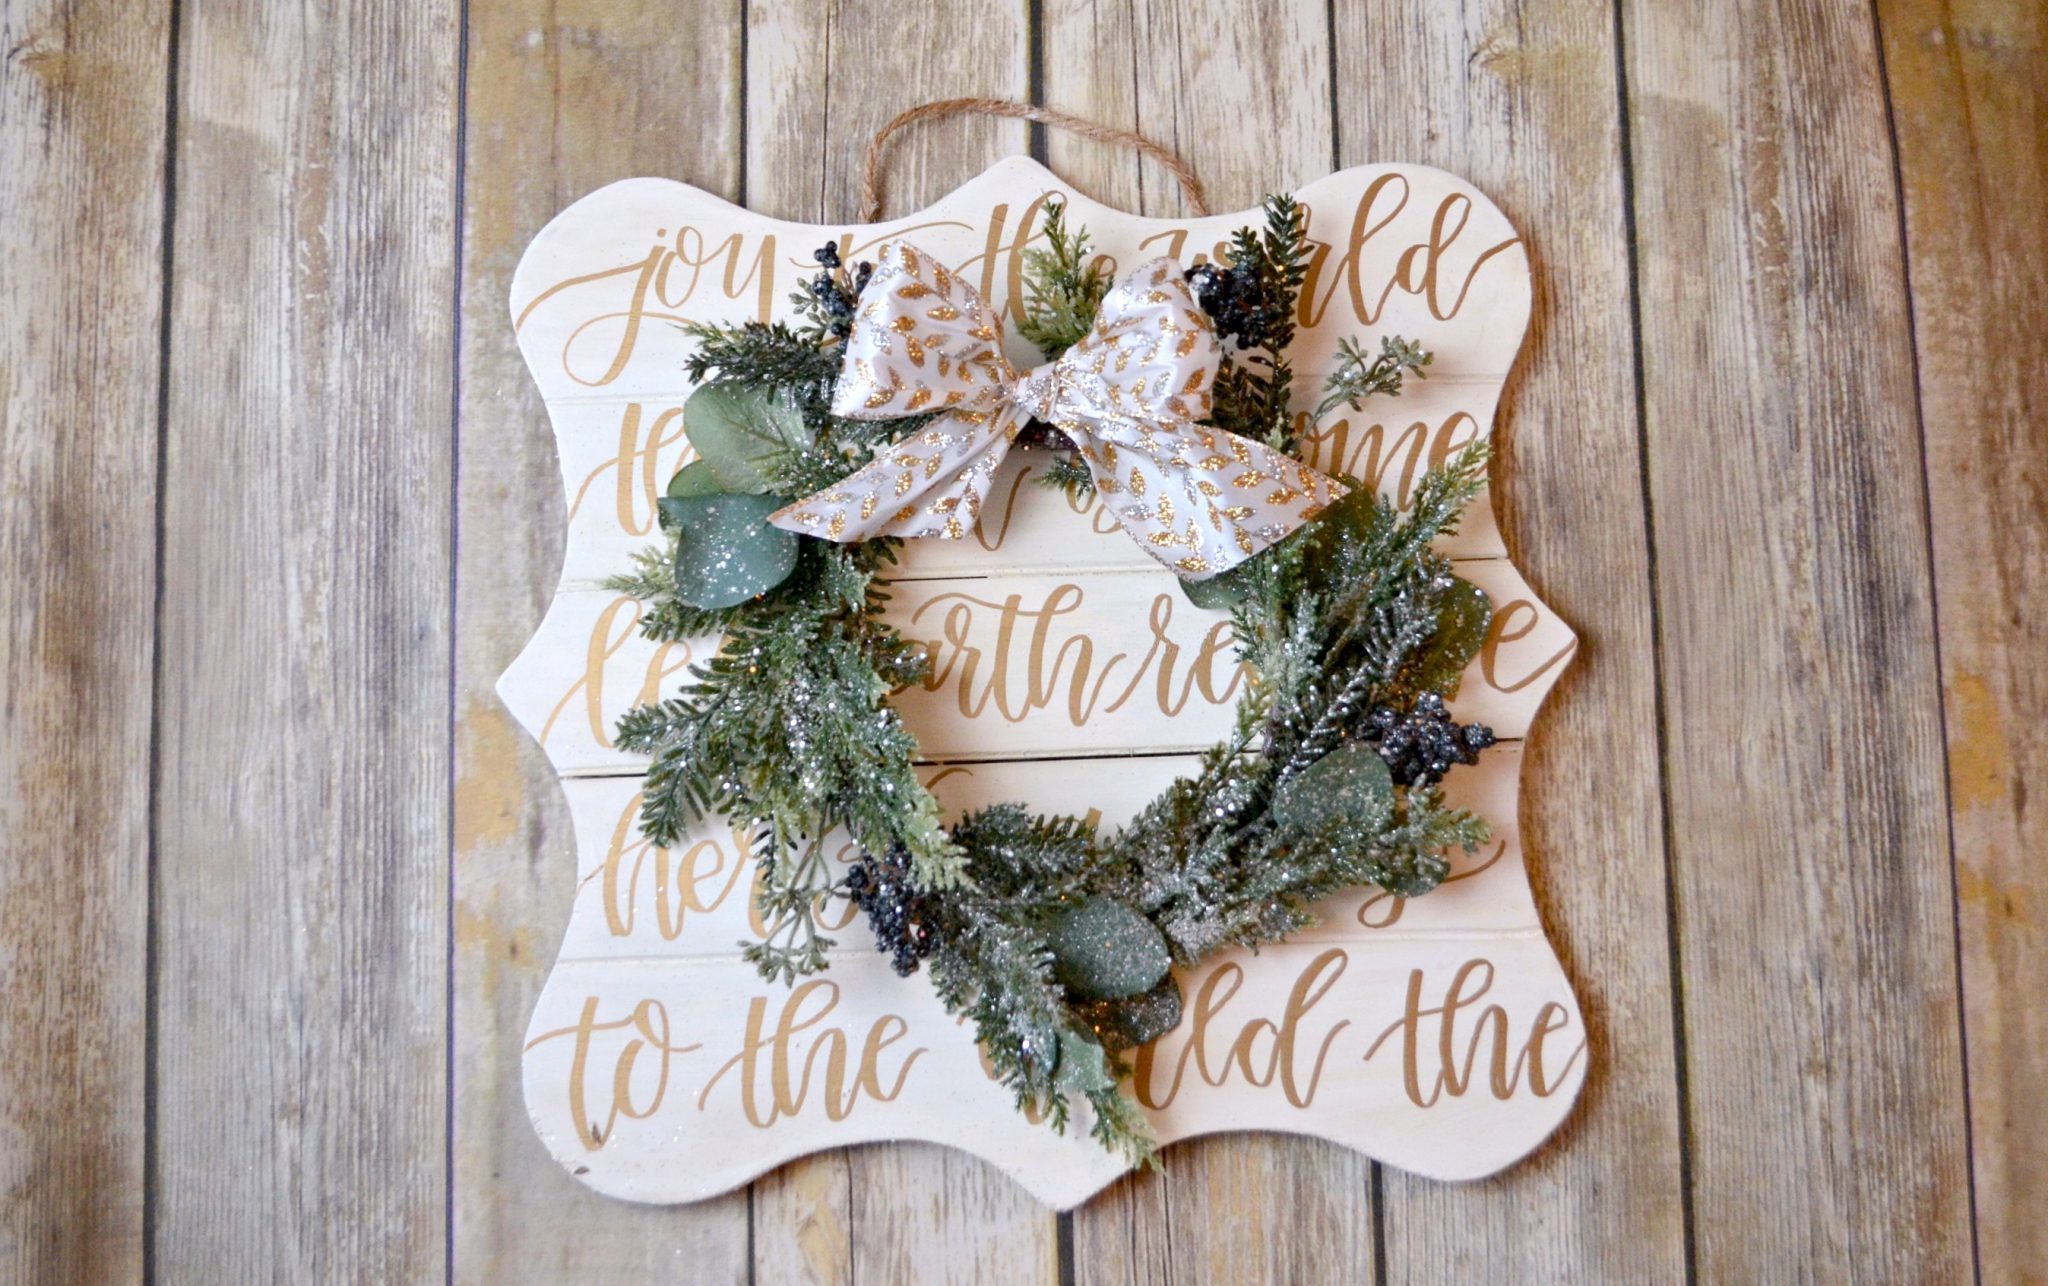
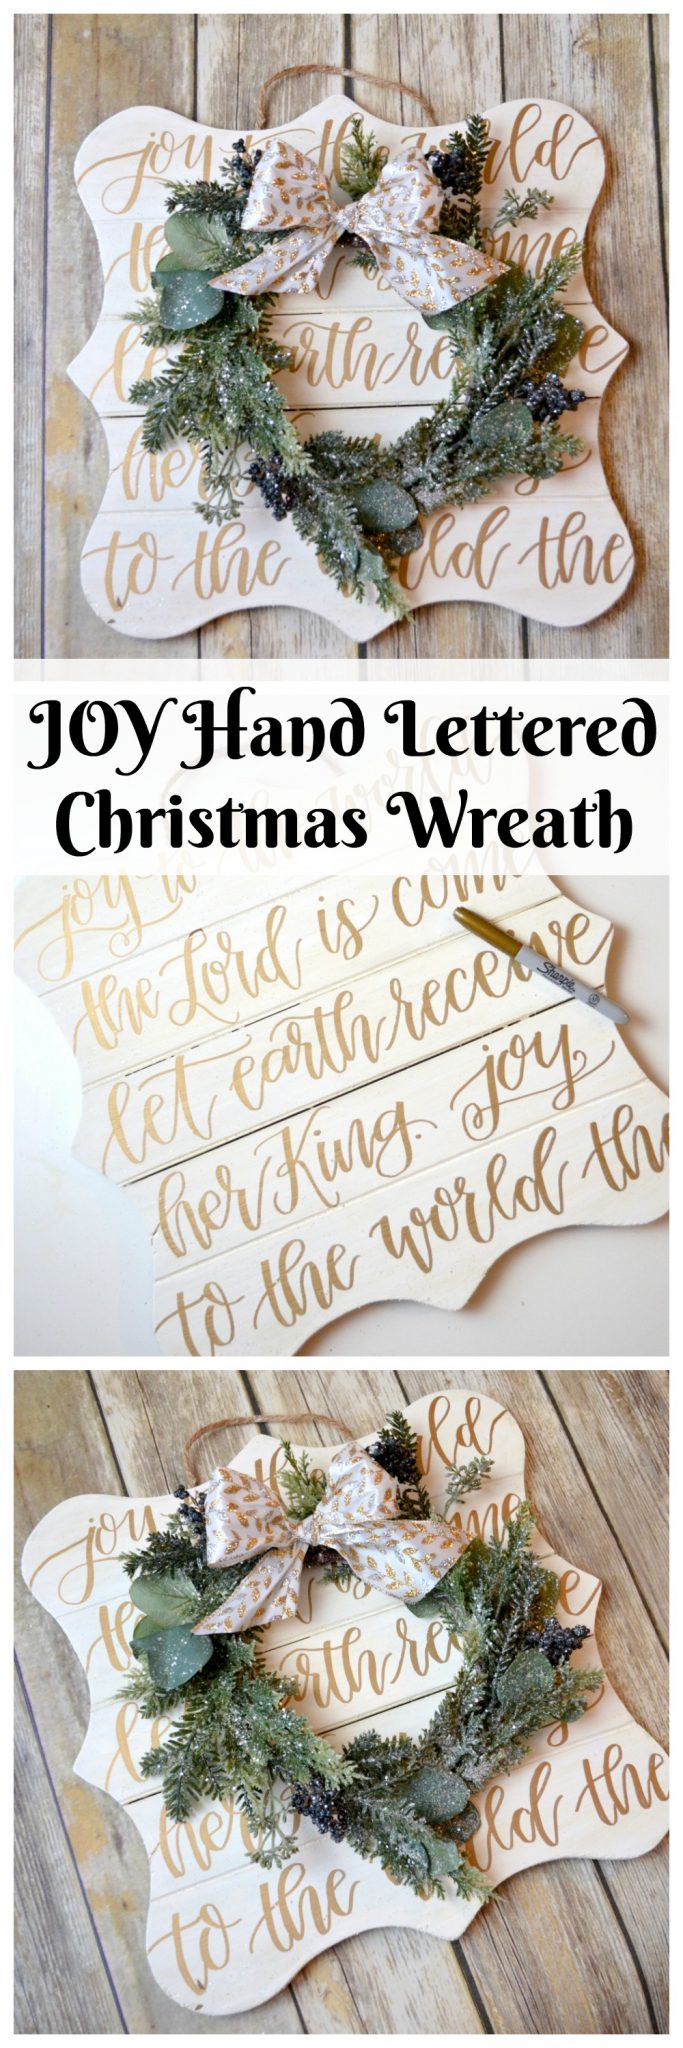
Joy to the World Christmas Wreath
It’s almost time to deck the halls! In addition to making holiday decor for my own home, each year, I participate in a local event called the Festival of Wreaths. Individuals, groups, businesses, and non-profits can sign up to decorate and donate a wreath to the festival, where it will be displayed for a week and sold silent-auction style to benefit the Arts Council in our community. The wreaths can be made and decorated with any materials and done in any style, as long as they fit within certain size requirements. This year, I decided to go a little non-traditional while still maintaining a classic holiday feel. Take a look…
I got everything I needed to make my wreath at Michaels; here’s a quick supply list. Some of the following are affiliate links, meaning if you click through and make a purchase, it supports my blog at no extra cost to you.
You’ll need:
FolkArt Home Decor Chalk Paint: Adirondack
Holiday Ribbon
Mini Wreath by Ashland
Scissors
Strong glue/adhesive
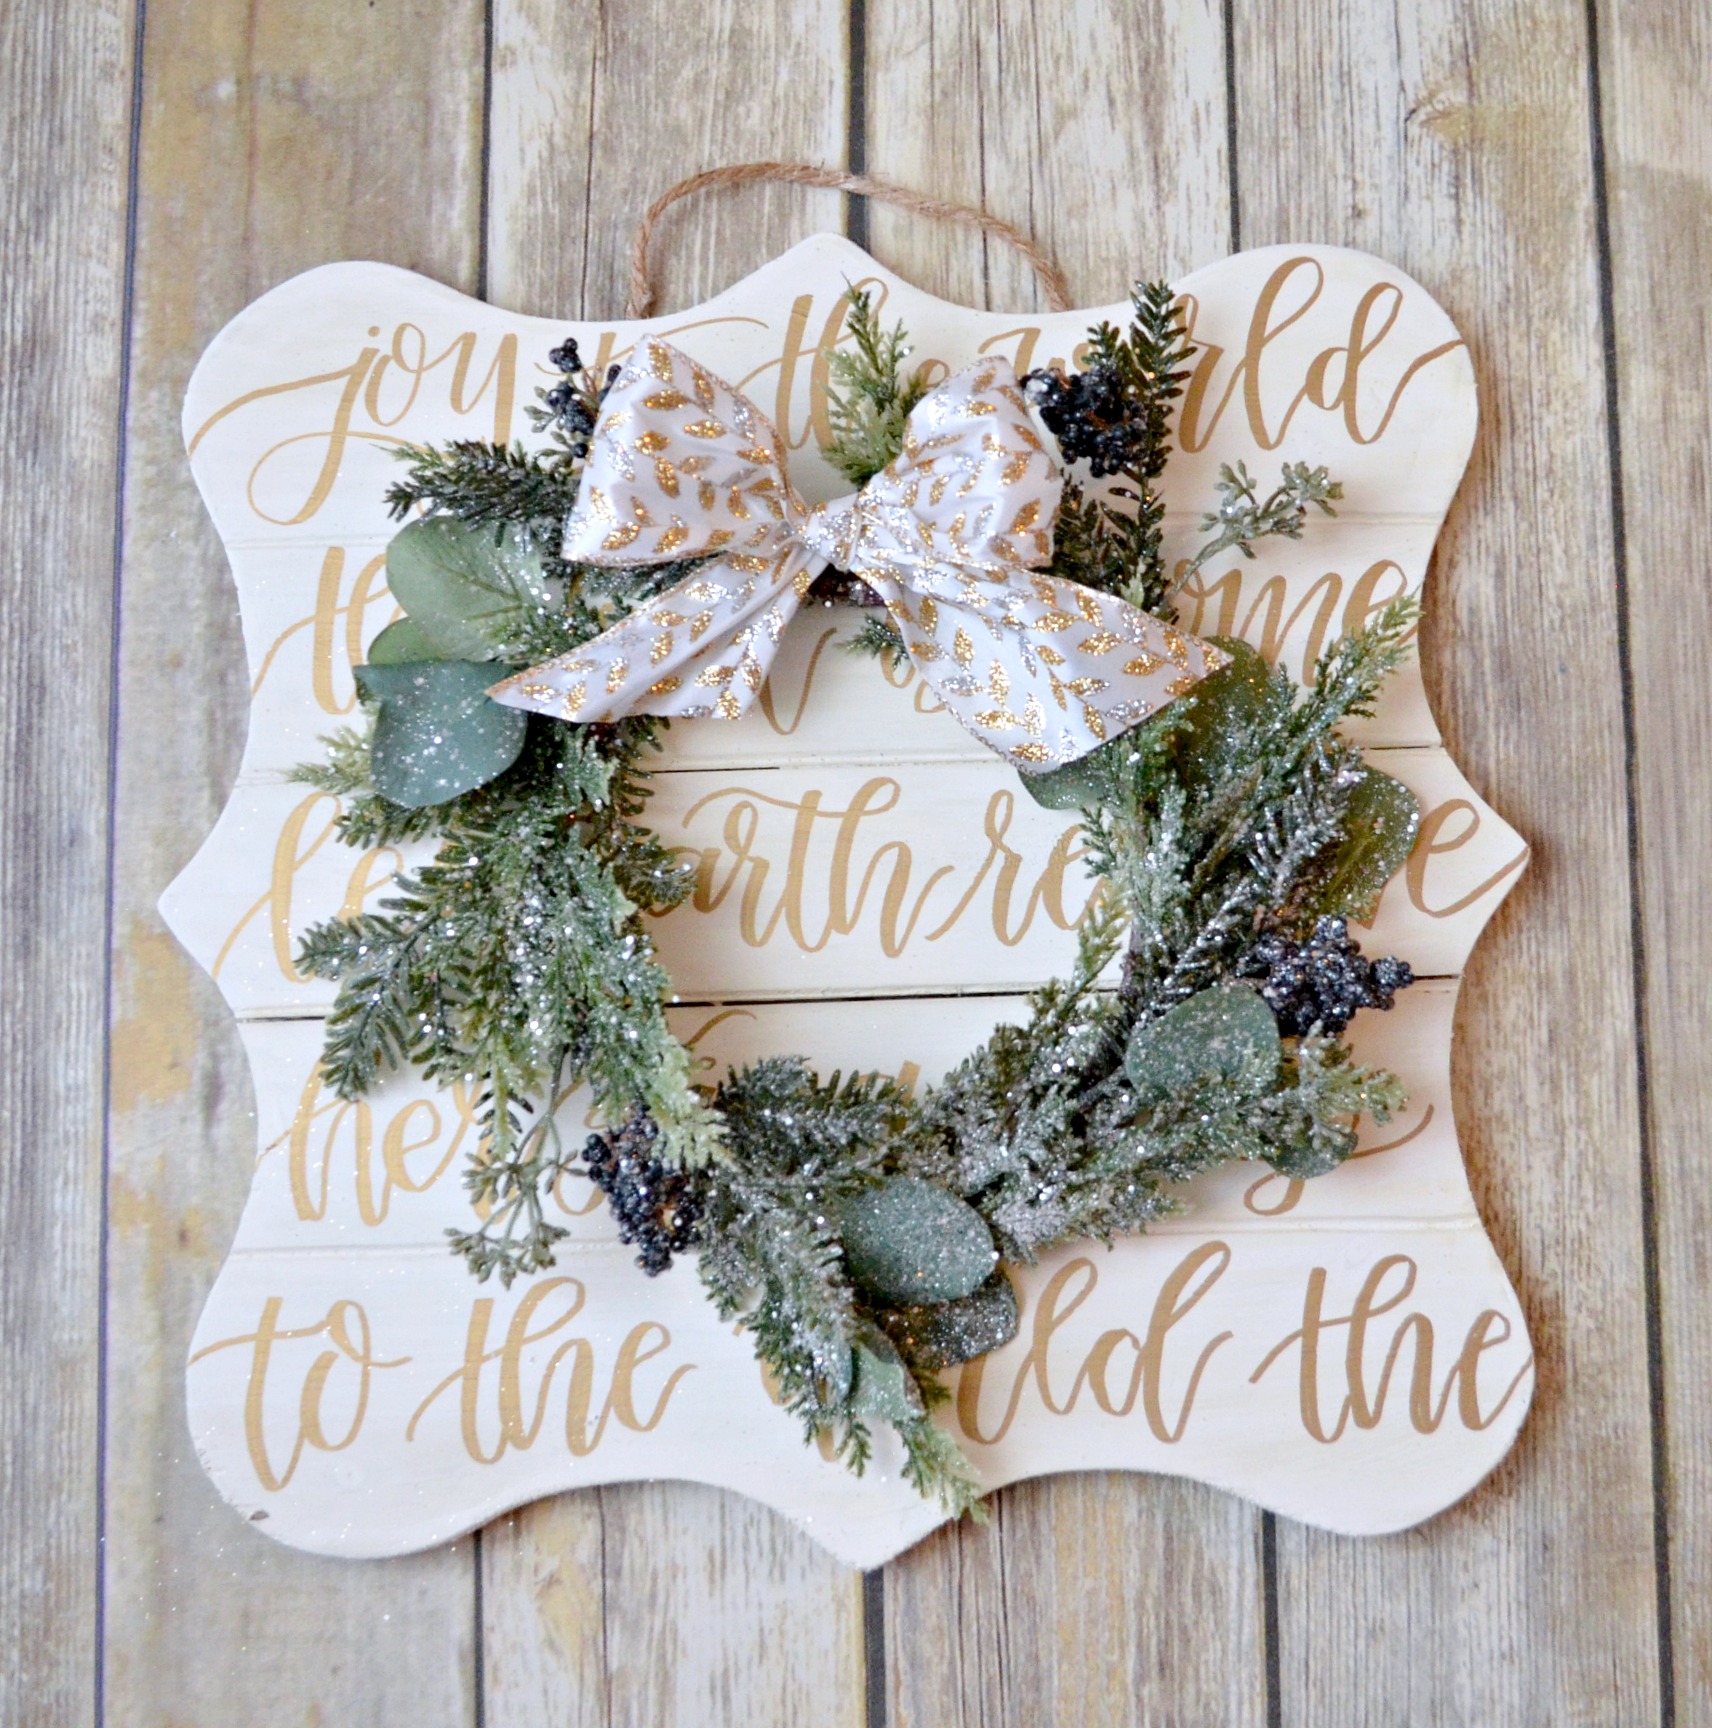
Step 1: Paint your plaque white.
I used two coats of the FolkArt Home Decor Chalk paint, because I wanted a very flat, matte finish. Let it dry completely before you attempt to letter on top, or you’ll quickly be sorry.
Step 2: Letter on the painted plaque using the faux calligraphy technique.
You’ll want to use a Sharpie or a paint pen for this step to make sure your lettering stays permanently on the wood surface. Many lettering pens, including 99% of brush pens, are water based and not designed for use on surfaces other than paper. This is why you’ll have to use faux calligraphy even if you’re a pro at the brush technique. If you’ve never tried hand lettering, now’s a great time to start! Check out my beginner’s guide here. I used the beginning of “Joy to the World,” then repeated it, but you can use any song, phrase, or words you like.
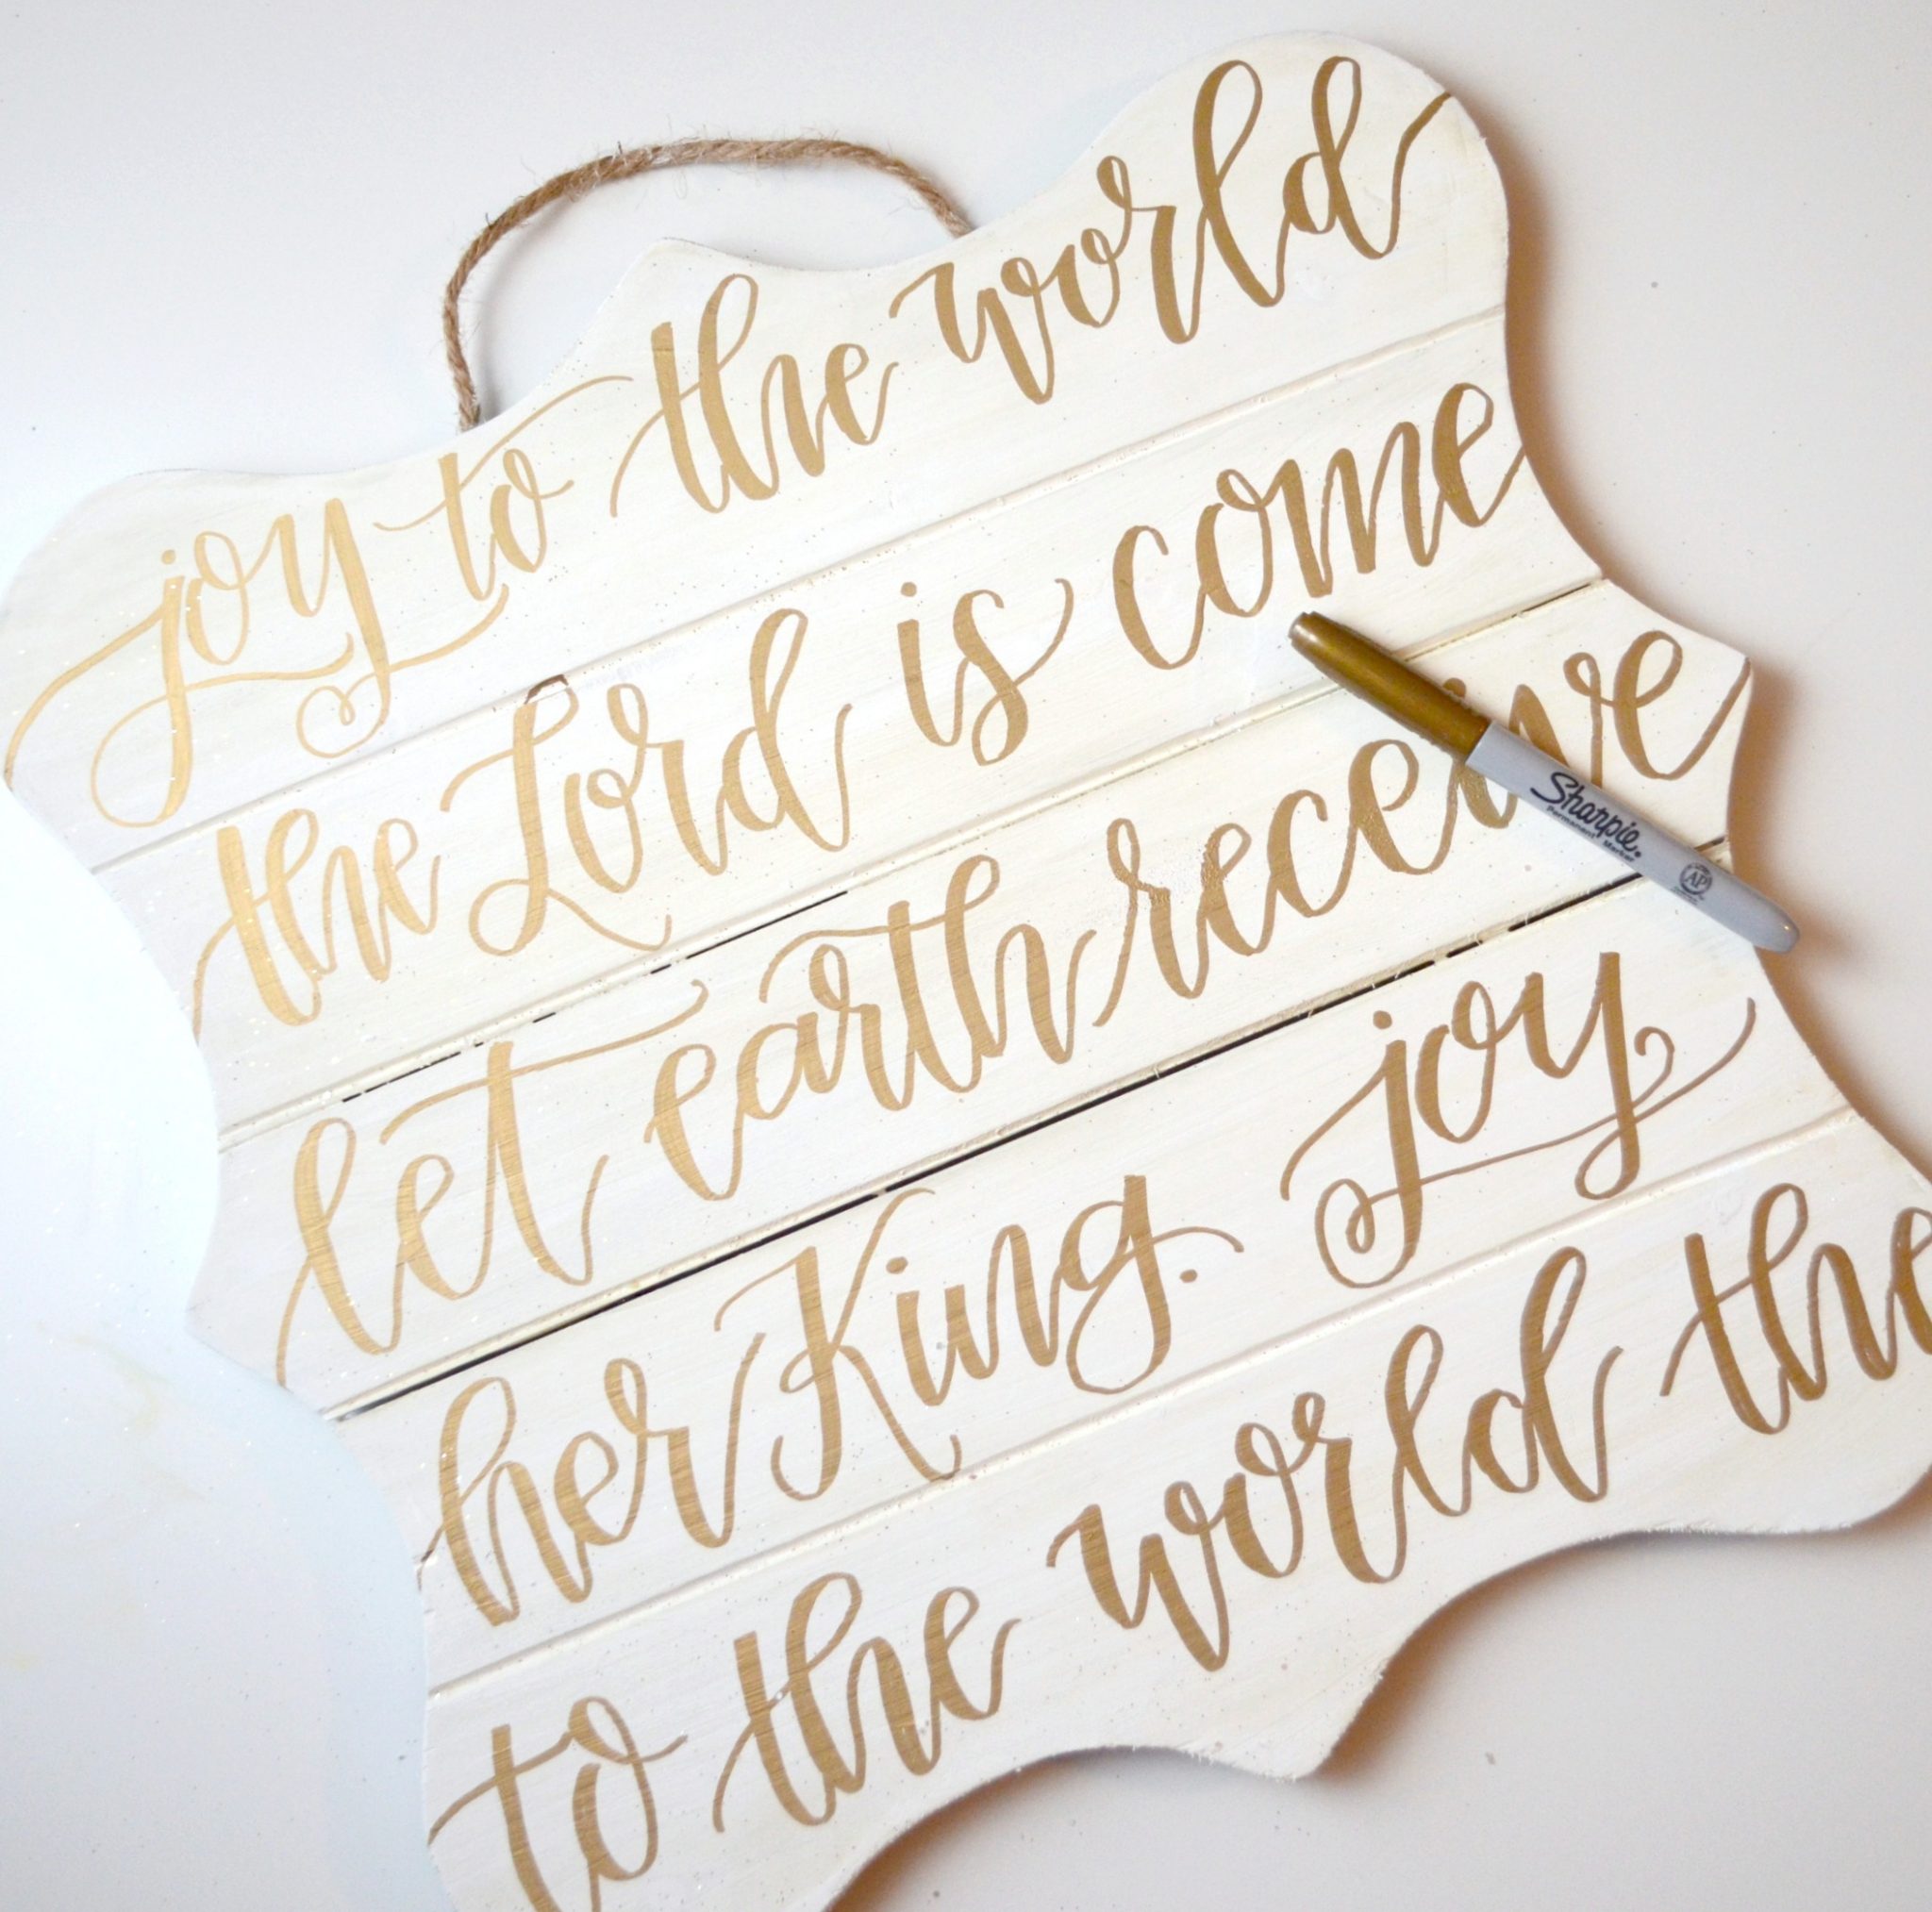
If the idea of lettering isn’t something that appeals to you, you can use stencils in the background with gold or silver paint instead. You can find stencils with words and phrases, or you can use alphabet stencils to spell something. Or, you can trade in the words altogether for a pretty geometric pattern.
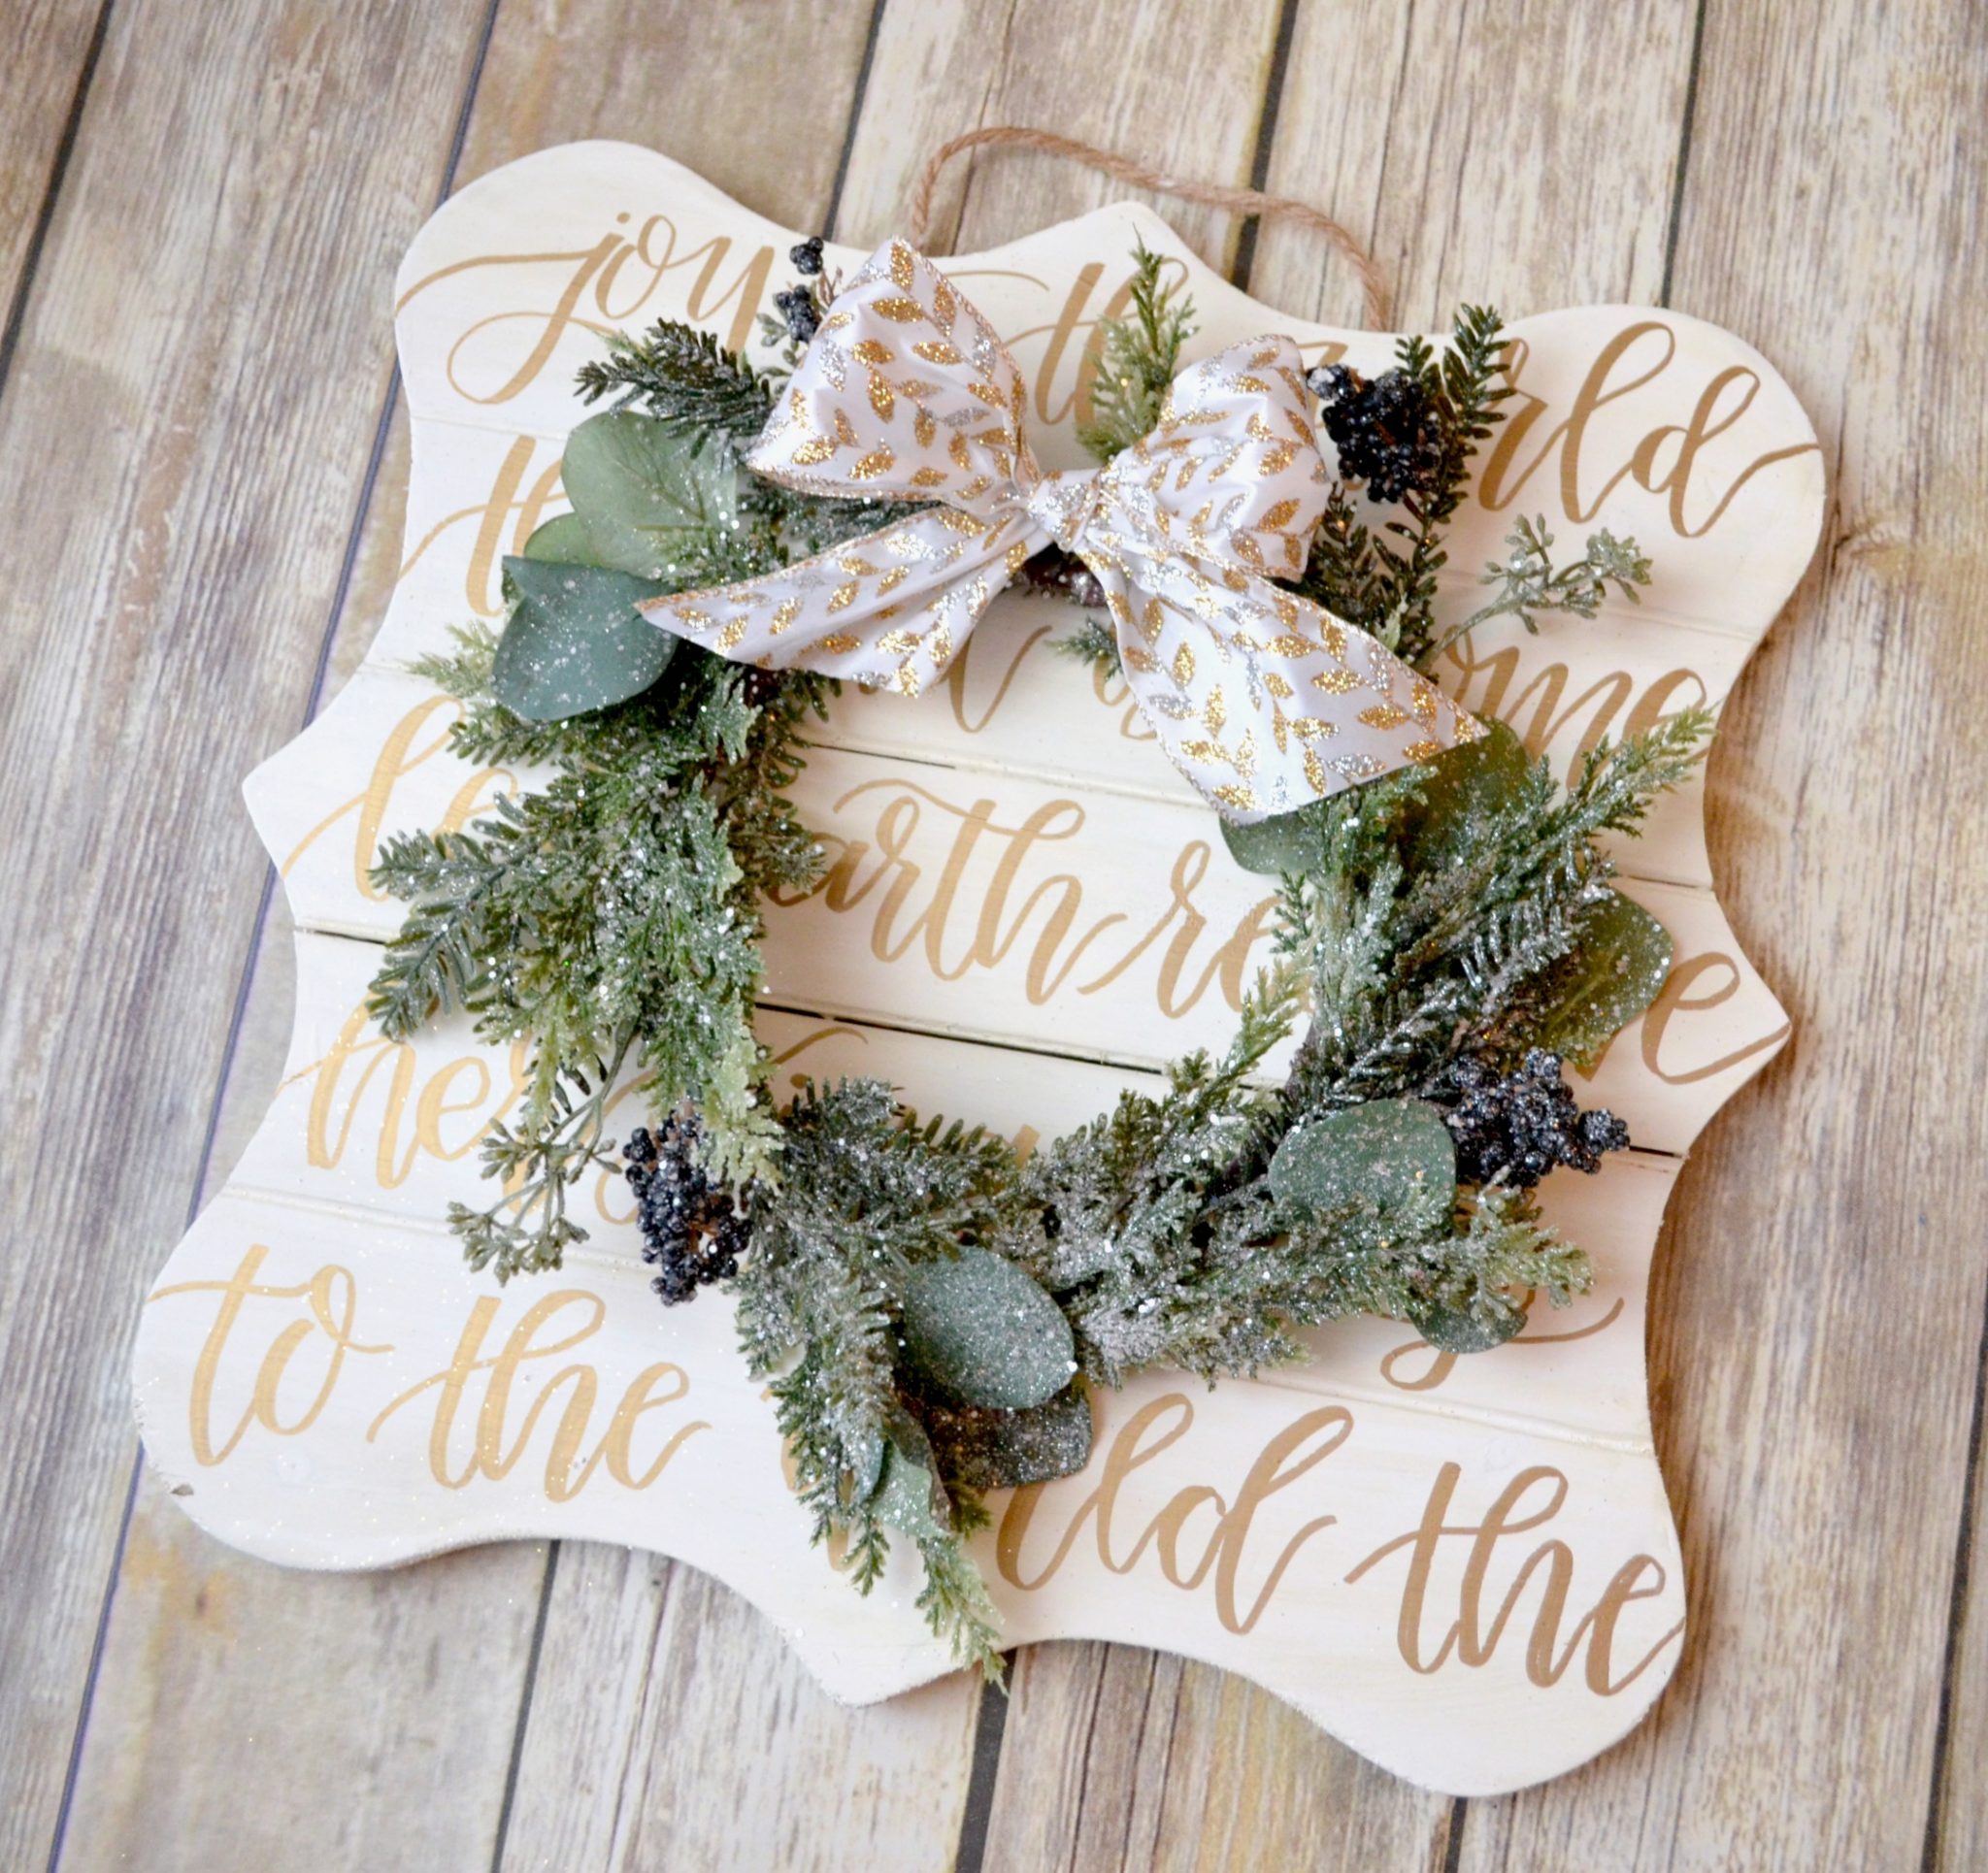
Step 2: Attach your mini-wreath.
Michaels had a variety of styles of these little wreaths. They measure about 12″ from edge to edge, which is just perfect for the 15″ plaque. Some of the wreaths had red berries, some had poinsettias, and others were metallic. I liked this one in particular because of the variety greenery styles and colors and the frosted look. Although I personally love red in some of my holiday decor, I like that the blackberries make this neutral so that any potential bidder could see it fitting into their own color scheme. You can choose your favorite style and attach it to the plaque using hot glue or another strong adhesive.

Step 3: Tie and attach a bow.
I chose a white and metallic ribbon to coordinate with my sign. Tie your bow, trim the ends to whatever length you like, and glue it to the top of your wreath.
It’s that easy! I painted my sign in the afternoon, let it dry, then completed everything else in about 15 minutes later on that evening. It’s a really quick and easy project, but it sure doesn’t look that way. I think it’s elegant and adds a gorgeous touch of class to your holiday decor.
The only trouble with making a wreath for the festival every year is that I always want to keep it for myself, and this year is no exception! I can already tell I’m going to have to make another trip to Michaels to get a second set of supplies. I’m hoping it’s a hit at the event and that it raises some money to support the arts in our community!
Here’s a quick look at a few of the other wreaths I’ve made and donated to the Festival of Wreaths in past years. Click on the name of each wreath to see a full step-by-step tutorial!
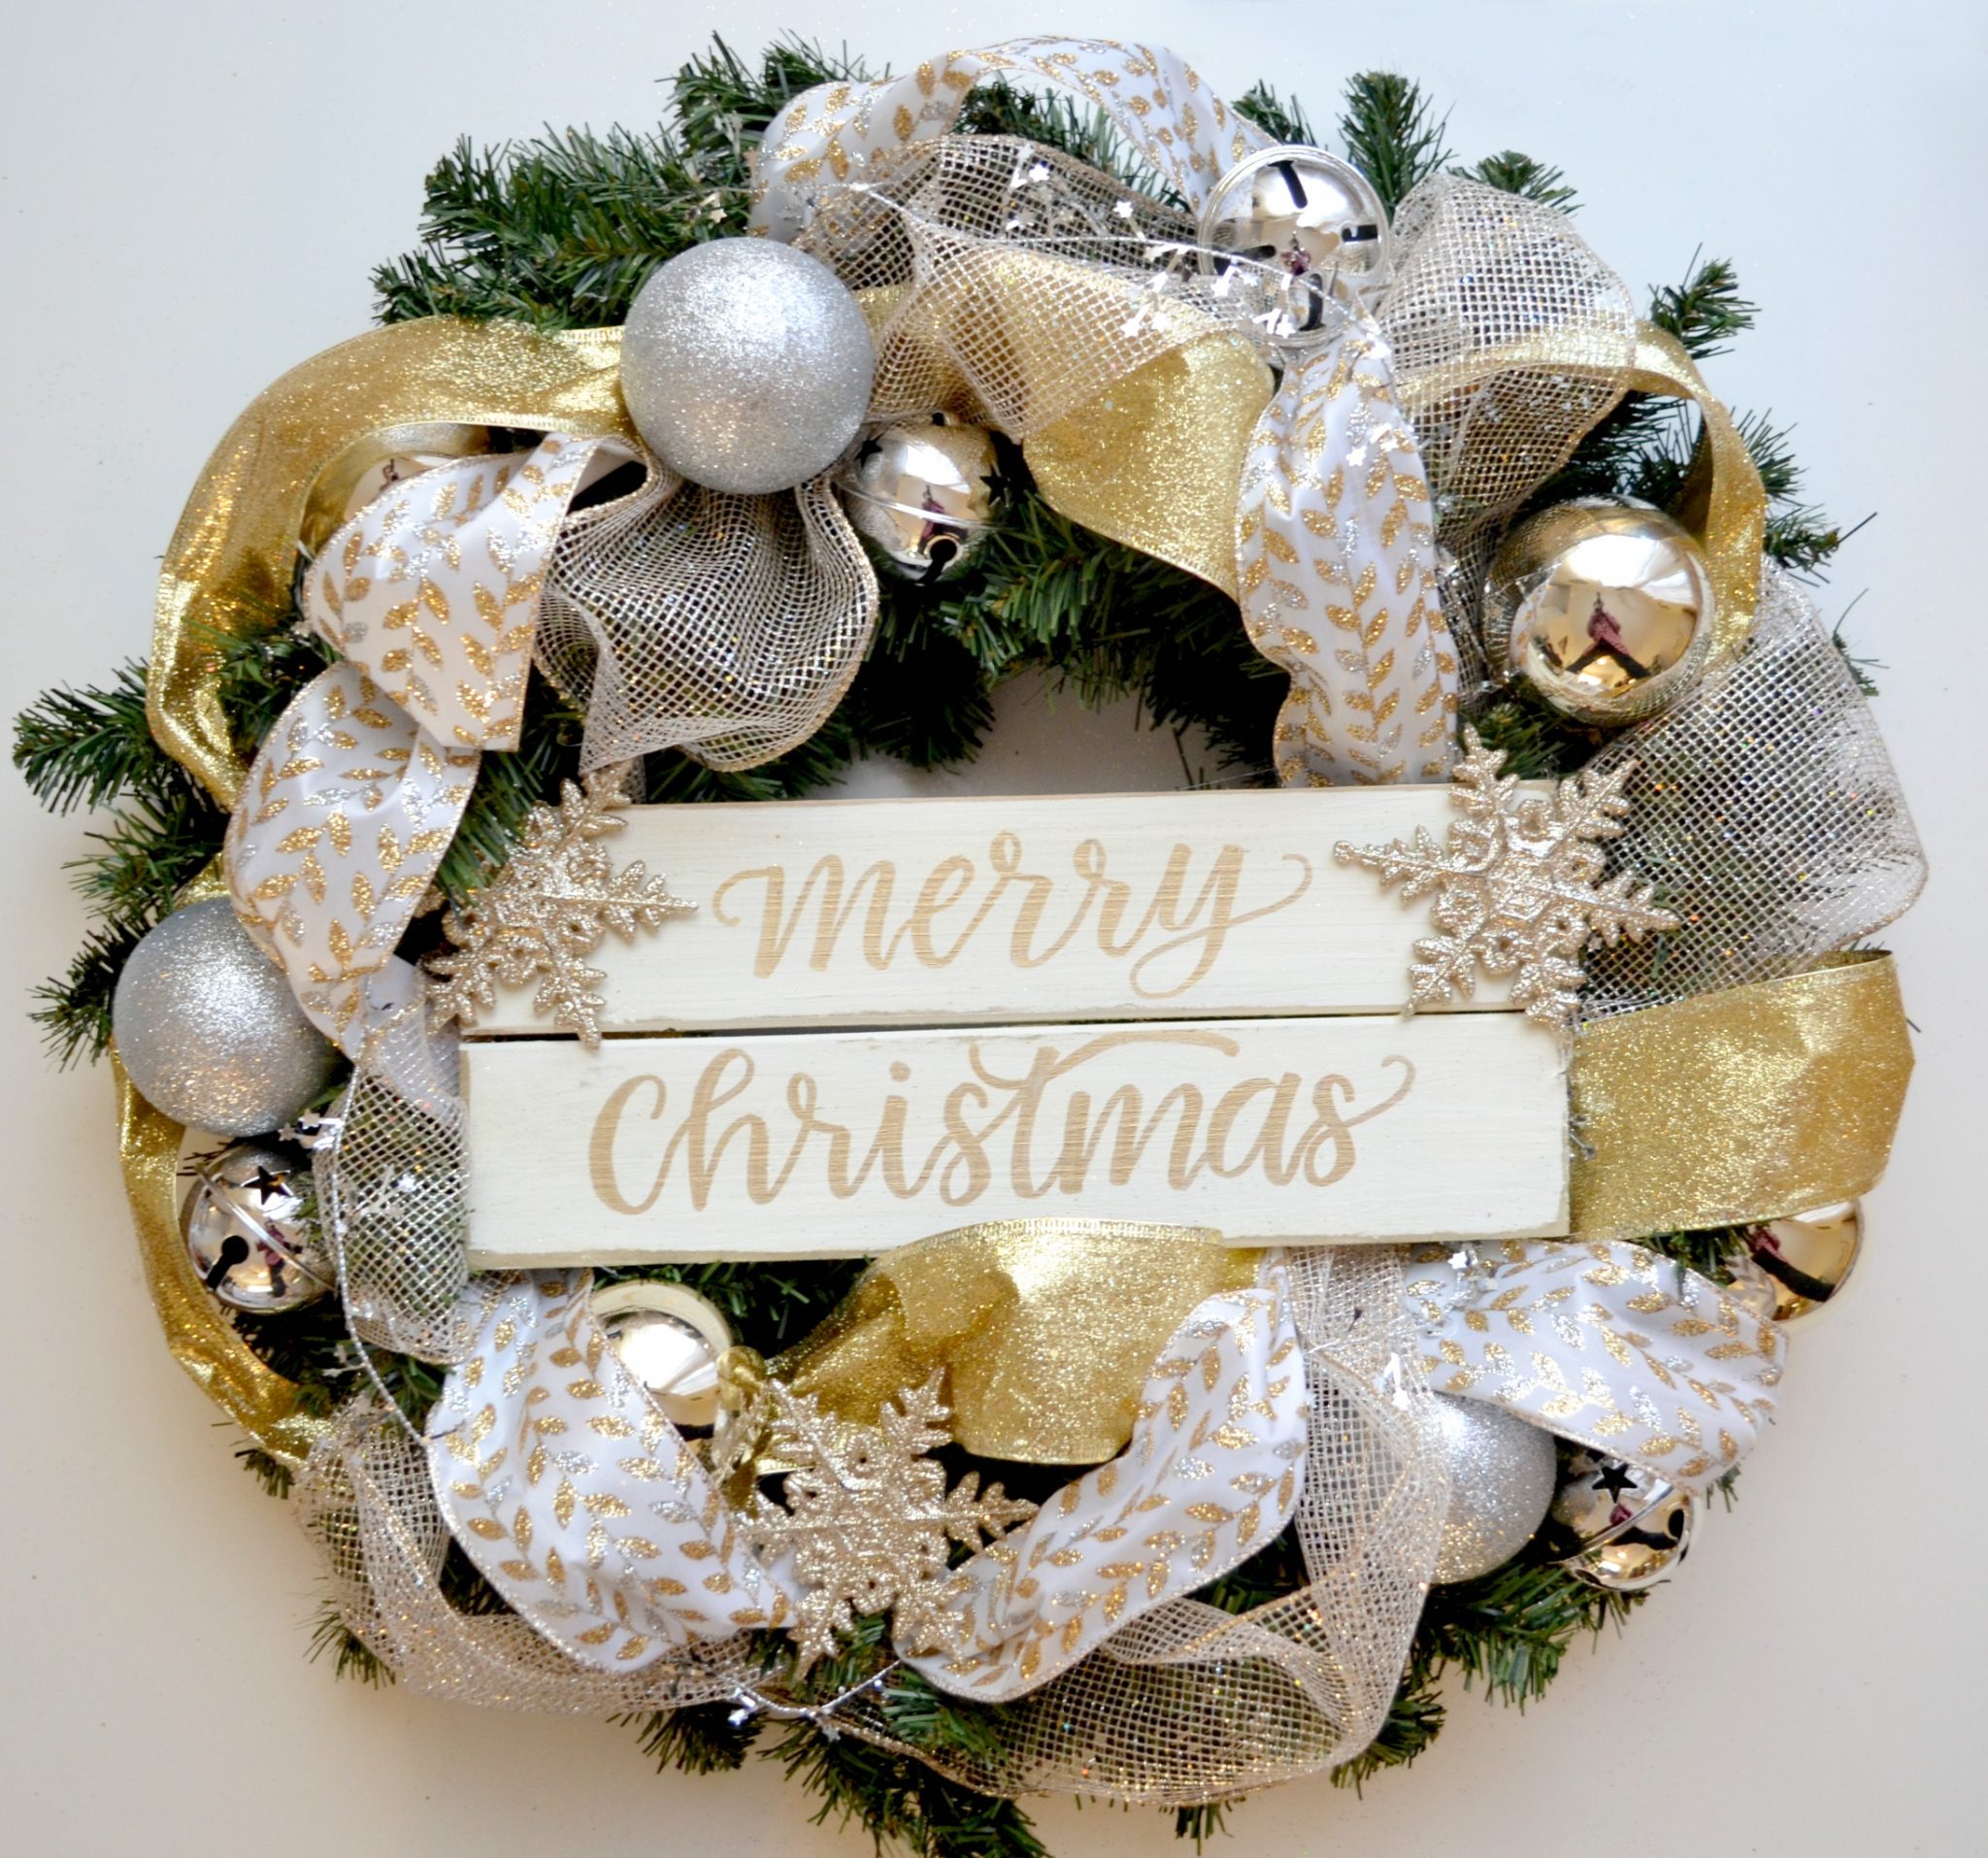
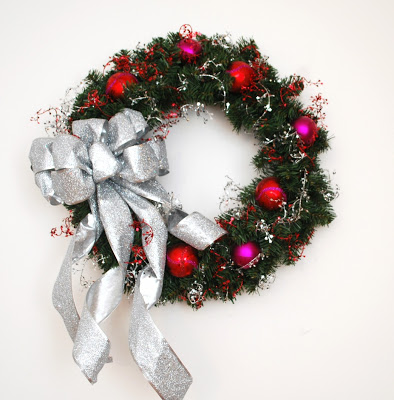
2016 – Metallic Merry Christmas Wreath
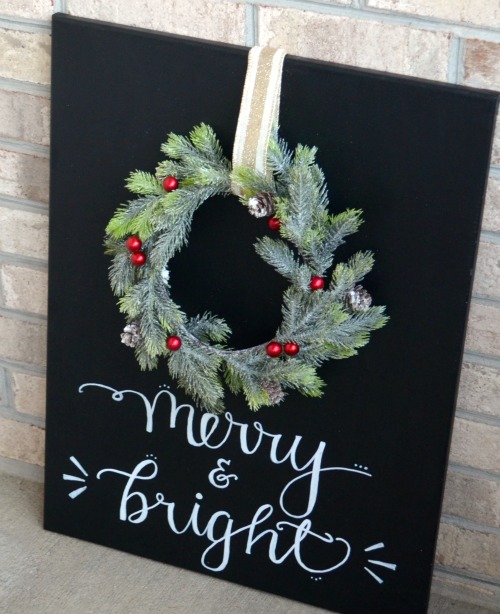
2015 – Merry & Bright Chalkboard Wreath
2014 – The 12 Days of Crafting Wreath
2013 – Ornament Wreath
What do you think? Which one is your favorite? I’d love for you to share your wreath projects with us over in the One Artsy Mama & Friends Facebook group! See you there!
Eautiful wreath, Amy.
Love your hand-lettering background.