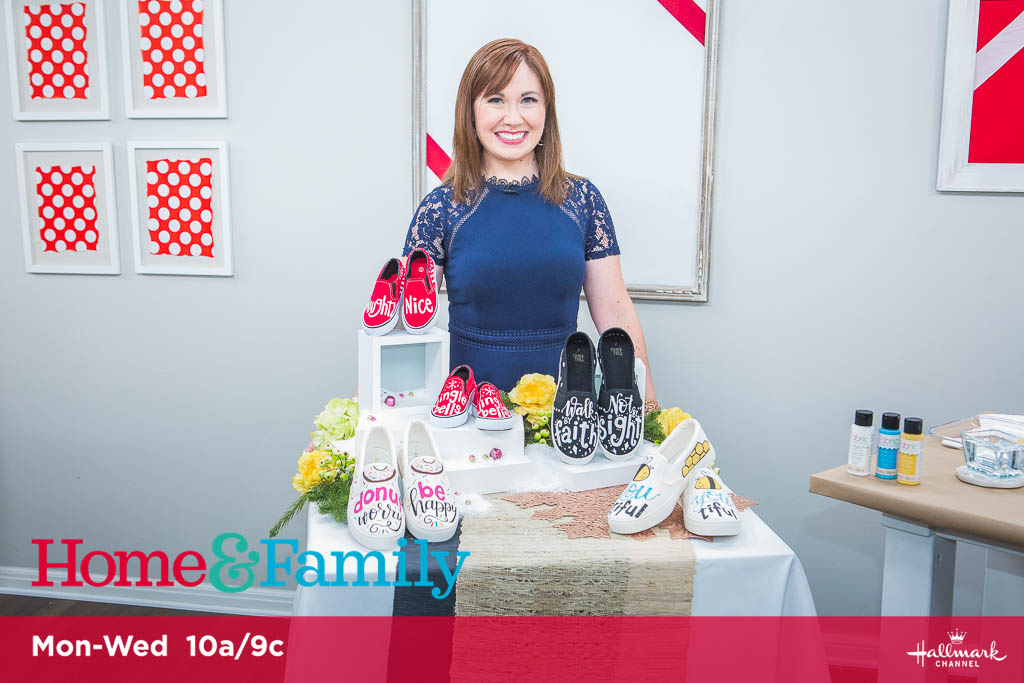
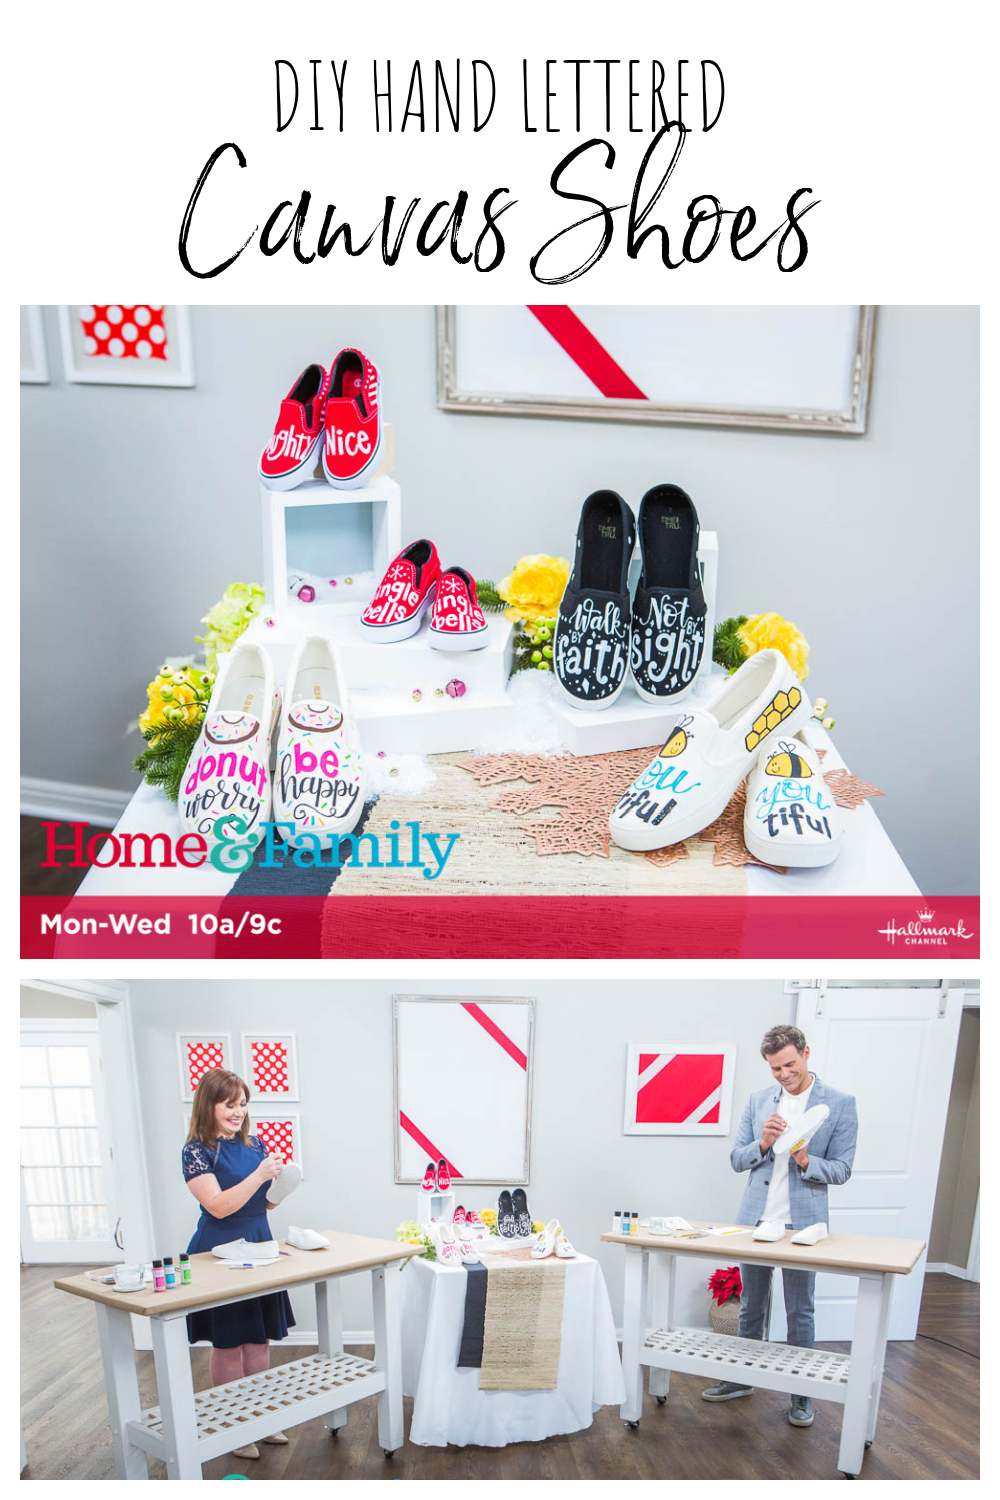
DIY Hand Lettered Shoes
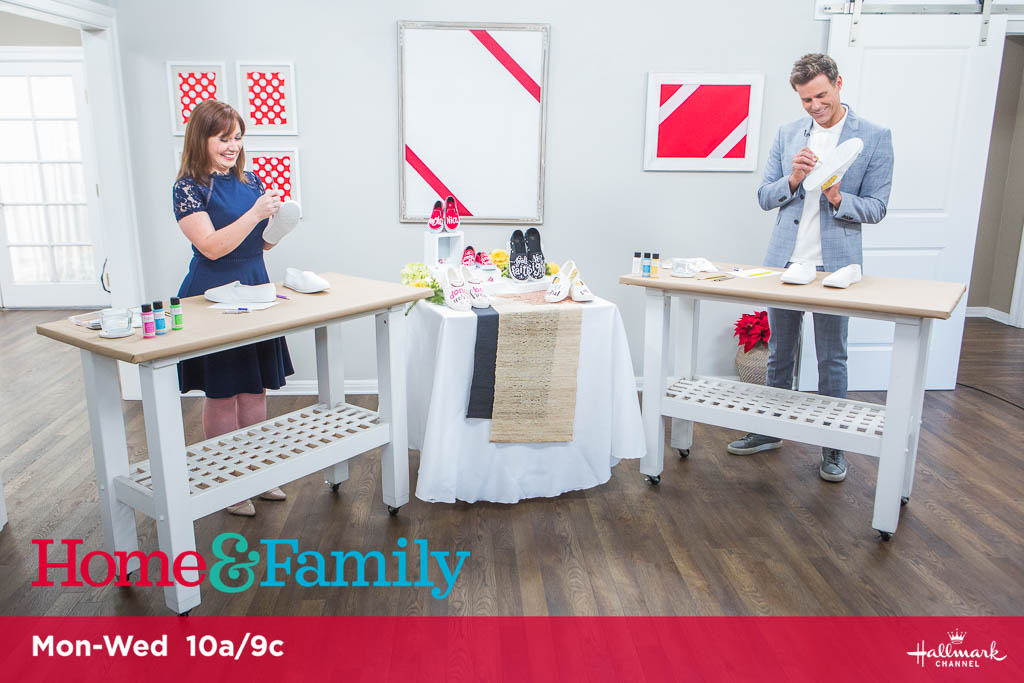
Hand lettering is one of my favorite kinds of art, and I especially enjoy finding ways to take it “off the page” and onto non-paper projects! From wall art and furniture to pillows, phone cases, and clothing, hand lettering is a great way to personalize just about anything. Today, I want to show you how you can use your own lettering and art to create DIY Hand Lettered Shoes, as seen on Hallmark Home & Family!
The possibilities for different designs are endless; you can personalize your shoes with any message and images you like. I’m going to share with you the basic materials and steps, and you can apply them to your own quotes/designs.
You’ll need:
a pair of men’s, women’s, or kids’ canvas shoes (I like these from Old Navy)
Fabric Creations Soft Fabric Ink, your choice of colors
pencil and eraser
small round detail paintbrushes (I recommend sizes 3/0, 10/0, and/or 20/0)
iron
scrap paper (optional)
Creating Your Hand Lettered Shoes
First, you’ll need to consider the color of the shoes you’ve chosen. For black, red, or other dark colored shoes, you’ll be limited to using white or metallic paints, while light colored shoes will allow you to use any and every color you like. Keep this in mind when you’re brainstorming what you want to create.
Step 1: Sketch a plan of your design.
If you like, you can sketch a general idea of what you want to do on paper first, or you can just dive right in and start lightly penciling on the shoes themselves. I like to start on the top of each shoe, deciding what phrase I want to letter, and if I want any illustrations or accents.
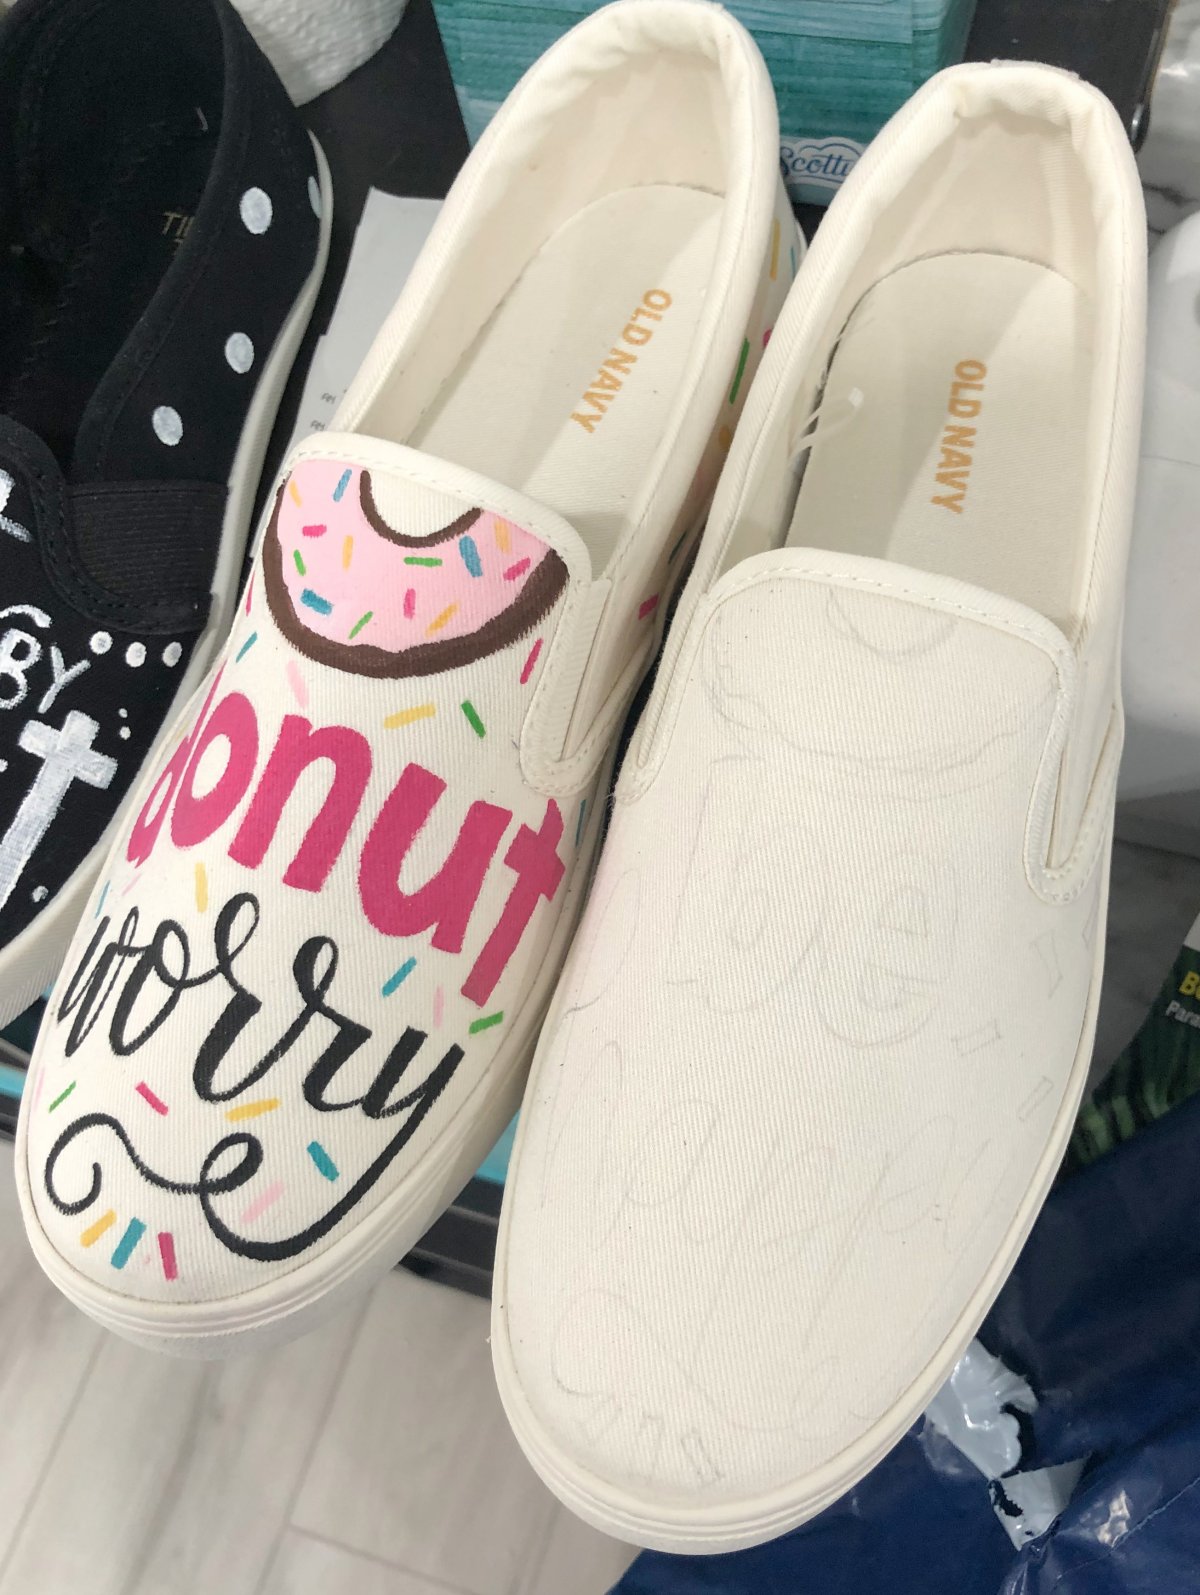
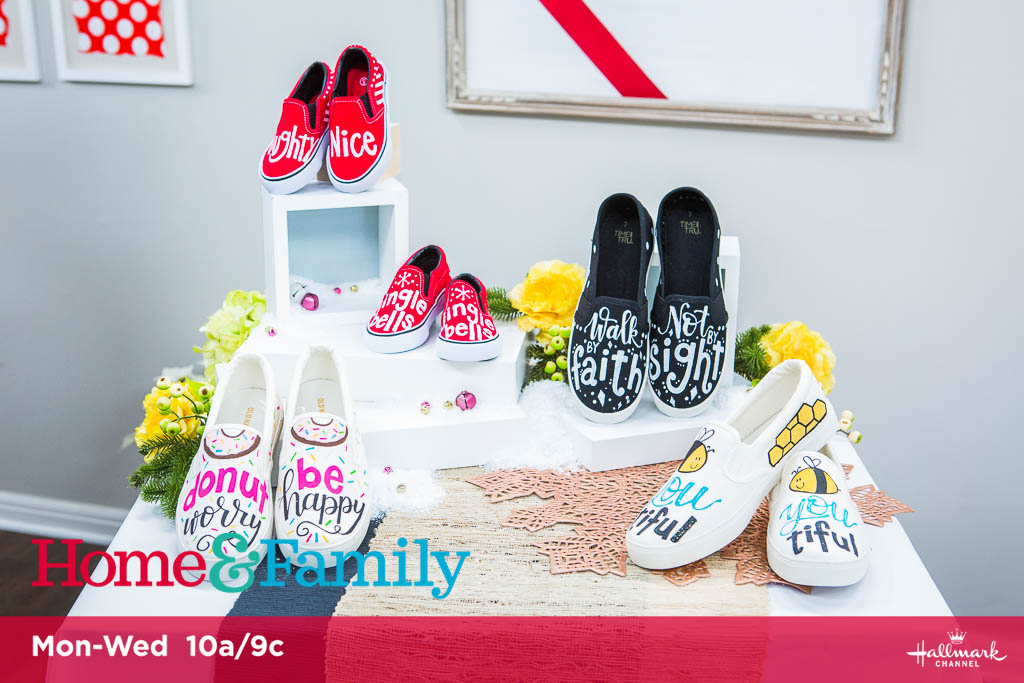
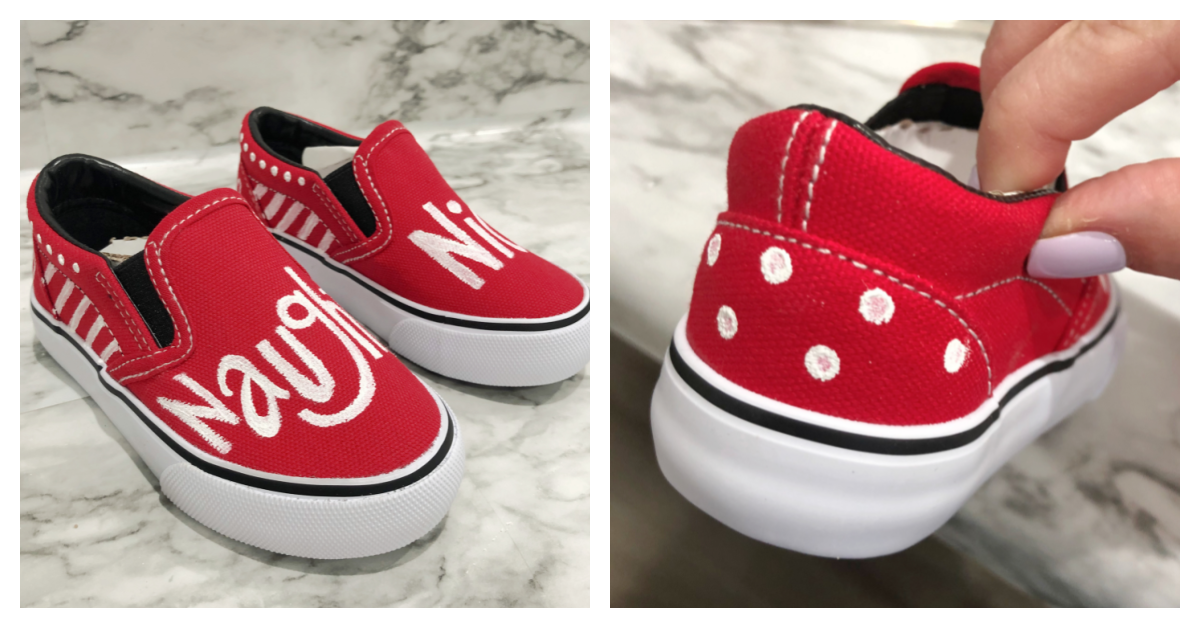
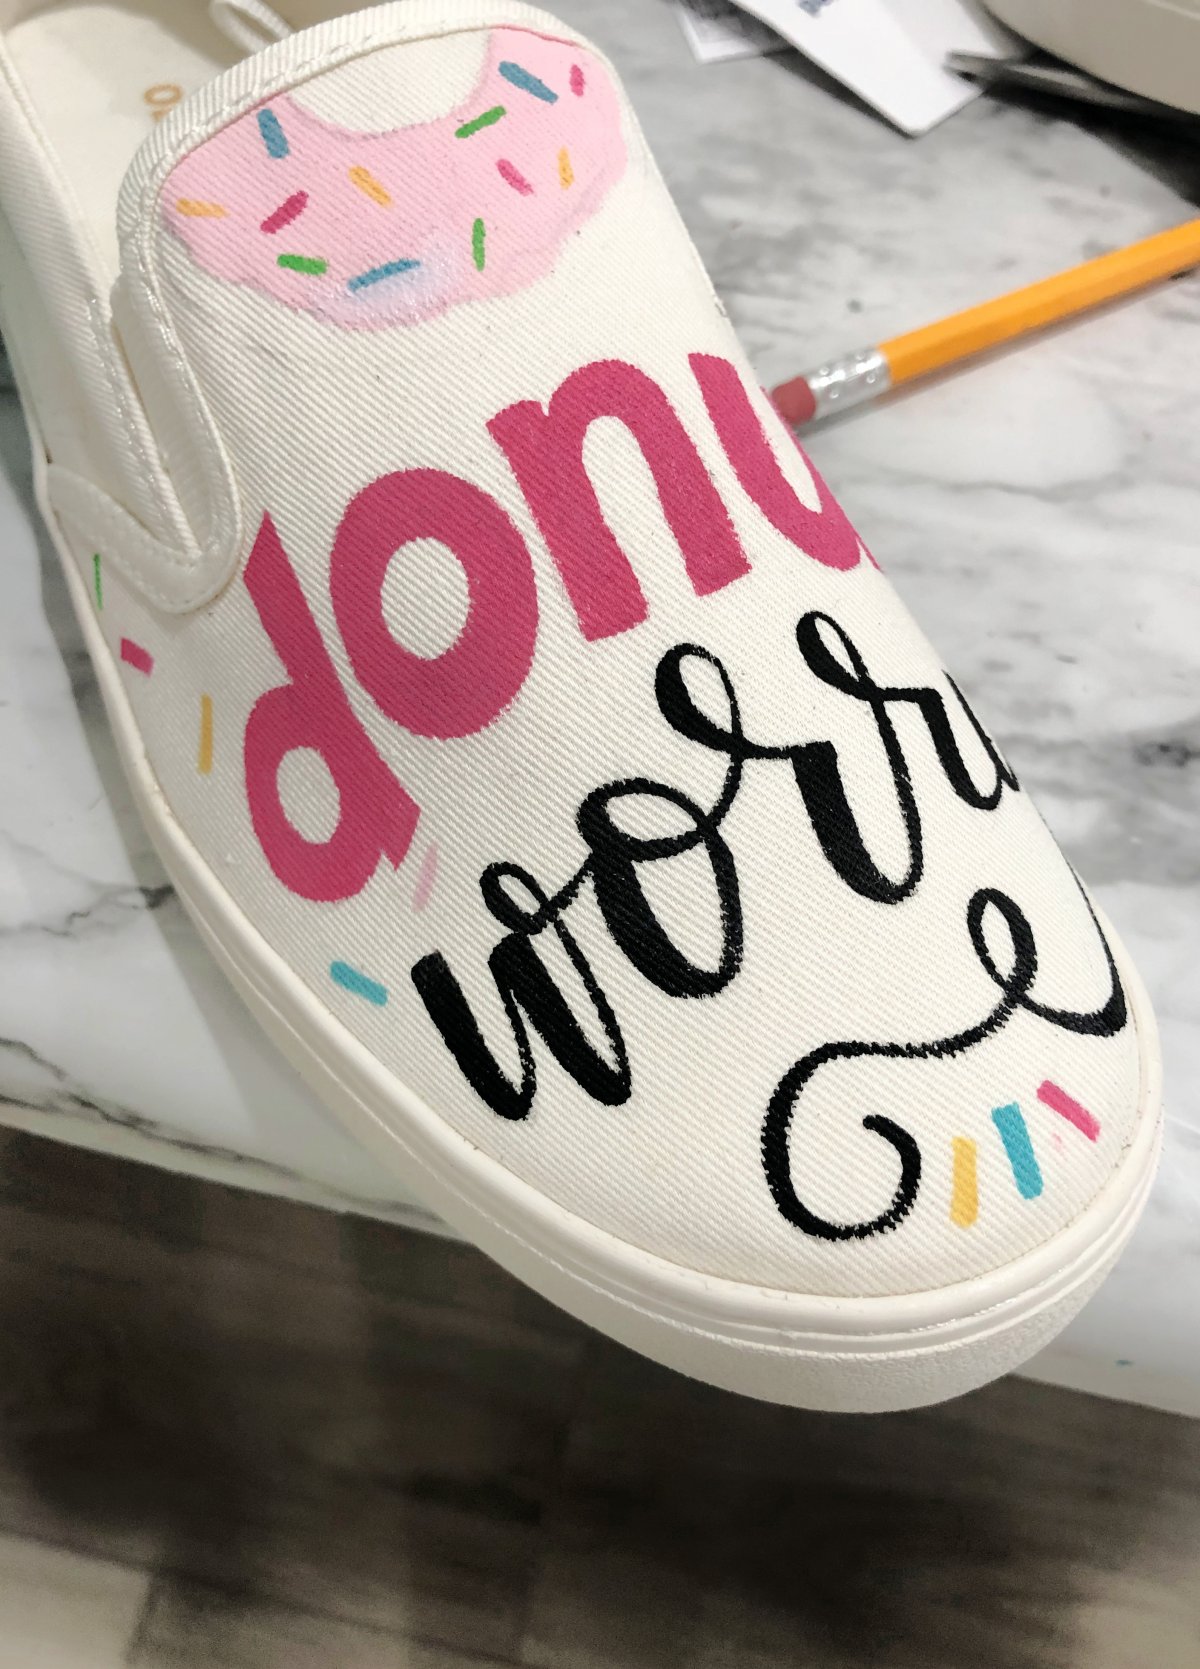
Sometimes I do a design that’s the same on both shoes, like my “bee you-tiful” ones, while other times I create a design that’s split between the two feet, like, “donut worry, be happy,” “walk by faith, not by sight,” or “naughty, nice.”
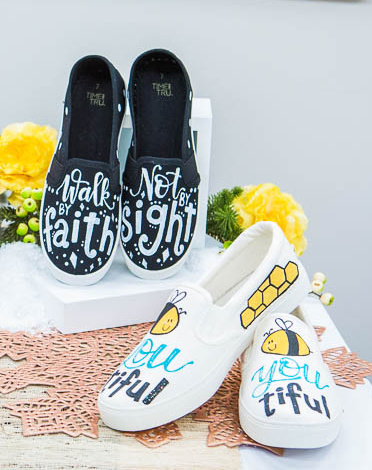
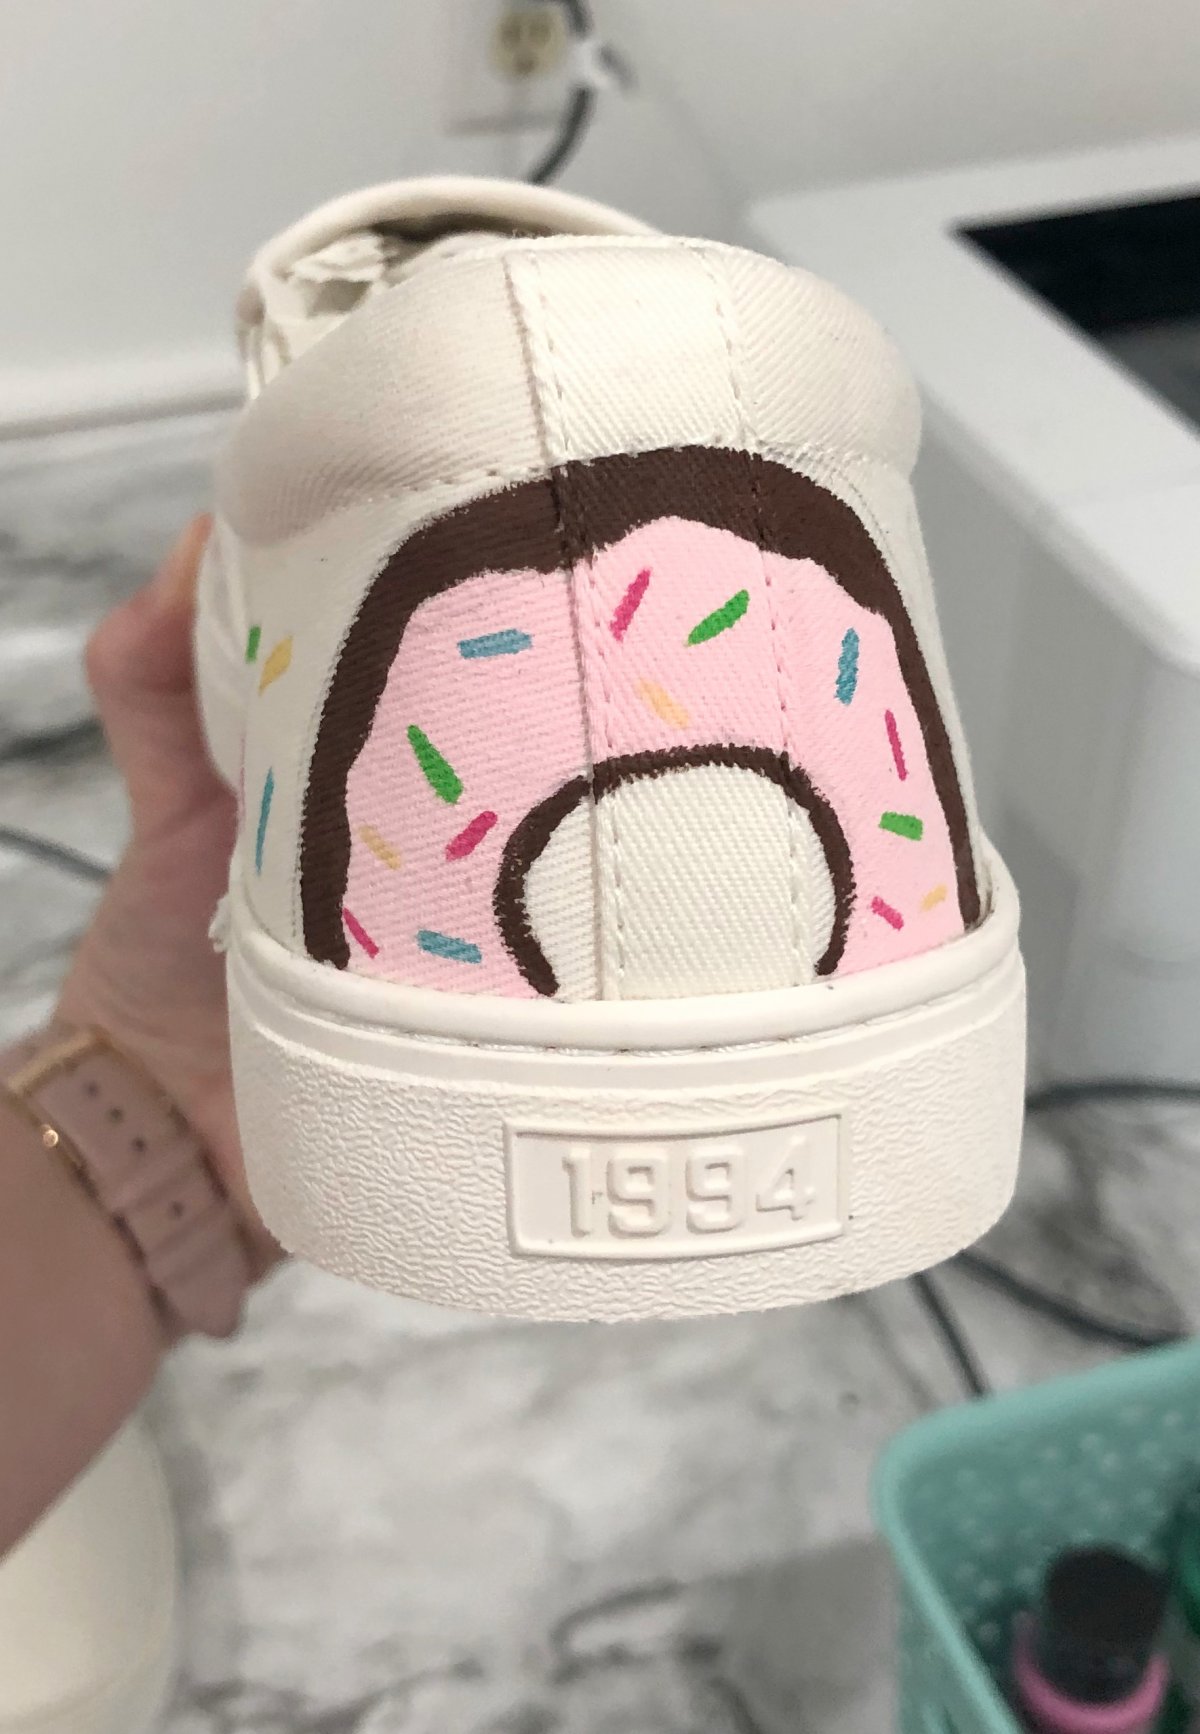
Then, move on to sketching details that will fit on the sides and backs of the shoes. For my donut pair, I sketched sprinkles going in all directions down the sides and 3/4 of a donut on the back. For my bee pair, I drew a honeycomb pattern on each side and finished with a tiny bee on the back.
Your illustrations don’t have to be complicated; you can also stay simple with basic shapes and patterns. For the “naughty or nice” kids’ pair, I simply did white stripes down the sides for a candy cane effect, and decorated the back with polka dots.
Step 2: Fill in your sketched areas with fabric paint.
I like to use Fabric Creations Soft Fabric Ink, because it dries extremely flexible. Squeeze a small amount of the color(s) you want to use onto a paper plate or a paint palette, then use your small paintbrushes to paint in your design. If you’re new to hand lettering, check out this super-simple tutorial for how to do faux calligraphy like my “worry” in the photo below. Or, take a look at this video I made for beginners! You’ll be lettering like a pro in no time.
Make sure all of your fabric paint is completely dry before moving on to the next step.
Step 3: Erase any visible pencil lines.
You should test your eraser on a piece of paper first to make sure it is a good one, not the kind of eraser that makes dirty marks on your surface. I like using Tombow Mono erasers, because they easily remove all my pencil marks without leaving anything behind.
Step 4: Heat set your designs.
Allow your shoes to dry overnight. Fill them with packing paper or cloth to help them hold their shape during pressing. Then, heat an iron to the highest setting allowed for your fabric type: canvas. Place a pillowcase or other pressing cloth on top of the shoe. Without using steam, press the decorated fabric area for 30 seconds, lift the iron and move to another section. Continue until you have heat set the entire design.
Once your shoes are heat set, they can be spot cleaned, gently hand washed, or even washed on a delicate cycle.

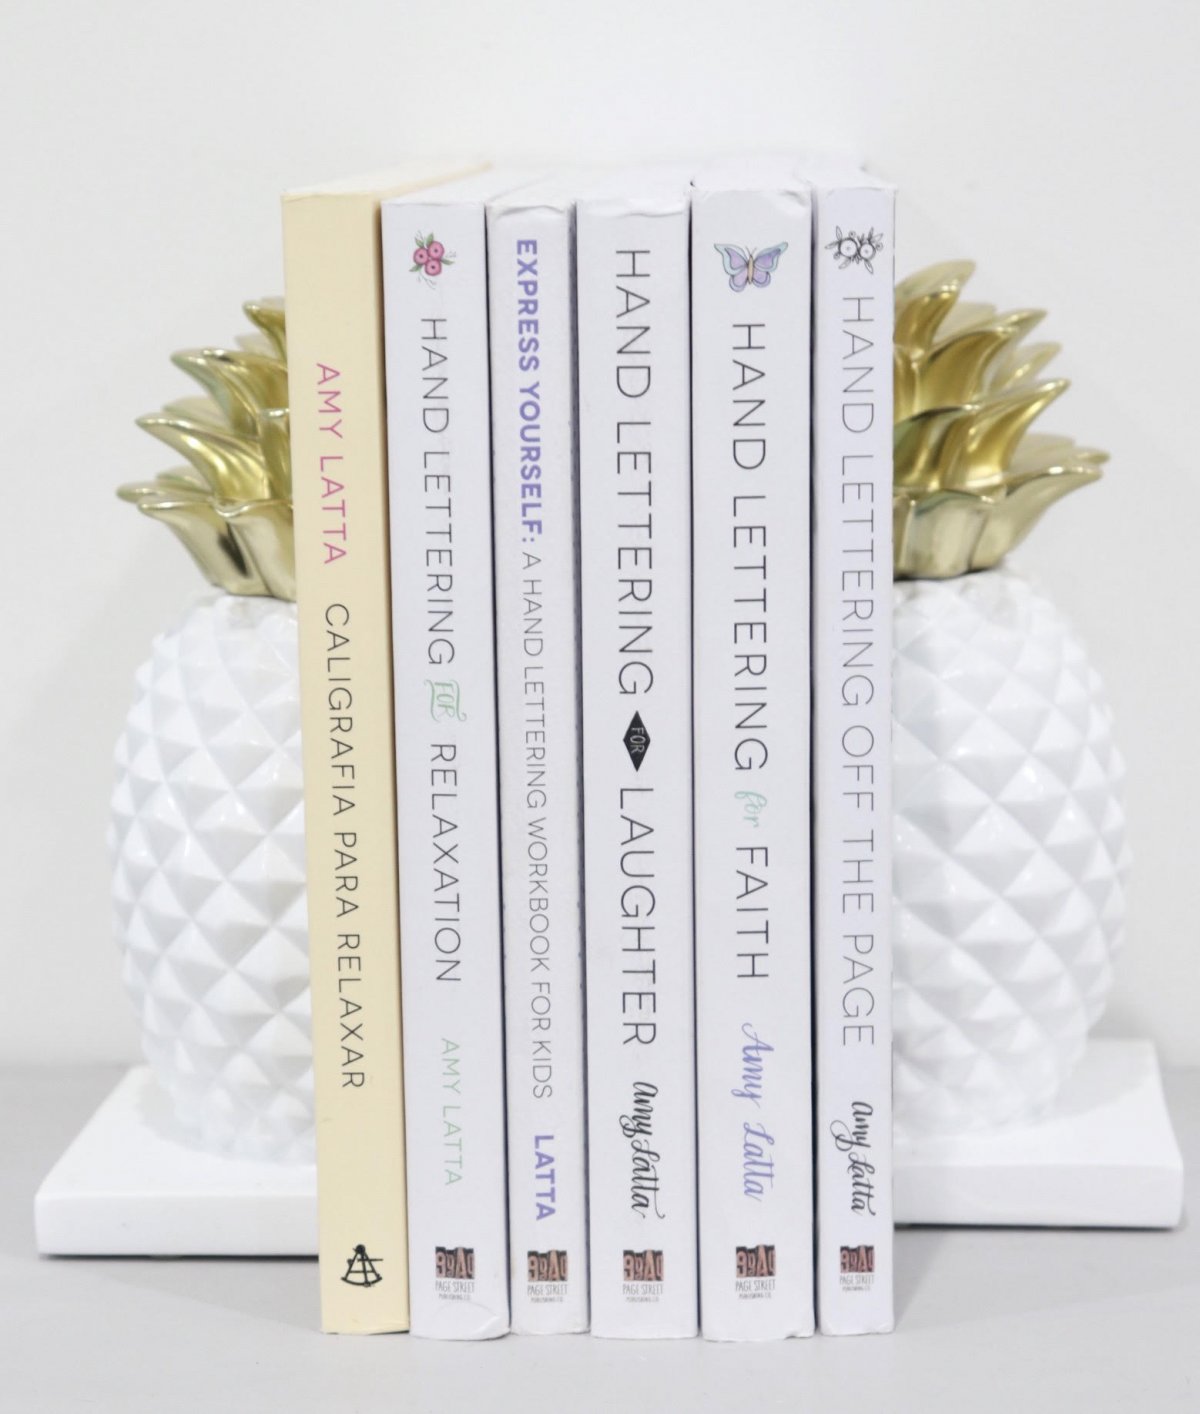
For more details on these shoes, along with 24 other lettering projects, check out my book Hand Lettering Off the Page, available on Amazon, at Barnes & Noble, Books-a-Million, Book Depository, your local bookshop, and everywhere books are sold. New to lettering? Check out my first book, Hand Lettering for Relaxation, as well as my Lettering Academy classes!
If you create a pair (or lots) of your own hand painted shoes, I’d love to see. Be sure to share your project photos in the Amy Latta & Friends Facebook group so we can all be inspired.
Before you go, check these out:
Easy Hand Lettering (as seen on Hallmark Home & Family)
Hand Lettered Gift Tags (as seen on Hallmark Home & Family)

Free Hand Lettering Practice Pages


These are awesome! I know Hobby Lobby sells canvas shoes too. I think I will pick some up to try this with.