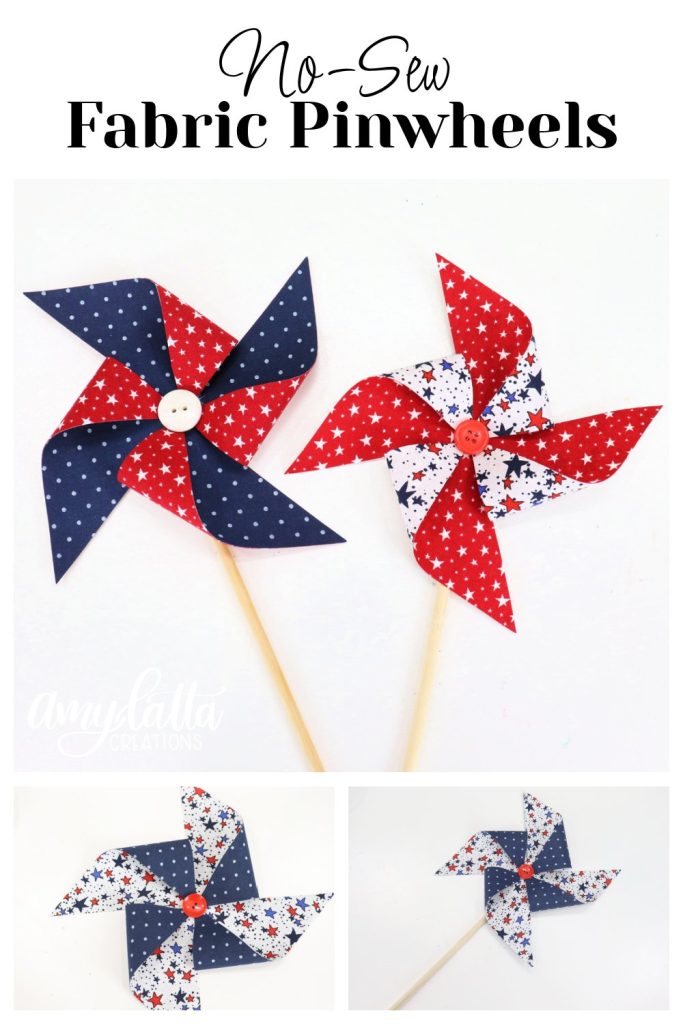
No-Sew Fabric Pinwheels
Celebrate summer with a fun project for crafters of all ages! These No-Sew Fabric Pinwheels only take a few supplies and add a fun touch to your home decor. I chose red, white, and blue fabric for mine, but you can use any colors and patterns you like to make your own. Let’s get started!
How to Make Fabric Pinwheels
This project takes about 10-15 minutes per pinwheel. If you’re anything like me, after you see how cute they turn out, you’ll find yourself wanting to make more than just one.
Materials & Supplies
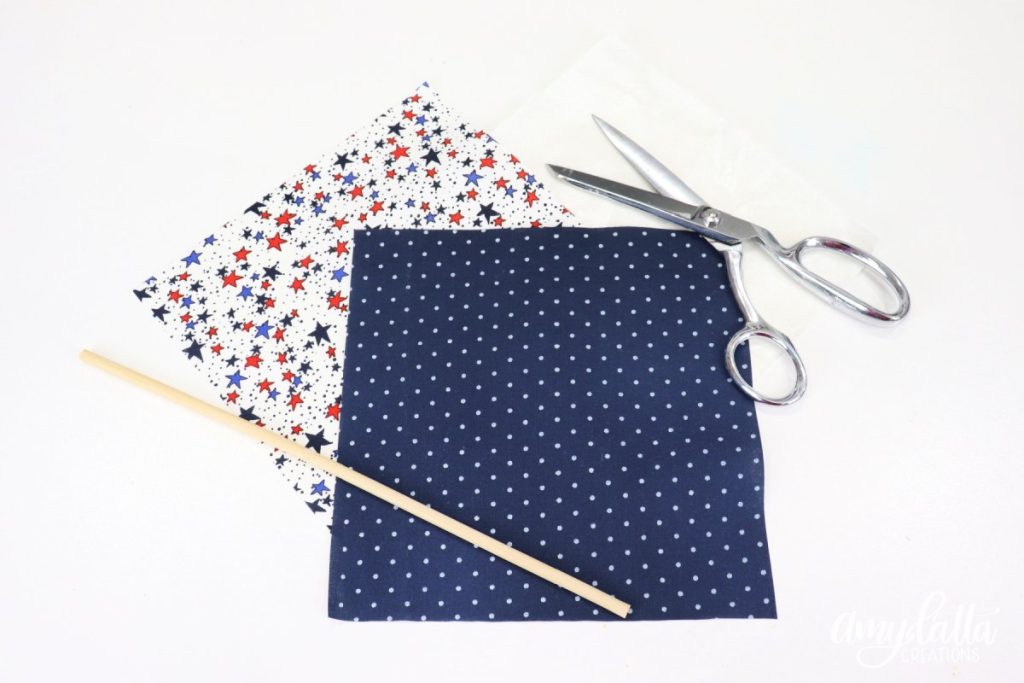
- two pieces of coordinating fabric (7” square each)
- double-sided fusible interfacing
- button
- wooden dowel (1/4” x 12”)
- scissors and/or rotary cutter and cutting mat
- hot glue gun and glue sticks
- pencil or heat erasable pen
Instructions
1. Cut your fabric and interfacing.
You’ll need a 7” square of each of the two fabrics, and a 6 3/4” square of interfacing.
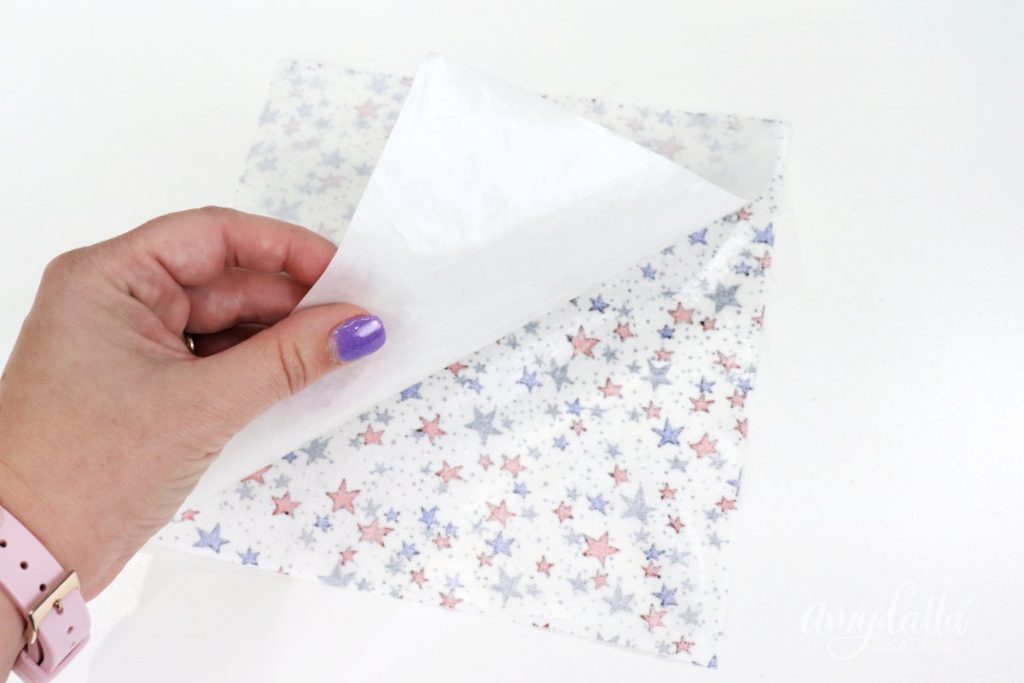
2. Iron the interfacing to the wrong side of one fabric square.
Use the manufacturer’s instructions on the interfacing for the best results.
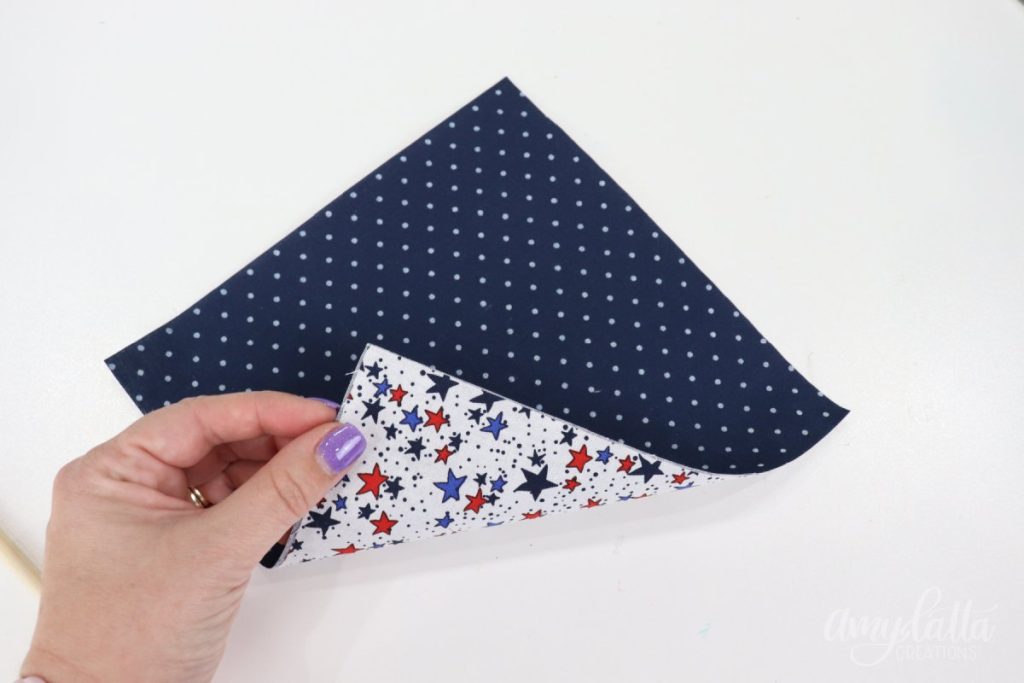
3. Iron the fabrics together.
Peel the backing paper off. Place the other fabric square on top, and iron to adhere it to the other square and the interfacing. Now you’ll have a double-sided square.
4. Trim your square.
Trim all 4 sides by 1/4” to create a finished square that measures 6 1/2.” The interfacing in between the fabrics will keep the edges smooth.
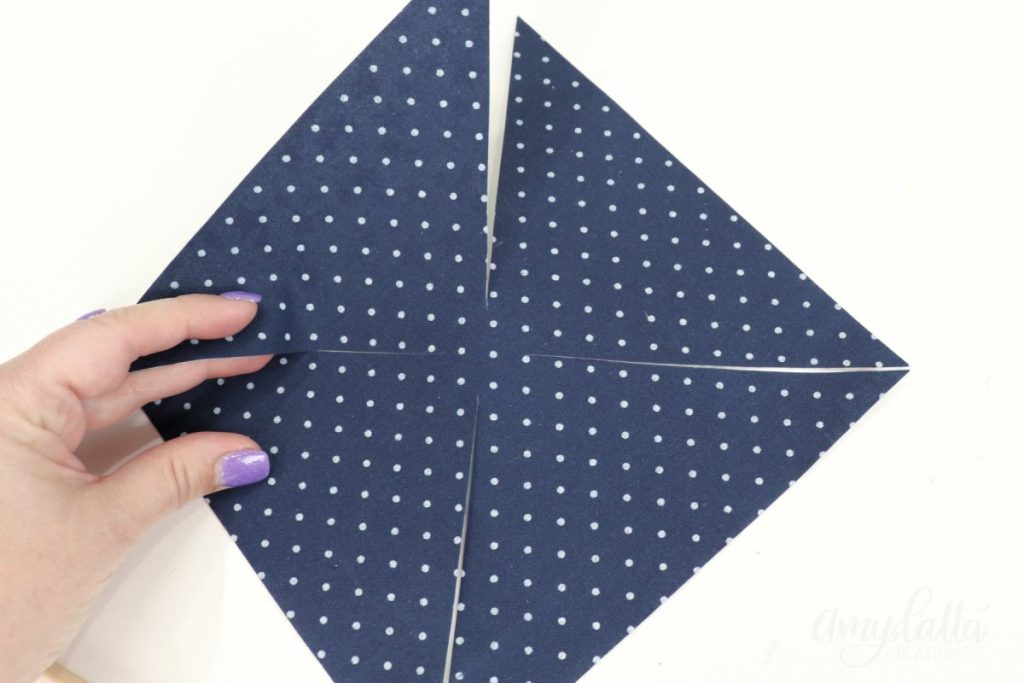
5. Mark your cut lines.
Use a pencil or a fabric marking pen to draw diagonal lines connecting opposite corners to form an “x.” Then, starting where the lines intersect, make a mark 1/2” from the center in each of the four directions.
5. Cut your fabric.
Cut along the lines, stopping at the marked spot. This will give you four triangle shapes that are still connected in the center.
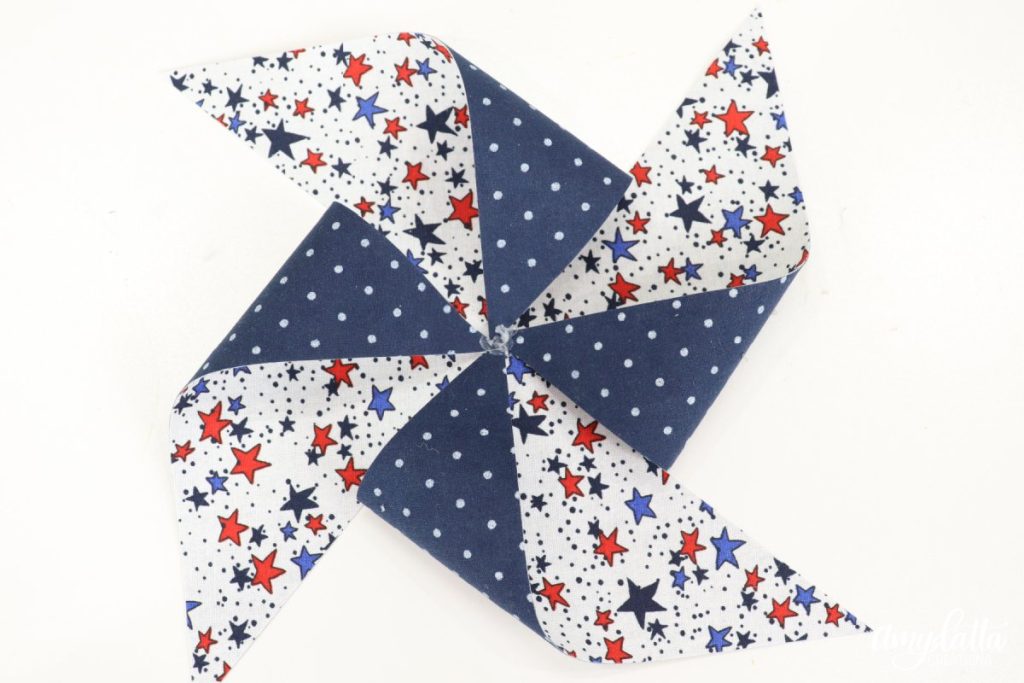
6. Fold and glue.
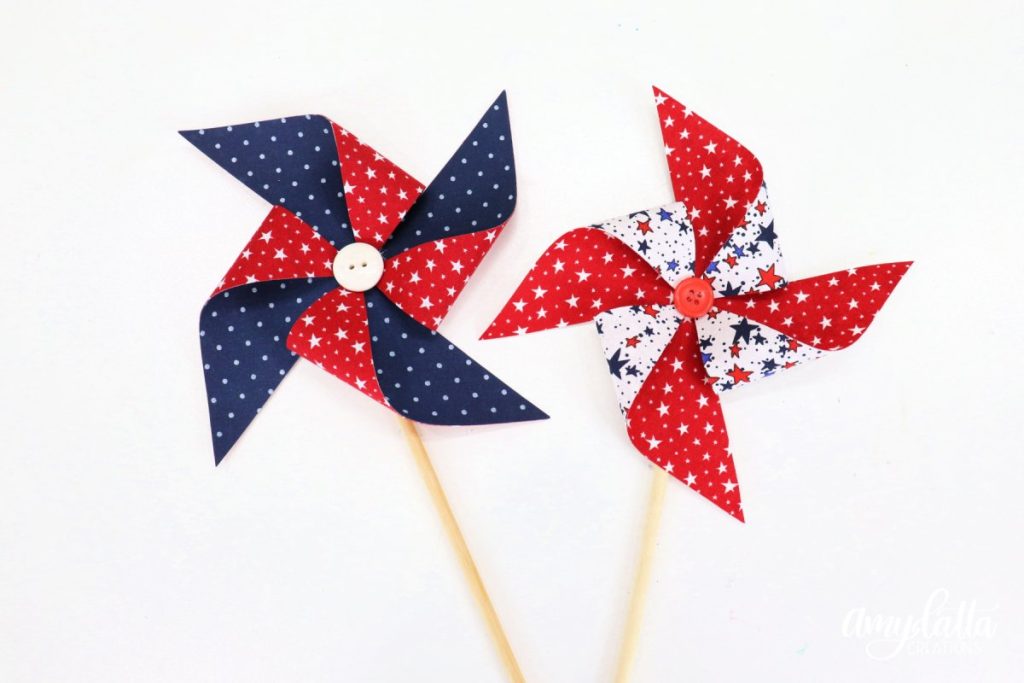
Decide which fabric you want to see more of, and place the square with that side facing up (I chose the white side). Place a dot of hot glue in the center of the square. Fold the right side of each triangle in to the center and press it into the glue.
Use the eraser end of a pencil or a wooden craft stick to push the fabric down into the hot glue (rather than your finger) to prevent burns.
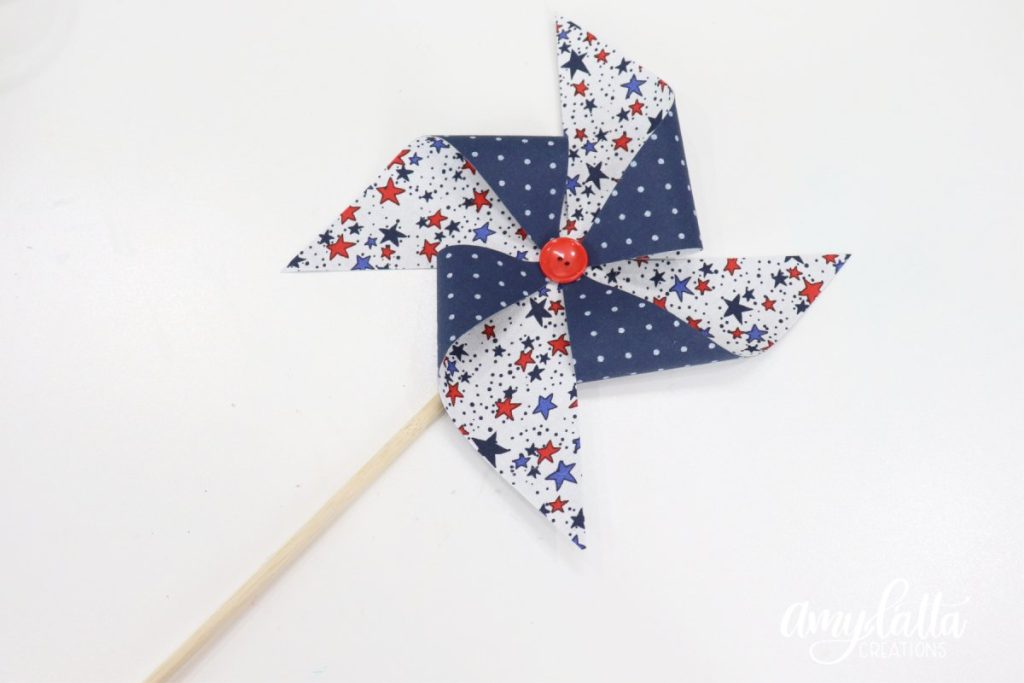
7. Add a button and a wooden dowel.
Finish your pinwheel by gluing a button in the center to cover the area where the points are glued. Then, glue the dowel to the back, and your pinwheel is ready to display!
Crafting Tips
- I highly recommend using a rotary cutter for cutting fabric! It makes the cutting process so much easier, as well as more precise.
- Using a square quilting ruler makes it super-easy to trim your fabric to the perfect size.
- My favorite way to mark on fabric projects is with the Pilot Frixion Pen, which is heat erasable! Just draw, cut, then iron your fabric and the ink totally disappears! Coolest pen ever.
- Using different combinations of fabric will give you a totally unique look.
- Try trimming your square slightly smaller (like 5.5″ or 6”) for a more petite pinwheel.
Frequently Asked Questions
No, it’s just decorative.
If you’re purchasing fabric by the yard, you’ll need 1/4 of a yard of each of your two colors. You can also get pre-cut 10” squares in packs called Layer Cakes.
YES! You can get double-sided scrapbook paper, then start at step 4. The process is exactly the same for steps 4-7!

More Patriotic Holiday Projects
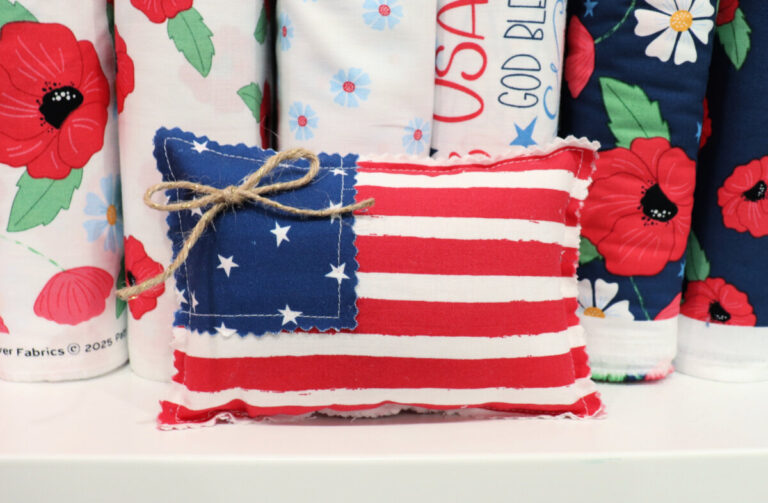
Looking for more patriotic projects to decorate your home? Check out these other tutorials for inspiration and step-by-step instructions.


No-Sew Fabric Pinwheels
Materials
- 2 pieces coordinating fabric
- double sided fusible interfacing
- button
- wooden dowel
- hot glue and glue sticks
- pencil or heat erasable pen
- scissors and/or rotary cutter and mat
Instructions
- Cut your fabric and interfacing (7” fabric squares, 6 3/4” interfacing square).
- Iron the interfacing to the wrong side of one fabric square.
- Peel the backing and iron the other fabric square on top.
- Trim your square 1/4” on each side to create a 6 1/2” square.
- Mark diagonal lines from one corner to the opposite corner to form an X.
- Mark each line 1/2” from the center in all four directions.
- Starting at the corners, cut along each line, stopping at the 1/2” mark.
- Fold the right side of each cut section in to the center and glue.
- Glue a button in the center and a wooden dowel to the back.
If you try making your own No-Sew Pinwheels, I’d love to see how they turn out. Make sure you’re part of the Amy Latta & Friends Facebook Group so you can share your latest project photos and we can all be inspired. Also, don’t forget to save this post to Pinterest and/or share it with a creative friend. Happy crafting!


Where did you find the double sided interfacing please ? Everything I have looked at is not the same. We use to call it interfacing but cannot find it. Love these pinwheels and my senior citizen ladies want to make them. Thanks so much!
https://www.missouriquiltco.com/products/heat-n-bond-fusible-interfacing-light