Braided Fabric Bracelet
Looking for a way to use your long, thin fabric scraps? Make a fashion statement by creating a braided fabric bracelet!
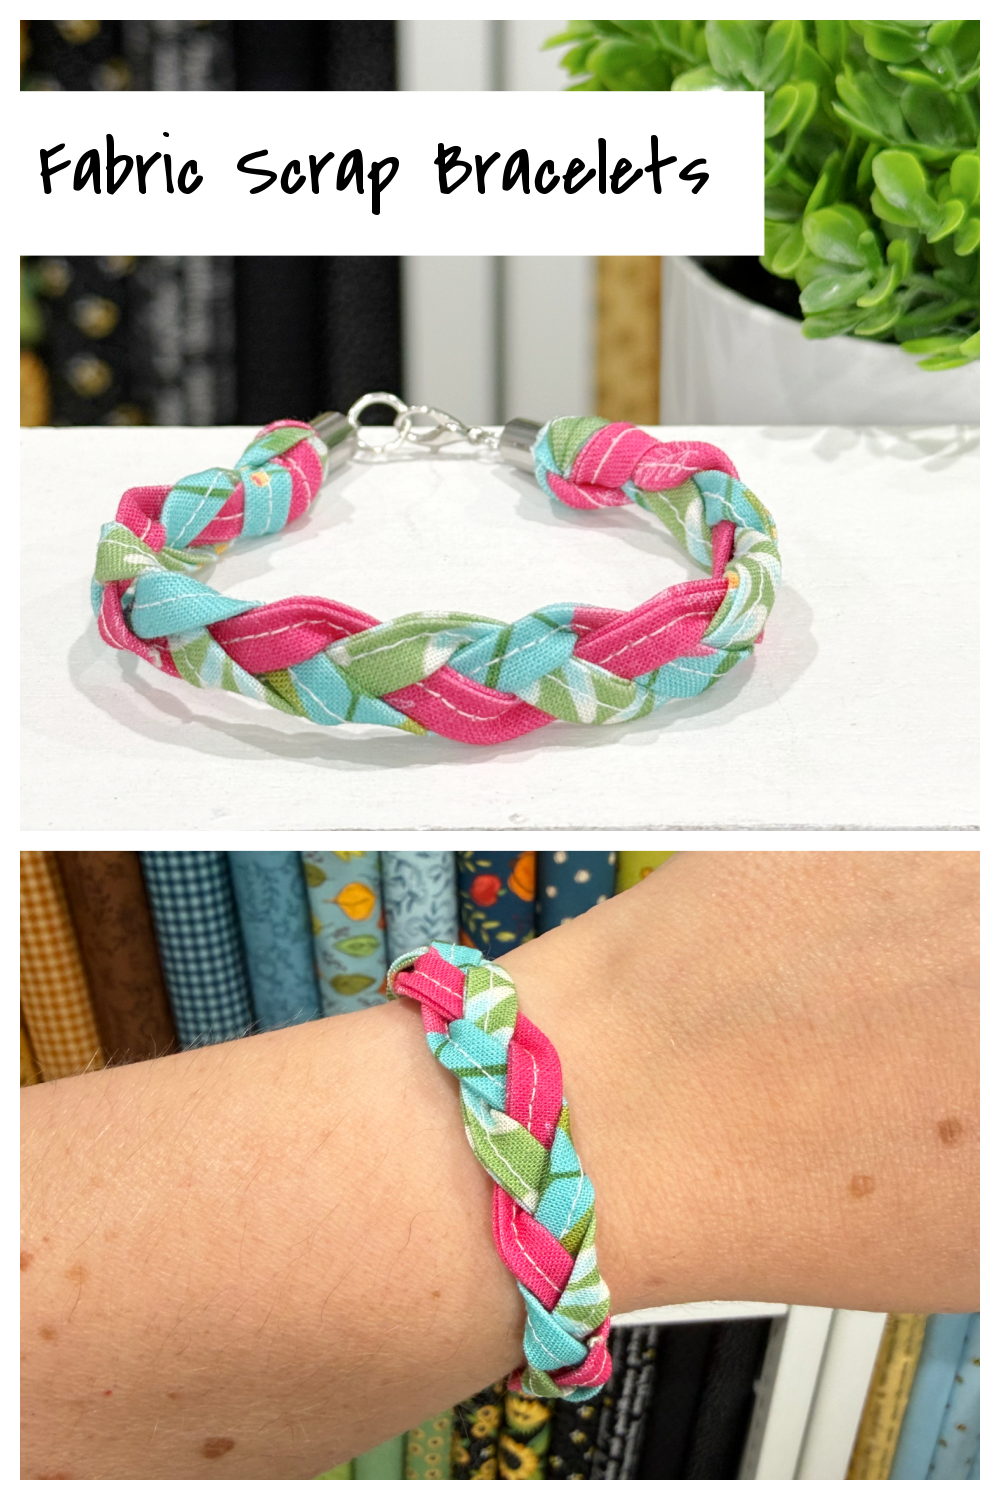
How to Make Braided Fabric Bracelets
These bracelets only require a few supplies and are a great way to use up your scrap stash. Just grab the materials listed below, and let’s get started.
Materials
- 3 fabric scraps (1” wide strips)
- 7mm jewelry end caps
- jump rings
- lobster clasp
- jewelry pliers
- E6000 or super glue
Instructions
1. Fold each strip in half longways and iron to make a crease.
2. Open the strip, then fold each long edge in to the center and iron. Fold on the crease again to form a long strip that is about 1/4” wide.
3. Sew a seam through the strip to hold the fabric in place.
4. Tie the three strips into a knot.
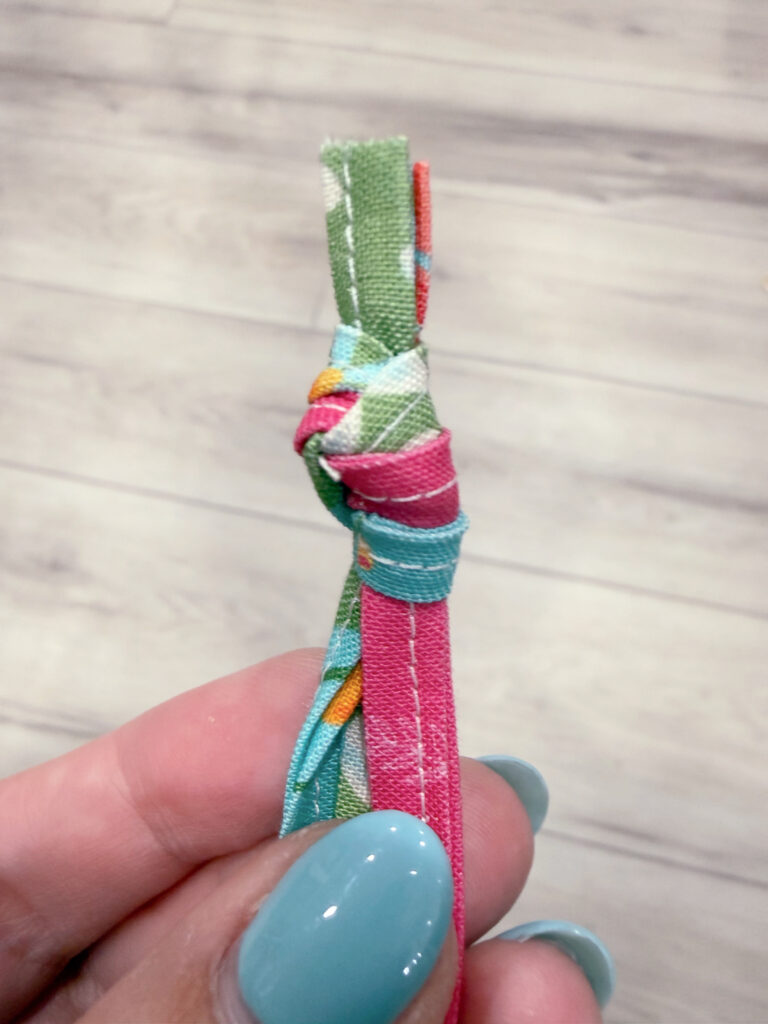
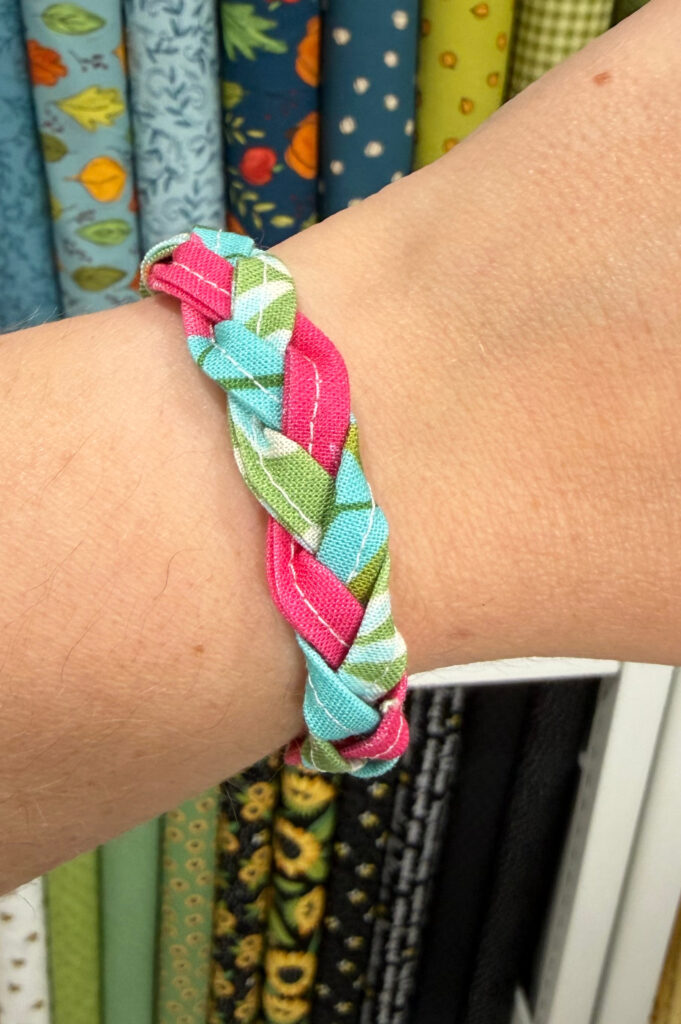
5. Braid the strips together and tie a knot at the bottom.
I recommend braiding between 5”-6” depending on your wrist size. The braid with knots should cover about 3/4 of your wrist, leaving room for the jewelry hardware. If you make the braid too long, your bracelet will be too big and slide off your wrist.
6. Trim the ends of the fabric and glue them inside your 7mm jewelry caps.

7. Add a jump ring to each jewelry cap, and attach a lobster clasp to one jump ring.
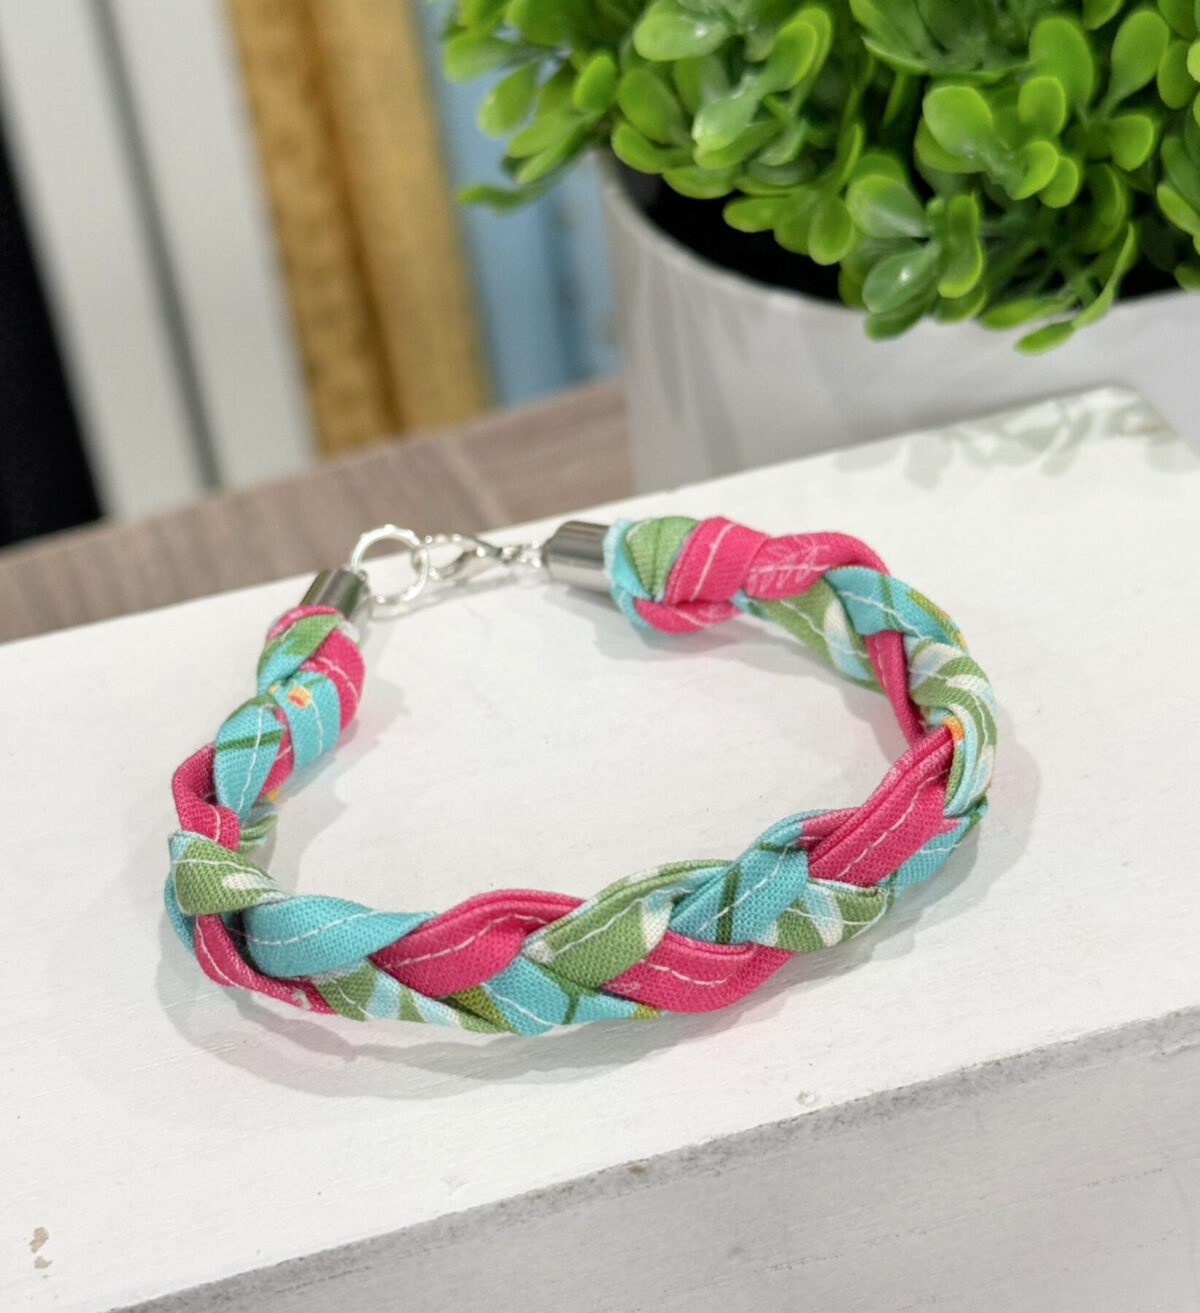
Now your bracelet is ready to wear!
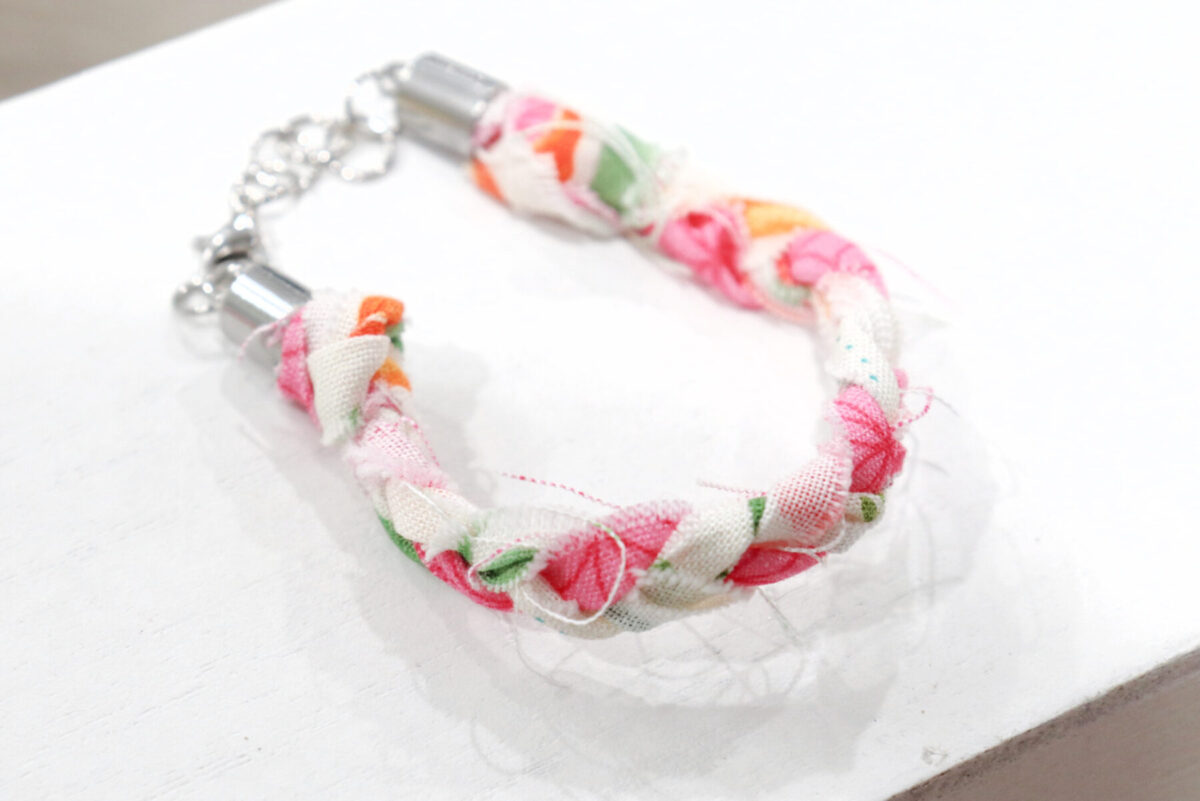
No-Sew Version
Don’t sew? No problem! Skip the first three steps, and start with fabric strips that are 1/2” wide instead. Tie the strips in a knot, braid, and finish as instructed in the tutorial above. Because the edges of the strips are unfinished, this will give you a scrappier look with loose strings that’s still really fun to wear (and quicker to create).
Crafting Tips
- Each combination of fabrics will give you a totally different finished look, so have fun mixing and matching your scraps.
- While kids can have fun making this project, you may want to supervise attaching the end caps due to the super glue.
Frequently Asked Questions
I used three of the fabrics from my Bloom and Grow collection for Andover. This collection ships in January 2027.
The no-sew version has a scrappy look with strings while the sewn version has finished edges.
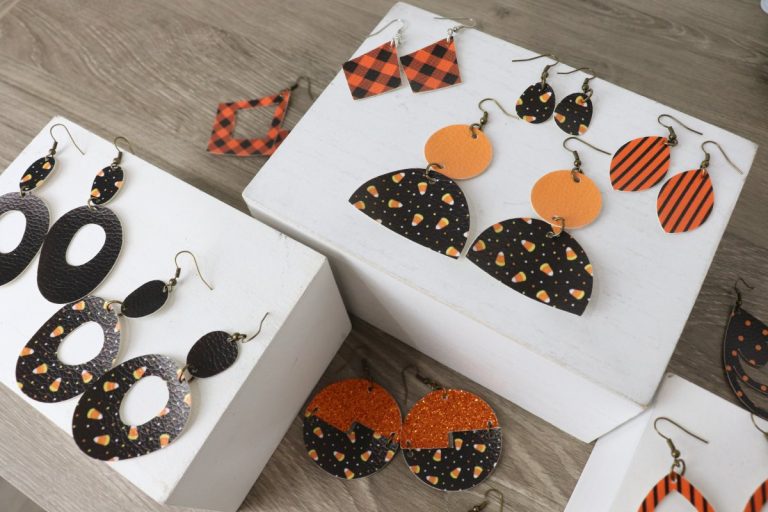
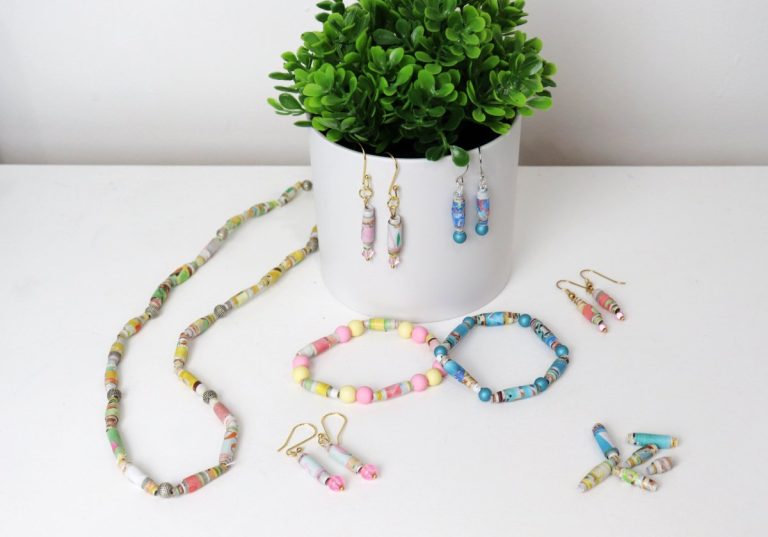
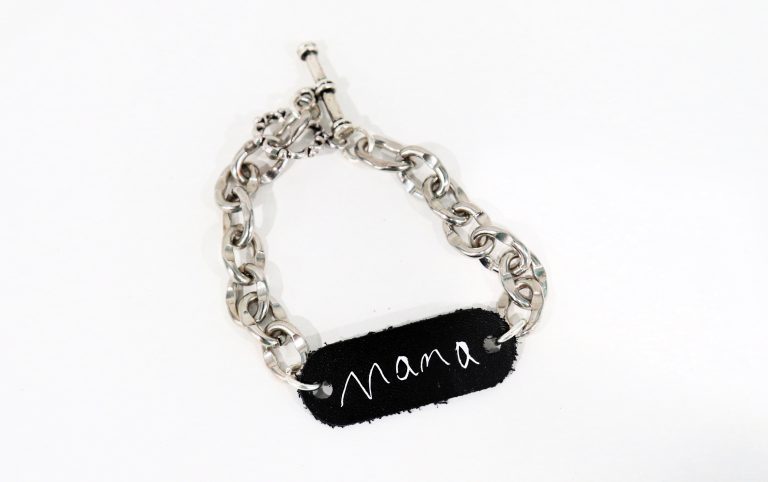
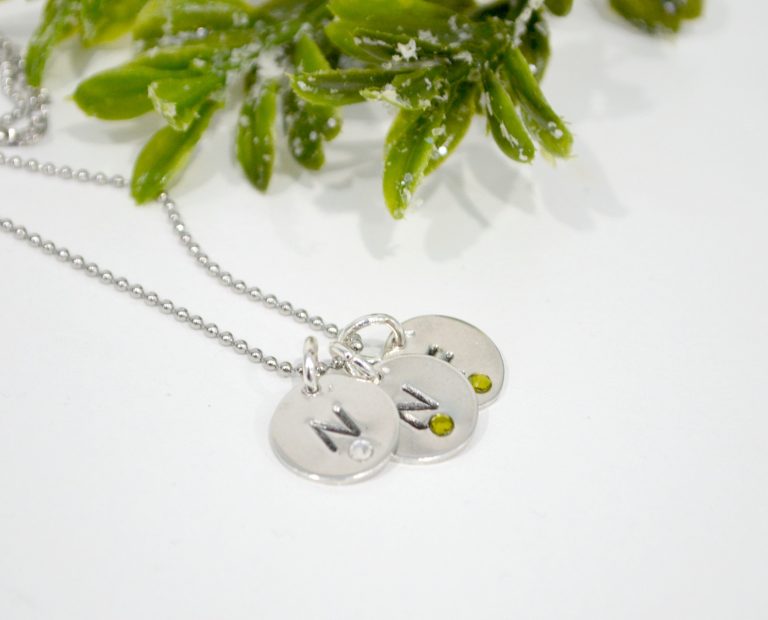
More Project Ideas
If you enjoyed this project, here are some other DIY jewelry ideas you might enjoy.
If you make your own fabric bracelets, I’d love to see how they turn out! Make sure you’re part of the Amy Latta and Friends Facebook Group so you can share your project photos and we can all inspire each other.