Chalk Paint Dresser Makeover
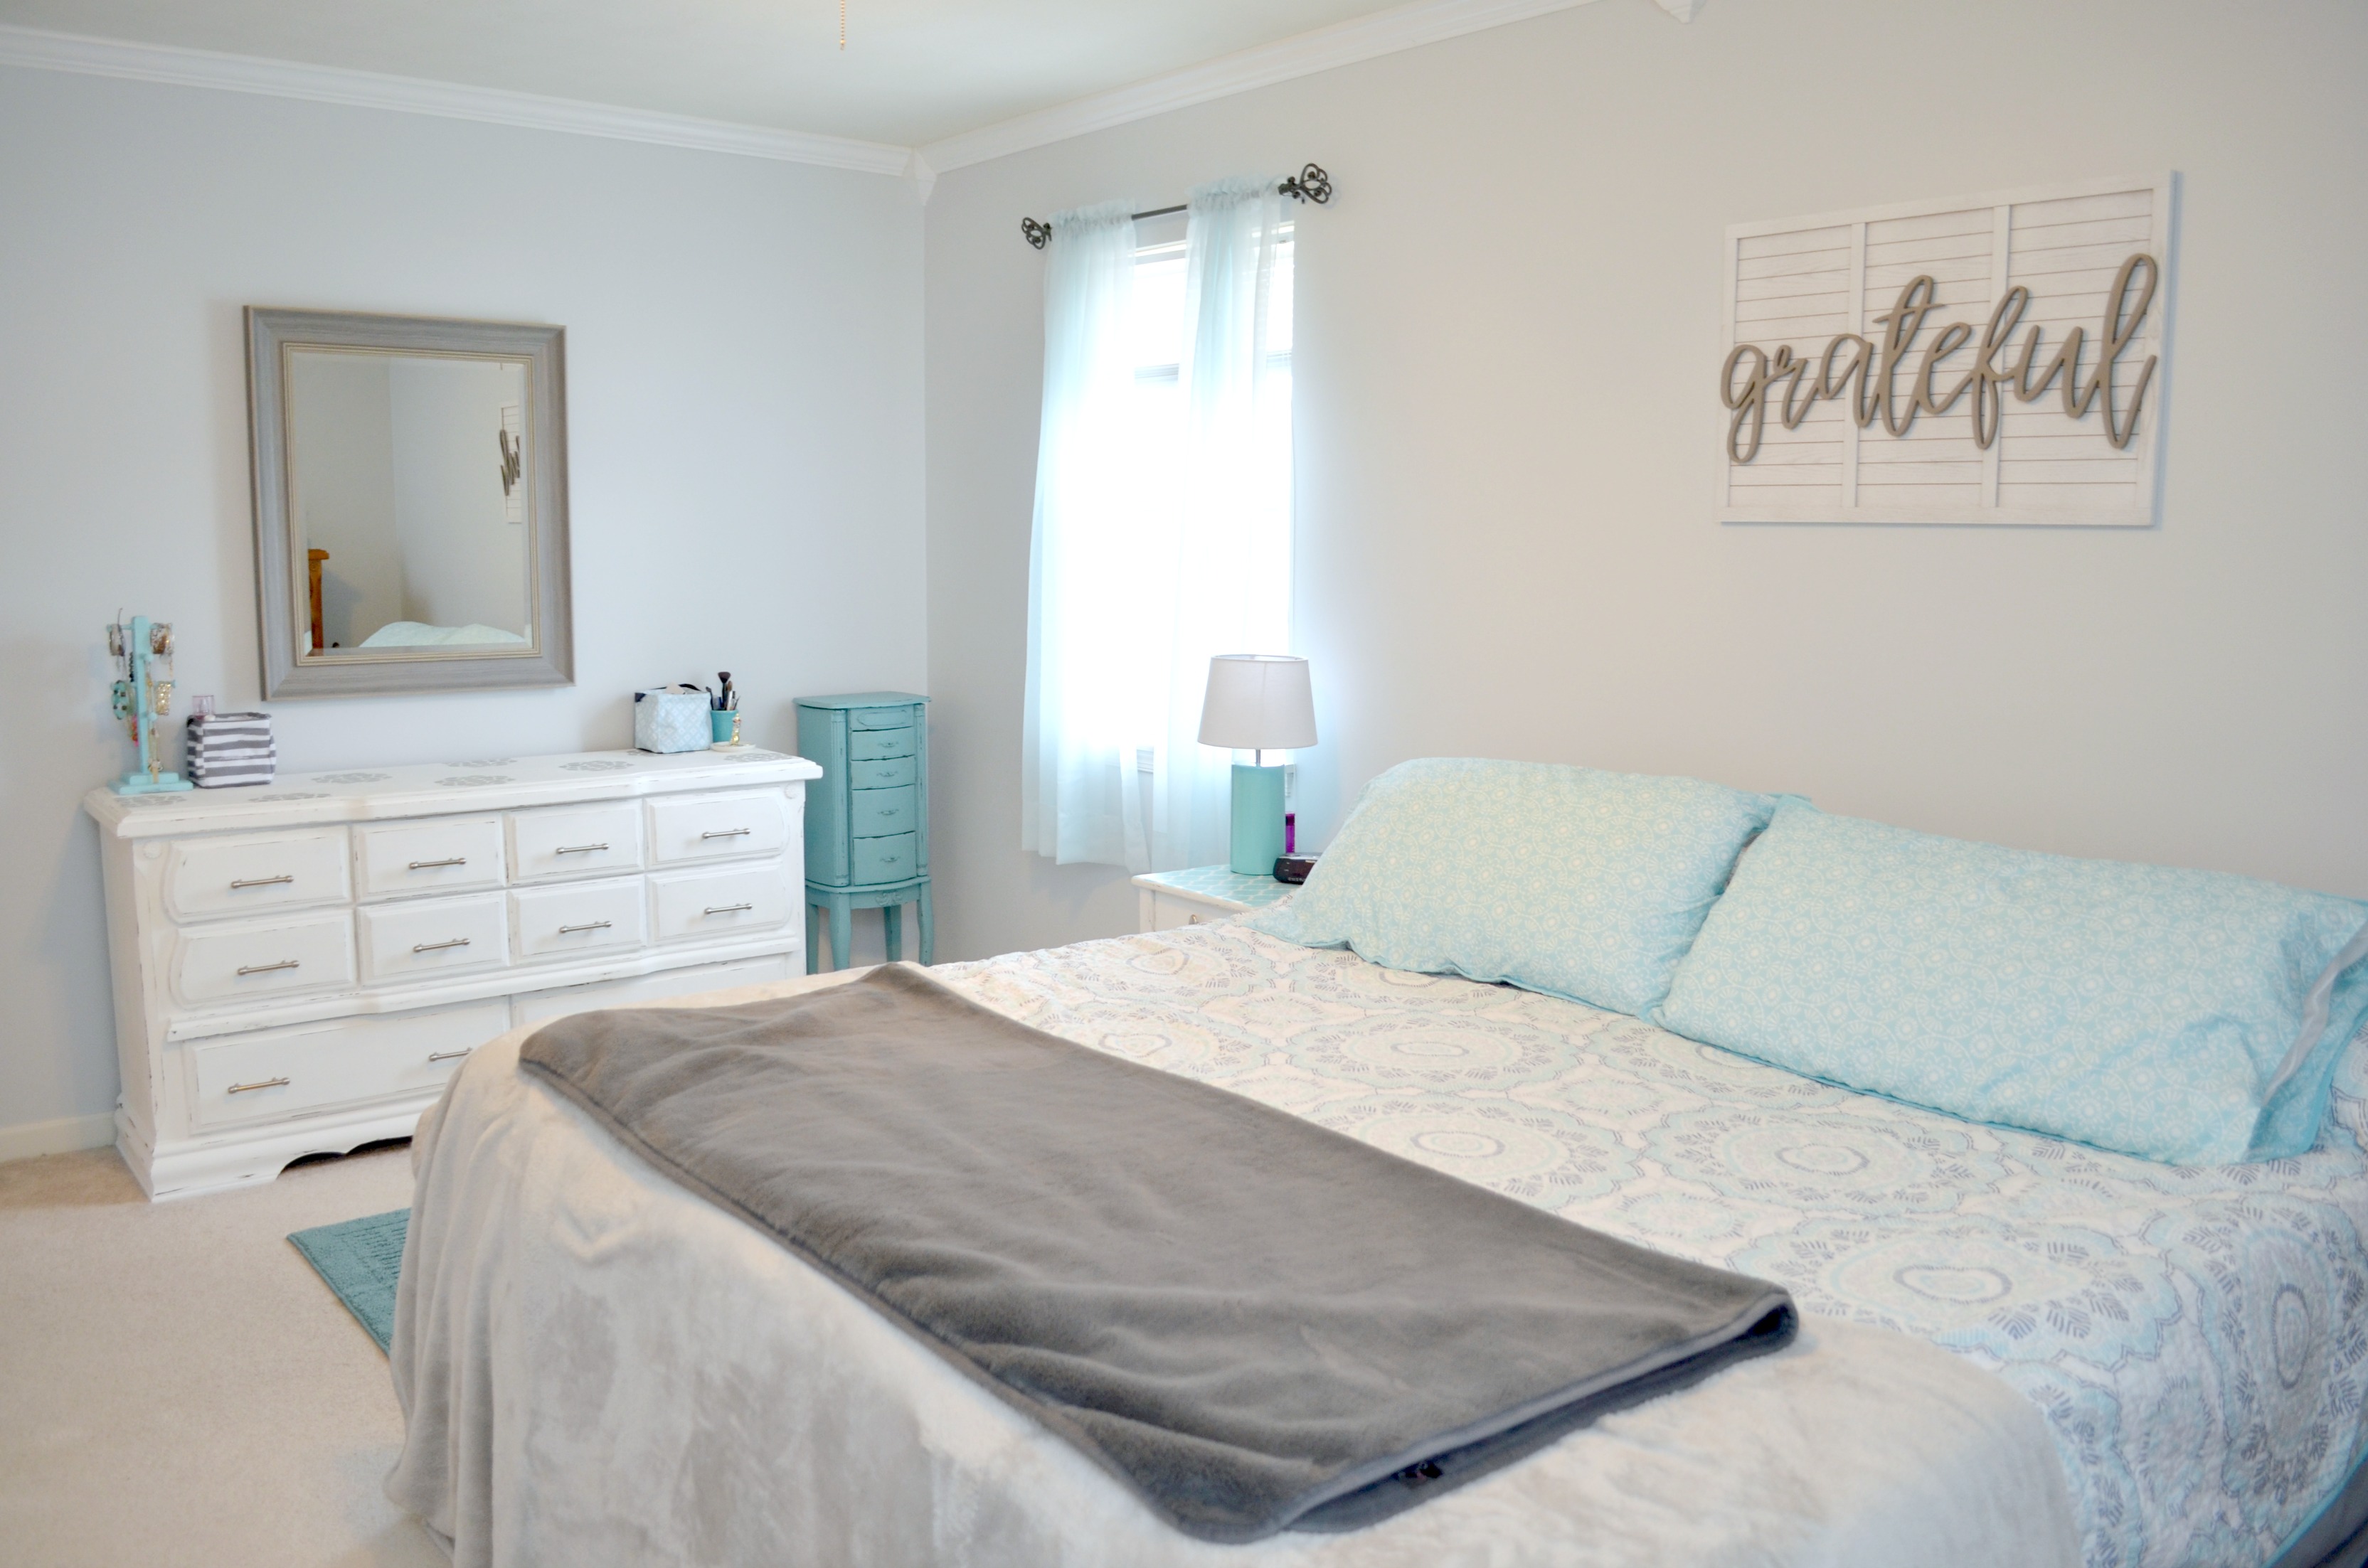
When my husband asked me what I wanted for Christmas this year, I told him that rather than “things,” I wanted to be able to fix up a few rooms in the house and make them look exactly the way I wanted. Today, I want to show you how we transformed the master bedroom by doing a few simple things. First, I chose a new paint color for the walls; a very light grey to replace the existing cream/yellow paint. Then, it was time to do a major makeover on my dresser.
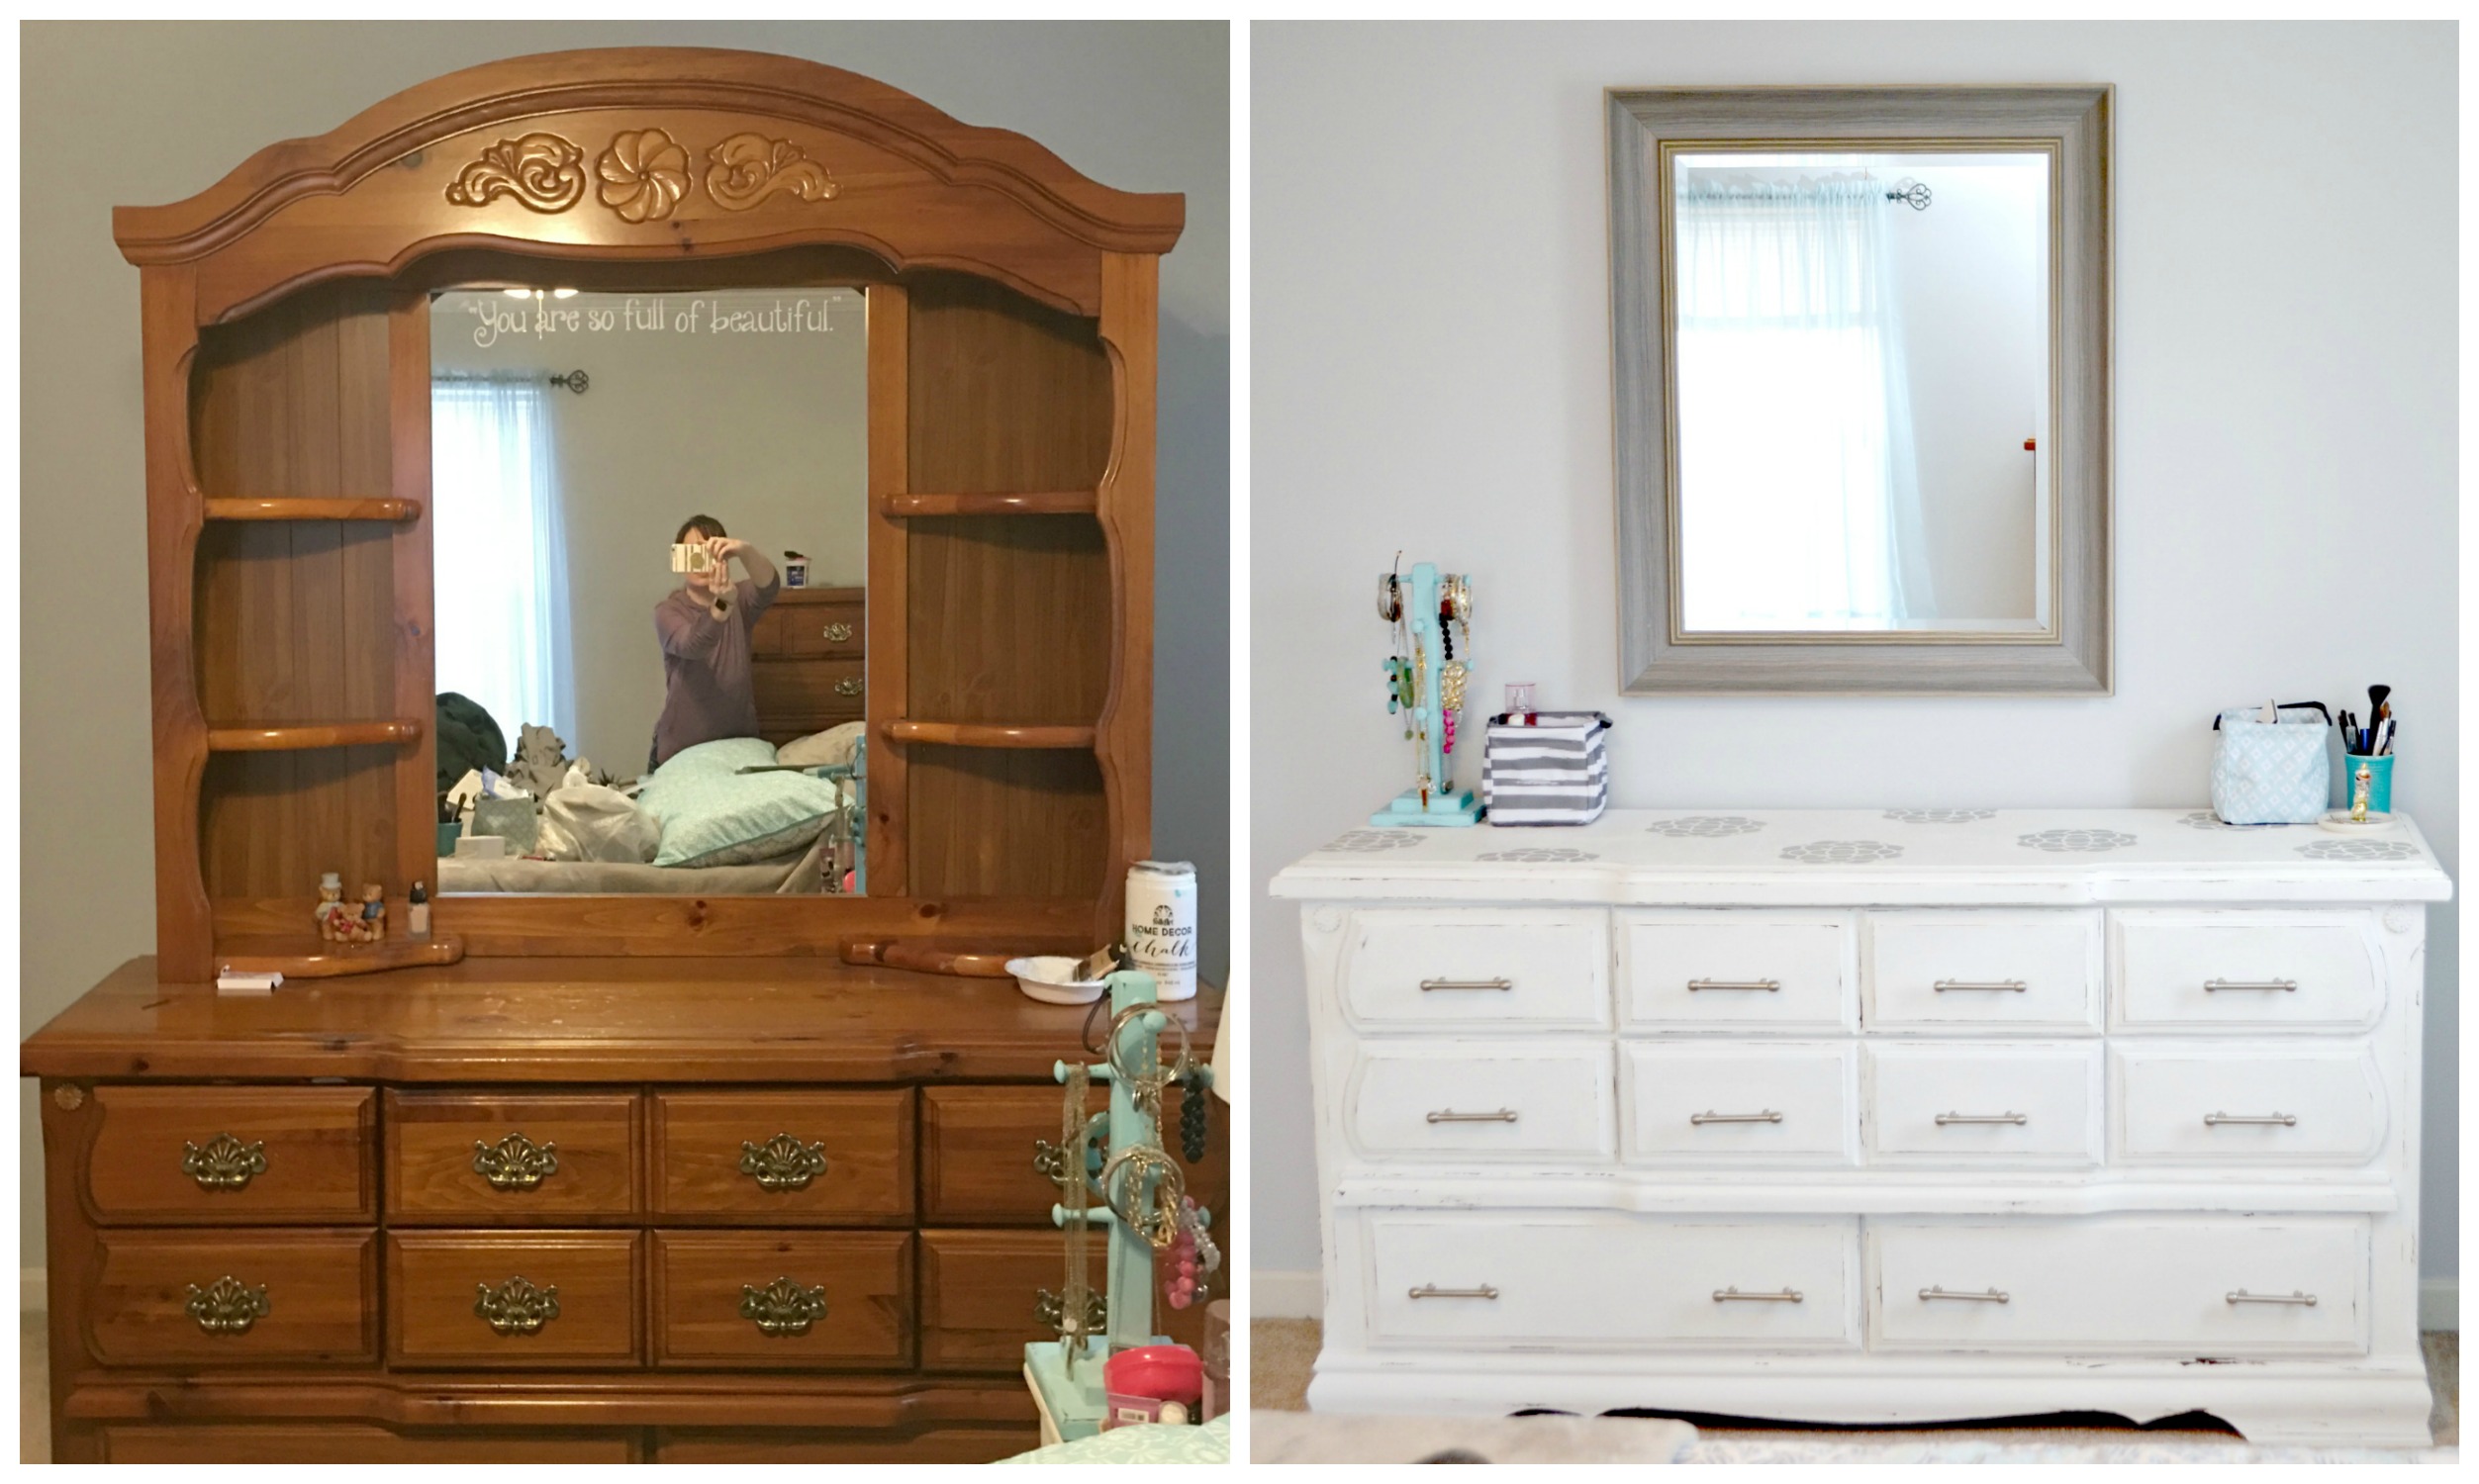
We bought our bedroom set when we got married in 2001, and at the time I thought it was really cool that mine had a hutch-type top around the mirror with shelves to hold whatever I wanted. This was before that I realized I prefer a “less-is-more” decor style. I didn’t know then that the shelves would be clutter magnets or how much dusting it would all require. The other thing I didn’t forsee was just how much smaller such a large, dark dresser would make a room feel.
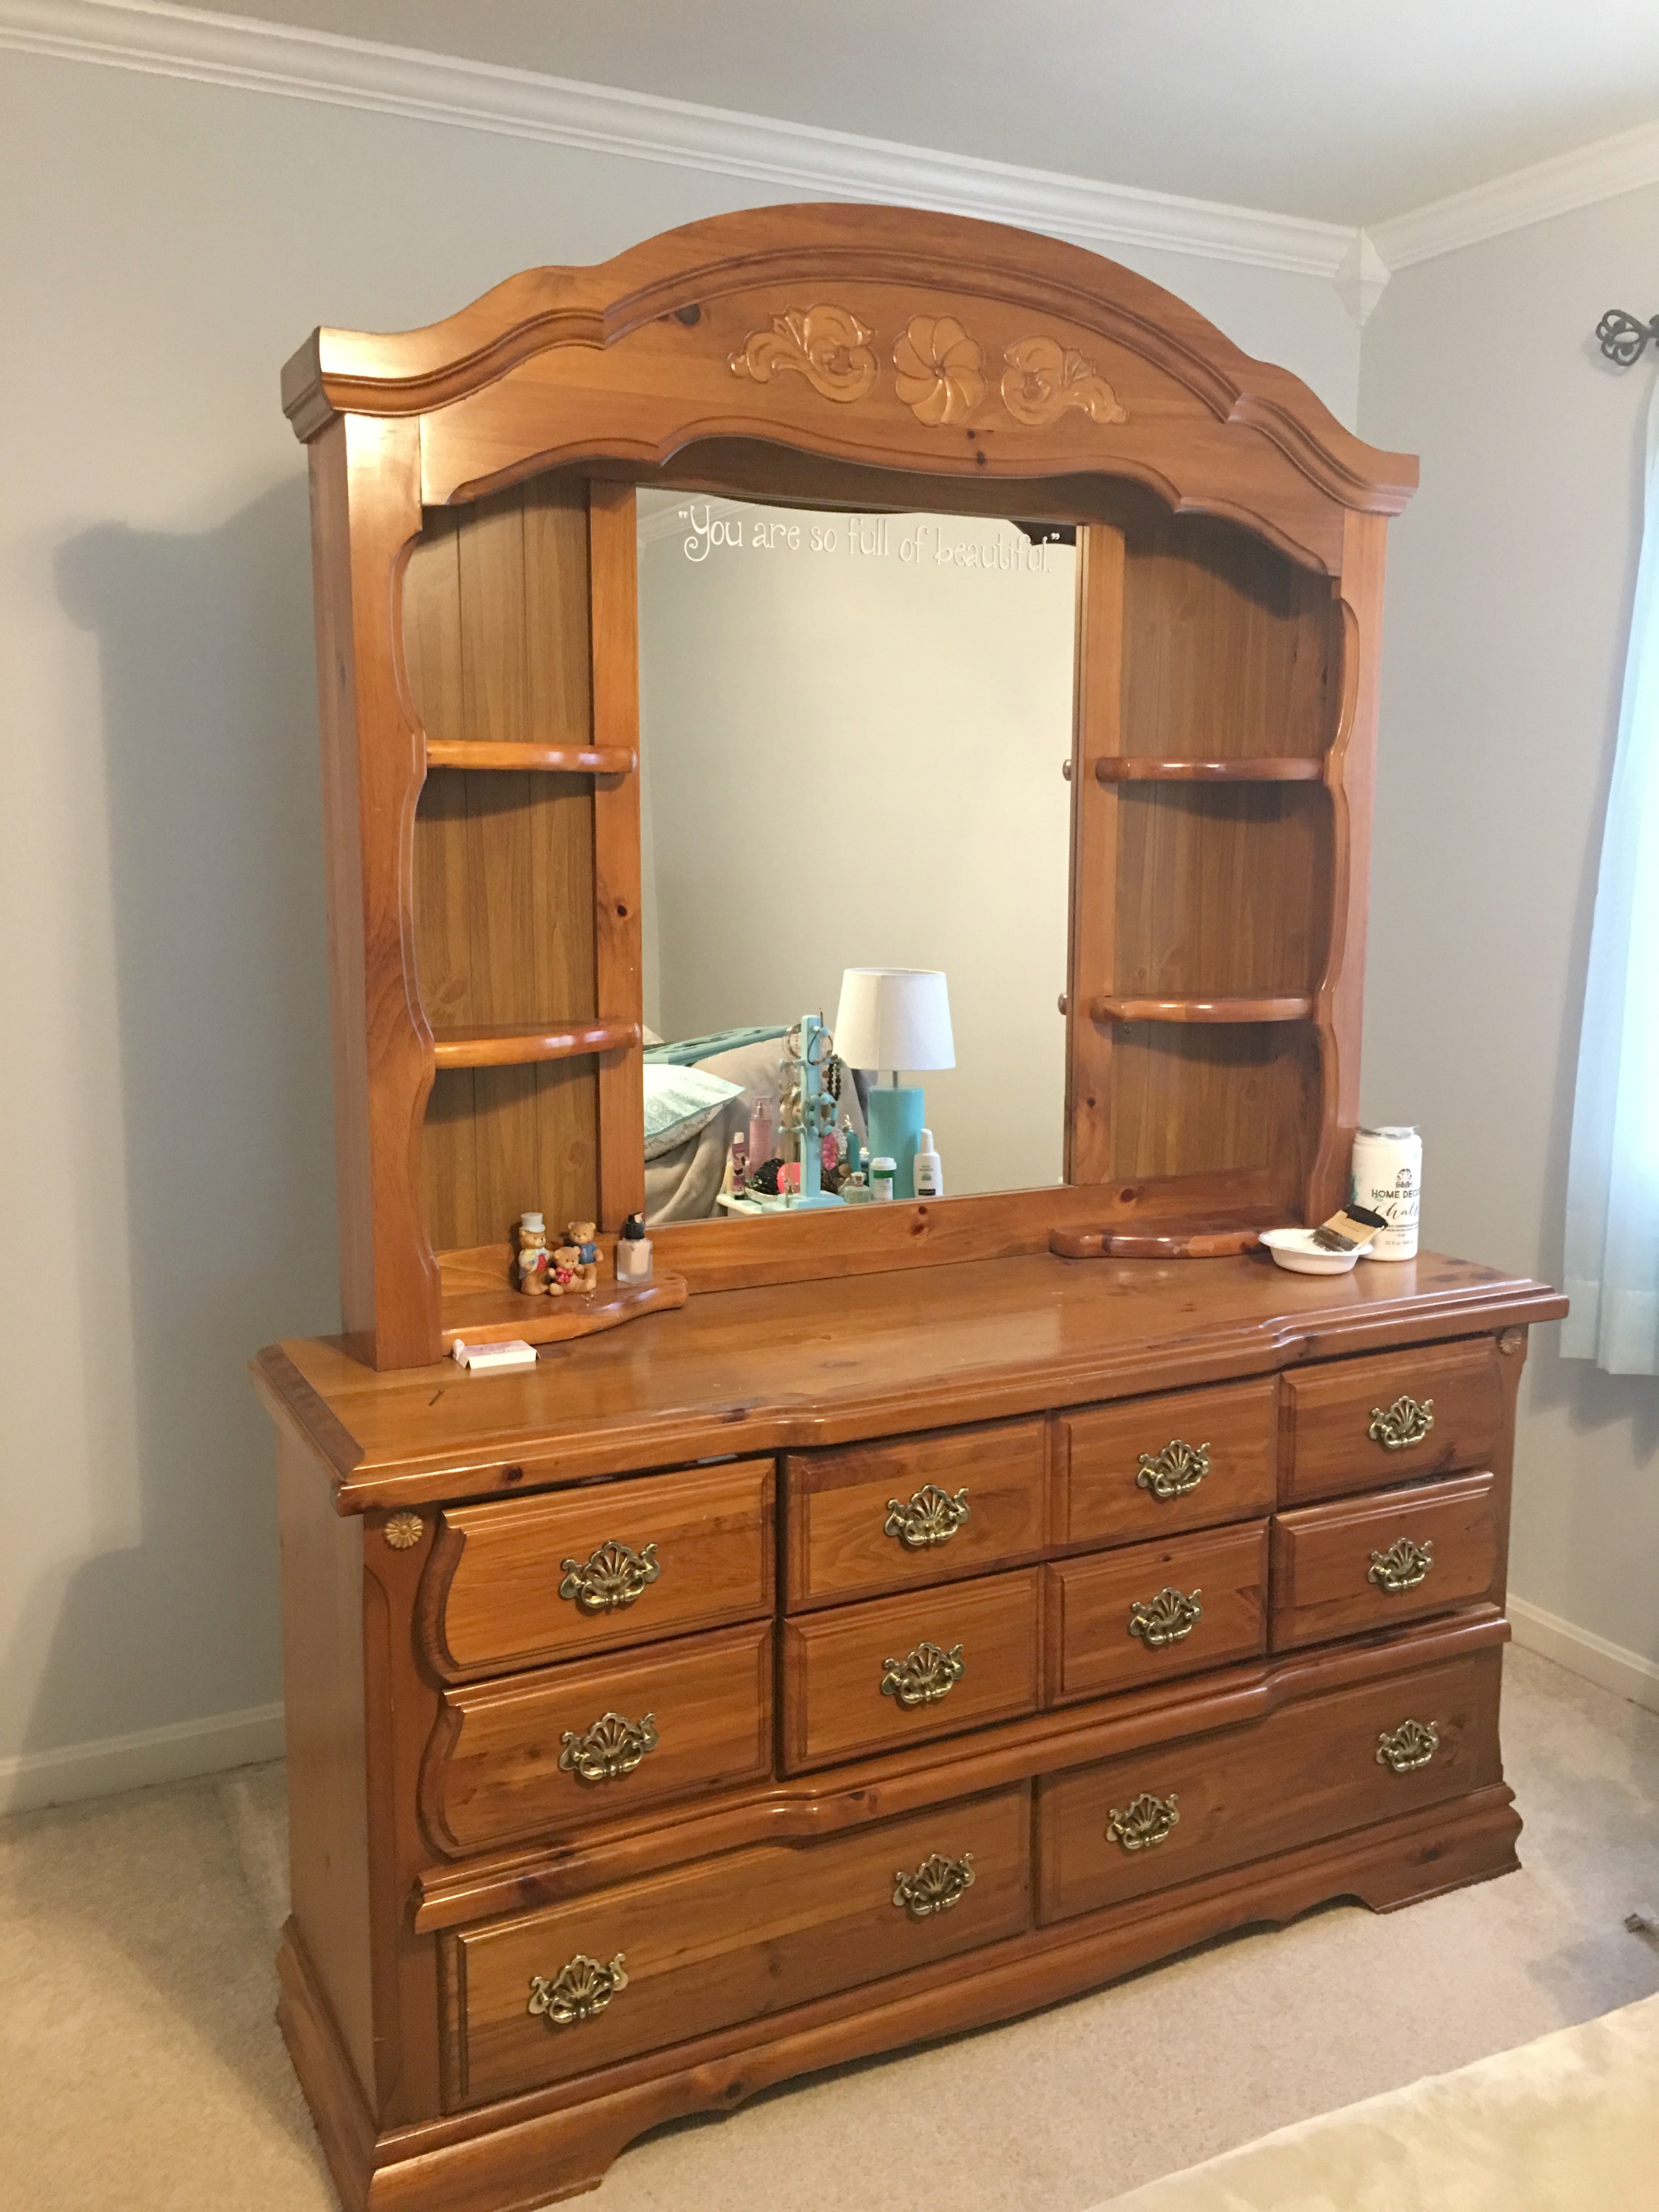
I envisioned painting the dresser white several years ago, when we moved into this home, but with the walls the creamy yellowish color, it would have looked pretty awful. Once the wall color changed, though, it was time to put my plan into action and to get rid of that top piece for a simpler, cleaner look. Here’s what I did.
Materials:
FolkArt Home Decor Chalk paint: Adirondack White, Silver Shadow, Espresso
FolkArt Home Decor Chalk Wide Brush
FolkArt Home Decor Layering Block
FolkArt Home Decor Layering Stencils: Flower
Painters’ Tape
3″ Drawer Pulls {12}
Step 1: Remove all hardware and drawers, and wipe the surfaces clean.
Make sure to empty the drawers too! This also forced me to organize and sort through my clothing, which was a good thing.
Step 2: Paint the dresser and drawer fronts with FolkArt Home Decor Chalk paint and the Wide Brush.
Because I was painting white over a dark wood, it took three coats to totally cover. No sanding or other prep was necessary, but if I were to do it again, I would probably start with a coat of primer. Make sure the paint is completely dry between each coat and before moving on.
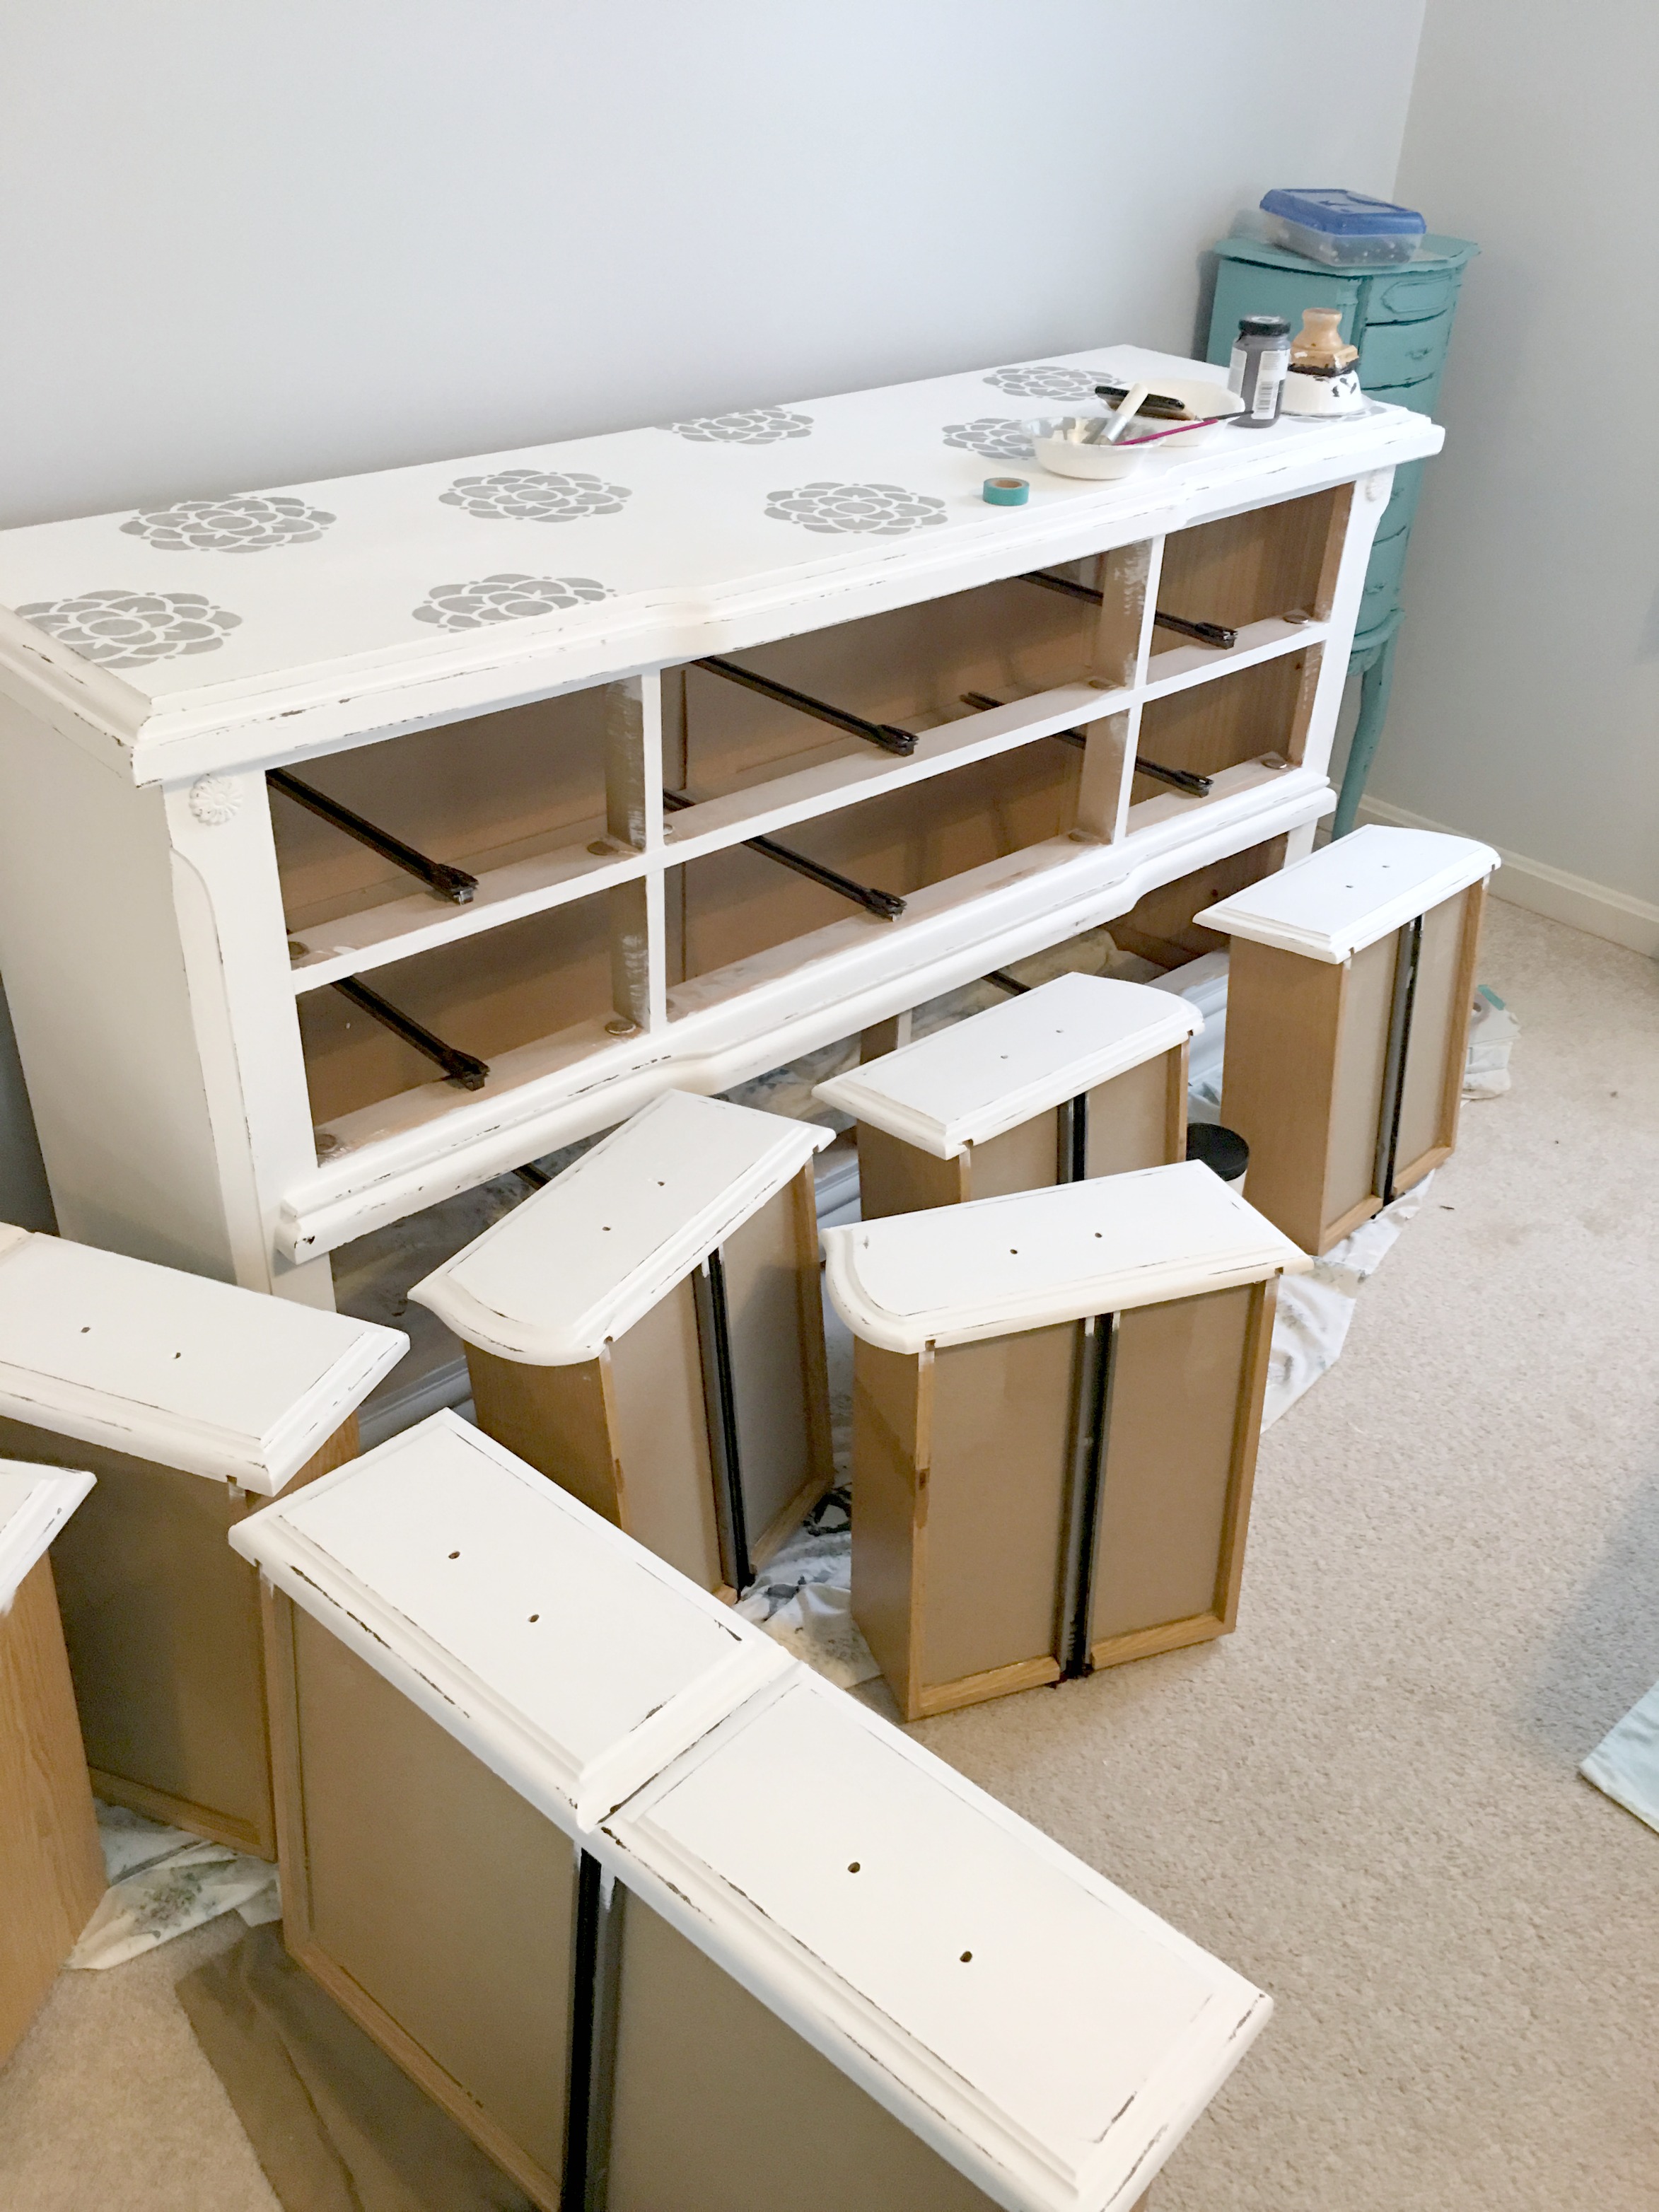
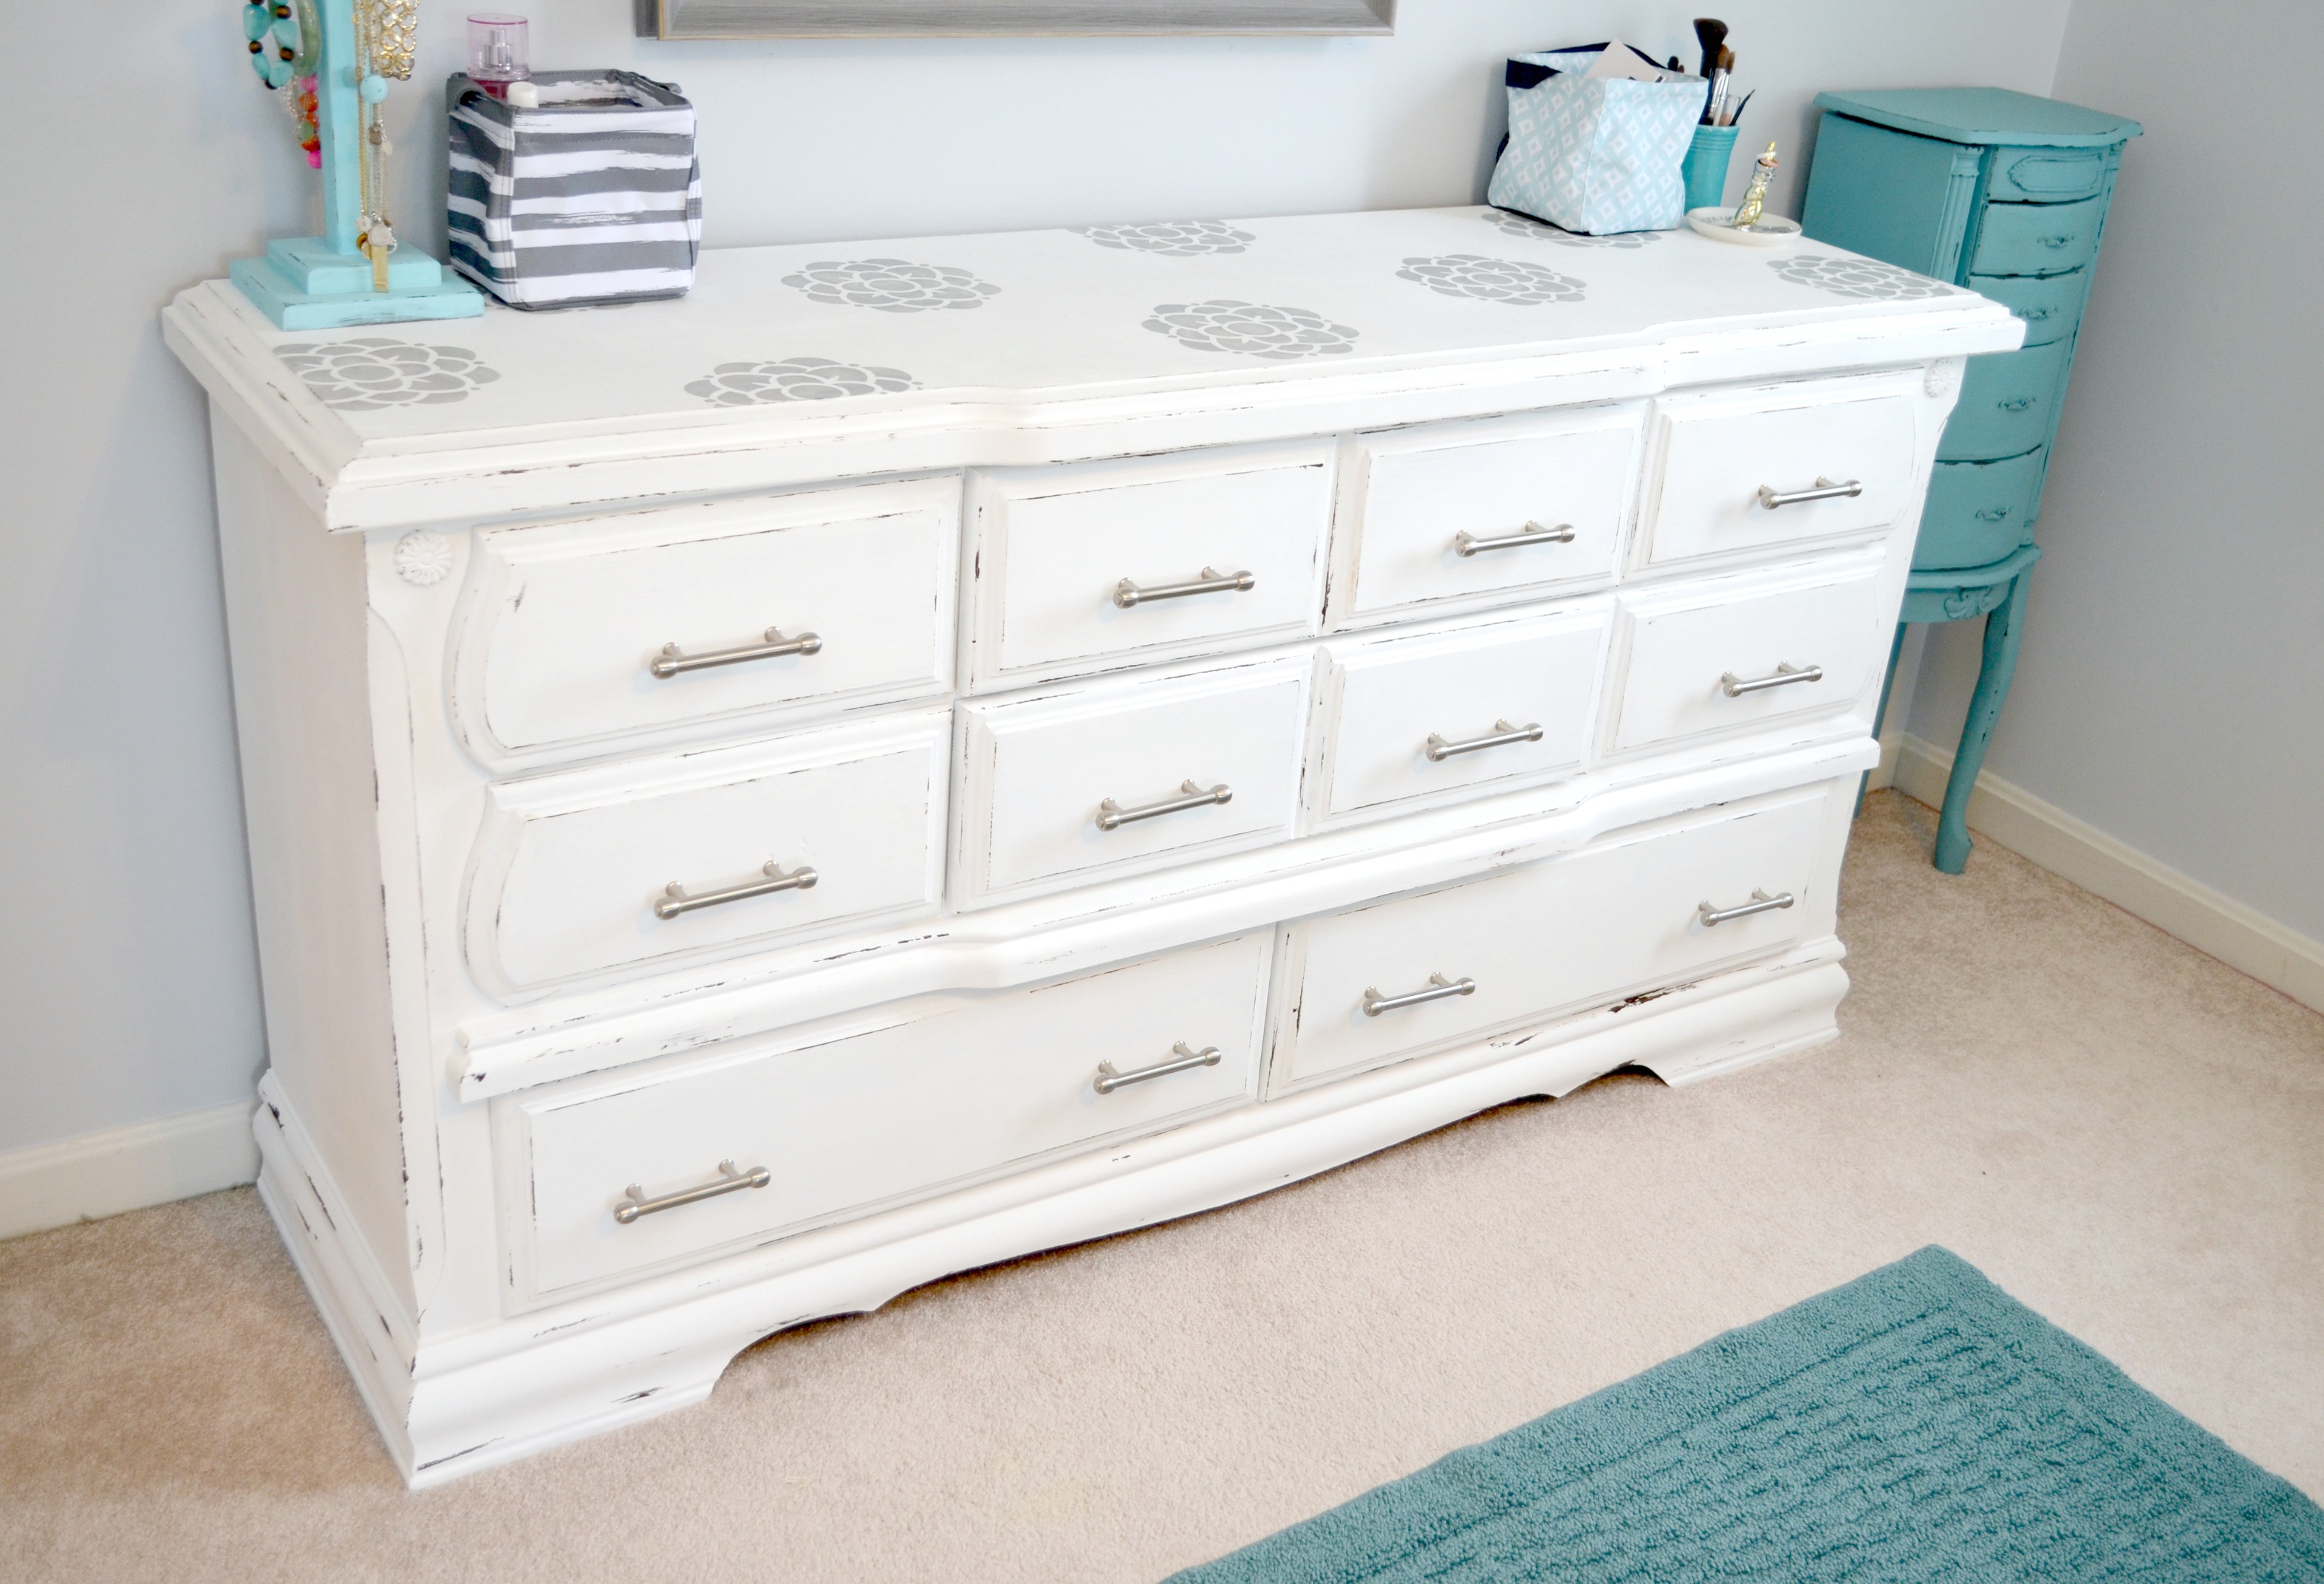
Step 3: Stencil a design on the dresser top.
I used just one of the flower layering stencils. I applied a small amount of Silver Shadow paint to a stencil brush and tapped it into the open areas of the stencil. For tips on how to stencil and get a crisp, clean image, check out this post.
Once the stenciling was complete, I went back with a tiny detail brush and touched up any areas that needed it.
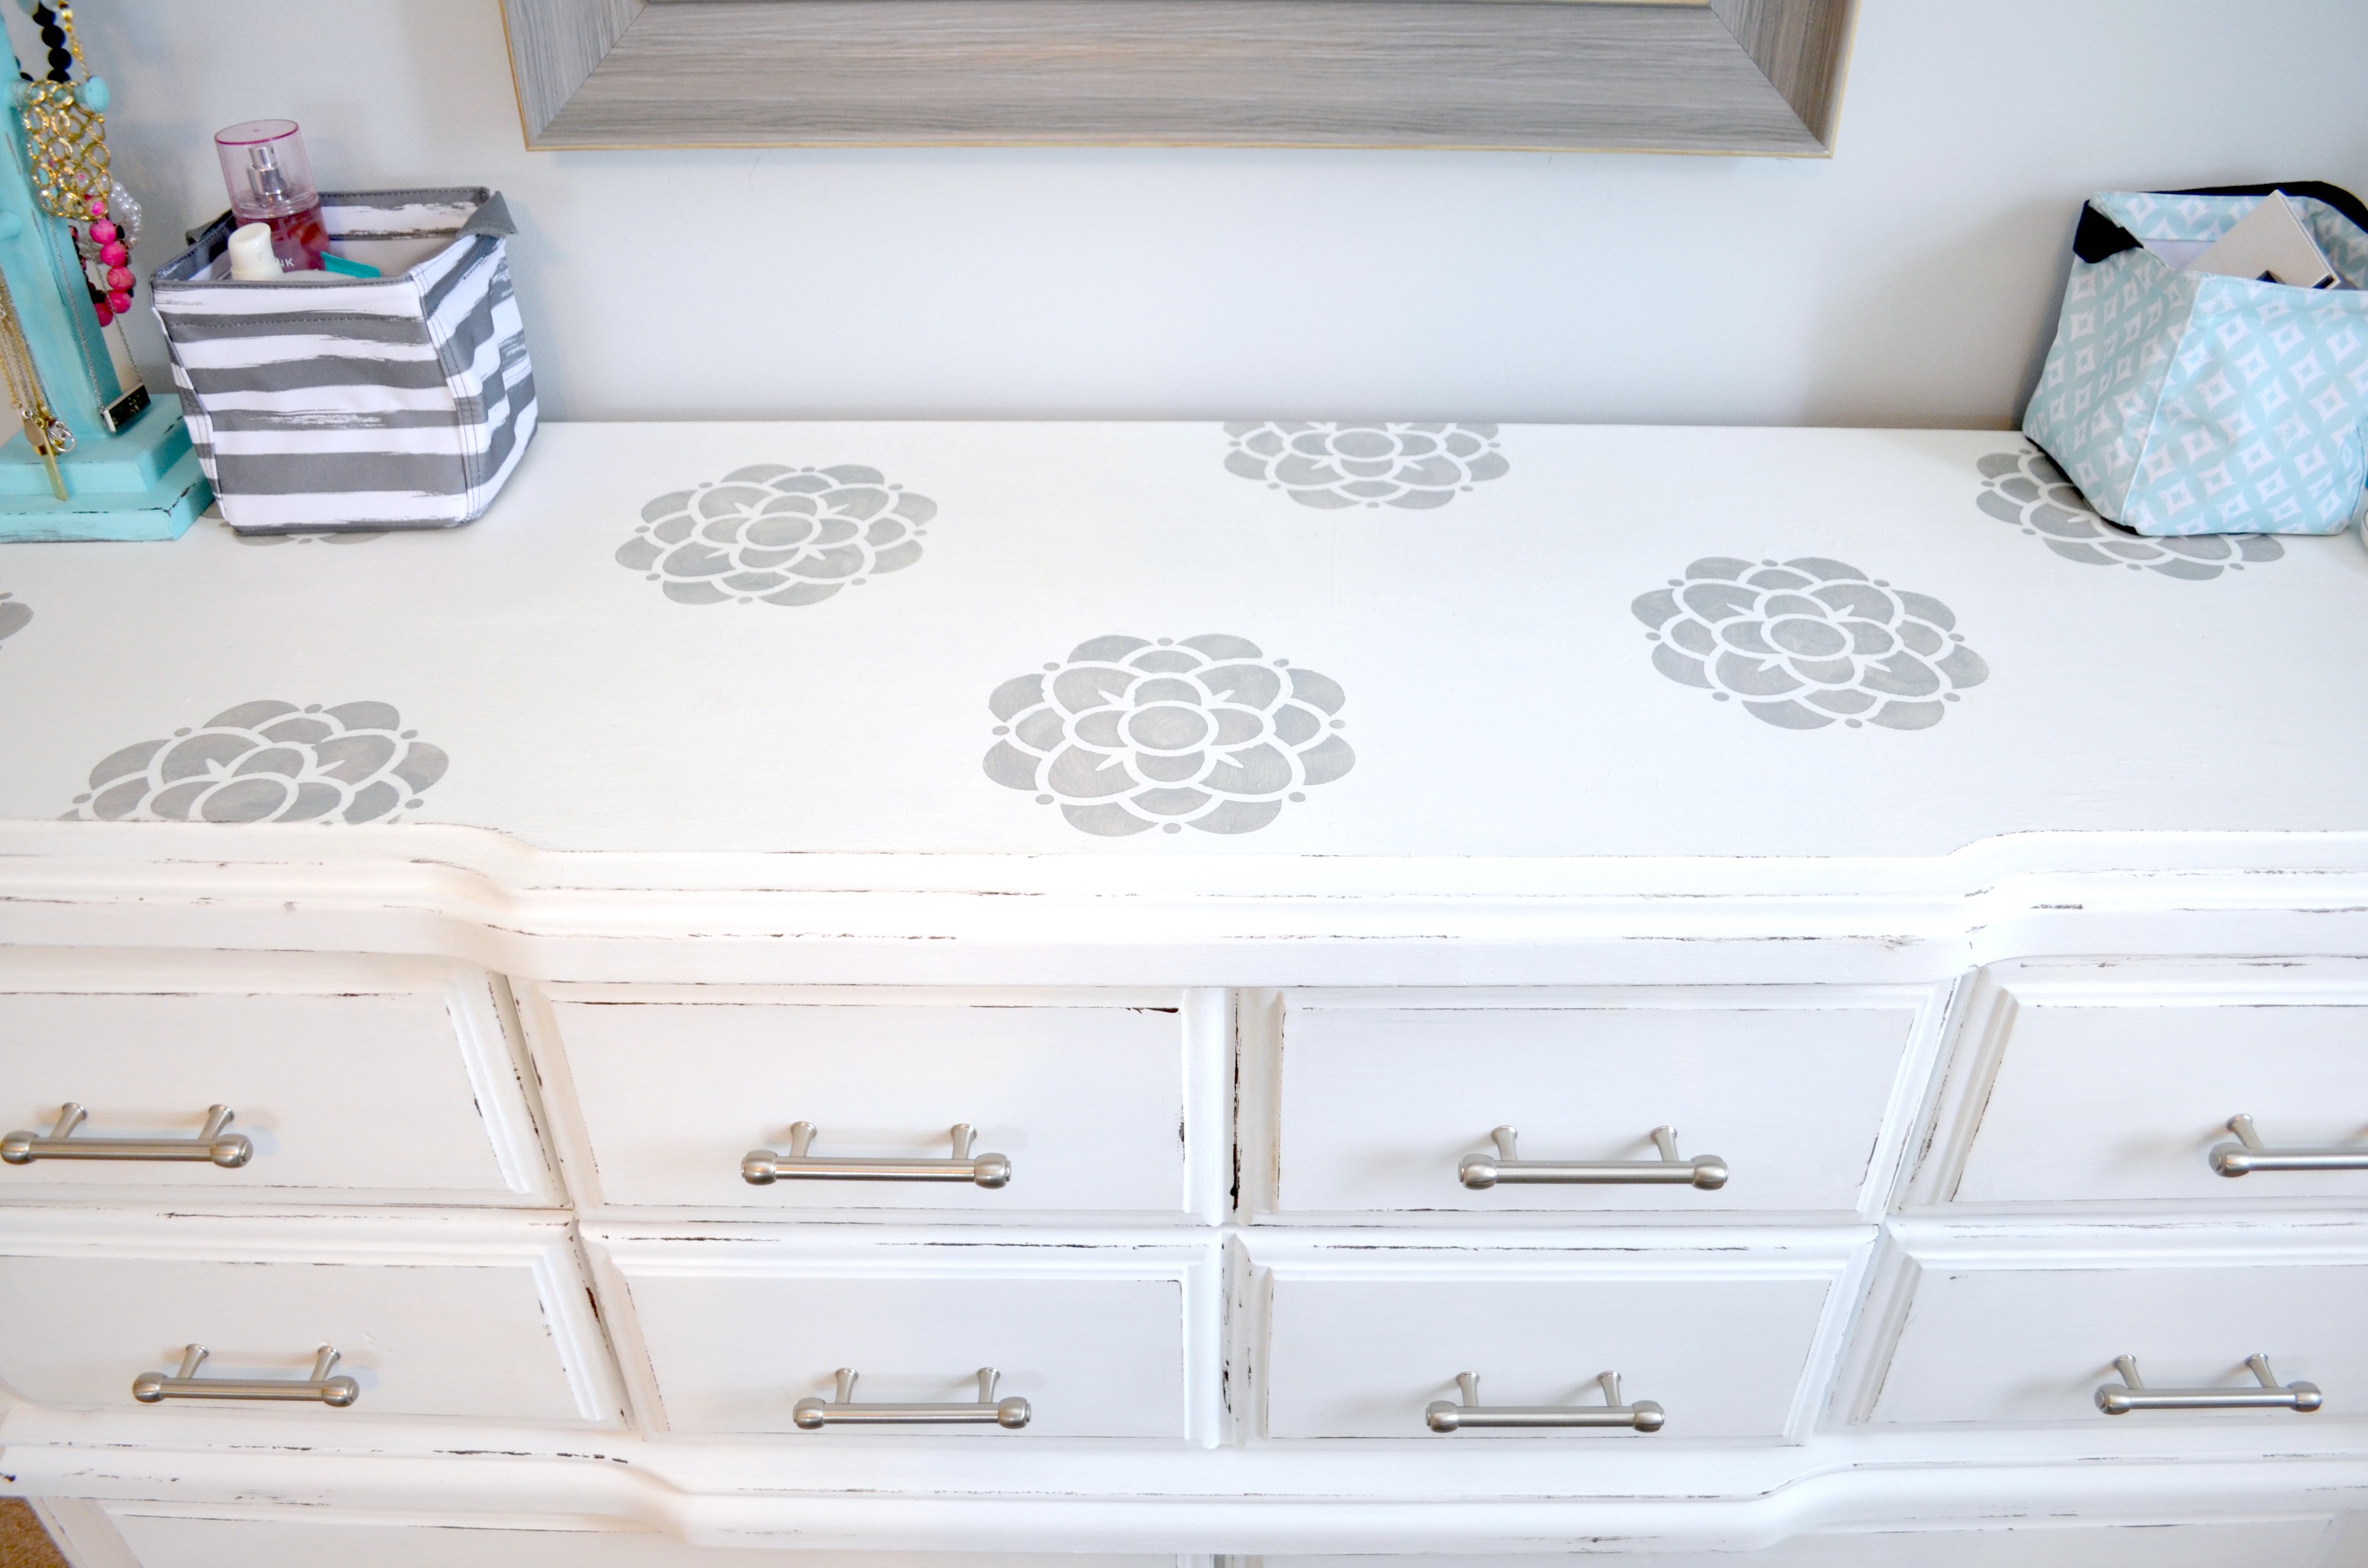
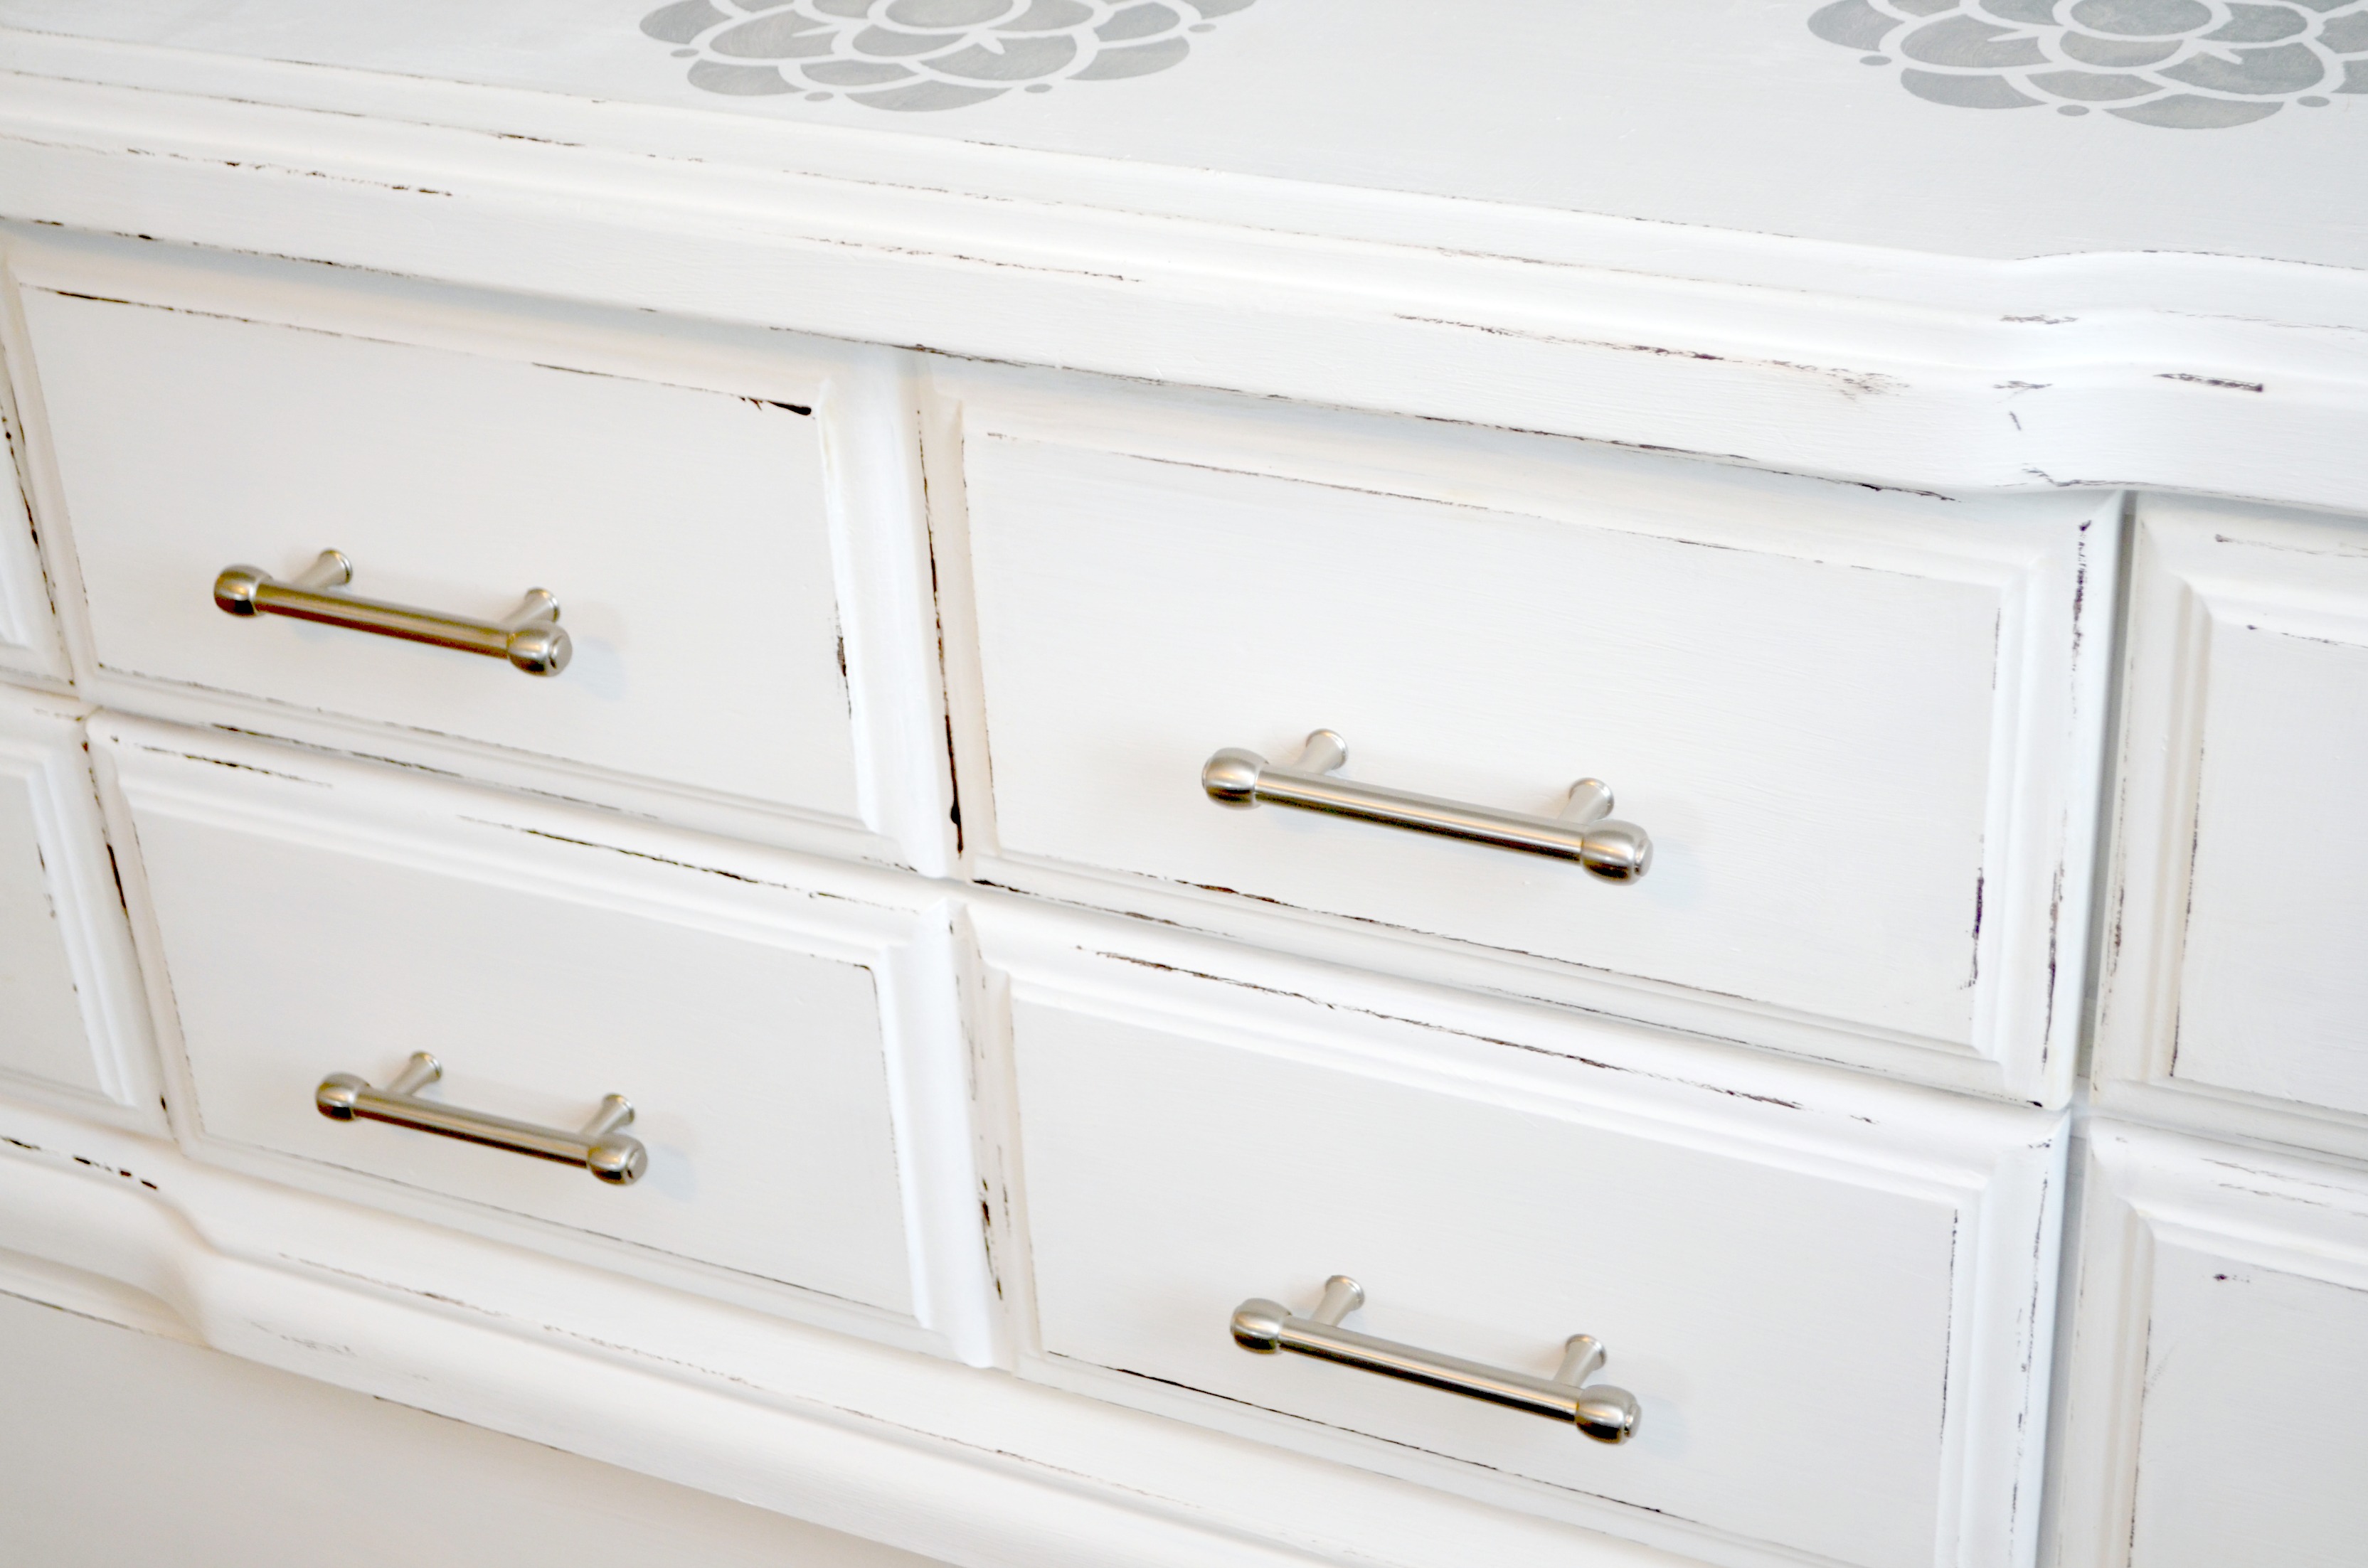
Step 4: Use a layering block and Espresso paint to create a distressed look around edges and corner areas.
This, of course, is optional. I choose to do it because then when natural wear and tear occurs, no one will ever notice! It also helps to hide any imperfections. This method of distressing is the opposite of sanding; rather than taking paint away, we’re applying paint in a dark color. You’ll want to apply a thin layer of the paint to the layering block, then run the block along edges and corners of your piece.
Step 5: Apply a coat of clear wax.
Using a wax brush is the best way to evenly distribute the wax and rub it into the paint, but you can also use a lint-free soft cloth. Make sure all paint is completely dry before applying the wax.
Step 6: Attach new hardware.
I found these gorgeous drawer pulls at Home Depot and I love the way they look with the grey flowers.
Reassemble the dresser, placing the drawers back in place, and the makeover is complete! I also did a similar makeover on my jewelry chest, using FolkArt Home Decor Chalk paint in Cascade.
I am keeping things simple on top of the dresser, just a few things I need! I have a jewelry rack my grandfather made, a ring dish, a holder for my makeup brushes, and two thirty-one Littles Carry-All Caddies to hold makeup, body spray, moisturizer, and deodorant.
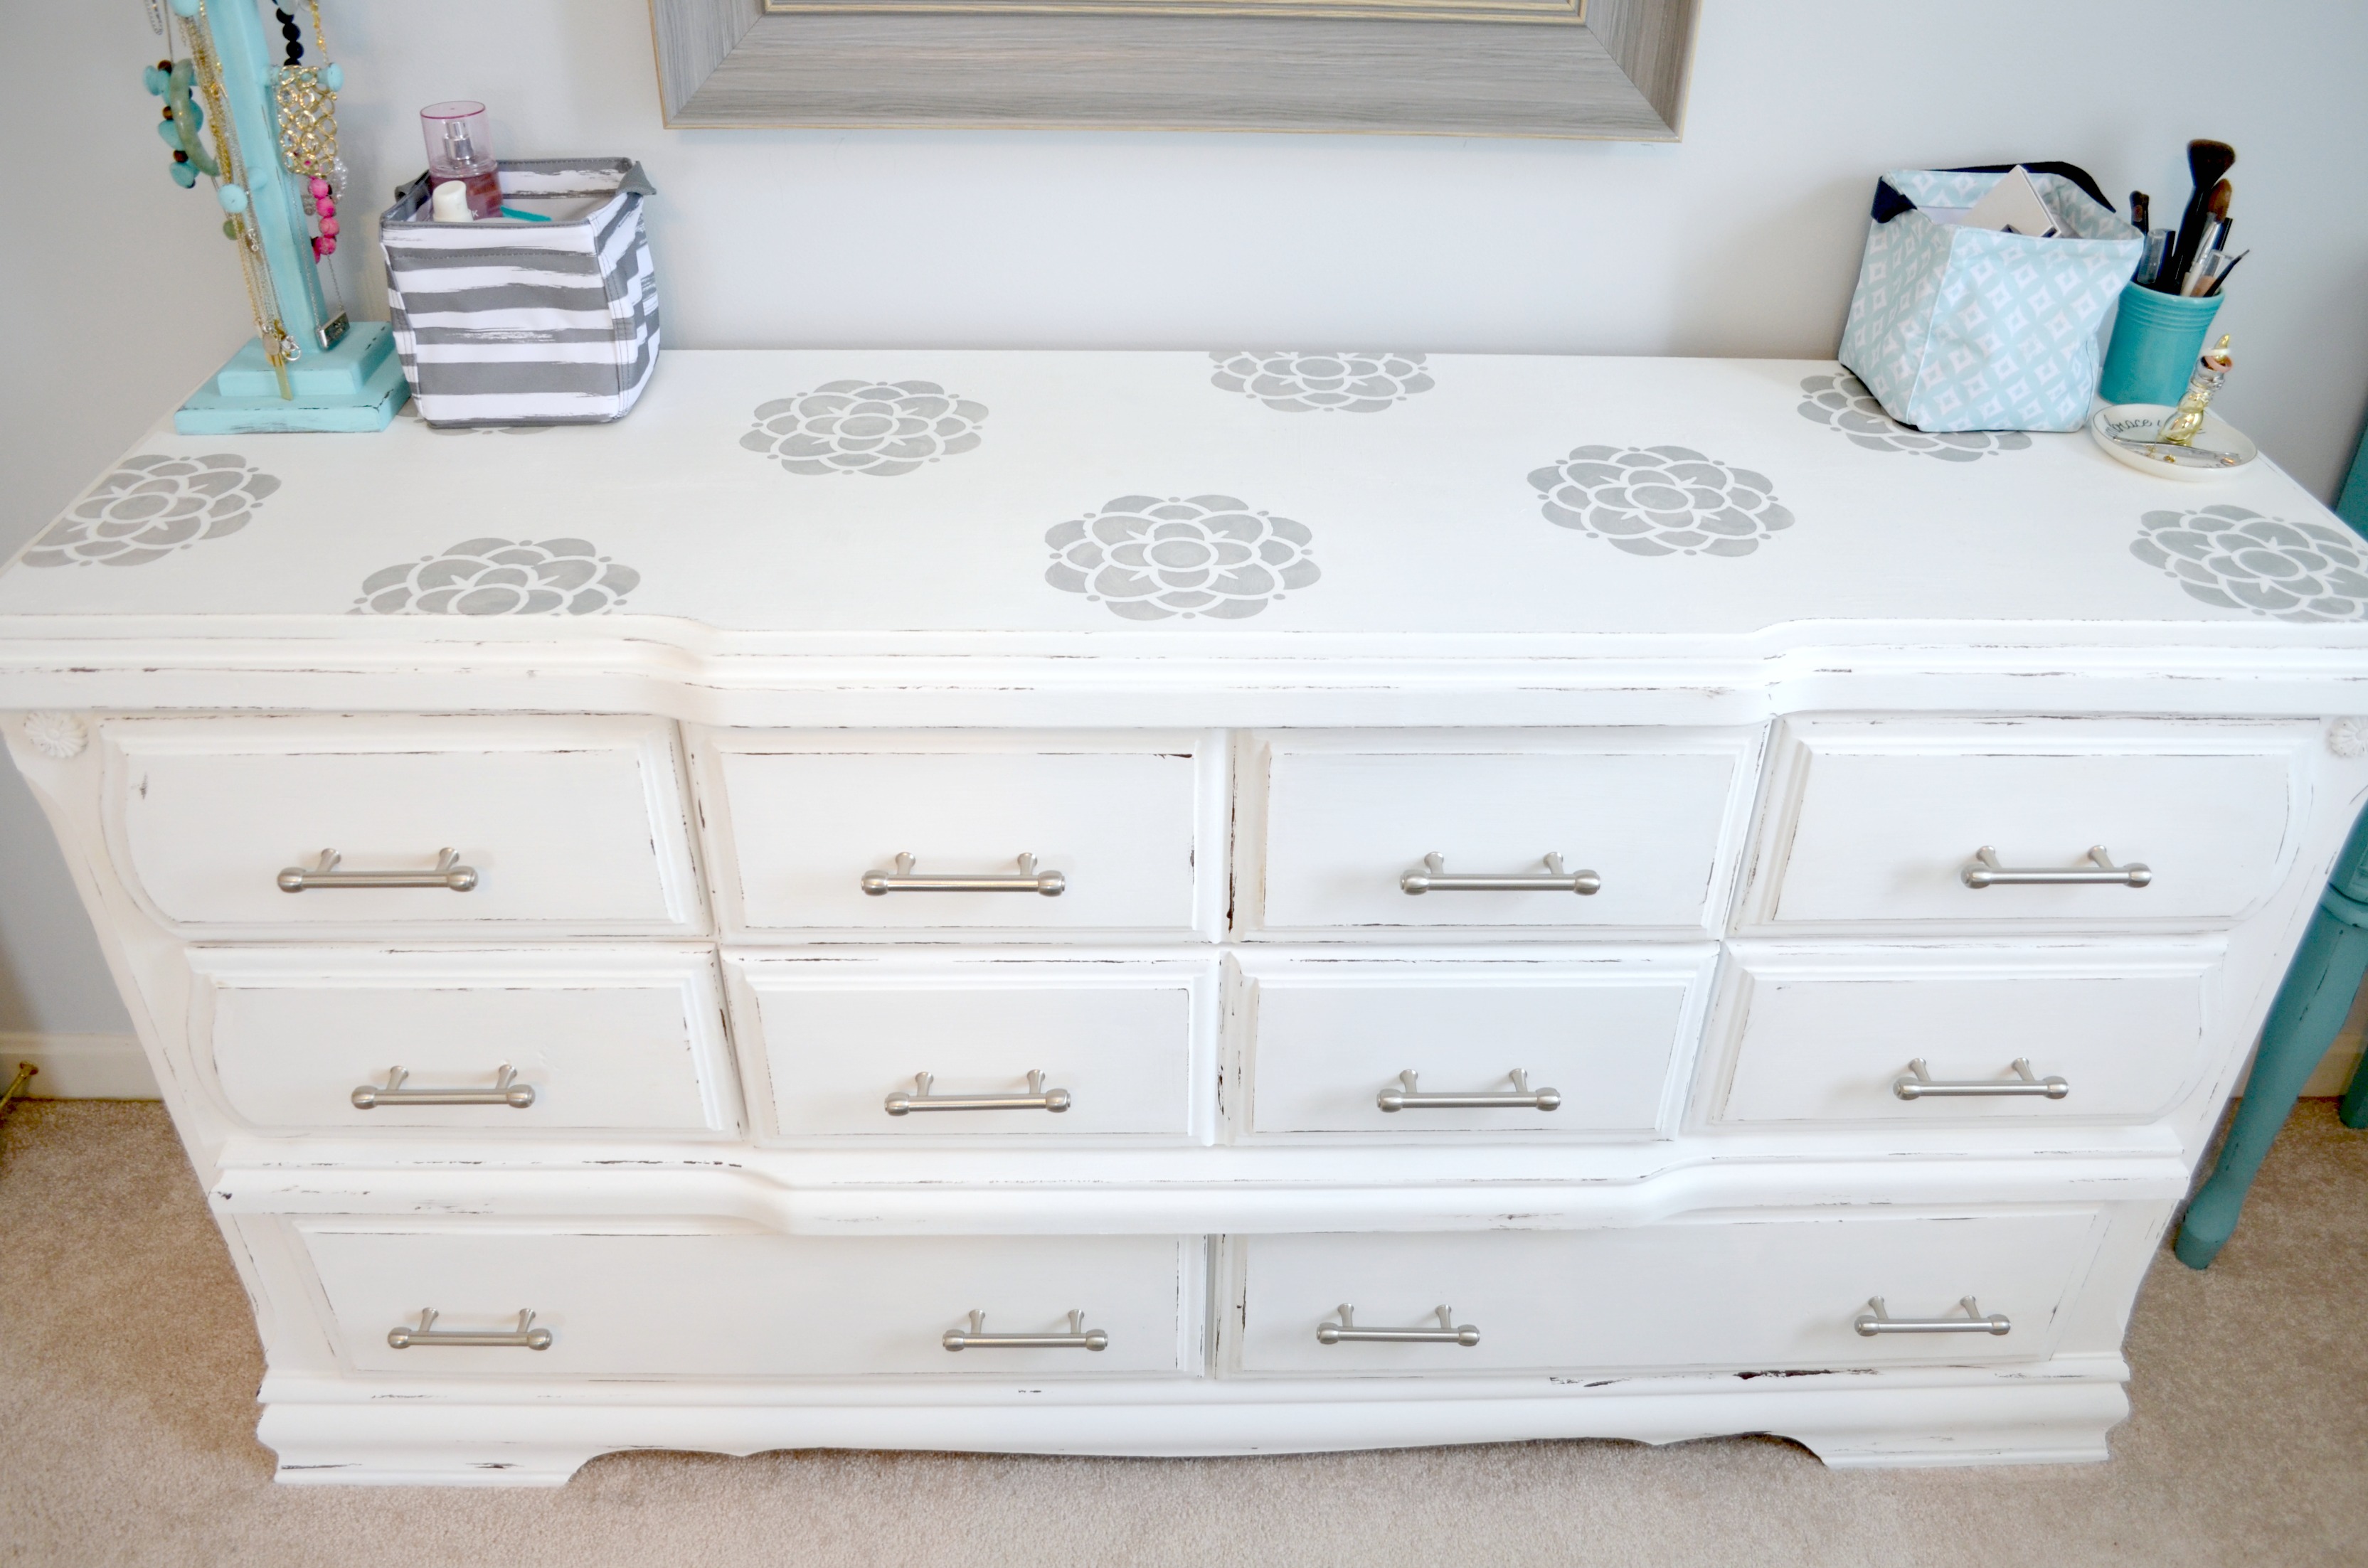
I’m amazed by how much bigger, lighter, and brighter the room feels now! The combination of removing the top of the dresser and making it white rather than dark brown is a huge transformation.

I still needed a mirror, so I picked up this grey one from HomeGoods for just $35! I think it looks perfect with the dresser, don’t you?
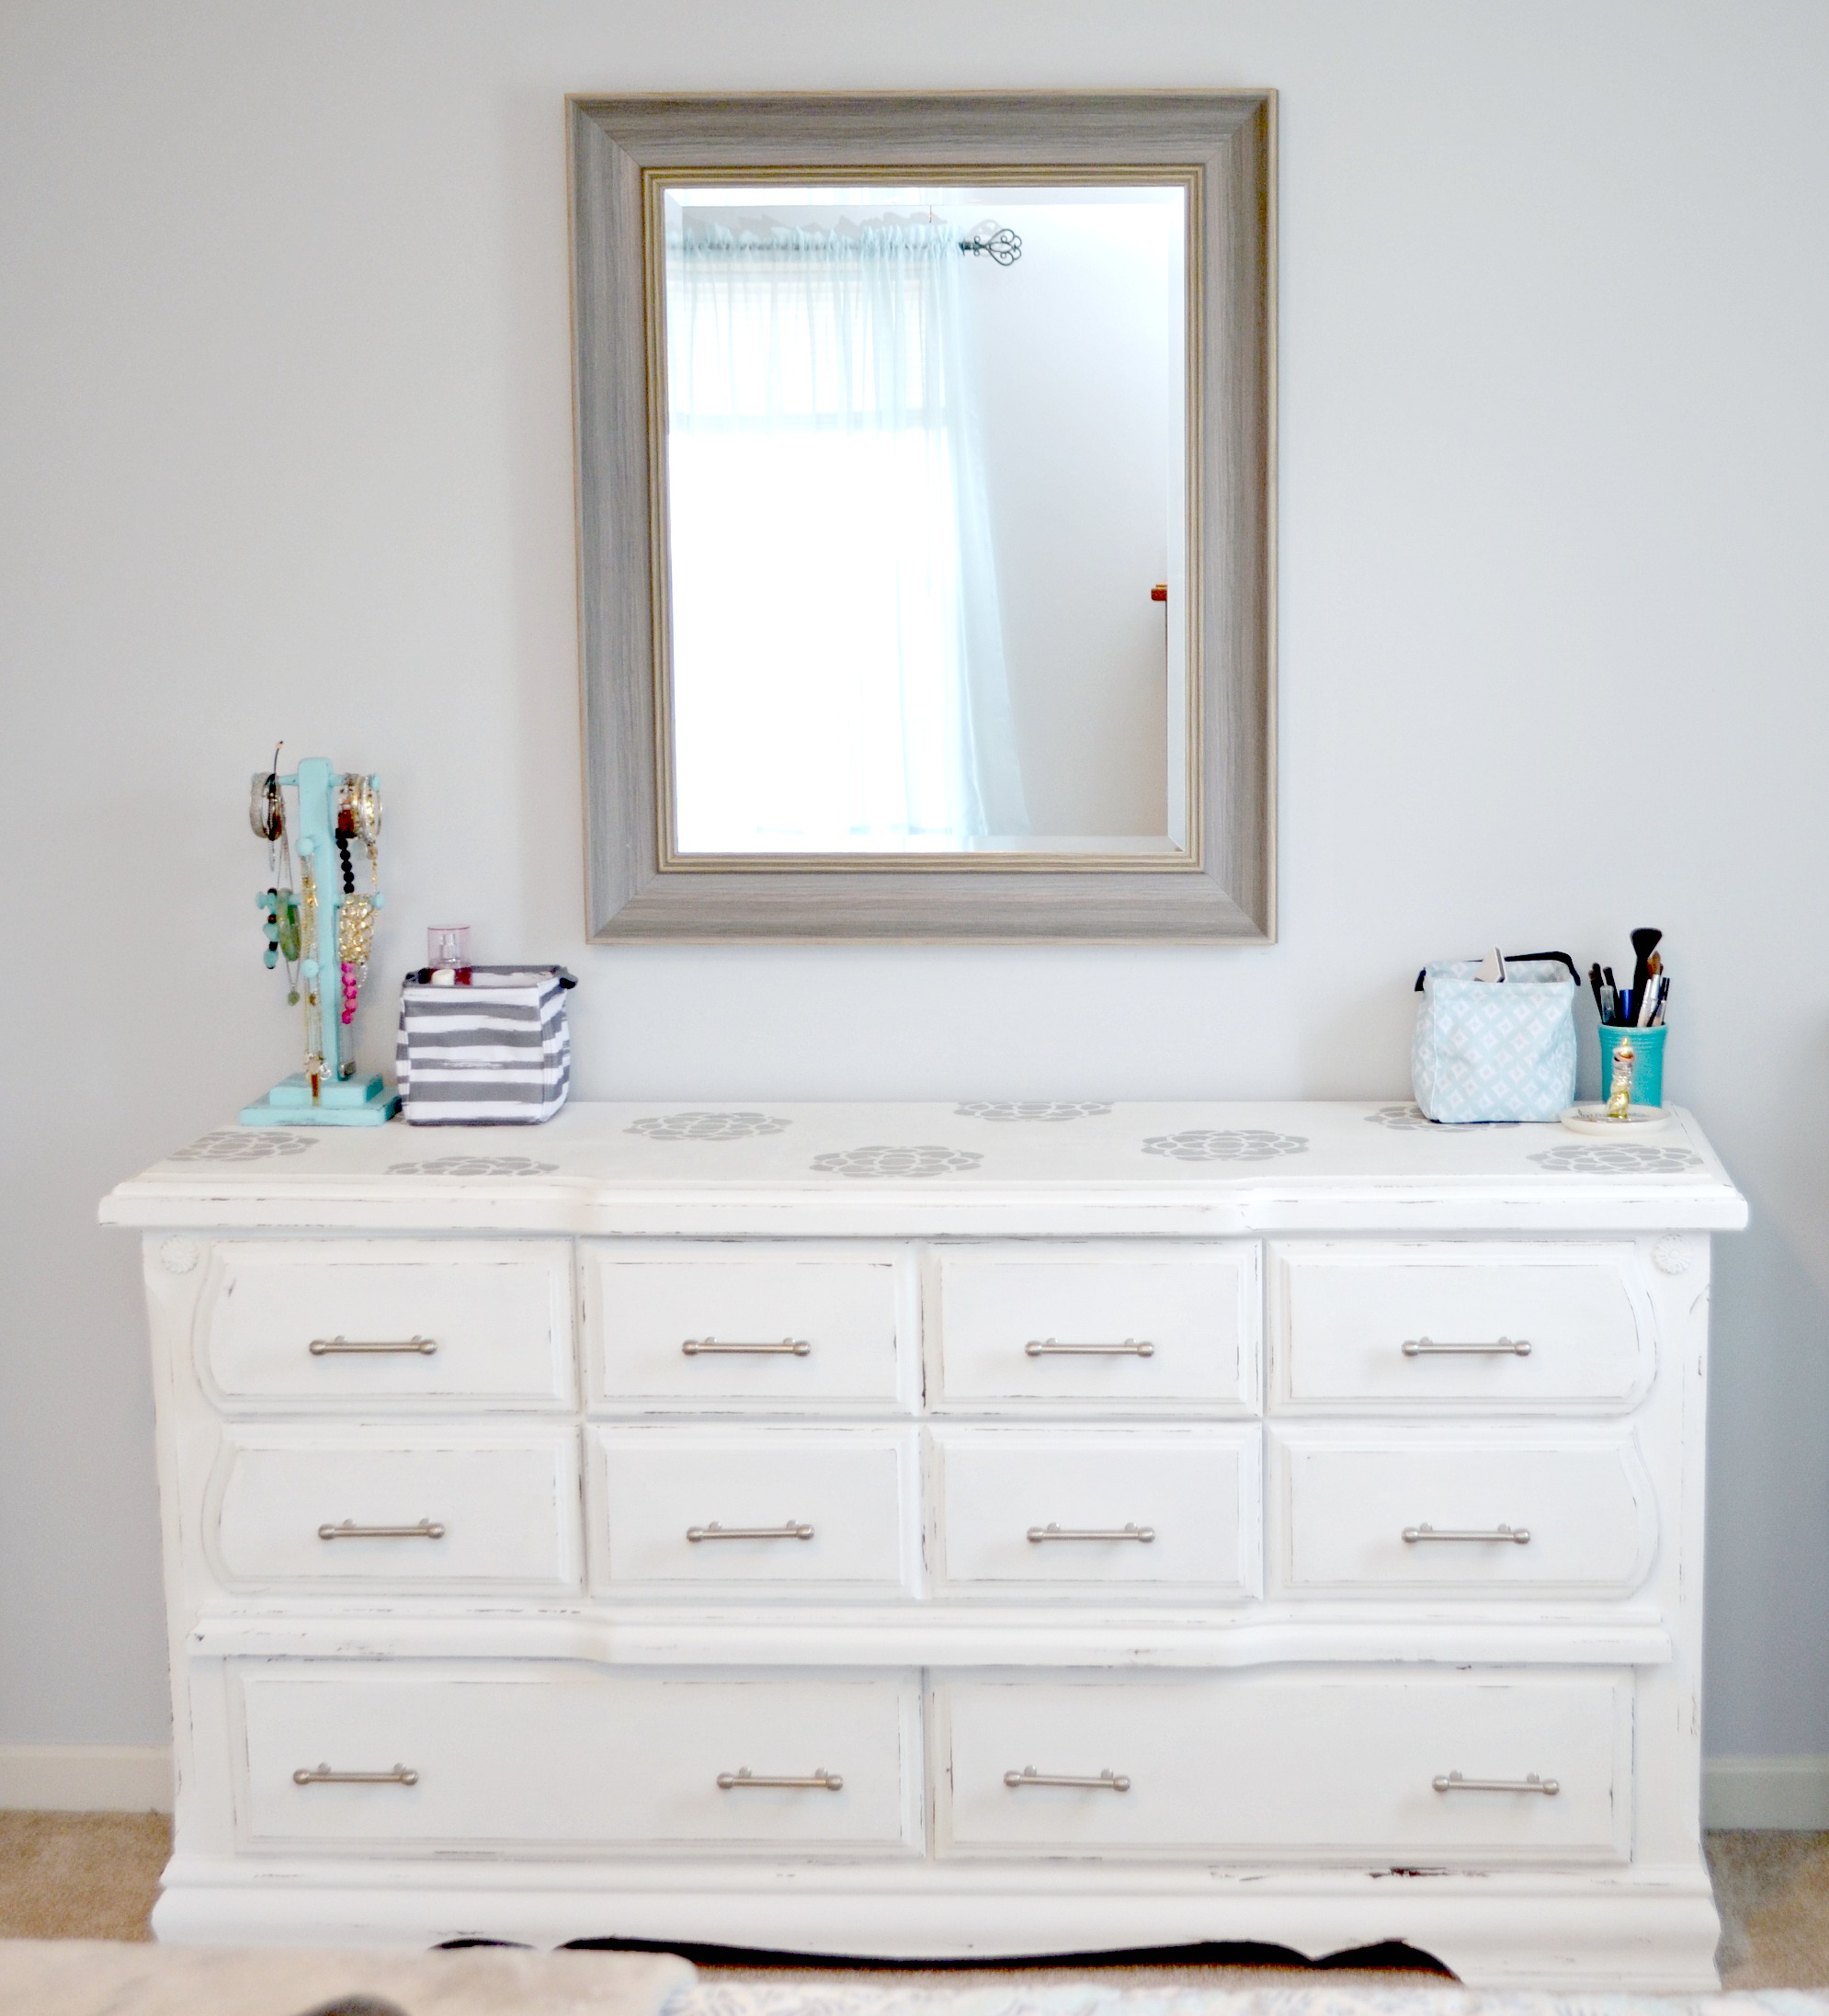
Here’s a peek at how the whole room is coming together! I couldn’t love it more! All that’s left is to paint hubby’s dresser to match…I just have to motivate myself to do it. It’s a ton of work, but I was able to do mine in a weekend, and I’m hoping his will take even less time since he has fewer drawers.
What do you think of the transformation?
Don’t forget, if you like it, then you oughta put a Pin on it!


wow, I LOVE this makeover! How did I miss that you do this kind of stuff?! I have some old-fashioned furniture I would love to paint white- seriously, no stripping or sanding? Another question is how to get painted drawers from sticking. I also love the gray accents you used.
Seriously, no sanding required! Just paint! I find that if you apply the wax to seal the paint, the drawers will move just fine.