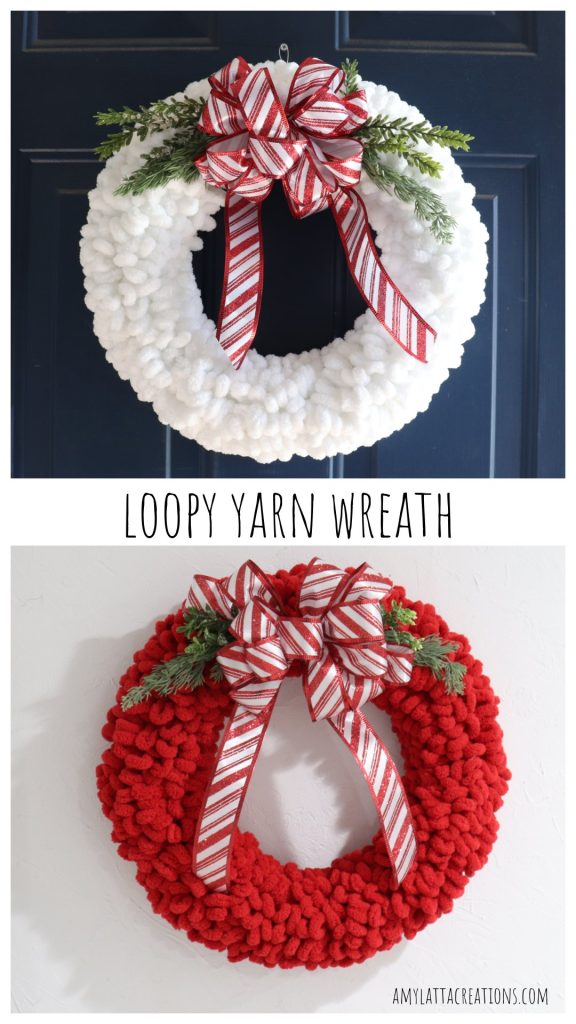
Loopy Yarn Wreath
’Tis the season for a festive wreath on the door! Here’s a quick and easy DIY Loopy Yarn Wreath idea that you can create in less than an hour. It takes no special skills, and is sure to get lots of compliments all season long.
How to Make a Loopy Yarn Wreath
The secret to this project is the loopy yarn itself. Wrapped around a wreath form, it creates fluffy, textured magic! Just gather the supplies below, then let’s get started.
Materials
- 2 skeins of Bernat Alize Blanket Yarn EZ – your choice of color
- styrofoam wreath form (mine is approx 13.5”)
- straight pins OR glue
- 1 roll of wide ribbon
- floral wire
- wire cutters
- scissors
- (optional) faux greenery
Instructions
Pin the end of one skein of yarn to the wreath form.
You can also secure this with glue for an extra hold.
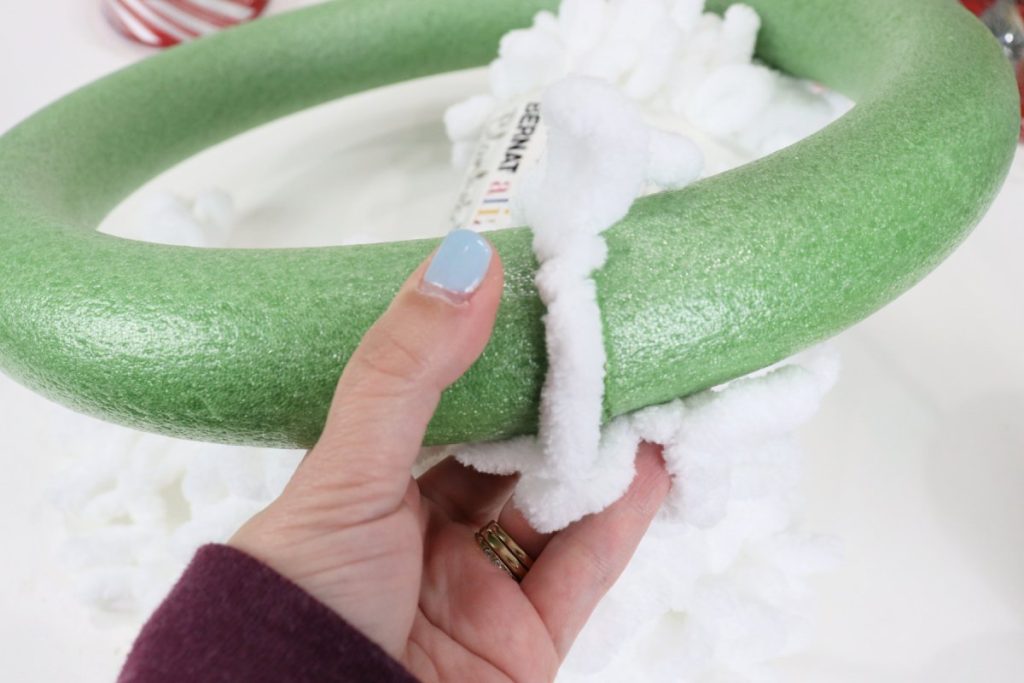
Wrap the loopy yarn around the wreath form until it is completely covered.
My 13.5” wreath form took about 1 1/2 skeins of yarn. When you get to the ends, pin and/or glue them to the wreath form to secure.

Create a bow using wide ribbon and secure it to the wreath.
I attached mine using floral wire. If you don’t know how to make a bow, you can purchase a pre-made one instead. You can also tie a more traditional bow if you prefer.

Optional: Tuck a few branches of faux greenery under both sides of the bow.
This adds a little extra color and texture to your wreath.

All that’s left to do is display it on your wall or front door! Different colors of yarn will create a totally different effect. White gives off a snowy, wintery vibe, while red really pops for Christmas! You can also create this same wreath using any colors that match your decor.

Crafting Tips
- I attached the bow at the top of my wreath, but if you prefer, you can attach it to the bottom instead.
- Feel free to vary the size of the wreath form based on the space you have to hang your finished project.
- If the wreath form won’t hang on your nail or hook, just wrap a piece of wire around it underneath the bow and form a wire loop in the back.

Frequently Asked Questions
The most time consuming part is wrapping the yarn. You should be able to complete this in an hour or less, an easy project for an afternoon or while you’re watching TV.
I got mine on sale at JoAnn Fabrics, but you can also find it at other craft stores, or online. Mine was Bernat Alize brand, but any kind of pre-looped yarn you find will work.
More Christmas Projects
If you enjoyed this project, be sure to check out these other crafts that will get you ready for Christmas and winter!


If you try any of these projects, I’d love to see how yours turn out! Make sure you’re part of the Amy Latta & Friends Facebook Group, where you can share your latest photos and we can all inspire each other. Hope to see you there!

Loopy Yarn Wreath
Equipment
- scissors
- wire cutters
- pins or glue
Materials
- 2 skeins Bernat Alize Blanket Yarn EZ
- 1 roll wide ribbon
- floral wire
- styrofoam wreath form
- faux greenery (optional)
Instructions
- Pin (or glue) the end of one skein of yarn to the wreath form.
- Wrap the loopy yarn around the wreath form until it is completely covered.
- Create a bow using wide ribbon and secure it to the wreath.
- Optional: Tuck a few branches of faux greenery under both sides of the bow.