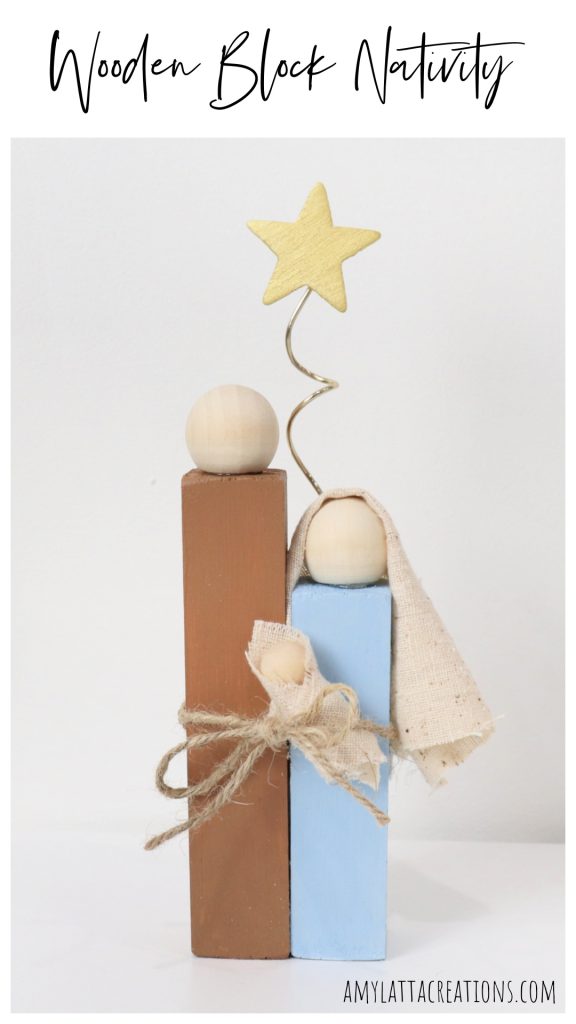
Wooden Block Nativity
At the heart of the Christmas season is the story of a baby’s birth. Here’s a quick and sweet project idea to help you decorate your home as you celebrate the birth of Jesus; a wooden block nativity.
How to Make a Wooden Block Nativity
This little project is my all-time favorite seasonal craft because of its simplicity and the reminder it carries of the reason why we celebrate. To create your own, gather the materials below, and let’s get crafting!
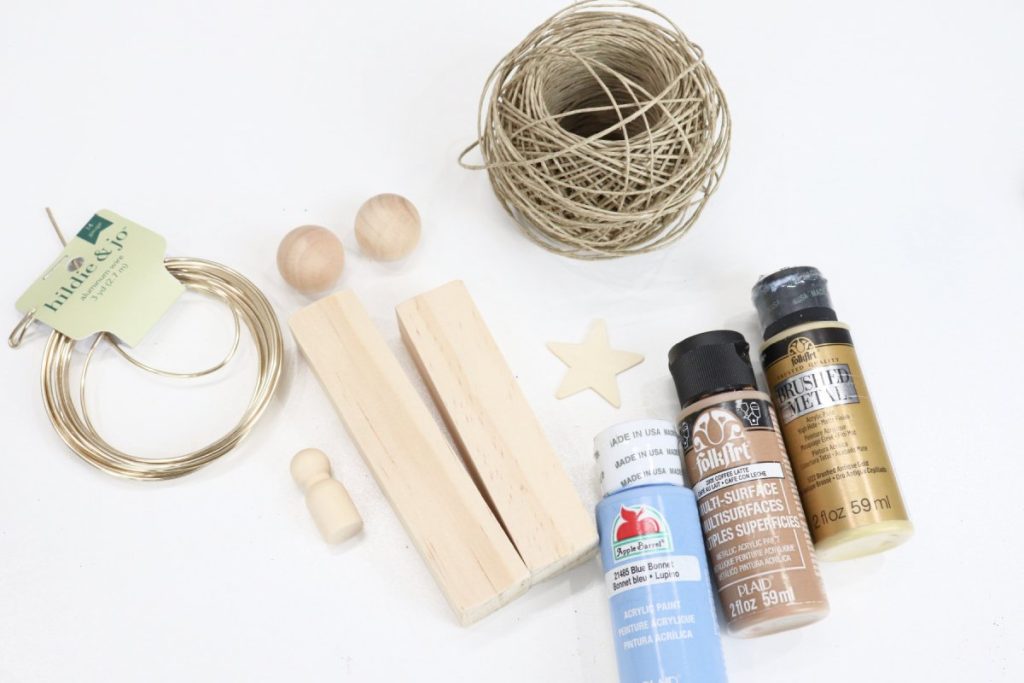
Materials:
- unfinished 1″square dowel cut into 4” and 5” lengths
- 2 – 1” wooden beads (I recommend the ones with flat bottoms)
- small peg person (mine is 35 mm)
- 1 1/2” wooden star
- acrylic/multi-surface paint (I used brown, blue, and gold)
- paintbrushes
- 20 gauge gold wire
- wire cutters
- hot glue gun and glue sticks
- scissors
- natural colored linen or burlap
- twine
Instructions:
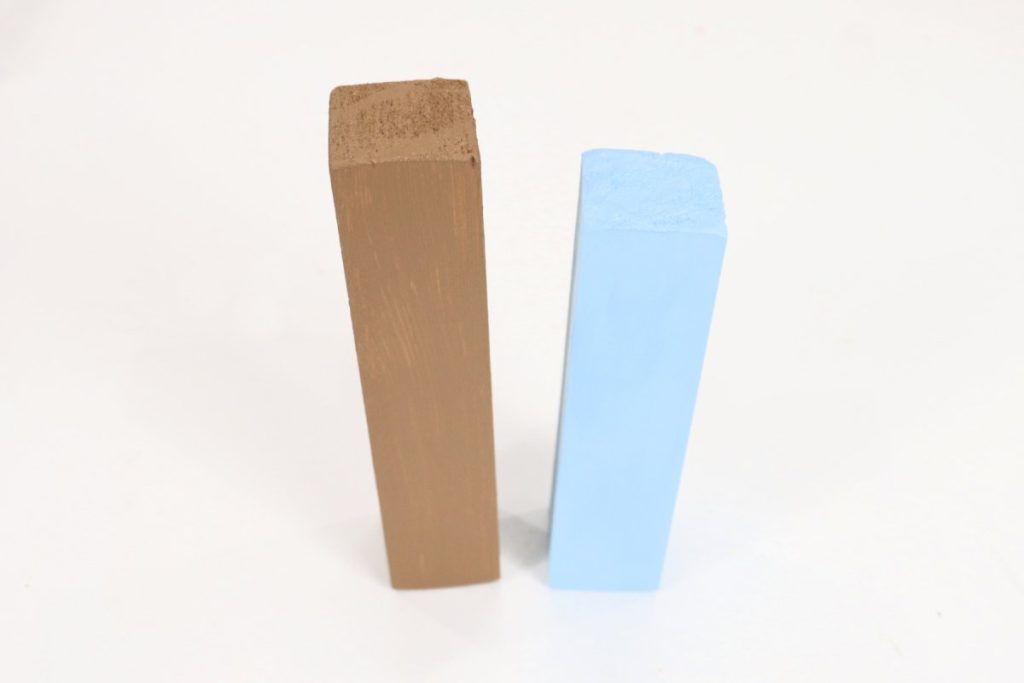
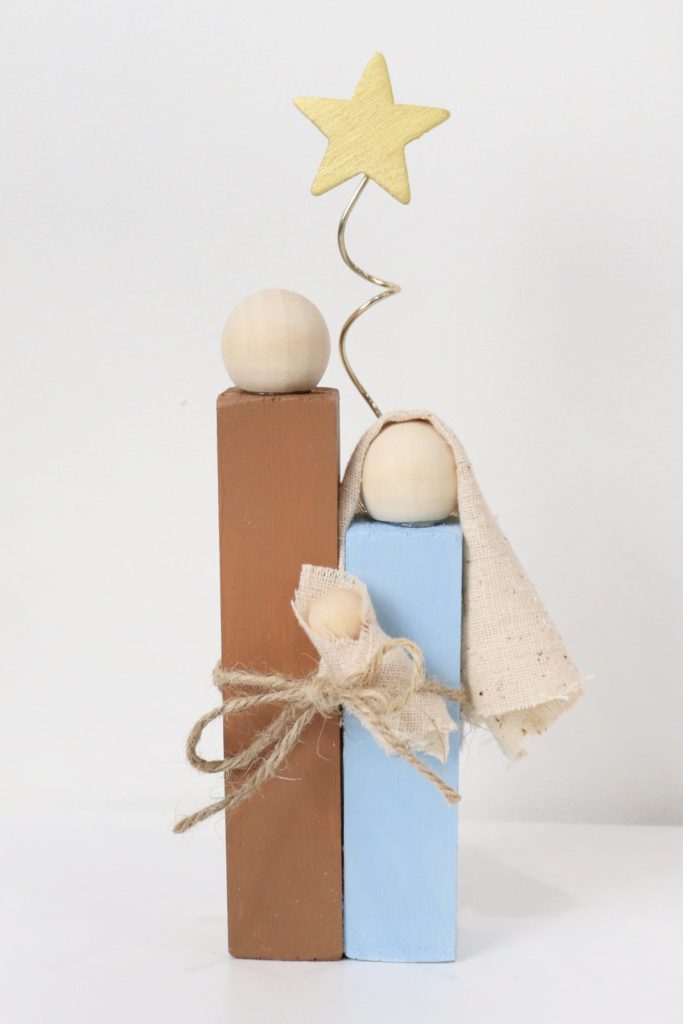
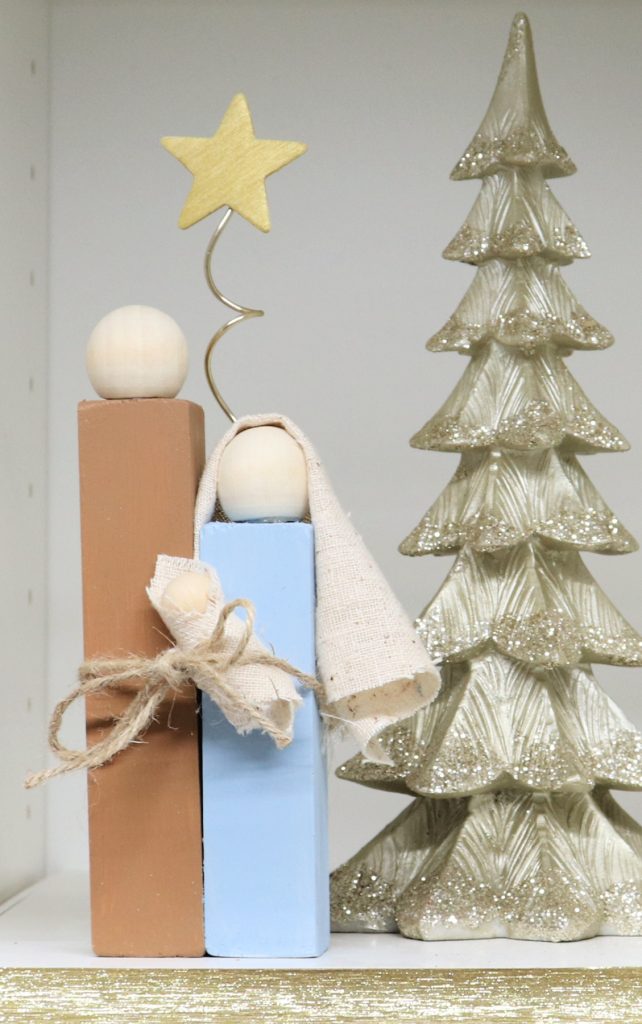
Paint the wooden blocks and star as desired.
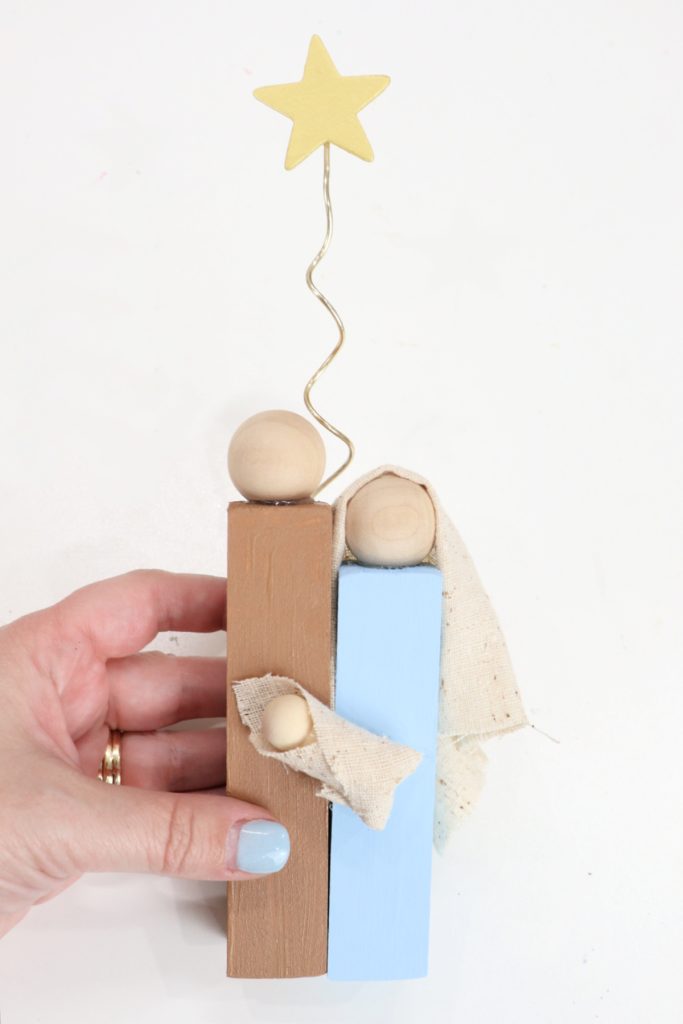
I chose brown for Joseph, blue for Mary, and gold for the star, but you can use any colors you like. Set these aside to dry.
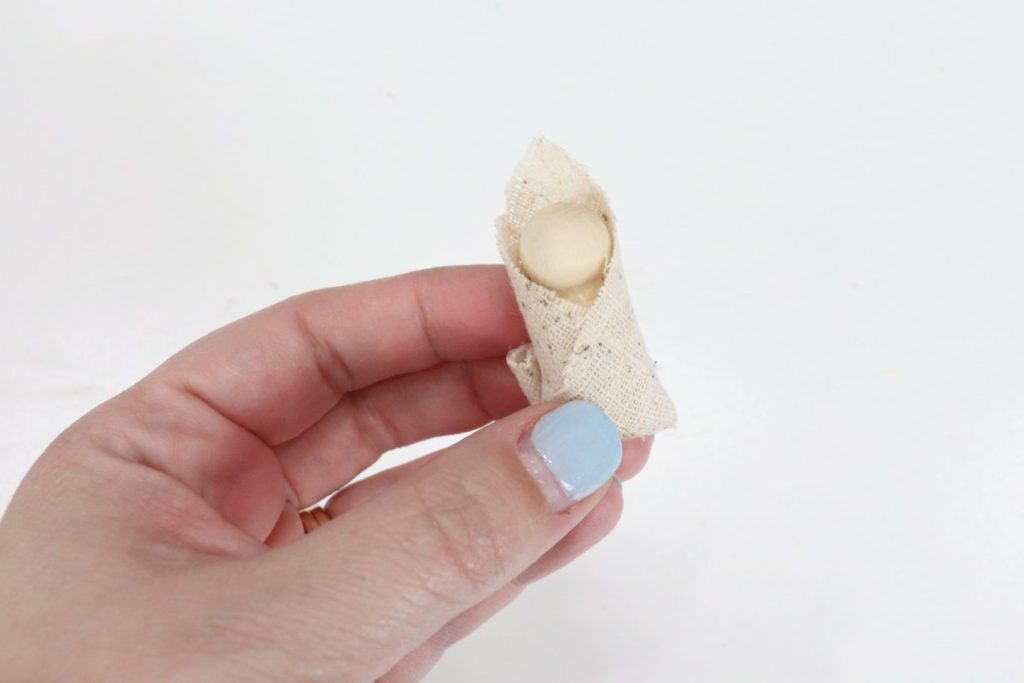
Wrap the small peg person in a square scrap of linen/burlap.
I placed the head just below one corner, then wrapped the side corners around the body, gluing the fabric in place. Finally, I folded the excess up in the back and glued it.
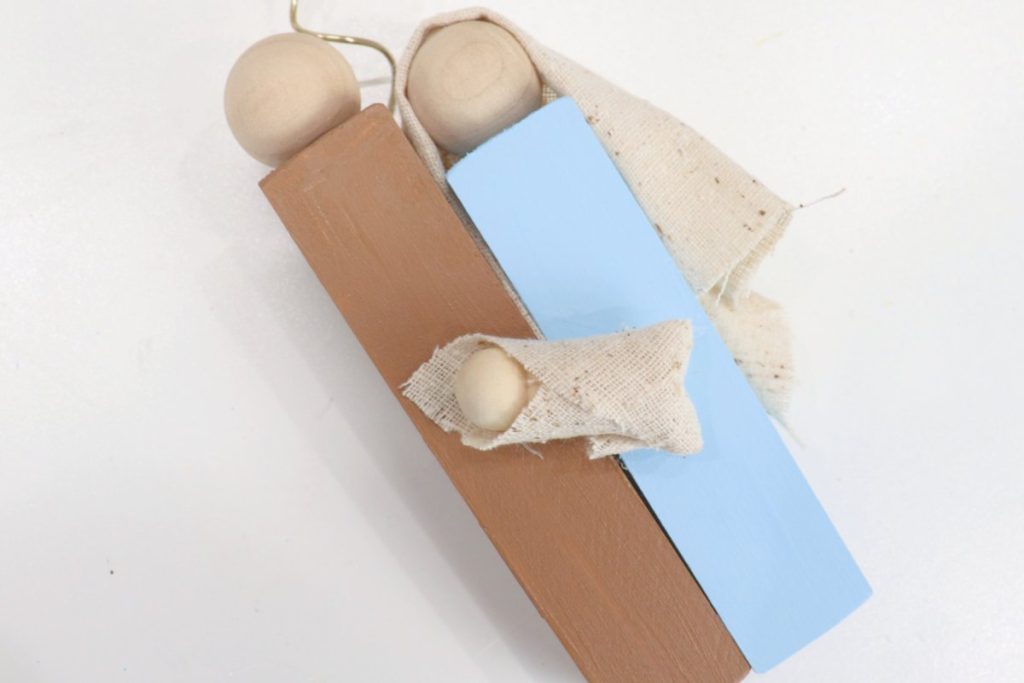
Use hot glue to attach a wooden bead to the top of each block.
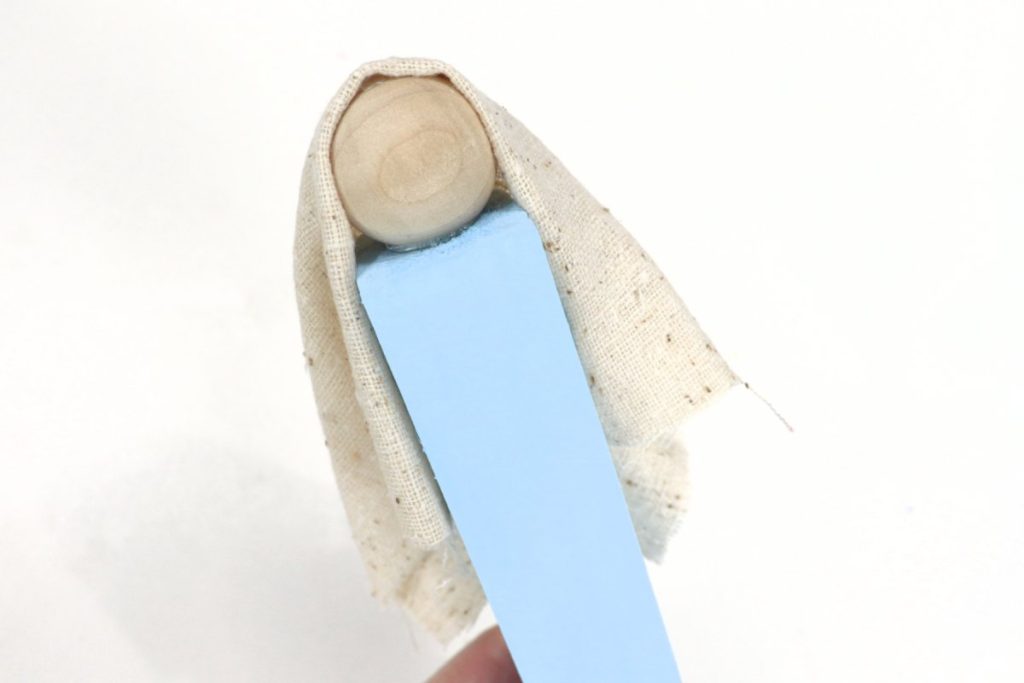
Cut a 4”x6” rectangle of linen/burlap and glue to Mary’s head.
I folded the cut edge under so that it didn’t show in the front. Then, I glued the fabric to the top and sides of the head as well as the sides and back of the body.
Glue the Mary and Joseph blocks together along one side, then glue the baby Jesus onto the front.
Glue the back of the wooden star to one end of a 10” piece of wire. Curl the wire and glue it to the back of your blocks.
I wrapped the wire around a pencil to create the spirals.
Tie a piece of twine around the family.
Now your nativity is ready to display!
Crafting Tips
- For a larger nativity, use a 2” square dowel and cut taller pieces until you have your desired size. You’ll also want to use 2” beads for the heads to match the width of the bodies.
- Give your blocks a more rustic look by distressing them with sandpaper.
- Feel free to add to your nativity by using wooden blocks and beads to create an angel, shepherds, and wise men!
Frequently Asked Questions
I bought a 36” square dowel from my local Home Depot. You can have them cut it into pieces for you at the store, or you can cut it yourself at home.
Of course! You can draw or paint eyes, faces, etc. if you like.
More Christmas Projects
If you enjoyed this wooden block nativity, here are some more holiday projects you may want to create!


If you make any of these projects, I’d love to see how they turn out! Come join the fun in the Amy Latta & Friends Facebook Group, where you can share your latest project photos and we can all inspire each other. Hope to see you there!

Wooden Block Nativity
Equipment
- scissors
- hot glue gun and glue sticks
- wire cutters
- paintbrushes
Materials
- 1” square dowel cut into two pieces; one 4”, one 5"
- 2 1” wooden beads
- 35 mm peg person
- acrylic or multi-surface paint
- 1 1/2” wooden star
- 20 gauge wire
- twine
- neutral linen or cotton fabric scraps
Instructions
- Paint wooden blocks and star as desired.
- Wrap the small peg person in a square scrap of linen/burlap.
- Glue wooden beads to the tops of the blocks.
- Glue a 4×6” piece of fabric to Mary’s head.
- Glue the blocks together along one side, and glue the peg person on top.
- Glue the star to a 10” piece of wire (curl wire around a pencil).
- Glue the star to the back of the blocks.
- Tie a piece of twine around the blocks.