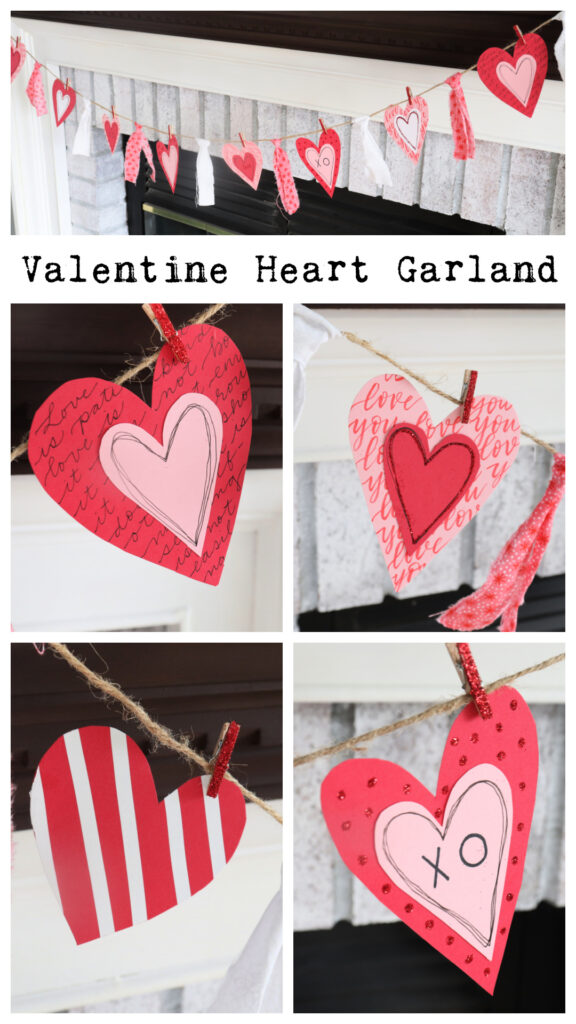
Valentine Heart Garland
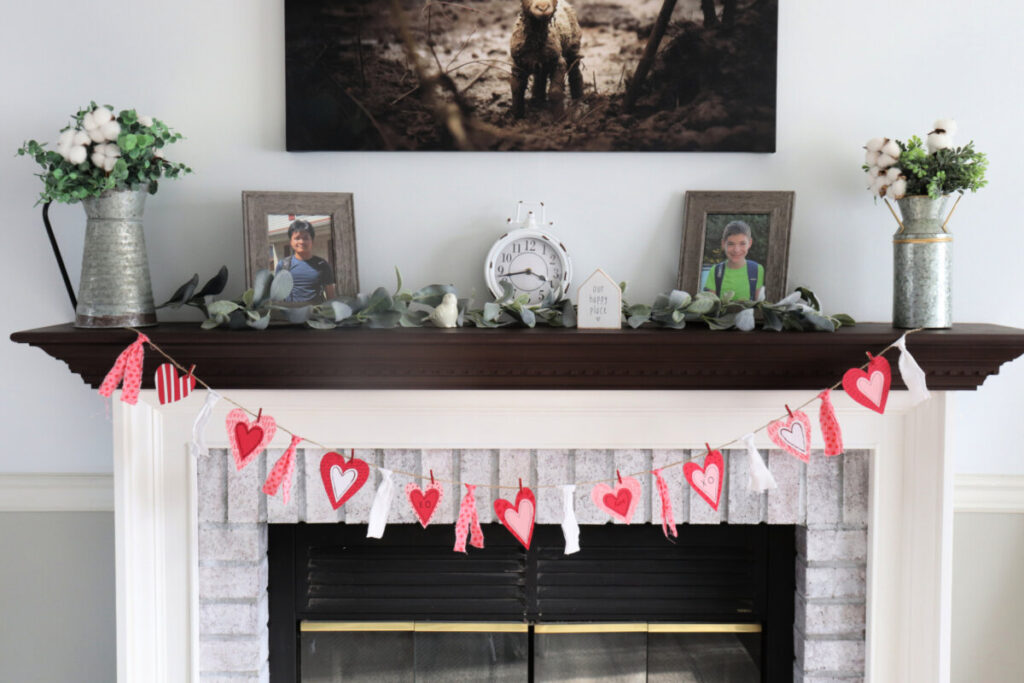
Let’s get ready to celebrate love with this fun DIY Valentine Heart Garland! It’s perfect for displaying on your mantel, coffee bar, doorway, or anywhere else you want to add a touch of seasonal cheer to your home.
How to Make a Valentine Heart Garland
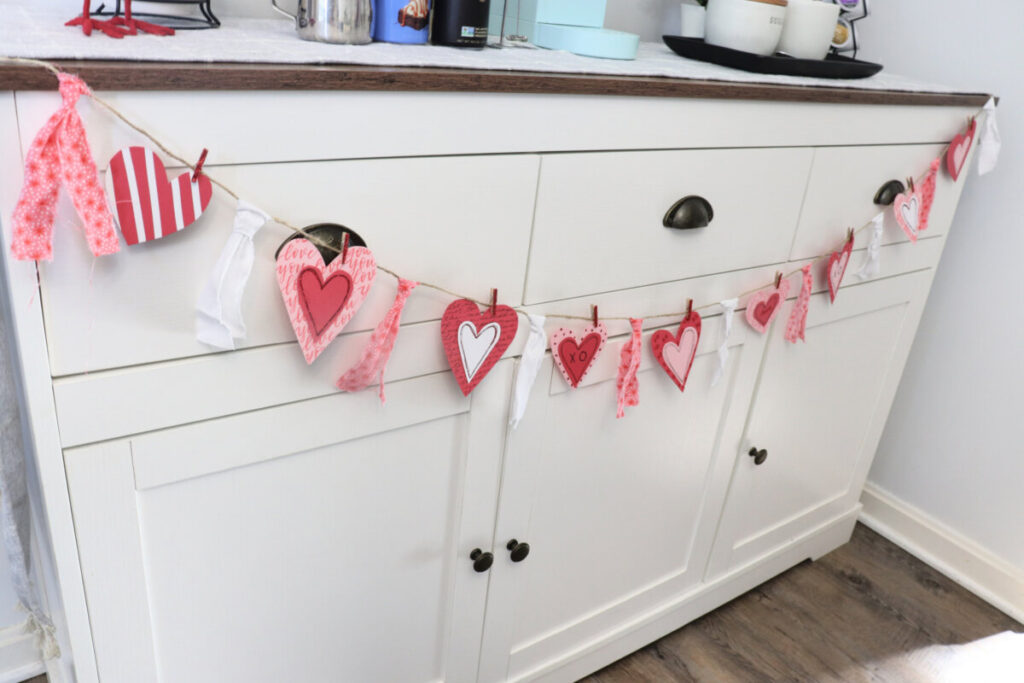
This garland is made up of individually decorated hearts that alternate with fabric scraps along a piece of twine. My favorite part about it is that each heart is totally unique, so you literally can’t go wrong! I’ll be sharing below about how I created mine, but feel free to put your own spin on the project and decorate your hearts in whatever ways you like best.
Materials
- red, pink, and white cardstock
- scissors
- twine
- tiny clothespins
- fabric scraps
- fine glitter, red
- Tombow MONO Adhesive
- Tombow MONO Multi Liquid Glue
- Tombow MONO Glue Pen
- Assorted Markers, Pens, and Pencils: the specific ones I used are listed below
Instructions
Cut hearts of various sizes/shapes from red, white, and pink cardstock.
I like to freehand this, because it adds to the individuality of each heart and adds a whimsical, handmade feel. However, you can also use a cutting machine or a punch, or trace a template to create your hearts if you are more comfortable doing so.
Decorate and assemble your hearts.
As I mentioned earlier, just have fun decorating these in any way you like. Here are a few of the ways I decided to create mine. I hope these ideas inspire you!
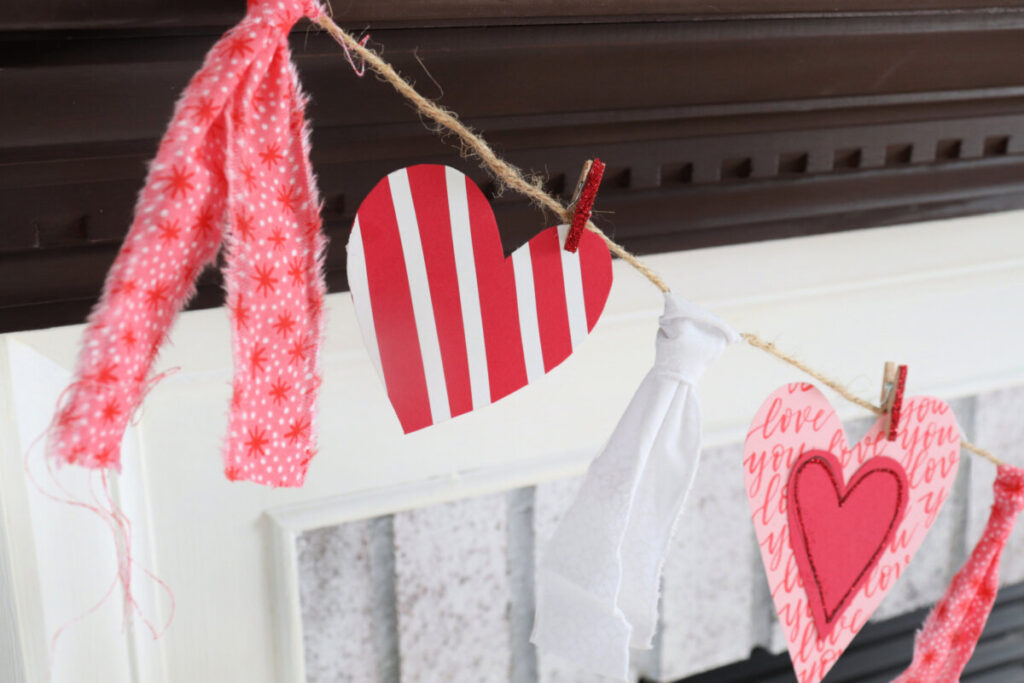
Red & White Stripes – To create vibrant white stripes on a red heart, I actually used Tombow MONO Air Touch Refillable Correction Tape and pulled it across the shape several times on a diagonal! It’s easy to do and creates a fun contrast with the cardstock.
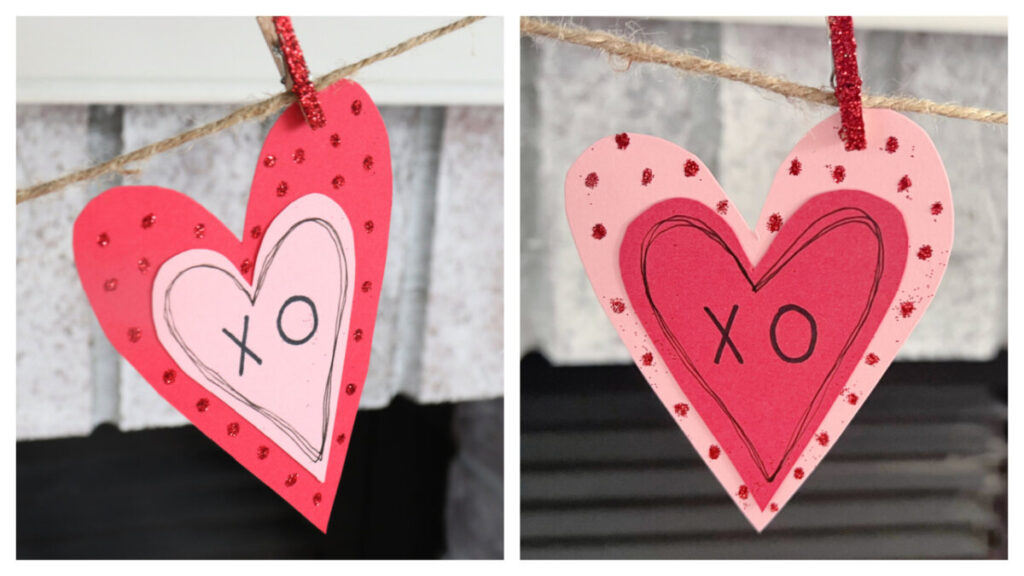
Polka Dot “XO” Hearts – To create the background, I used the Tombow Glue Pen and drew tiny circles all over the larger hearts. Then, I sprinkled loose glitter on top to create the sparkly polka dot effect. On the smaller hearts, I wrote “XO” in the center with the MONO Twin Permanent marker, then outlined the shape of the heart several times with the MONO Drawing Pen 005.
PRO TIP: By simply switching the colors of the large and small hearts, you get a totally different effect!
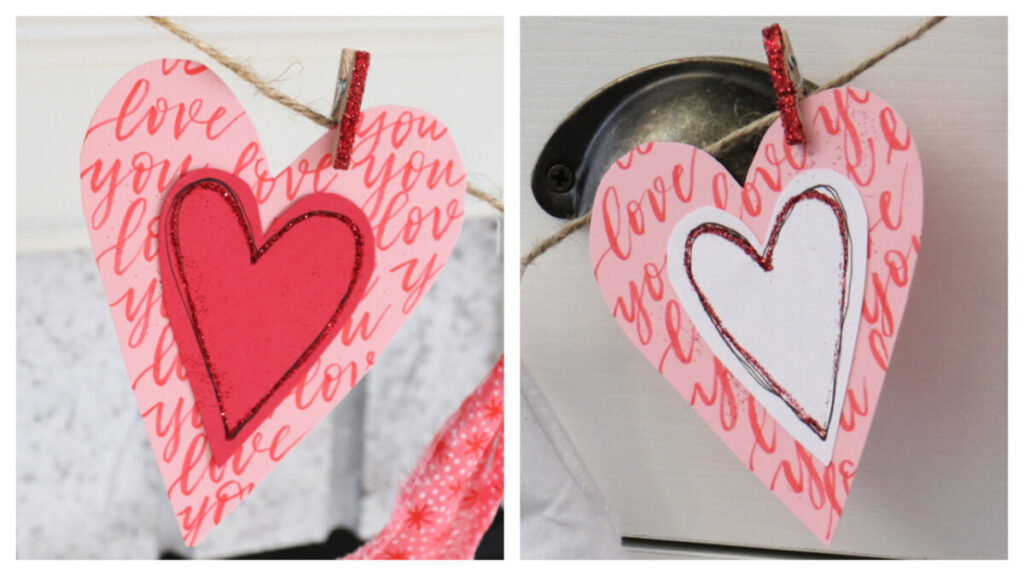
“Love You” Hearts – I used a red Fudenouske marker to write “love you” over and over in brush script on the larger hearts. Once again, I used the MONO Drawing Pen 005 to outline the smaller heart shape, but this time I also outlined it with the glue pen and added loose red glitter on top.
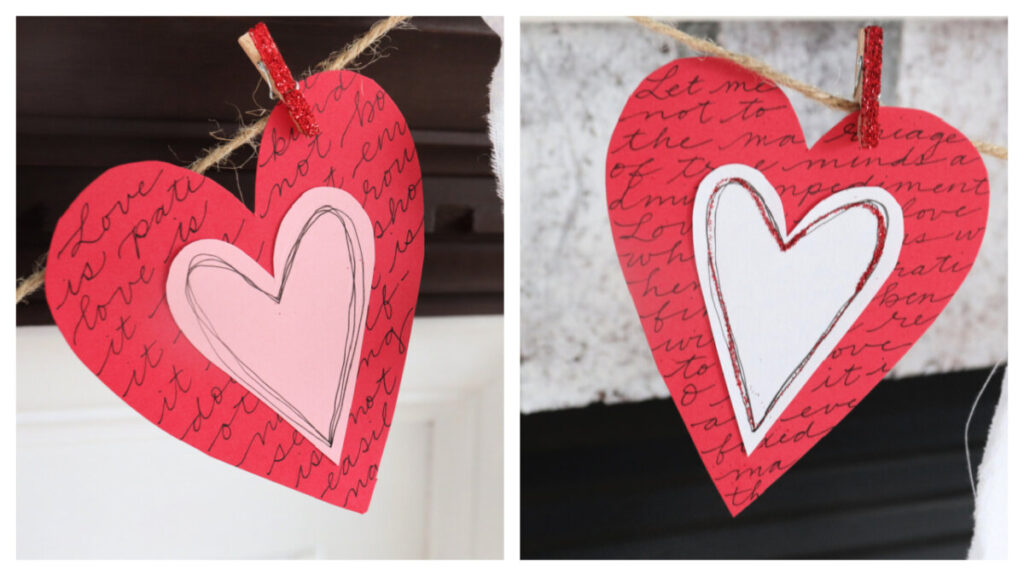
Elegant Script Hearts – The backgrounds of these large hearts actually contain some of my favorite “love” texts! I used the MONO Drawing Pen 005 to write out quotes from 1 Corinthians 13 and Shakespeare’s Sonnet 116. The smaller hearts are simply outlined again, with optional glitter.
PRO TIP: Personalize these by using the lyrics of a special song, your wedding vows, or another quote that means something to you.
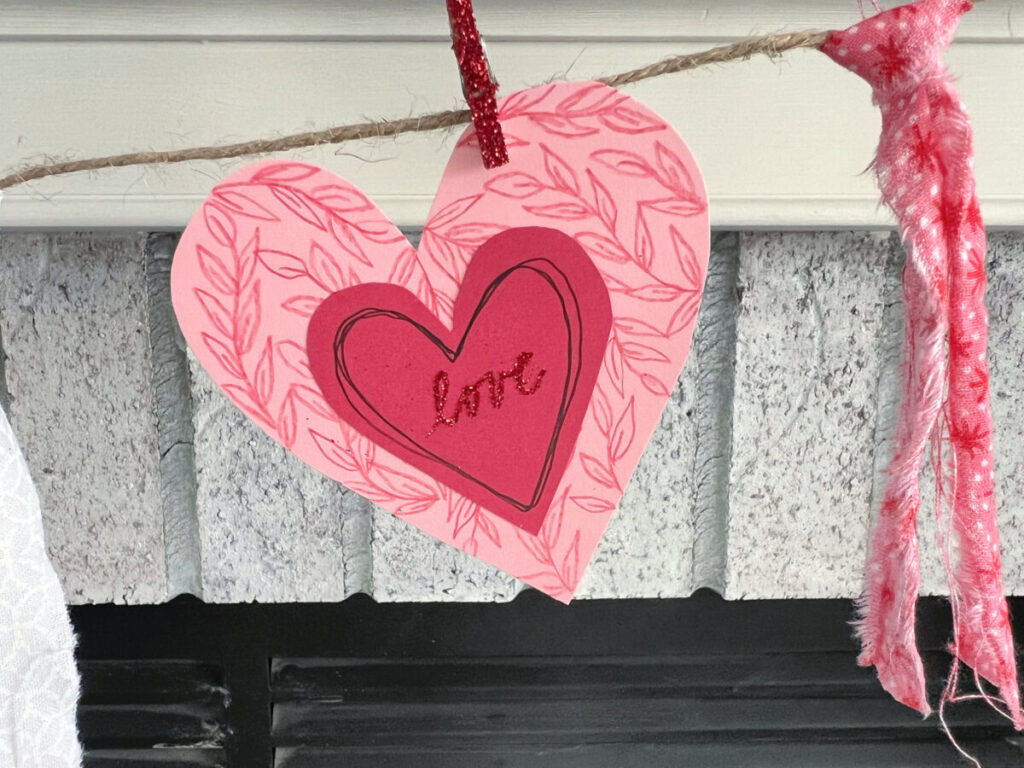
Graceful Vines Heart – I used a red Irojiten colored pencil to sketch simple leafy vines all over the large pink heart to create a botanical background. I outlined the smaller heart using the MONO Drawing Pen 005, then used the glue pen to write the word “love” in the center. Finally, I sprinkled the word with glitter.
Remember, these are just ideas that you can feel free to use, or you can come up with your own totally unique ways to decorate each heart using the supplies you have on hand.
Glitter your clothespins
While totally optional, I thought it was fun to make my tiny clothespins match the rest of the banner. To do this, just spread a thin layer of liquid glue on the top surface of each clothespin, then sprinkle it with glitter. Shake off the excess, and let the clothespin dry completely.
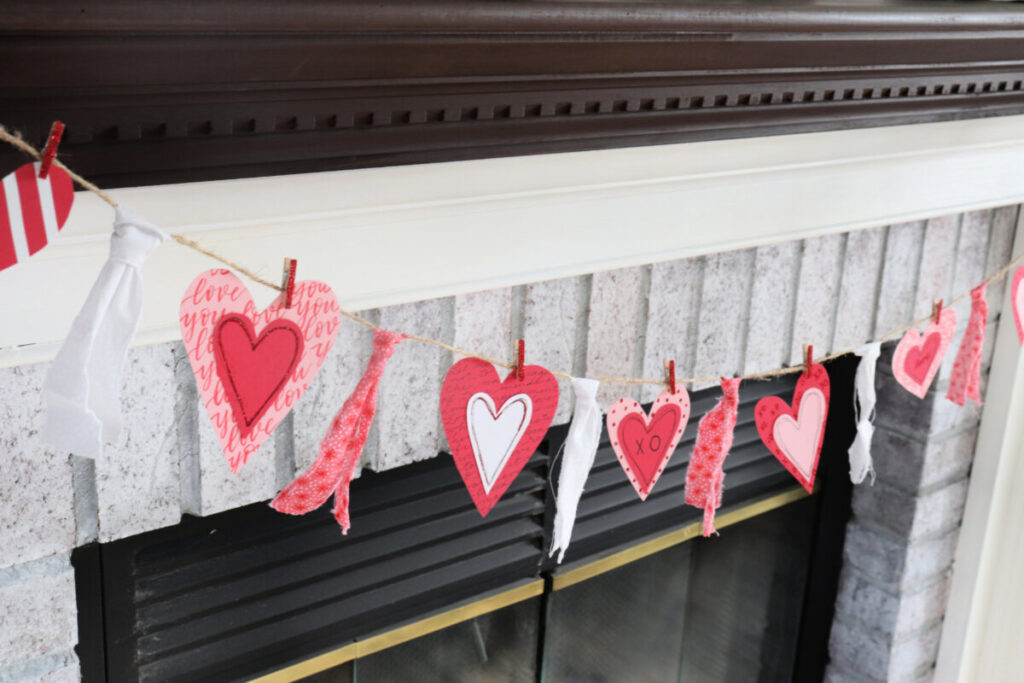
Assemble your banner.
Cut a piece of twine that’s the length you want your banner to be. I pinned mine to my quilting wall so I could easily work with it.
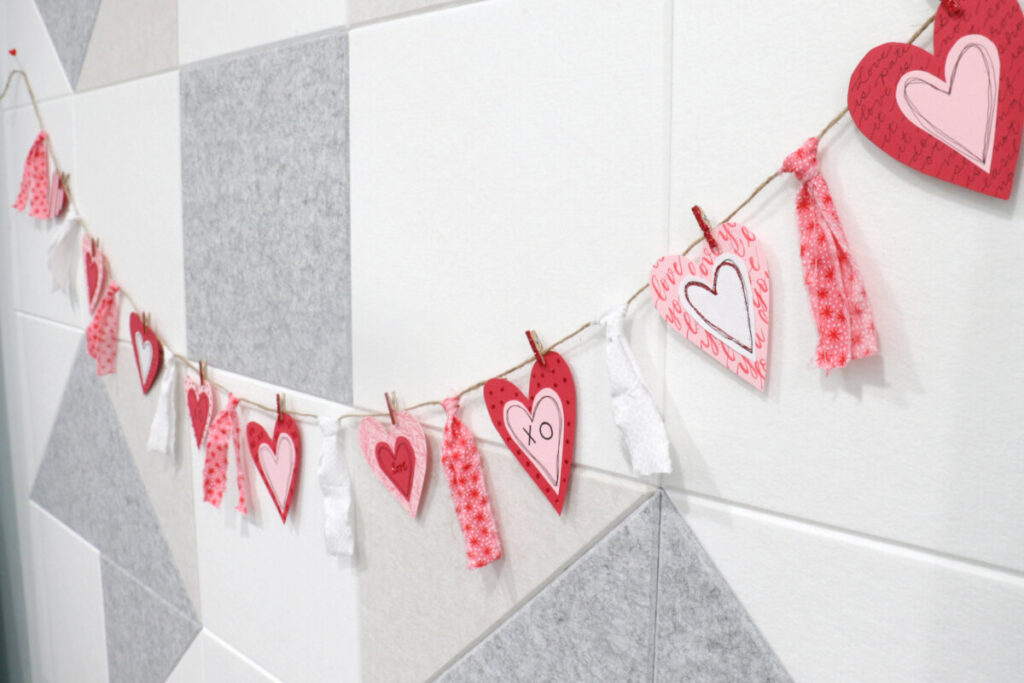
Cut or tear scrap fabric into strips that are 2” wide and approximately 12” long. Tie the fabric onto the twine, leaving space in between for your hearts. Then, clip your hearts onto the twine, alternating colors and styles.
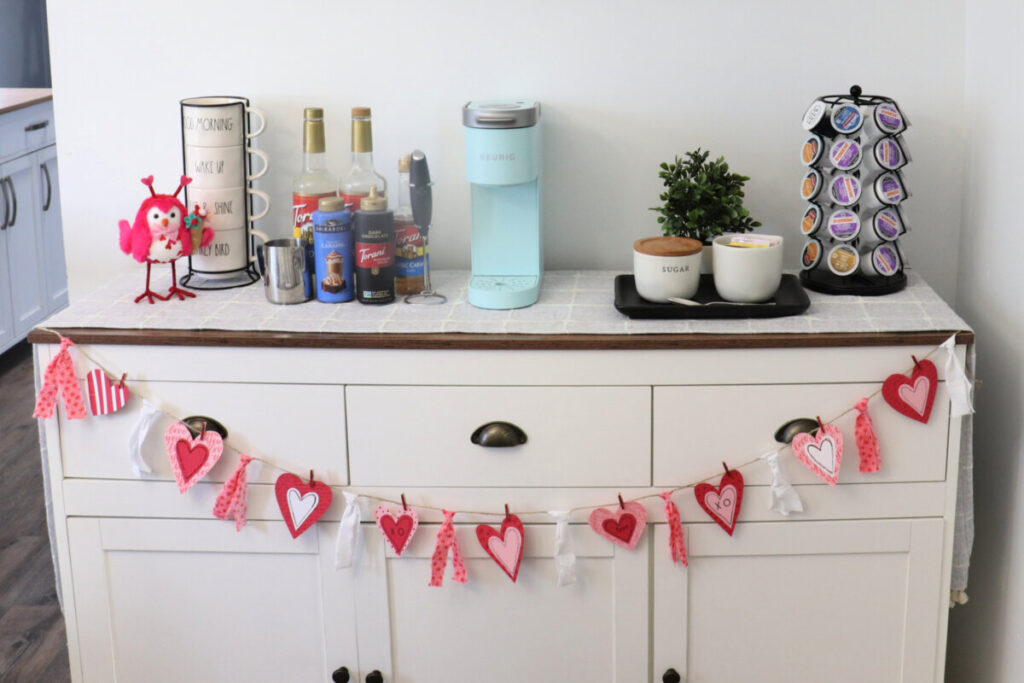
Once your garland is finished, it’s ready to display in your home to bring a touch of Valentine’s Day cheer.
Crafting Tips
- Make your banner extra personal by including text that is meaningful to you. Write the names of your loved ones on some of the hearts, use lyrics from a special song, or incorporate your favorite quotes and inside jokes.
- Although red, white, and pink are traditional Valentine’s Day colors, your banner can be any colors you like. Multicolored pastels would create the feel of Sweethearts candies.
- Don’t have fabric? You can still create this banner, just fill it with more hearts or use paper streamers in between.
Frequently Asked Questions
Your hearts can be any size you like. Mine are between 3-4” tall. Each one is hand cut, so they’re all a little different.
Easy peasy! Just make more or fewer hearts. You can totally customize this project to your own space.
You can also use construction paper, it will just be a little thinner and less sturdy.
More Valentine’s Day Projects
If you enjoyed this Valentine Heart Garland, here are some other fun holiday projects you can create!


If you create your own Valentine Heart Garland, or any other festive crafts, I’d love to see how they turn out! Make sure you’re part of the Amy Latta & Friends Facebook Group, so you can share your photos and we can all be inspired by each other. Hope to see you there.

Valentine Heart Garland
Equipment
- scissors
Materials
- red, pink, and white cardstock
- twine
- tiny clothespins
- fabric scraps
- fine loose glitter
- Tombow MONO Adhesive
- Tombow Multi Liquid Glue
- Tombow MONO Glue Pen
- Tombow MONO Drawing Pen 005
- Tombow MONO Twin Permanent Marker
- Tombow Fudenosuke Brush Pen, red
- Tombow Irojiten Colored Pencil, red
- Tombow MONO Air Touch Refillable Correction Tape
Instructions
- Cut hearts of various sizes/shapes from red, white, and pink cardstock.
- Decorate & assemble your hearts.
- Glitter your clothespins.
- Assemble your banner.

One Comment