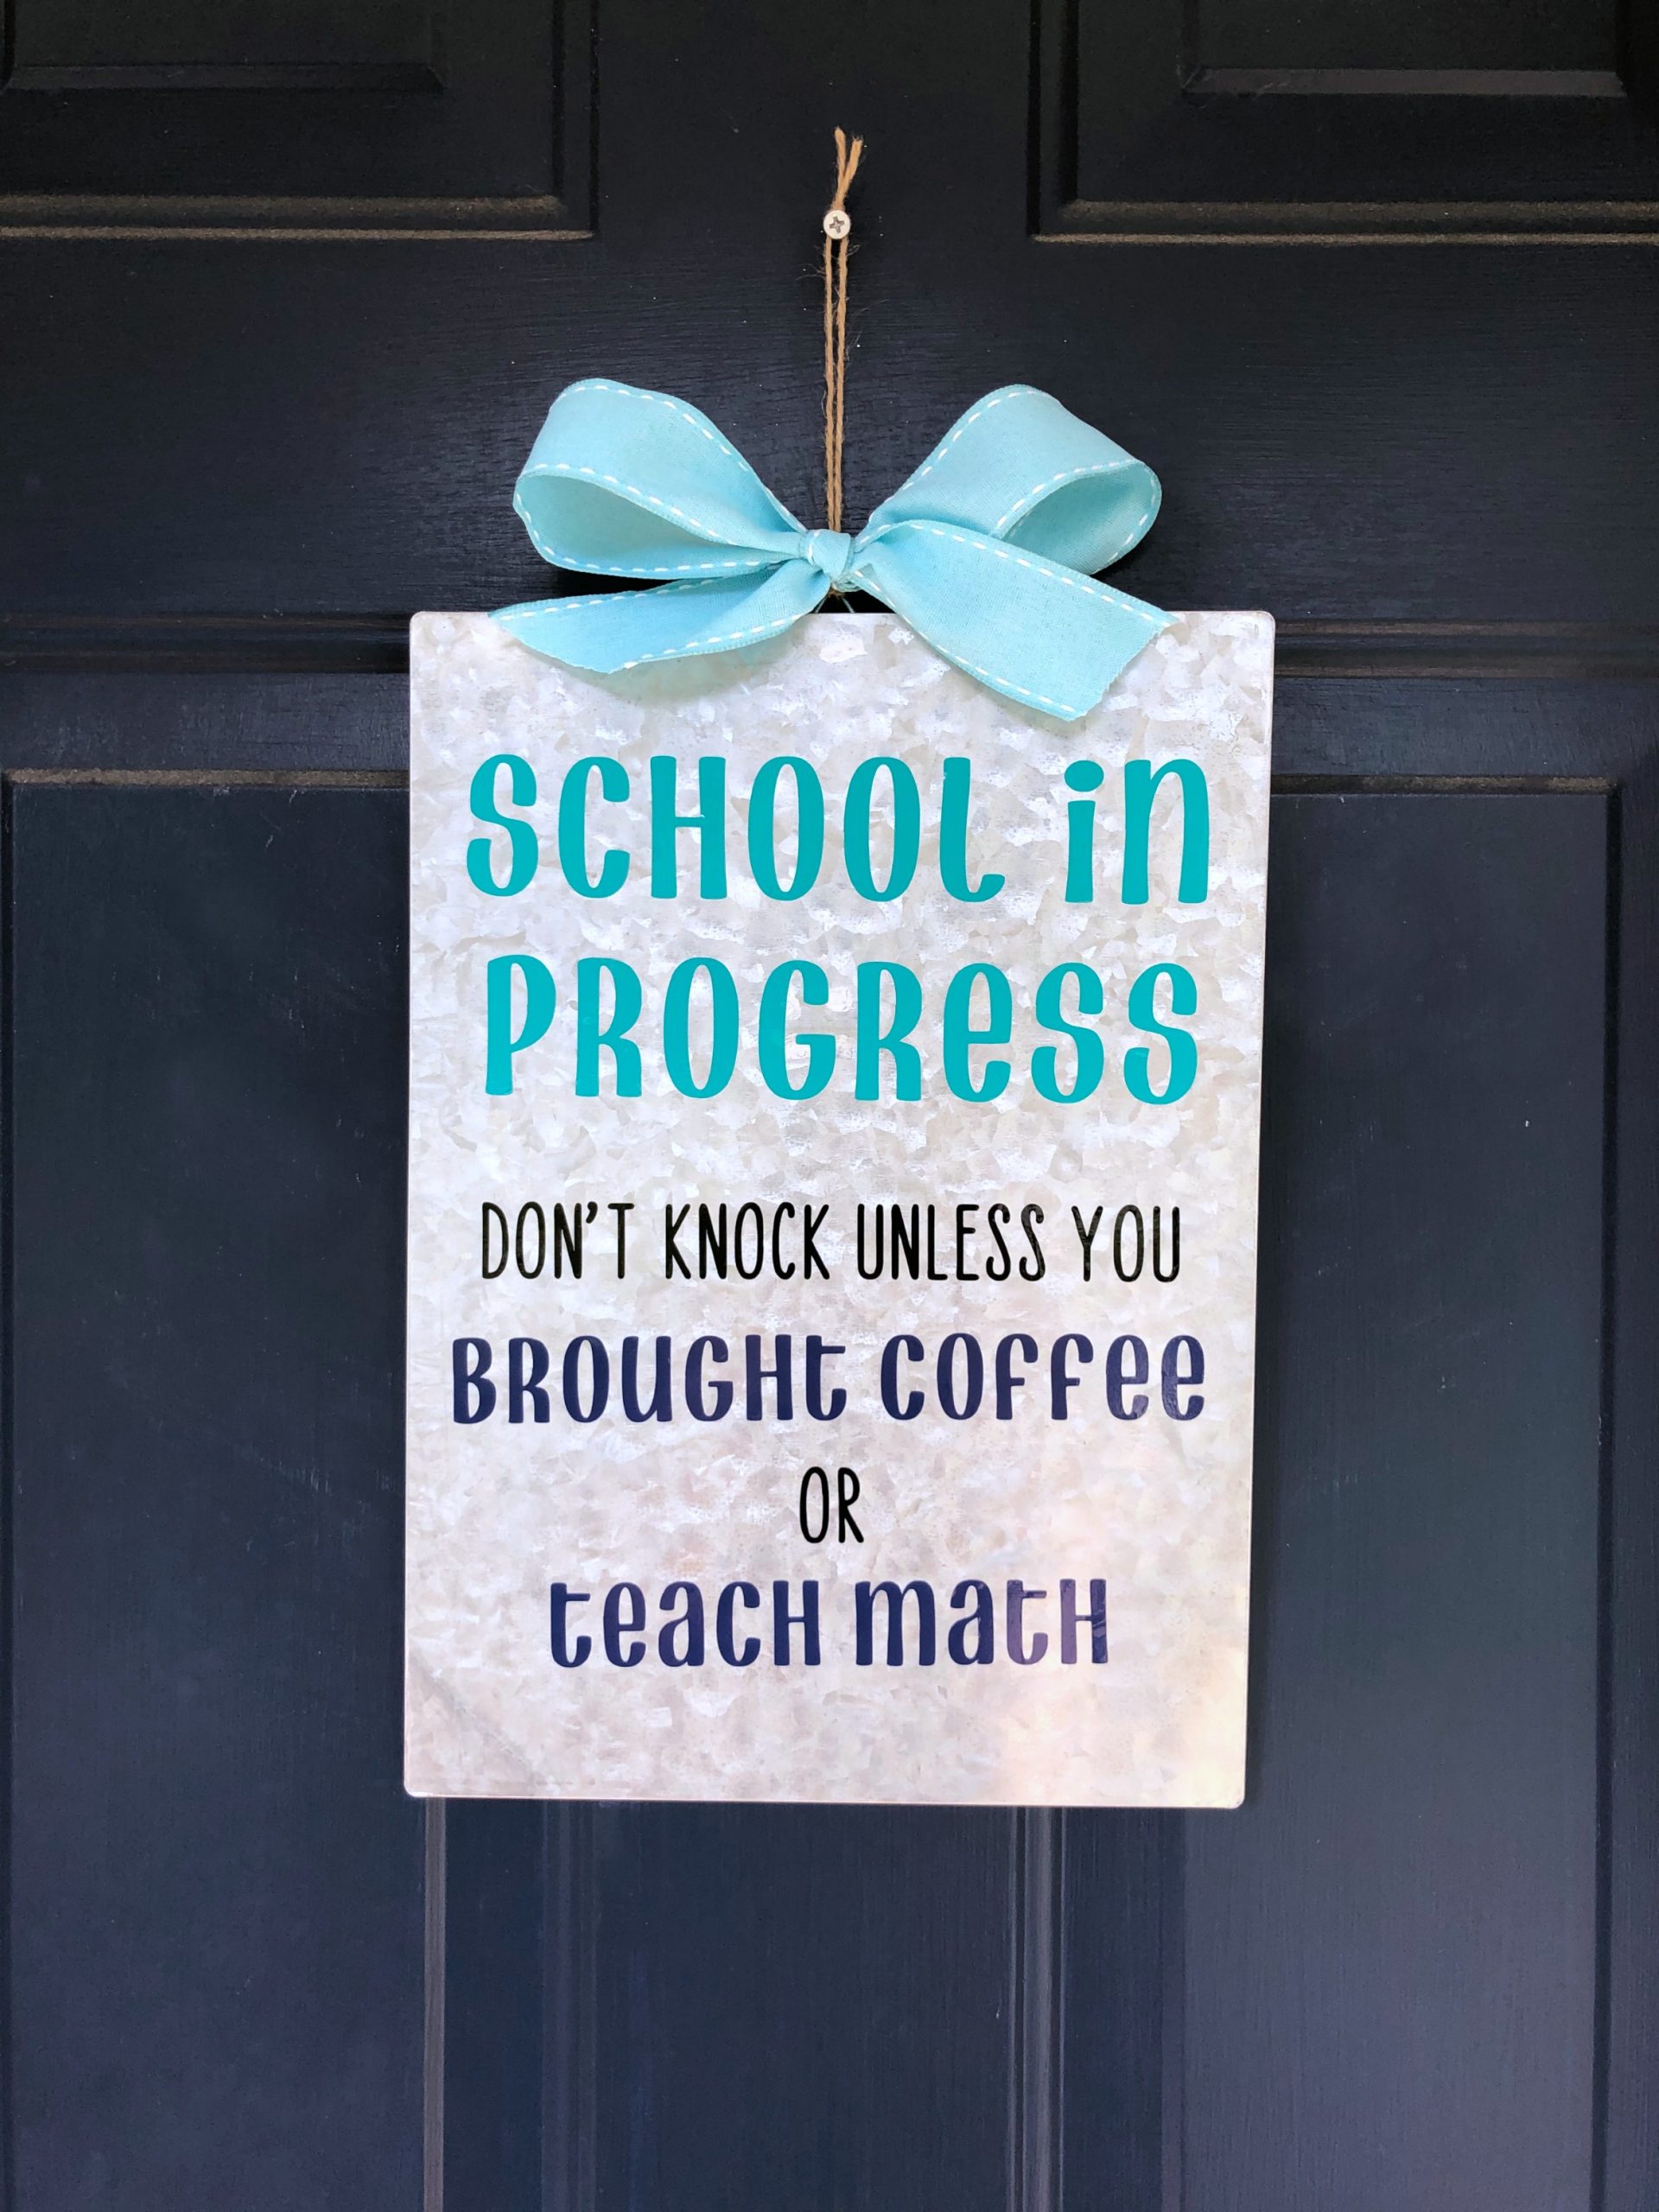
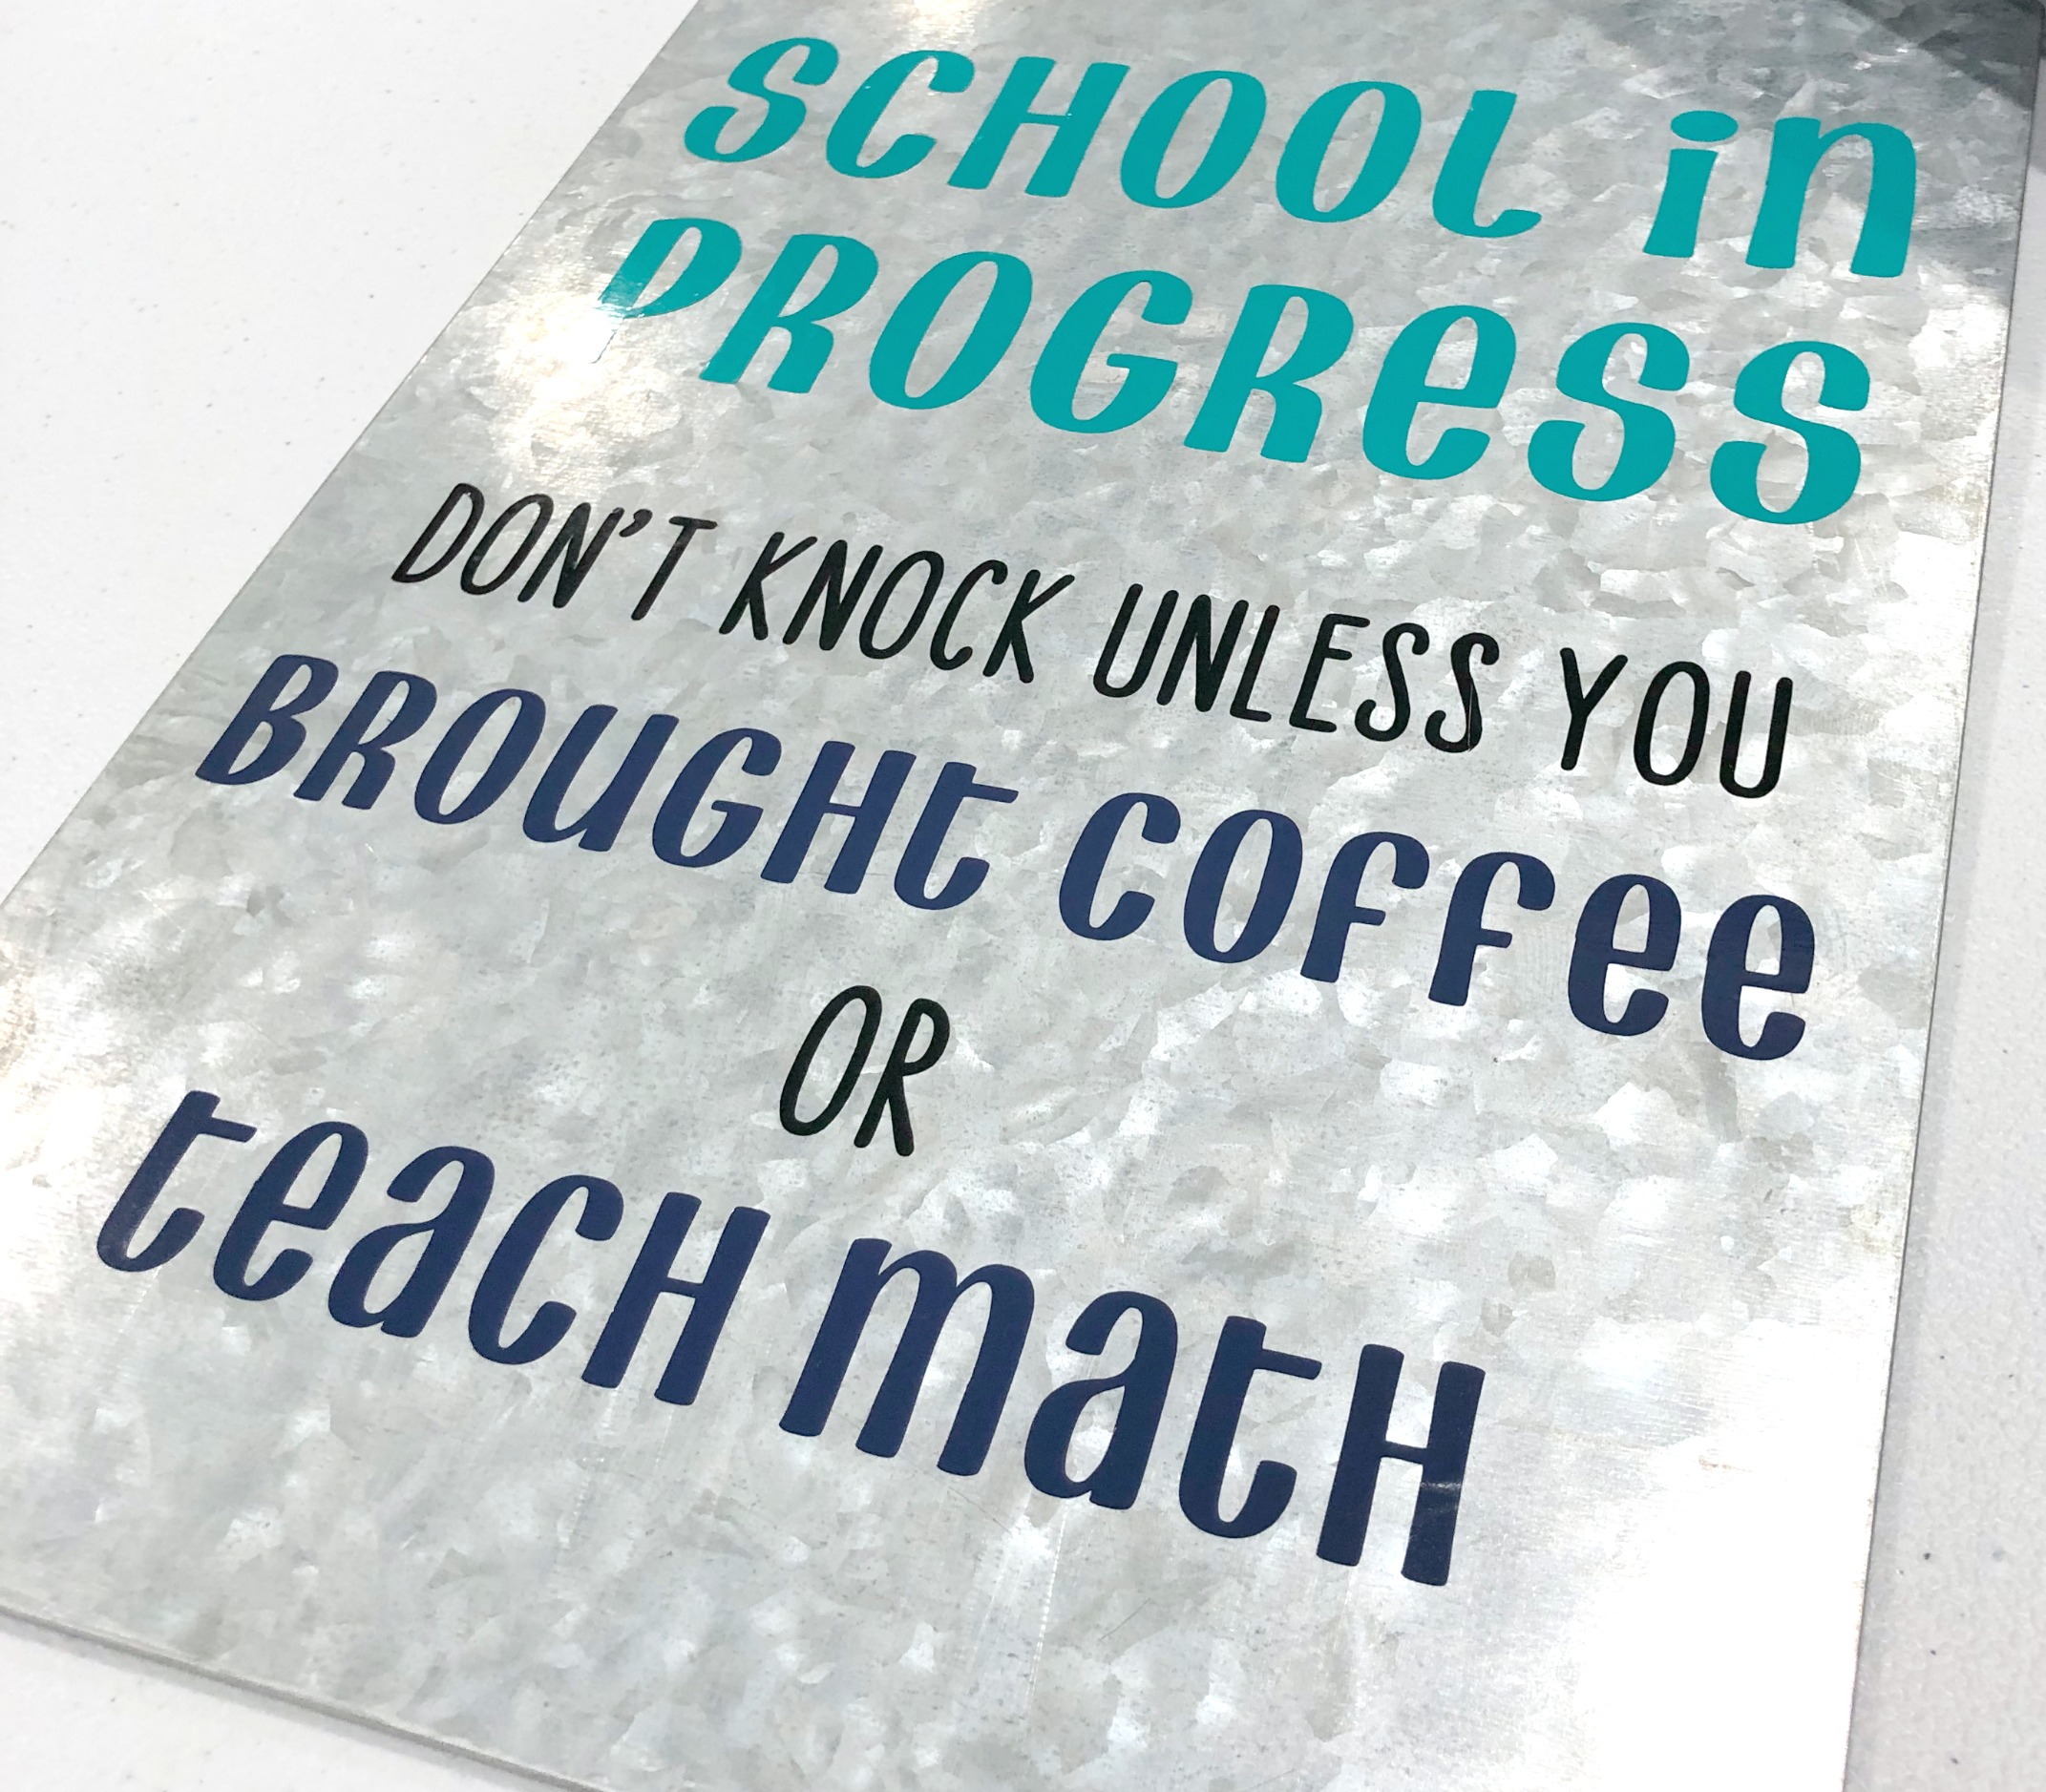
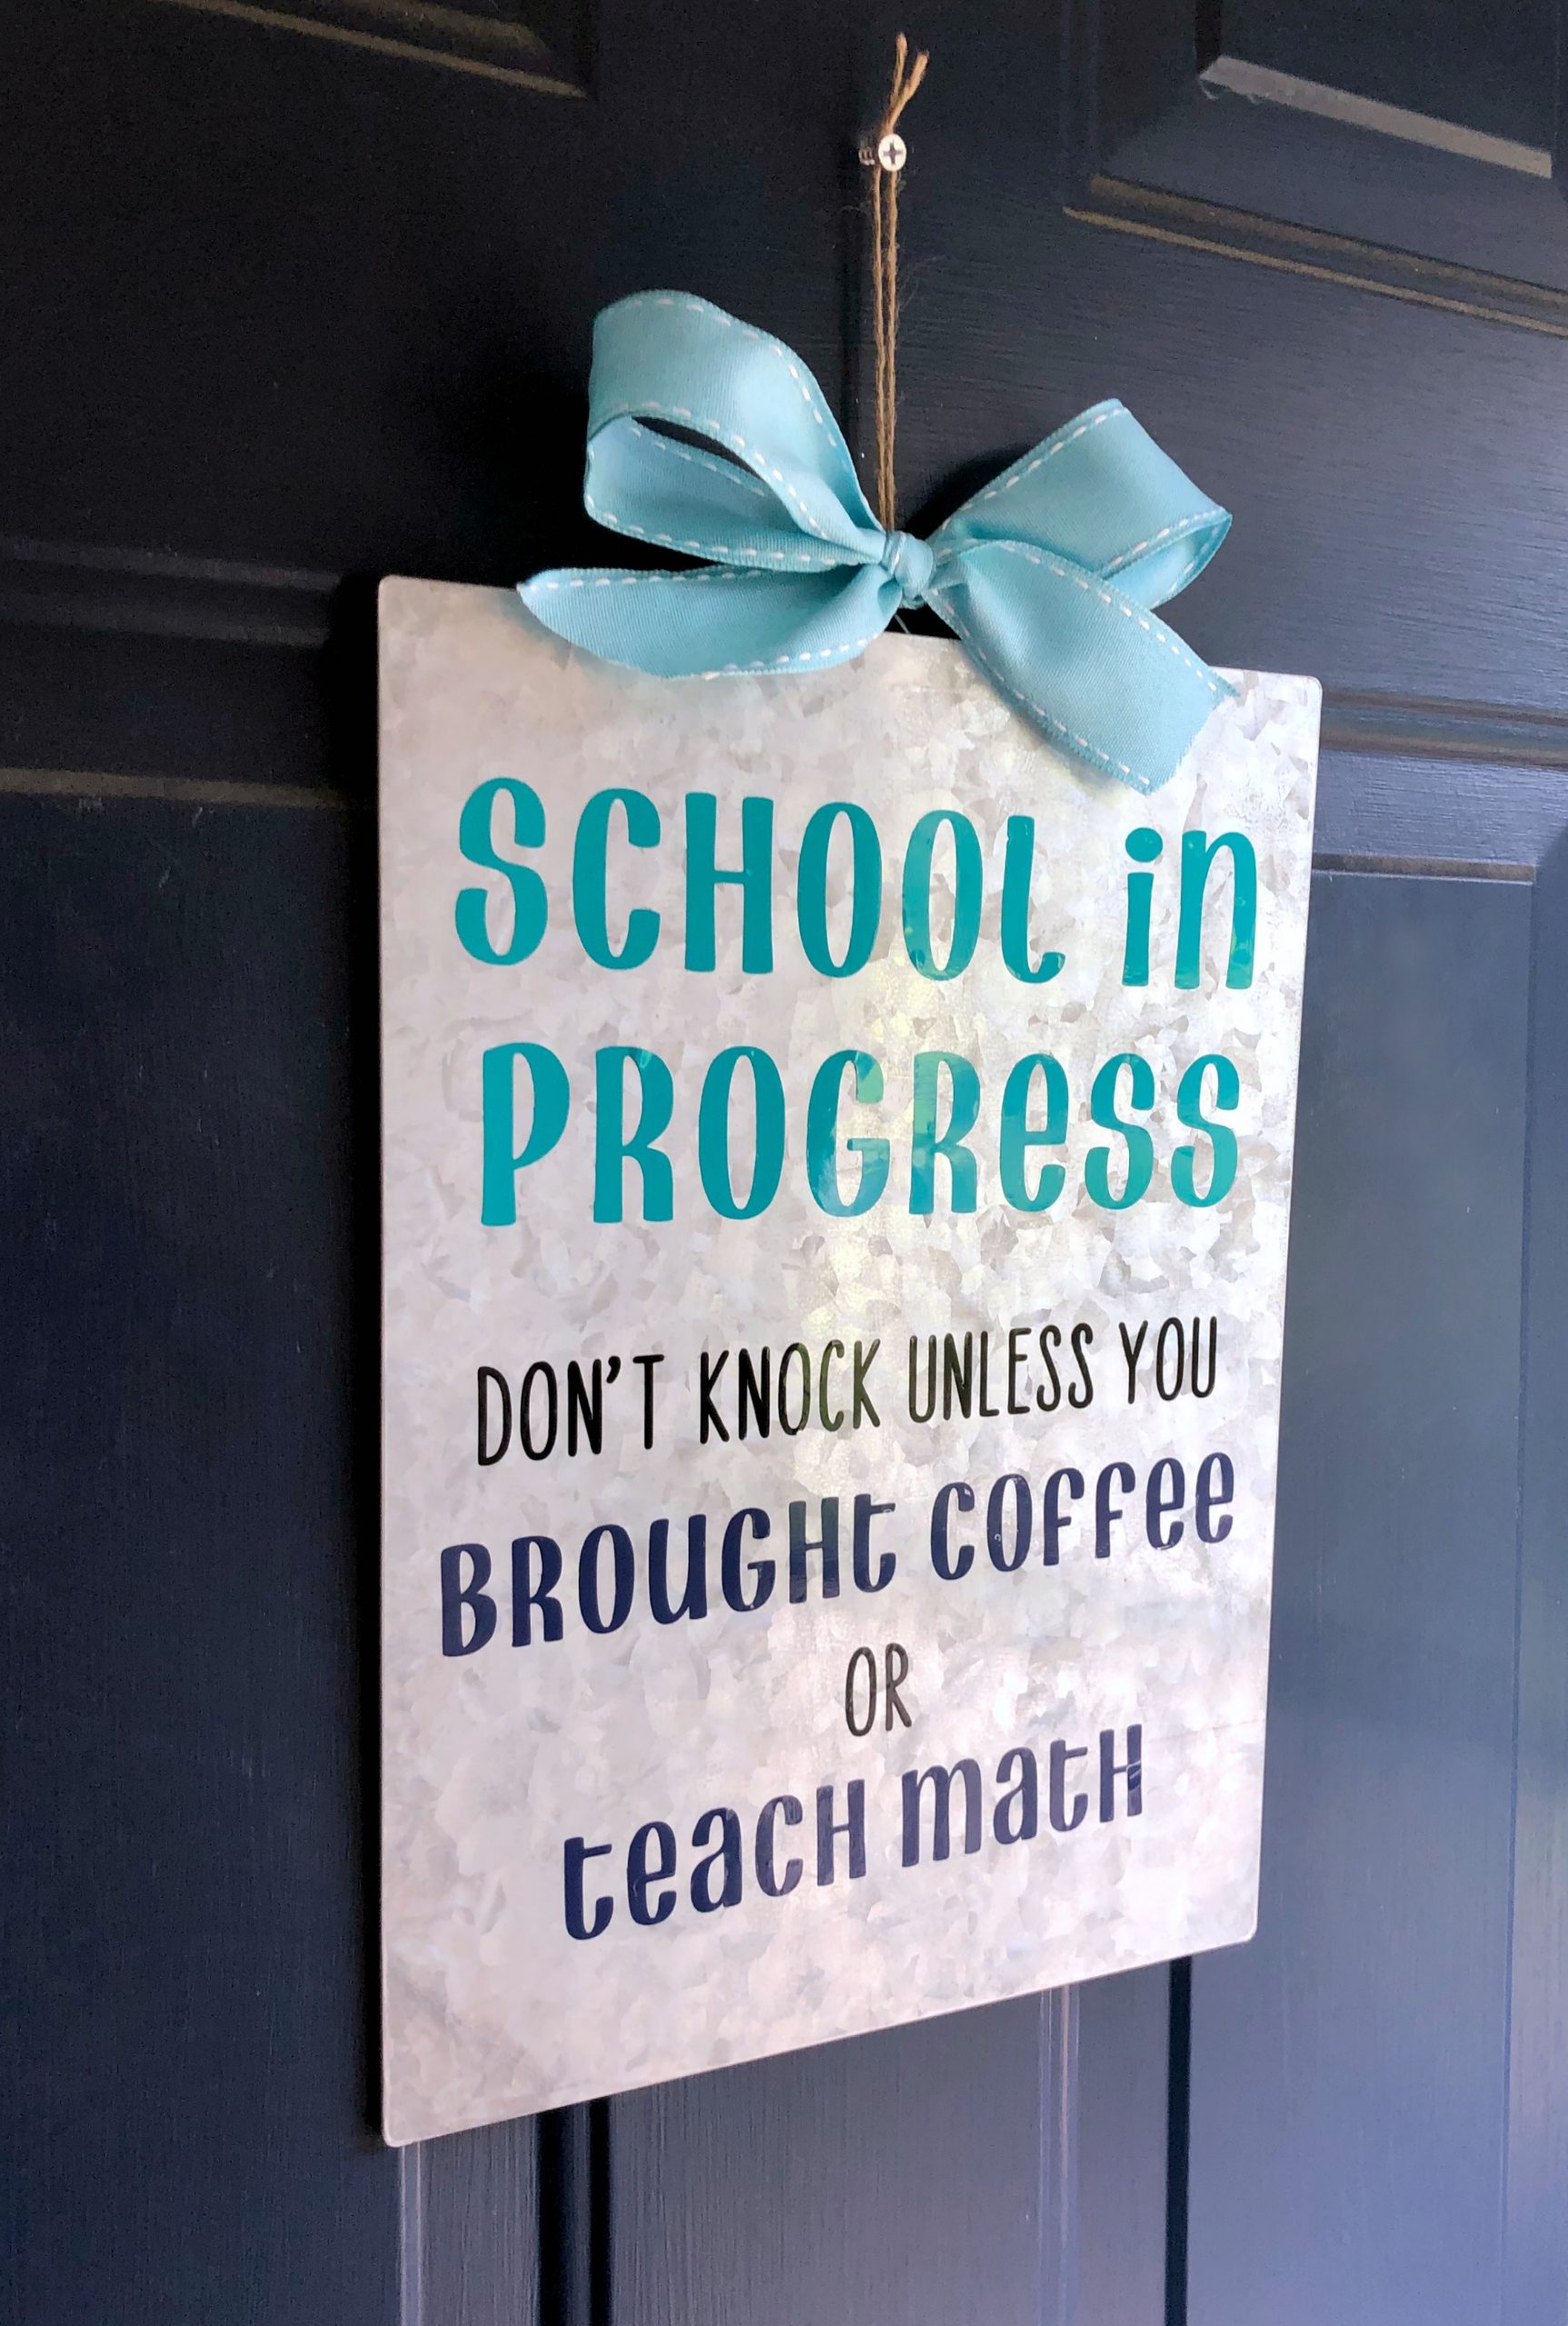
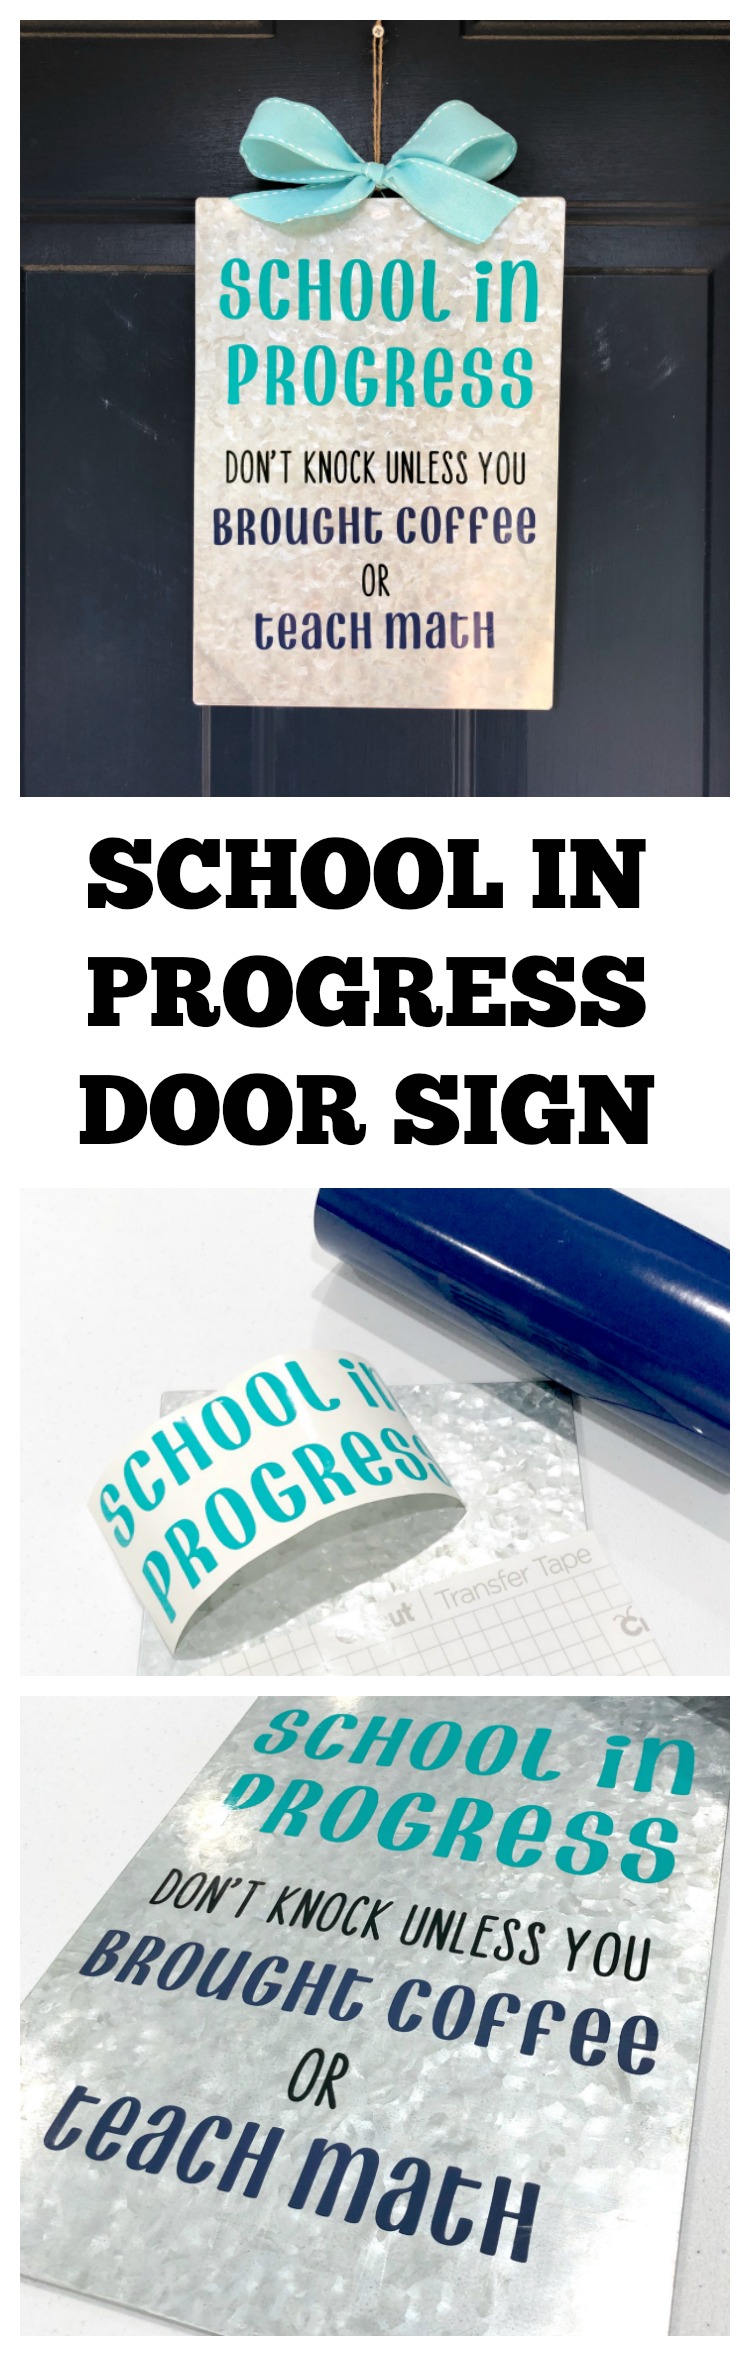
School in Progress Door Sign
As the new school year begins, many of us find ourselves gearing up for some form of learning at home. Whether it’s distance learning, hybrid learning, or full-on homeschooling, we’re going to be doing our best to facilitate a school environment in the house, which includes minimizing distractions. I created this fun sign for our front door in the hopes that it will keep unnecessary interruptions away and also bring some smiles to our neighbors. Here’s how you can make your own:
You’ll need:
Cricut Explore Air 2 or Cricut Joy electronic cutting machine
Scissors
Metal or wood sign base, any size and shape
Step 1: Create your design.
I chose two fonts I liked from Cricut Design Space, then typed my message, making sure I sized it to fit my sign. I used the Don Juan font for “School in Progress,” “brought coffee,” and “teach math,” and the Four Seasons Home Decor font for everything else. Because I wanted to use different colors of vinyl, I did three separate cuts, one for each vinyl color.
My phrase, “unless you brought coffee or teach math” applies to my personal weaknesses, but you can easily re-word it for your own. Change coffee to wine or chocolate, substitute a different subject for math, or create your own unique saying if you like.
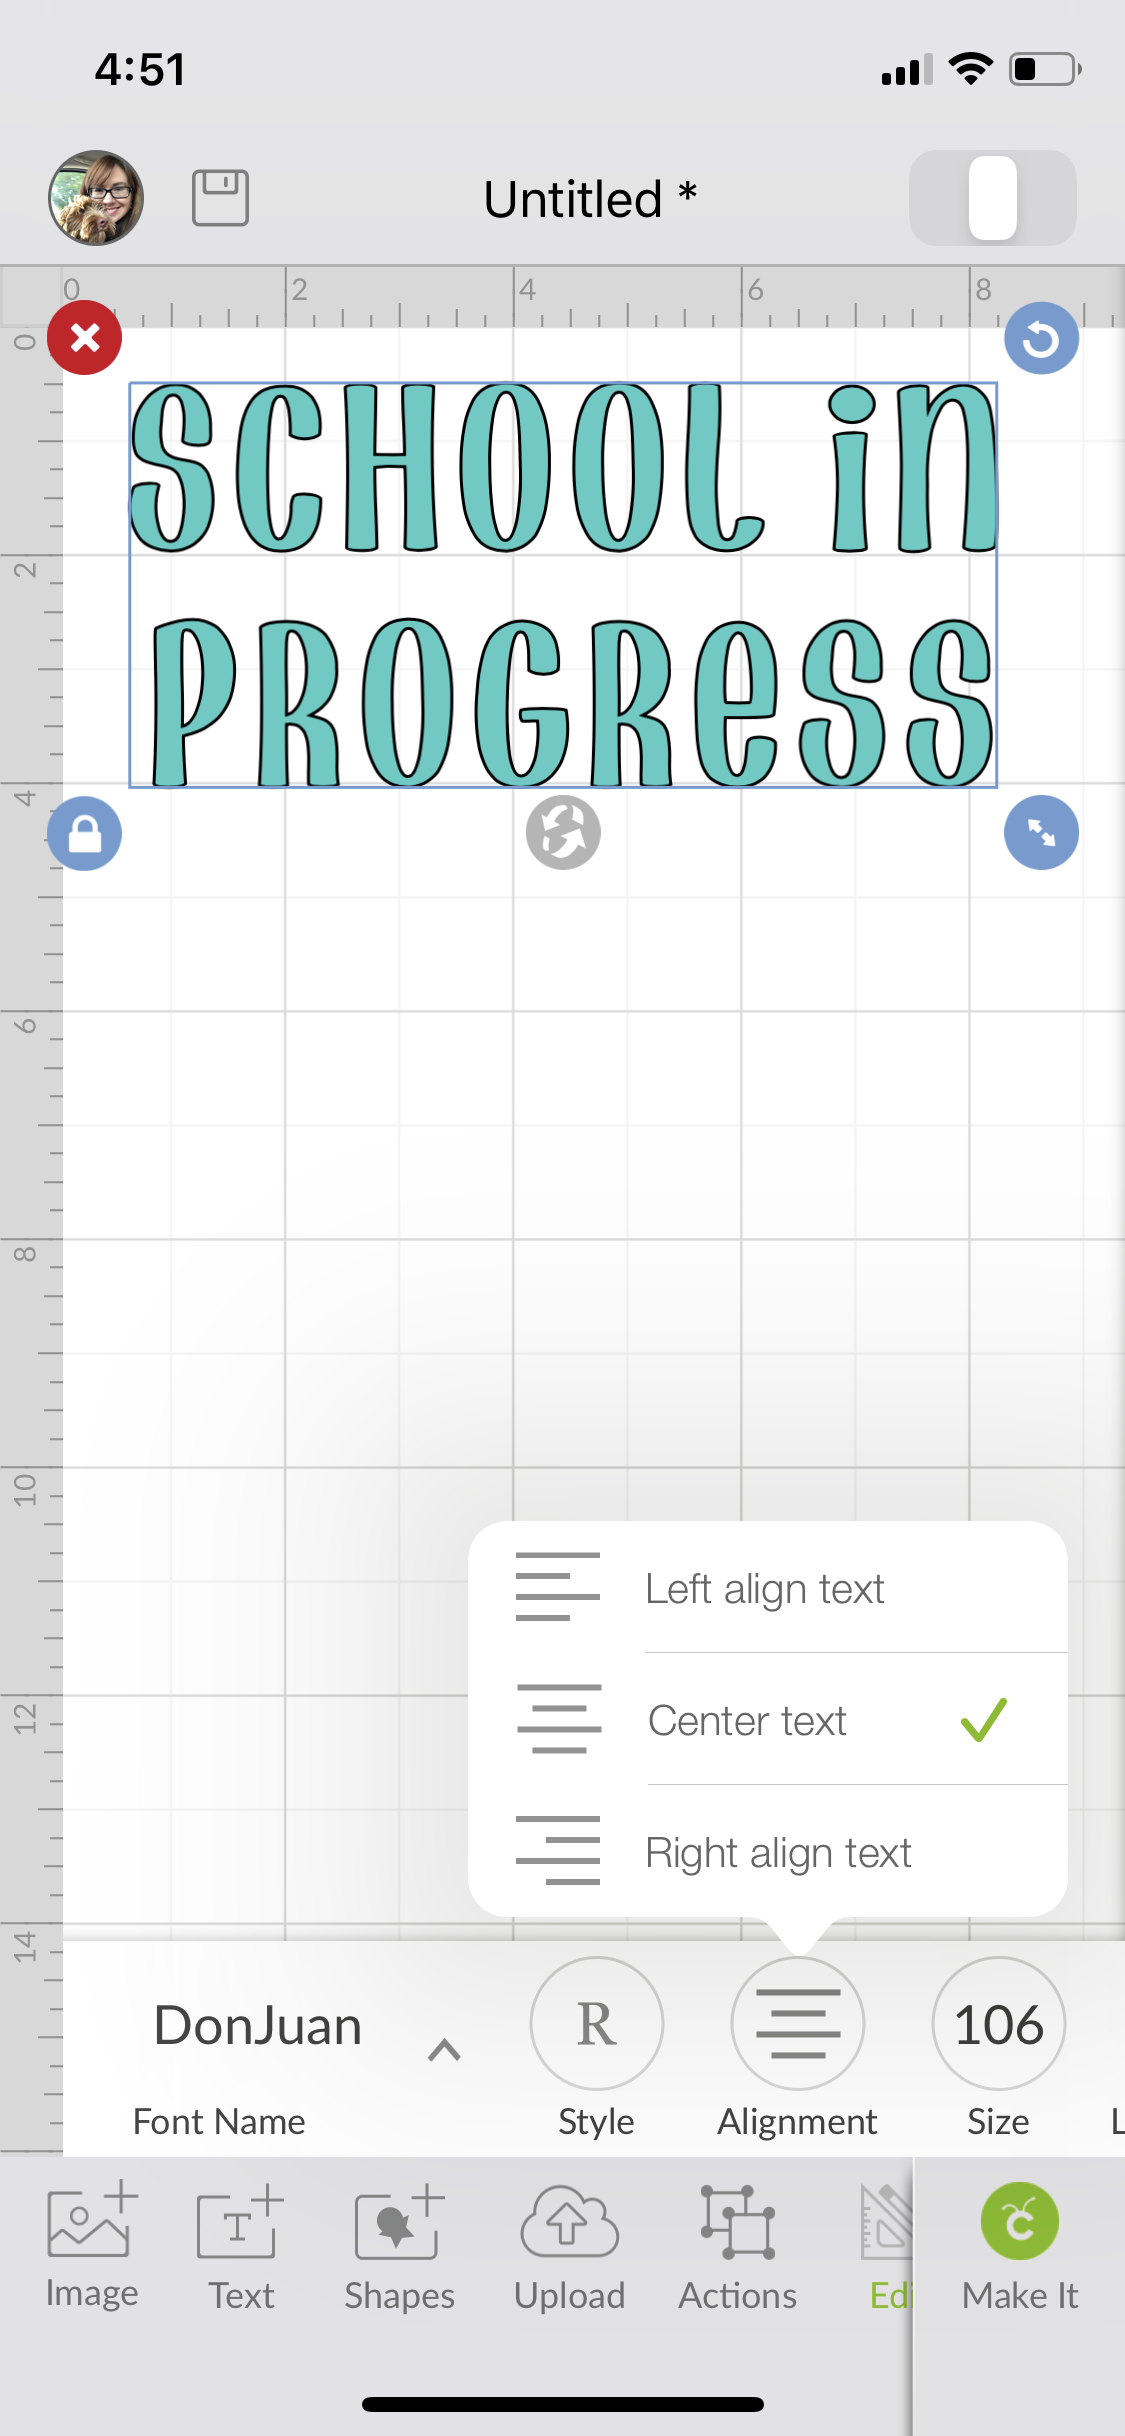
Step 2: Send the design to your machine.
Once the design is ready, choose the “make it” button in the bottom right corner of the app. Adhere your vinyl to a cutting mat, then follow the prompts in the app to load your machine and begin the cut. The machine will do the magic, cutting your design.
Step 3: Weed the vinyl.
Peel off and dispose of all the vinyl that isn’t part of your design, including the centers of letters like “o” and “e.”
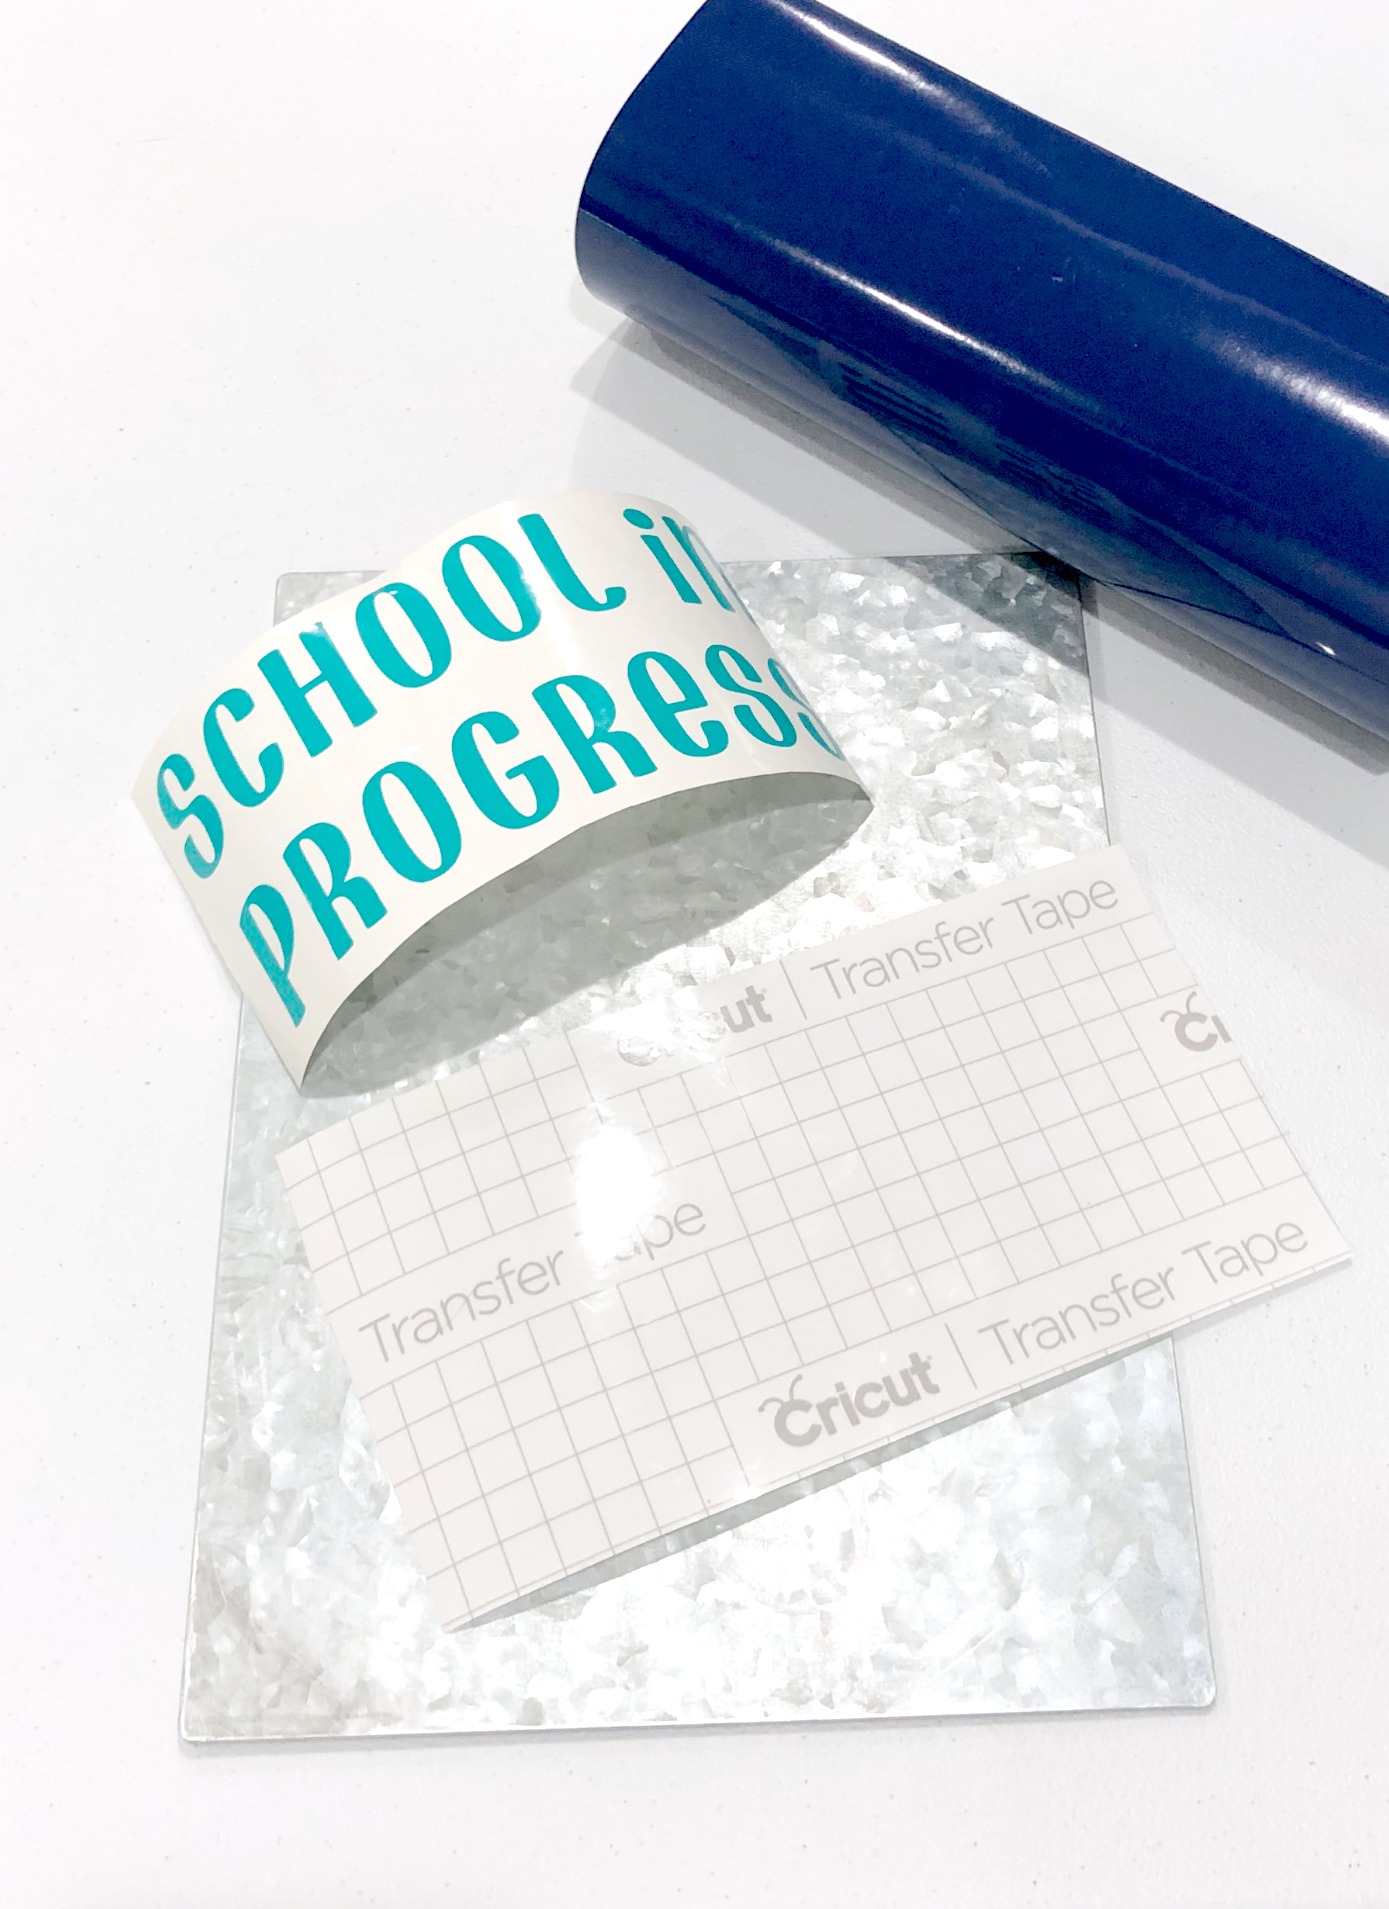
Step 4: Use transfer tape to apply the vinyl to your sign.
Apply a piece of clear transfer tape on top of your design and rub it with a burnishing tool or your finger. This will cause the vinyl letters to stick to it. Peel it back up, and the vinyl letters should come along. Then, apply the letters and transfer tape to the sign’s surface wherever you want them to go. Rub one more time, then peel the transfer tape off. The letters should be adhered to the sign.
Repeat this process until your entire design has been transferred to the sign.
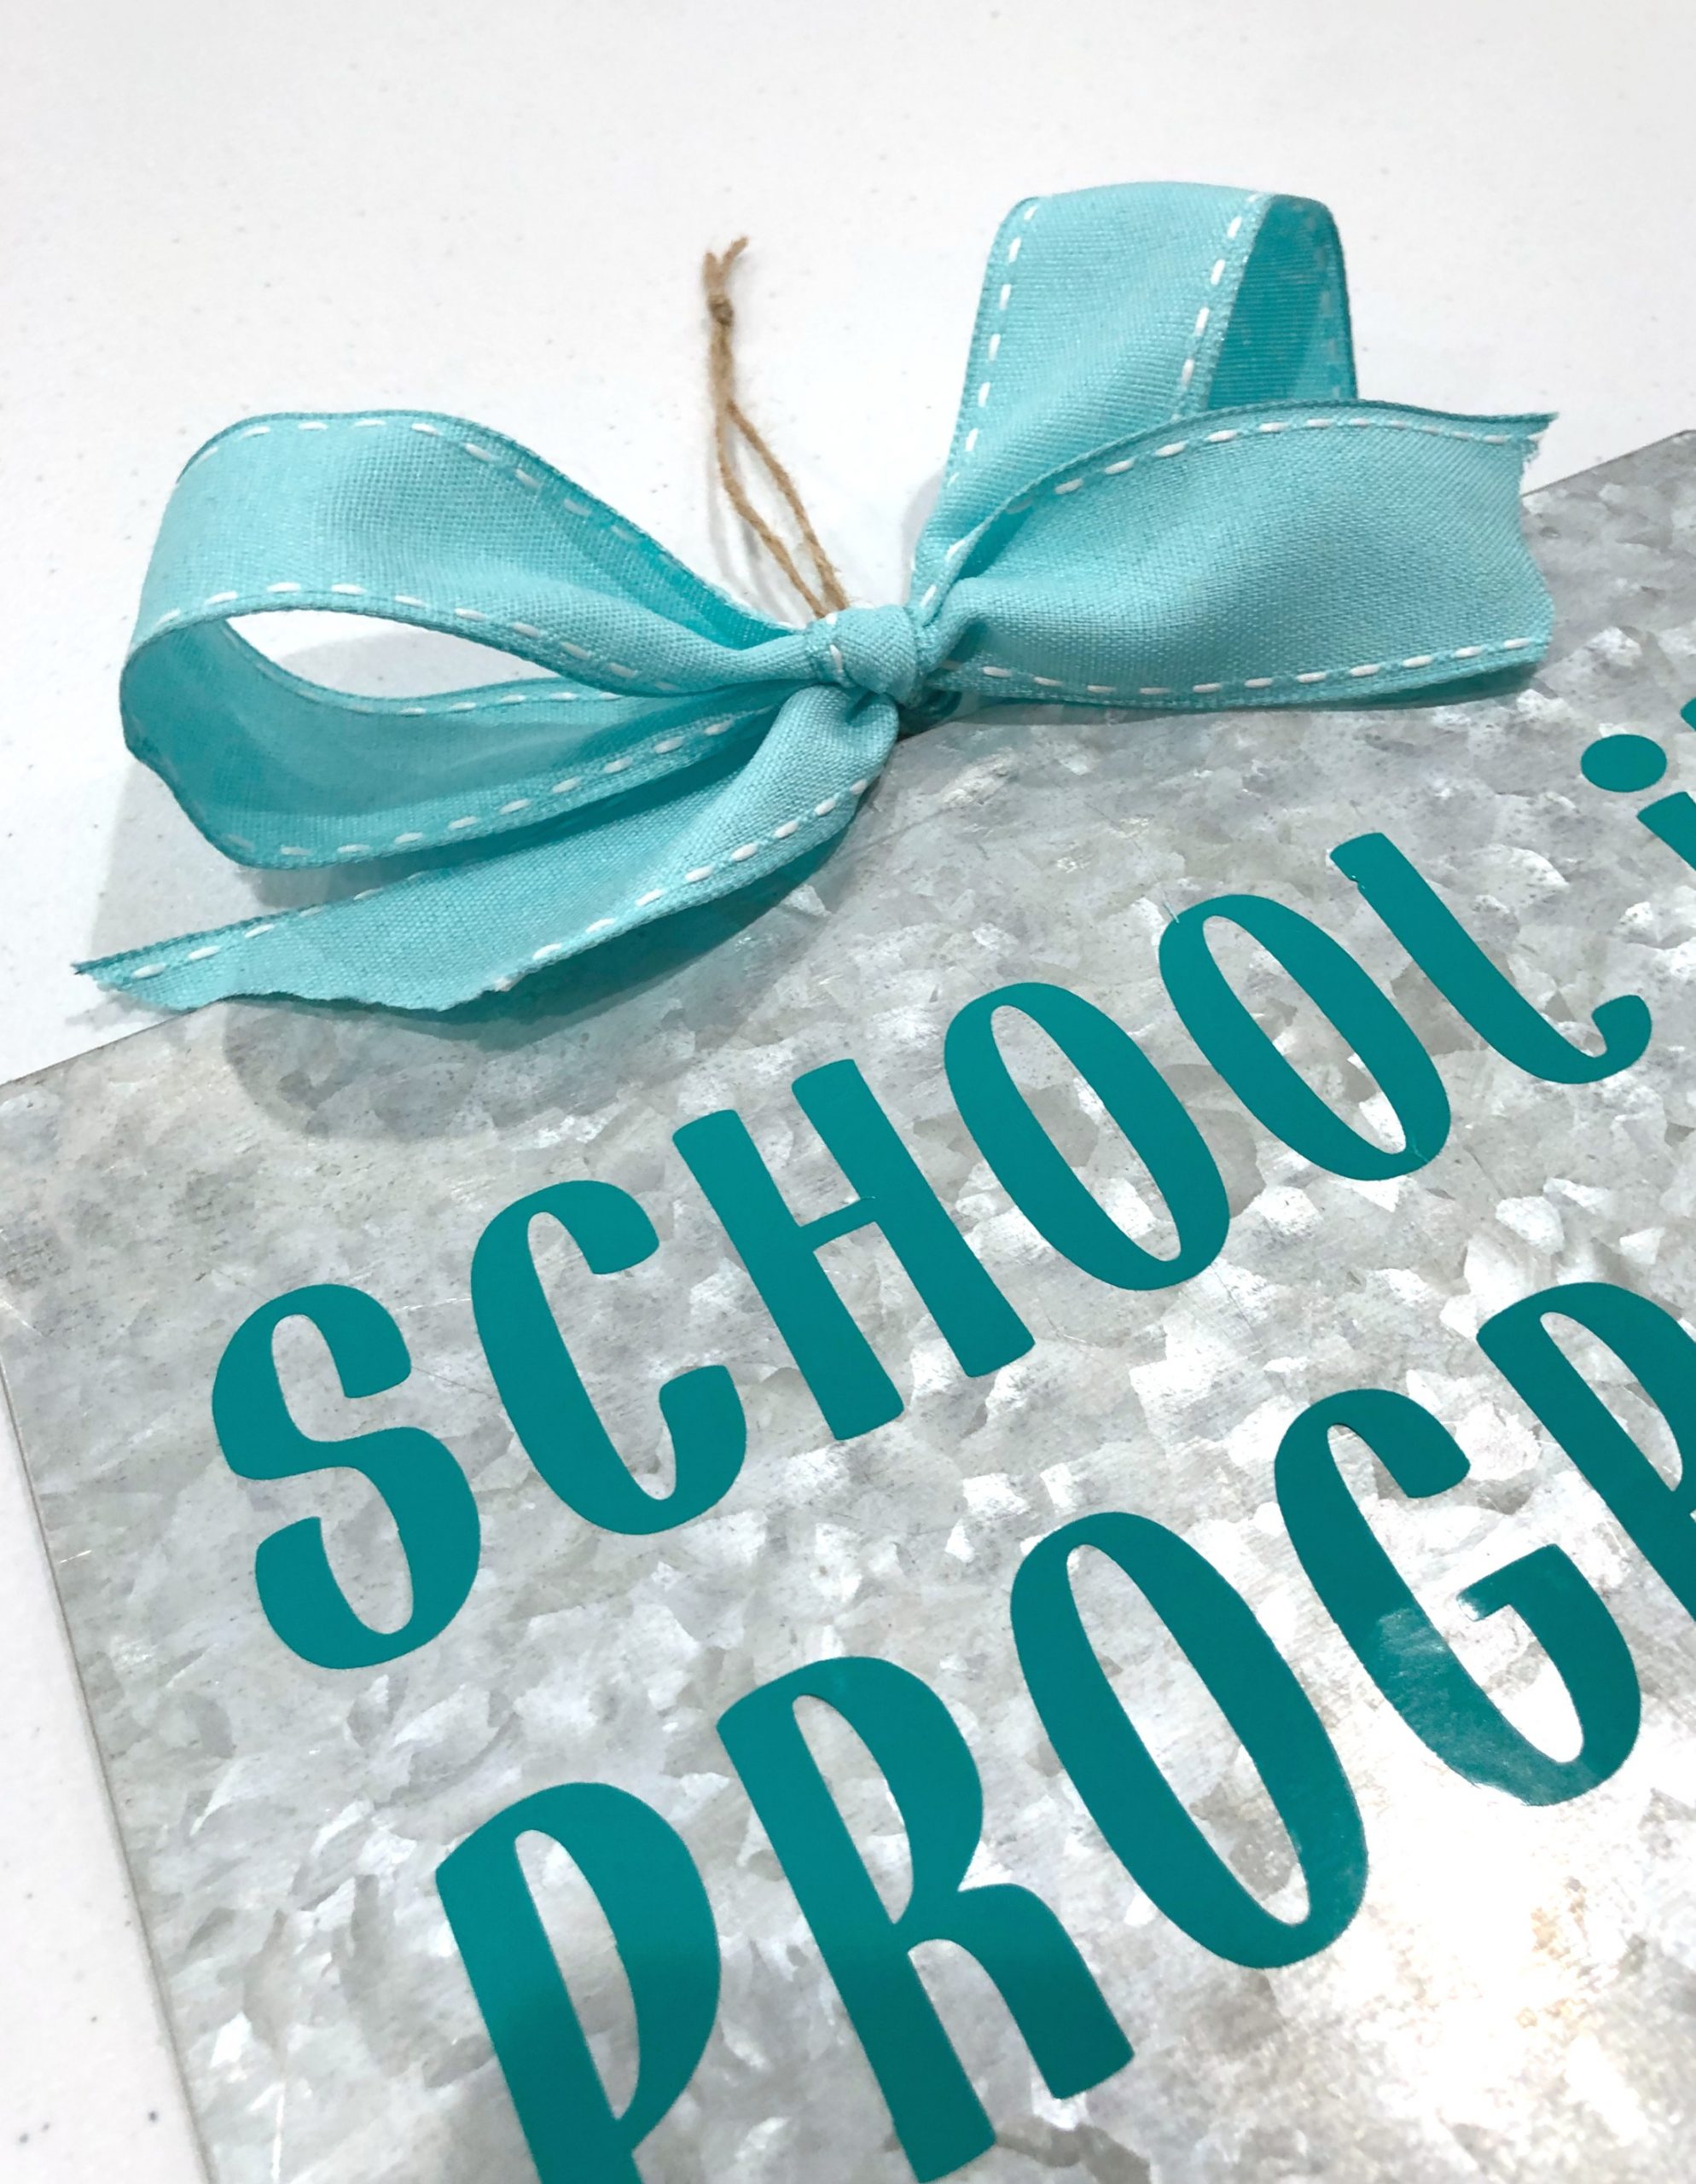
Step 5: Add a twine hanger and a ribbon bow (optional).
Depending on the type of sign you are using, you may need to add a hanger so it can be displayed on your door. I tied a piece of twine to the hanger on the back of the sign. Then, I tied a piece of wide ribbon around it and formed a bow.
Now your sign is ready to display! I’m hoping this will help minimize distractions during our school days and maybe score me an extra cup of coffee now and then. Is this something your family could use as we start a very unusual school year?
I’d love to see your back to school decor ideas, as well as any other creative projects you’re working on. Be sure to join the Amy Latta & Friends Facebook group and share your photos so we can all be inspired.
Here are a few other Back to School projects to help you gear up for this school year:

If you like this idea, don’t forget to Pin it and/or share it with a friend.


This is so cute!! I love the saying!