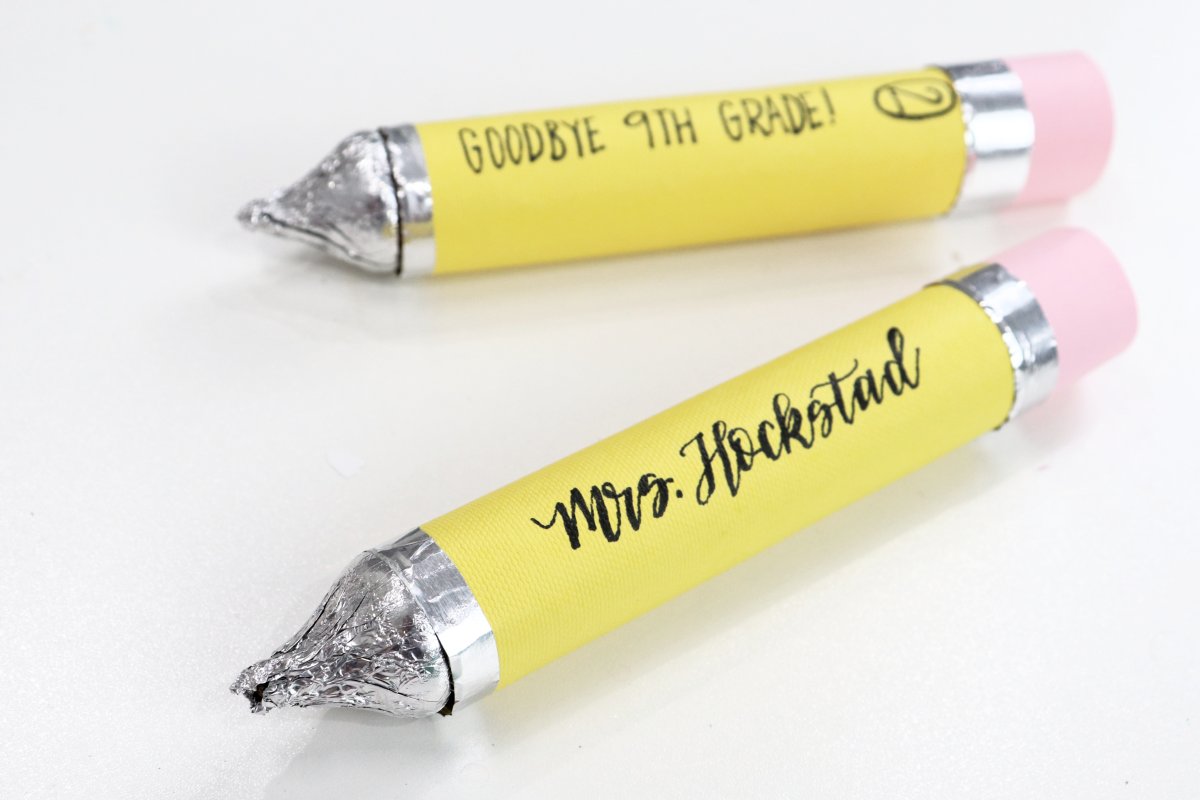
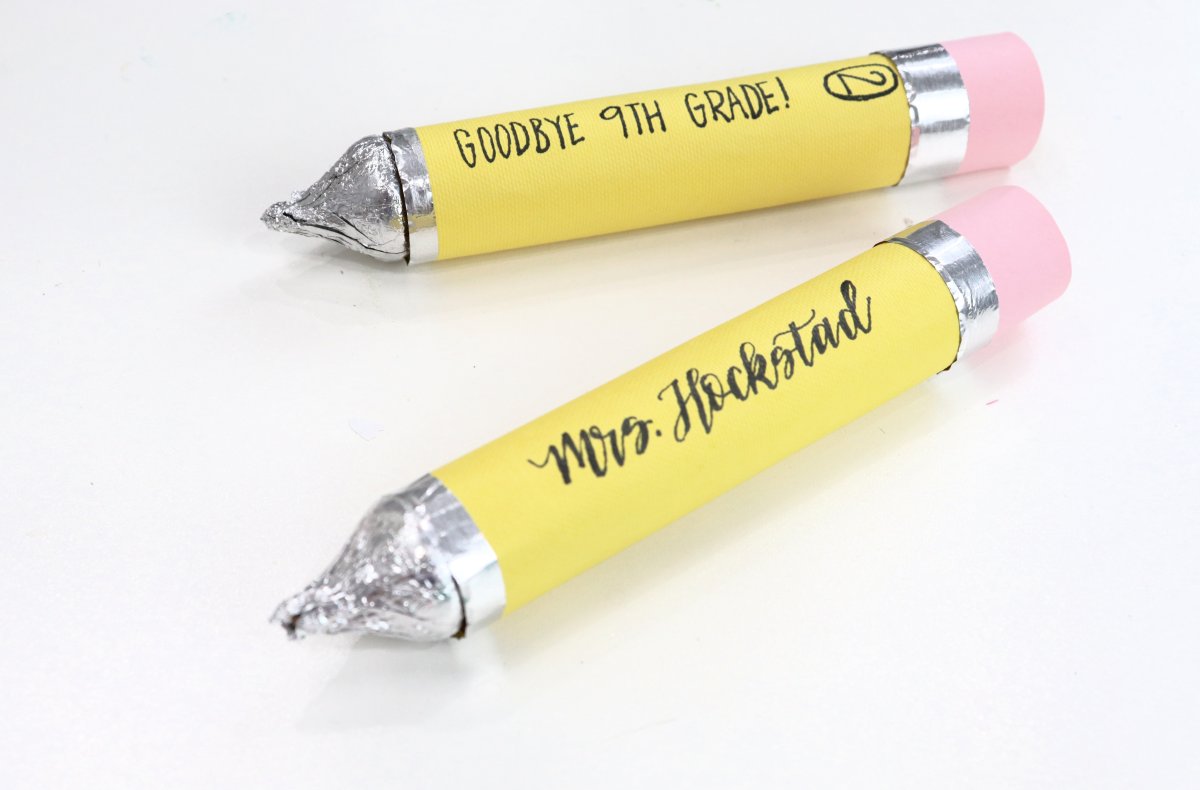
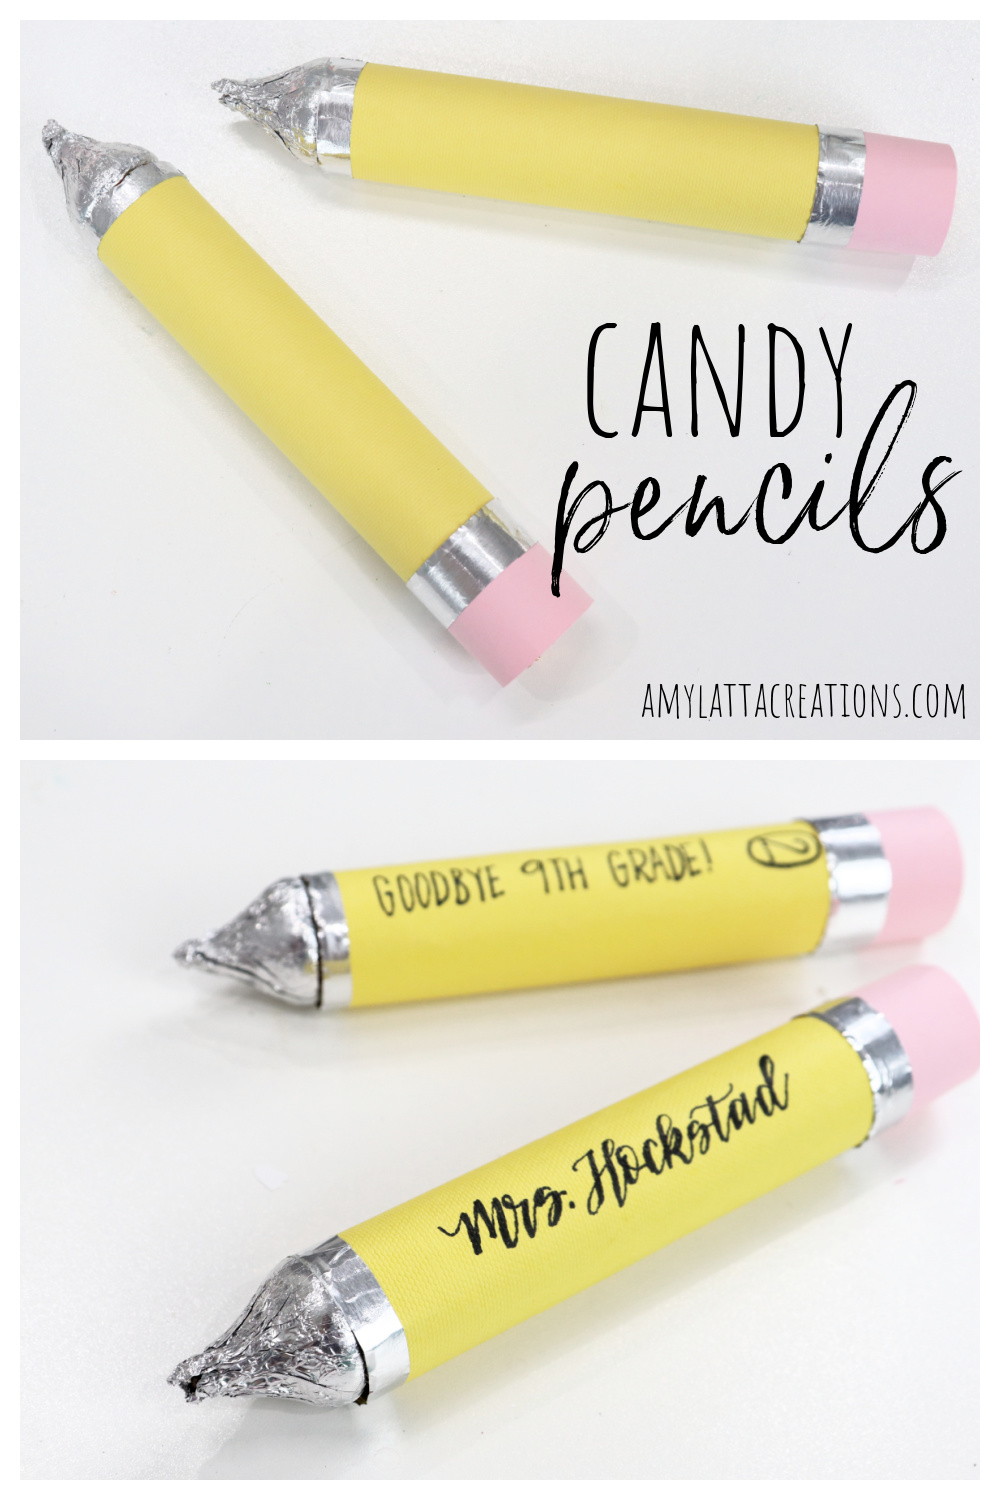
Candy Pencil
Whether the school year is beginning, ending, or in full swing, this little candy pencil is a sweet treat for teachers and students alike. You only need a few basic supplies, and it’s simple for crafters of all ages to create. Here’s how to make your own.
How to Make a Candy Pencil
You’ll need:
chocolate kisses
roll of candy (Rolo, LifeSavers, mentos, etc)
yellow and pink cardstock
aluminum foil
adhesive
scissors or paper cutter
fine tip black marker (optional)
Instructions
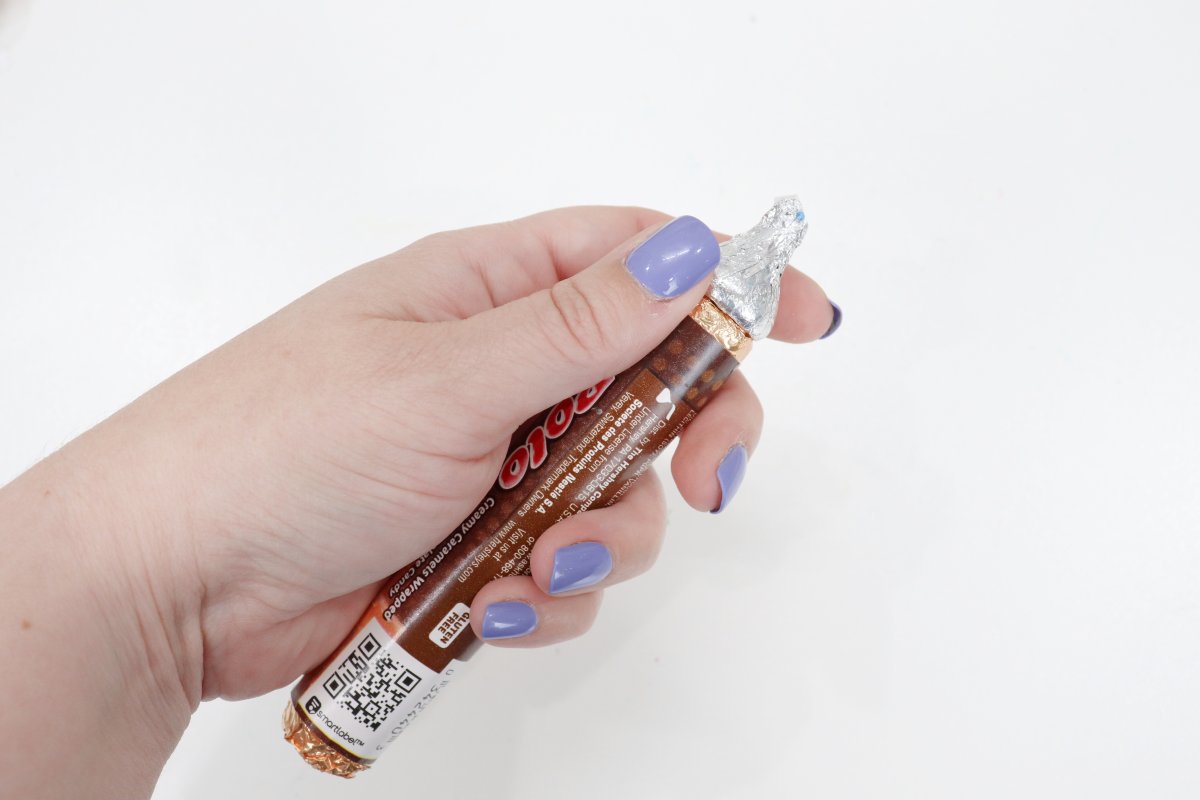
Step 1: Attach a chocolate kiss to one end of the candy roll.
I like to use either an adhesive dot or other Tombow adhesive tape rather than glue since we’re working with something edible.
Step 2: Cut your cardstock and foil.
Use scissors or a paper cutter to cut the following sizes:
yellow cardstock – 3.5″ x 4″
pink cardstock – 3.5″ x 1″
foil – 3.5″ x 0.5″, 3.5″ x 0.25″
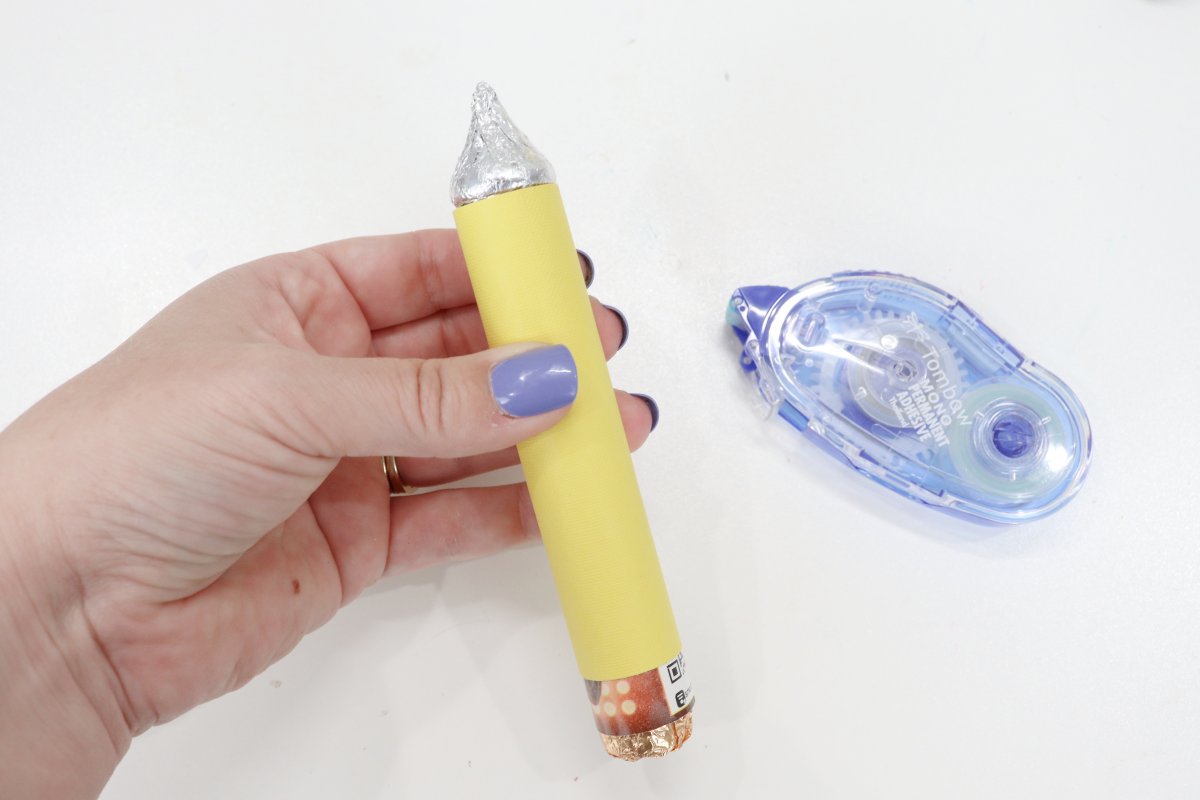
Step 3: Wrap the candy roll with the yellow cardstock.
I recommend putting lots of adhesive all over the back side of the cardstock, and especially around the edges, to help it stick and stay closed.
Step 4: Wrap the pink cardstock and the foil around the bottom of the “pencil.”
Once again, you’ll want to use lots of adhesive! Wrap the pink part first, lining it up with the bottom of the candy roll. It will overlap the yellow cardstock a bit. Then, add the 1/2″ wide strip of foil around the section where the colors overlap.
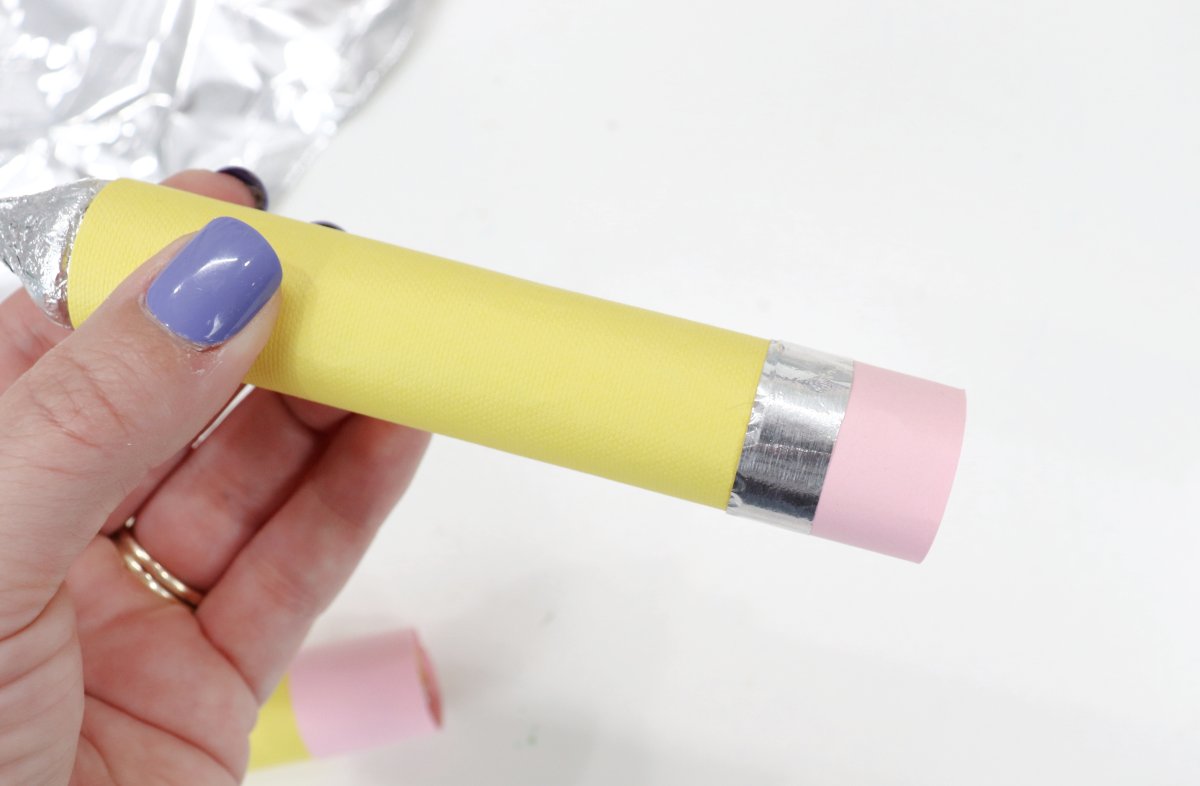
Step 5: Wrap the 1/4″ wide foil strip around the top part of the “pencil.”
This will help keep the yellow cardstock in place.
Step 6: (optional) Write on the yellow part of the pencil.
You can write a teacher’s name, student’s name, school name, or any other message you like. Or, if you prefer, you can leave your pencils plain.
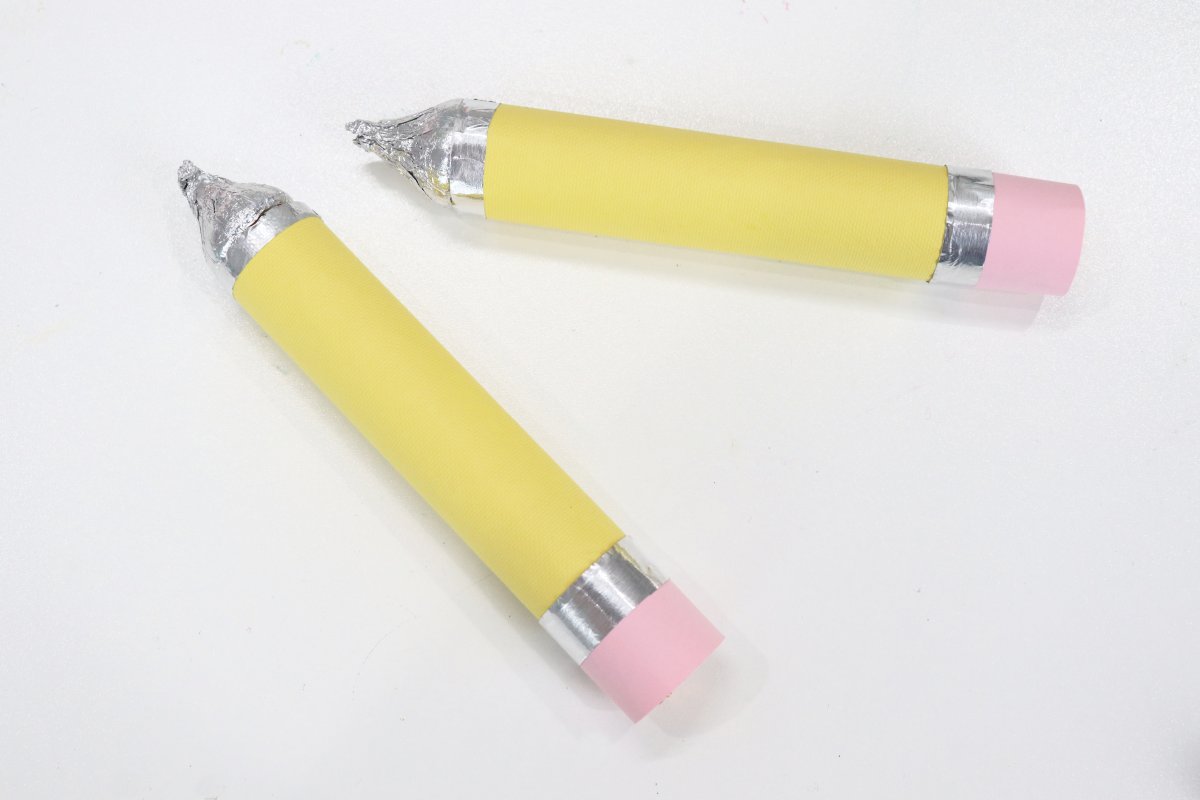
These are a simple little project to create, and everyone is sure to enjoy such a sweet treat.
Crafting Tips
- If you have a Cricut or other electronic cutting machine, you can have it do the cutting for you, saving time and effort!
- If you’d like to hand letter the name or message, check out this post to see how easy it is to do your own faux calligraphy.
- If you can’t get your hands on cardstock, you can substitute construction paper or colored scrapbook paper.
Frequently Asked Questions
Since cardstock is pretty inexpensive, each pencil only costs a little bit more than the cost of the candy you use to make it.
You can create this craft in 5 minutes!
More Back to School Craft Projects
If you enjoyed this post, be sure to check out these other fun and easy Back to School projects!