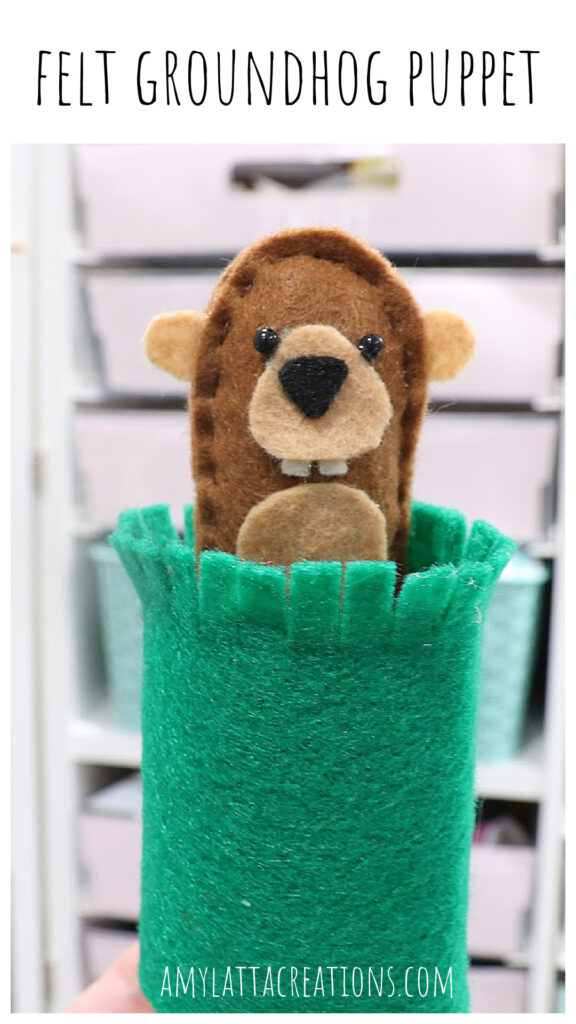
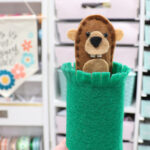
Felt Groundhog Puppet
Although it’s not as popular as the other winter holidays, Groundhog Day can still be a fun thing to celebrate, especially if the groundhog doesn’t see his shadow! This felt groundhog puppet is a quick little project that crafters of all ages can enjoy. It’s interactive, uses recycled materials, and is just plain adorable; take a look.
How to Make a Felt Groundhog Puppet
This interactive craft only requires a few basic supplies, and you can complete it in an afternoon. Just grab the materials below, and let’s get started!
Materials
- felt: dark brown, light brown, white, black, and green
- scissors
- hot glue gun and glue sticks (or fabric/craft glue)
- thin wooden dowel
- small black beads or craft eyes
- Poly-Fil
- needle and brown thread (optional)
- toilet paper roll
- free pattern
Here’s a quick video of how I constructed this cute little craft. You can also find a full step by step photo tutorial below.
Instructions
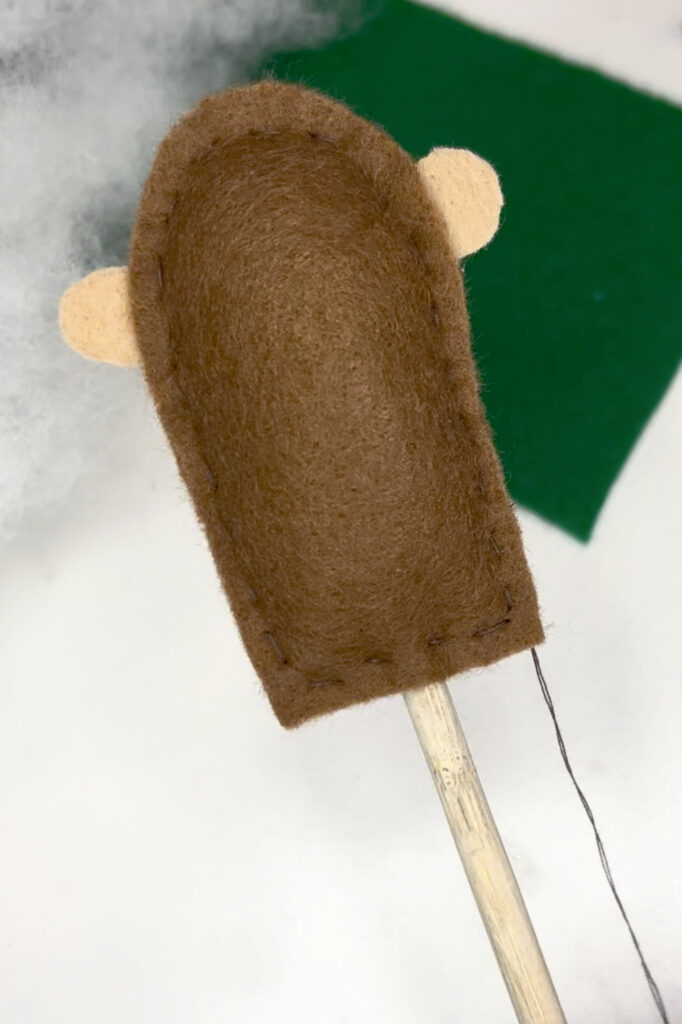
Cut your felt pieces.
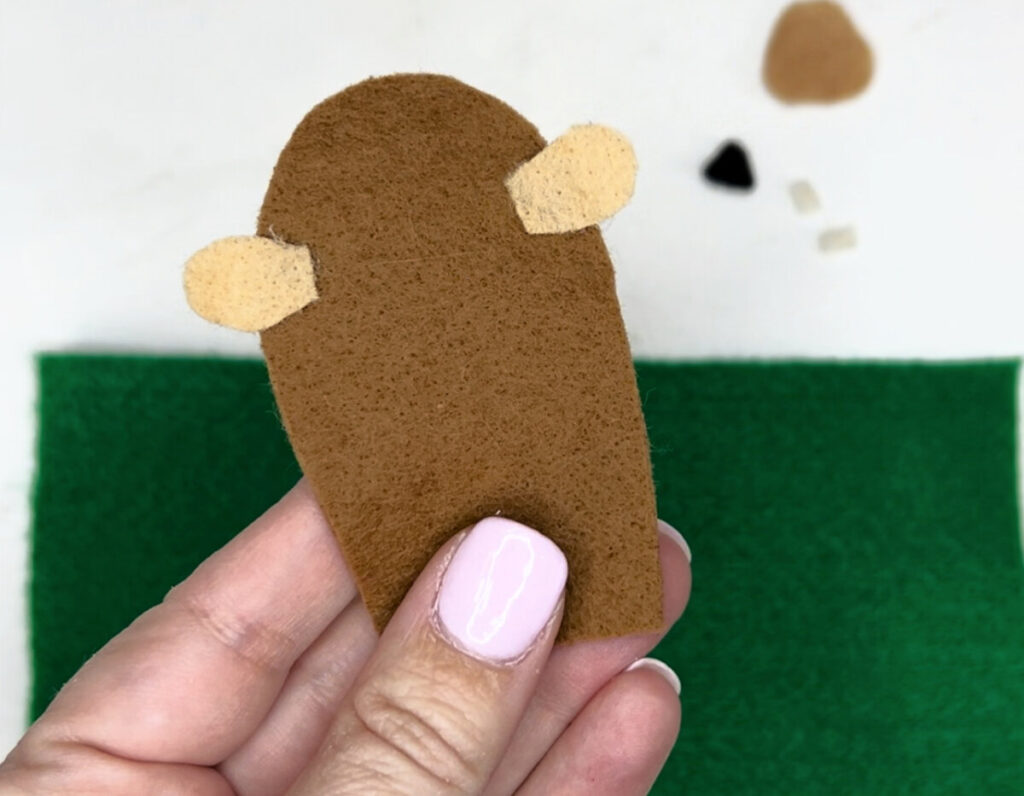
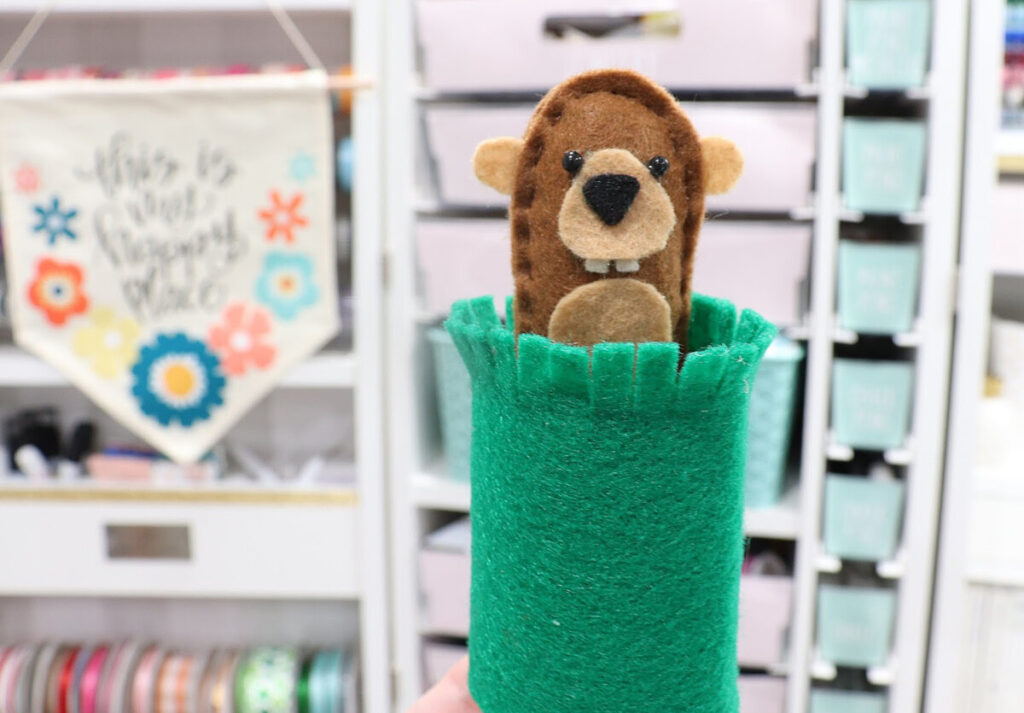
Print out the free pattern and cut the pieces from felt. You’ll need 2 body pieces from dark brown felt, 2 ears, a belly, and a muzzle from light brown felt, a nose from black felt, and two teeth from white felt. You’ll also need a rectangle cut from green felt for the grass.
Glue the ears to one of the body pieces.
I positioned these on the sides of the head rather than the top.
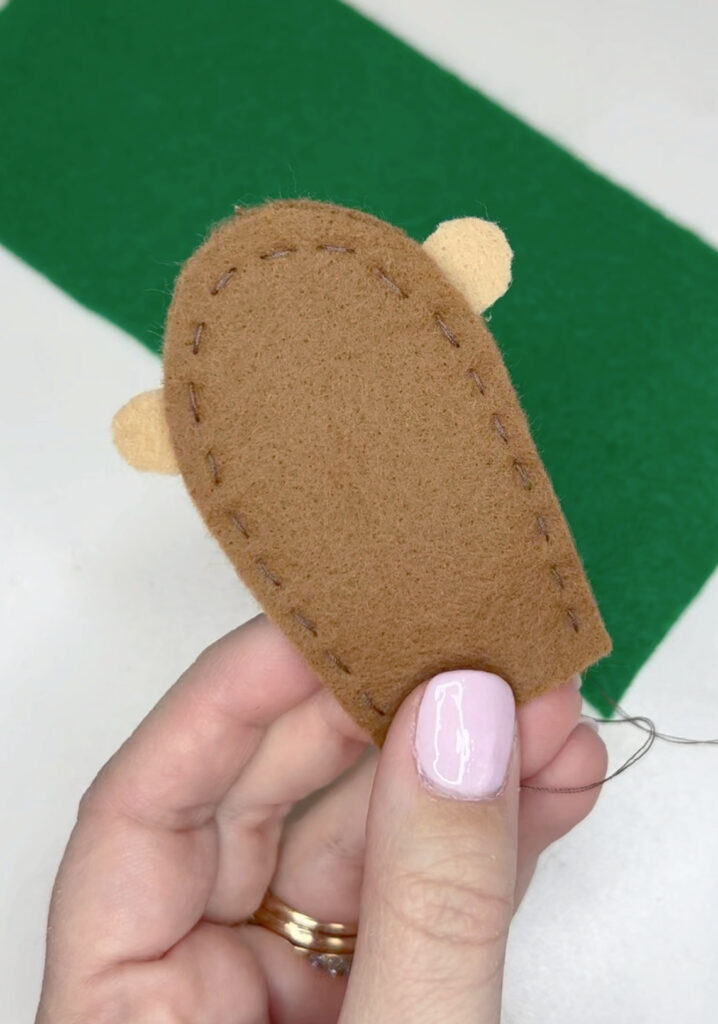
Sew (or glue) the two body pieces together with the ears in between, leaving the bottom open.
I chose to hand stitch around the body shape with brown thread, close to the edge. However, you can use glue for this step if you prefer.
Stuff the body with Poly-Fil.
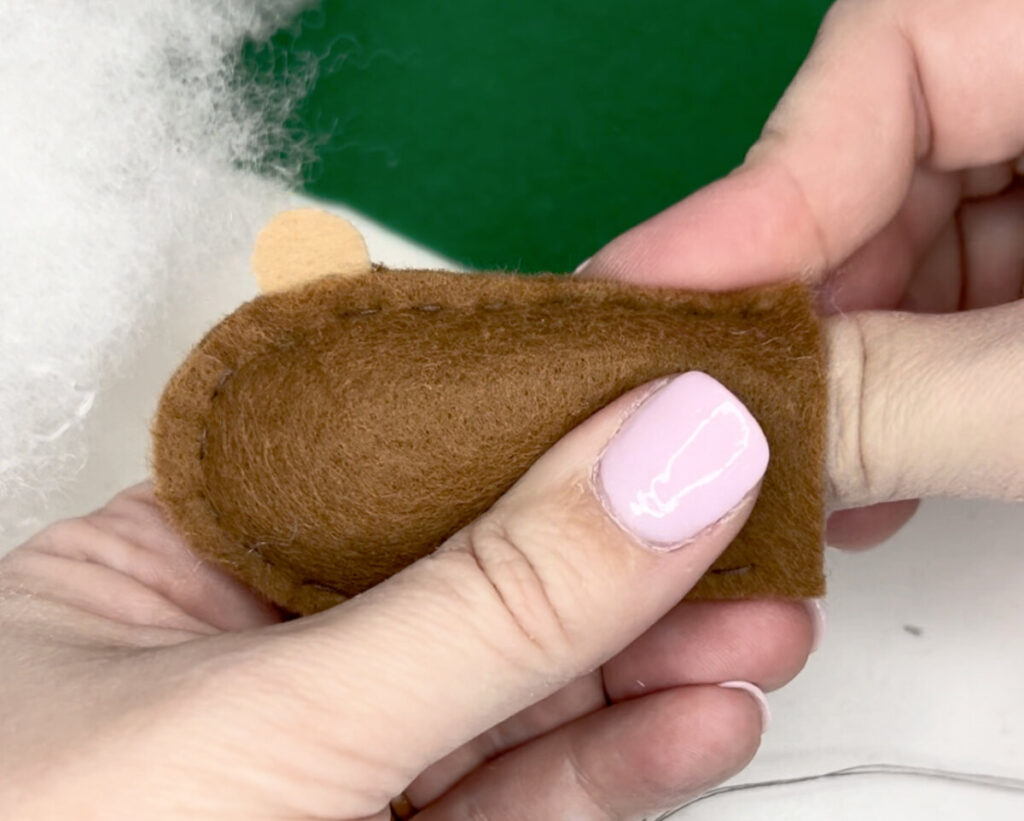
Insert a wooden dowel, then sew or glue the bottom of the body shut.
I left my dowel the original length, but you can cut it to any length you like for a shorter puppet.
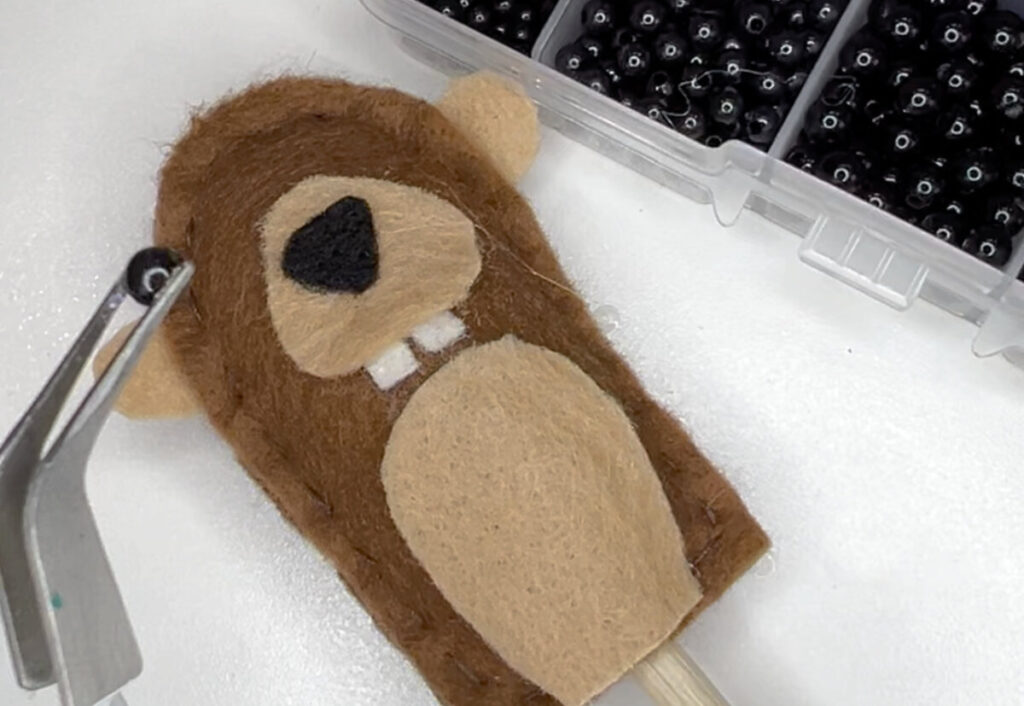
Glue the other body parts onto the front of the groundhog.
Add the belly, muzzle, teeth, and nose. I tucked the tops of the teeth under the muzzle for a more finished look. Also, add a pair of eyes. I like to use a pair of tweezers when placing the eyes, so that I don’t have to worry about touching the hot glue.
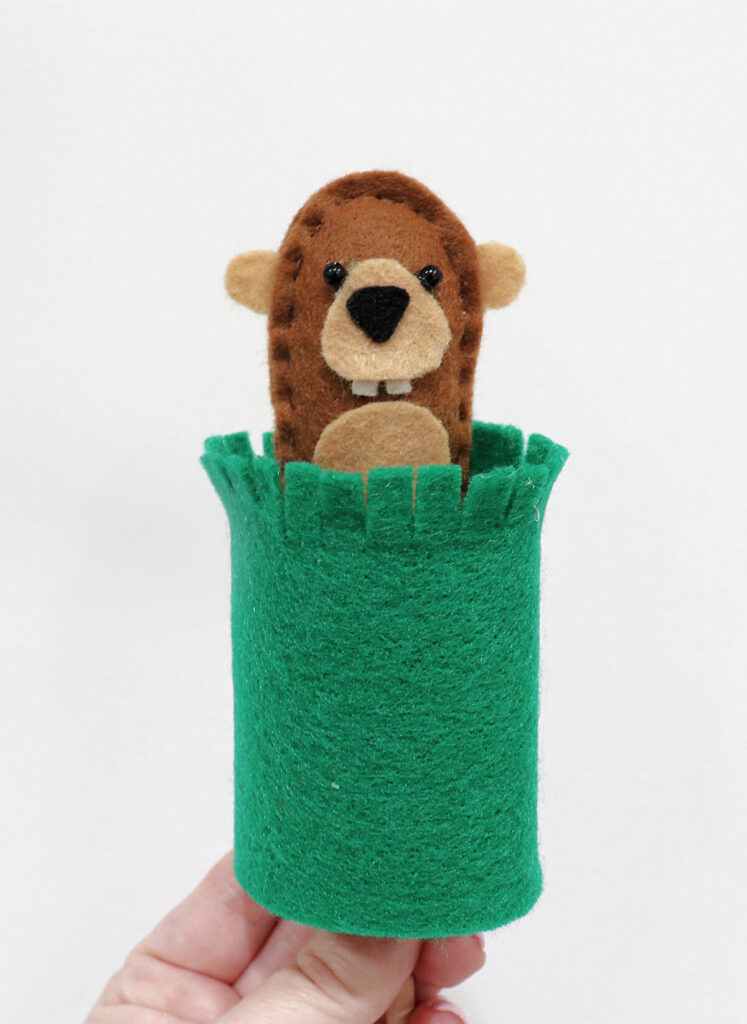
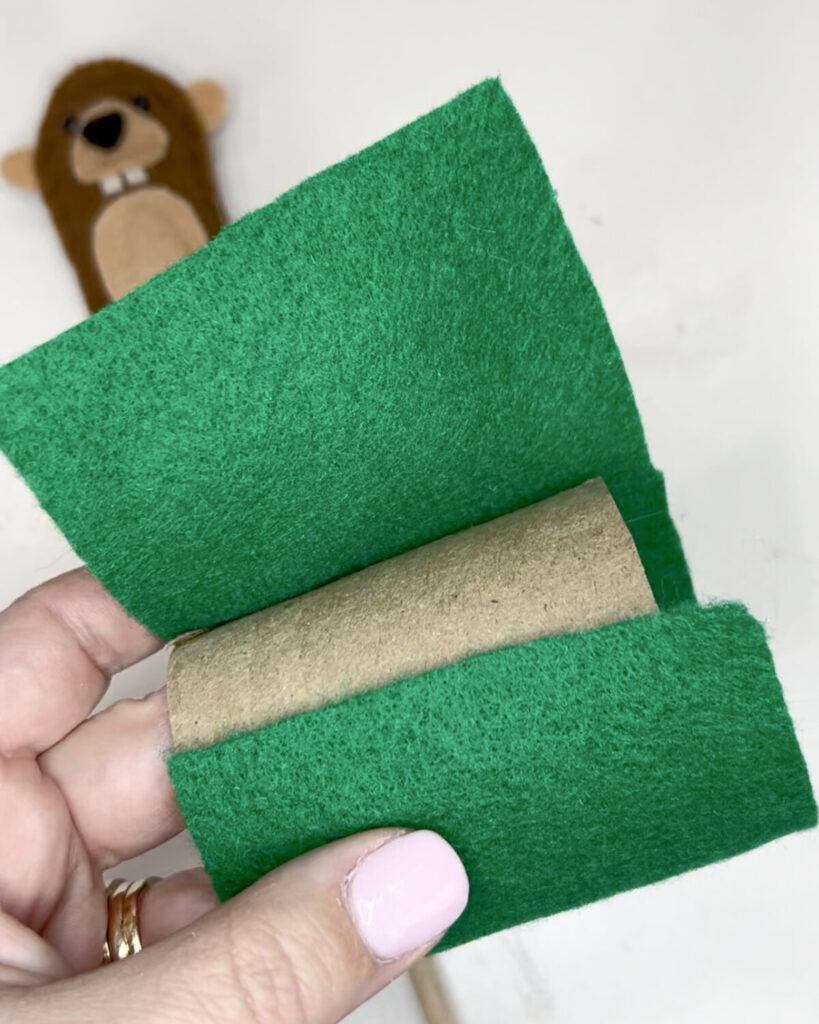
Trim off about 1” from the top of the toilet paper roll. Wrap the green felt around the remaining tube and glue in place.
Line up one edge with the bottom of the roll. You will have excess felt on the top, which will become the fringed grass.
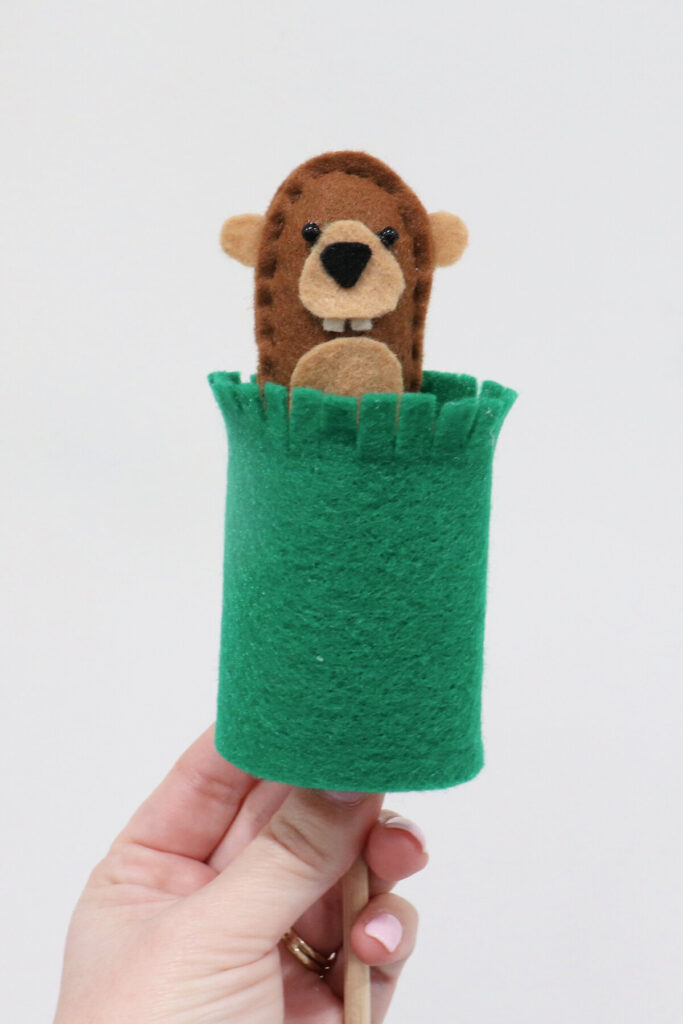
Cut slits in the excess green felt to create grass.
Snip to the top of the toilet paper roll, cutting just the felt.

Now your puppet is ready to use! Just slide the groundhog up through the bottom of the tube and he can pop in and out of his burrow. Make sure he doesn’t see his shadow, so that spring is just around the corner!
Crafting Tips
- Use tweezers when handling small pieces like the eyes and teeth to avoid touching the hot glue with your fingers.
- While I used traditional colors for my project, you can certainly get creative and have any color groundhog you like.
- The free pattern can also be used with cardstock. Just cut one body, and glue the other pieces to it, making a flat paper puppet instead of a dimensional felt one. Add a popsicle stick or dowel to the back, and you still have an interactive craft.
Frequently Asked Questions
The finished groundhog is about 2.5” tall and 1.5” wide.
Absolutely! Just use glue to attach the front and back of the body instead! Or, make a flat version from felt or cardstock. Just cut one body piece instead of two, and glue the stick to the back.
More Felt Projects
If you enjoyed this project, check out these other fun crafts you can make using felt.

If you try making a felt groundhog puppet, or any of these other felt crafts, be sure to share your project photos in the Amy Latta & Friends Facebook Group so we can all be inspired. Hope to see you there!
Felt Groundhog Puppet
Equipment
- scissors
- hot glue gun and glue sticks
- sewing needle and brown thread optional
Materials
- felt: dark and light brown, black, white, green
- toilet paper roll
- free pattern
- small black beads or craft eyes
- wooden dowel
- Poly-Fil
Instructions
- Use the free pattern to cut your felt pieces.
- Glue ears to one body piece.
- Sew or glue body pieces together, with ears in between, leaving the bottom open.
- Stuff with Poly-Fil.
- Add a wooden dowel, then sew or glue the bottom shut.
- Glue on other felt body pieces and eyes.
- Trim 1” from top of toilet paper roll.
- Wrap roll with green felt and glue.
- Snip slits in the top of the green felt to create grass.