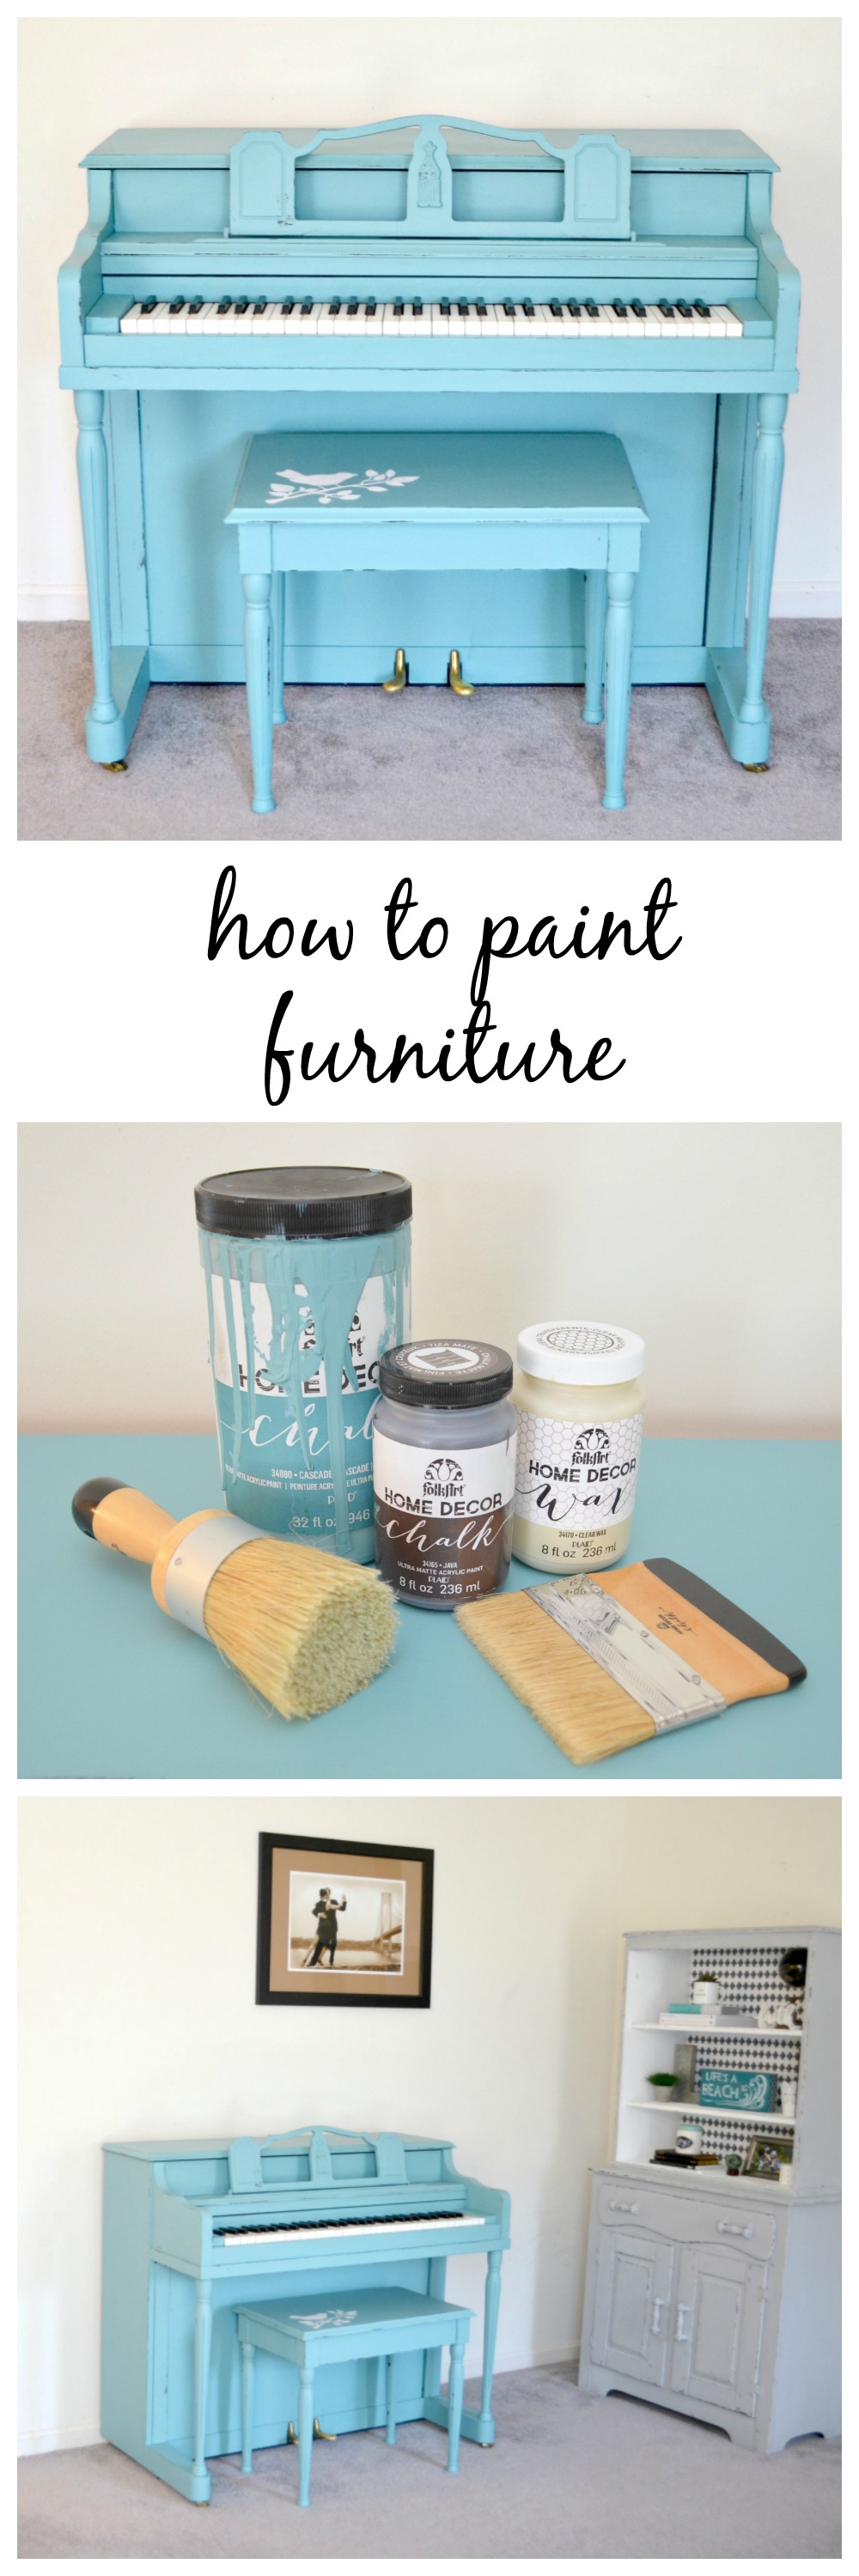
How to Paint Furniture using Chalk Paint
One of the most common crafting questions I get is, “what’s the best way to paint furniture?” While I know some folks who aren’t big fans of altering the natural wood finish of a piece, I personally believe that some paint and a little TLC can totally transform old furniture into something that looks and feels brand new. Today, I want to give you a quick tutorial on how easy it is to do, and share with you the materials and method I’ve used on many of the furniture pieces in our home.
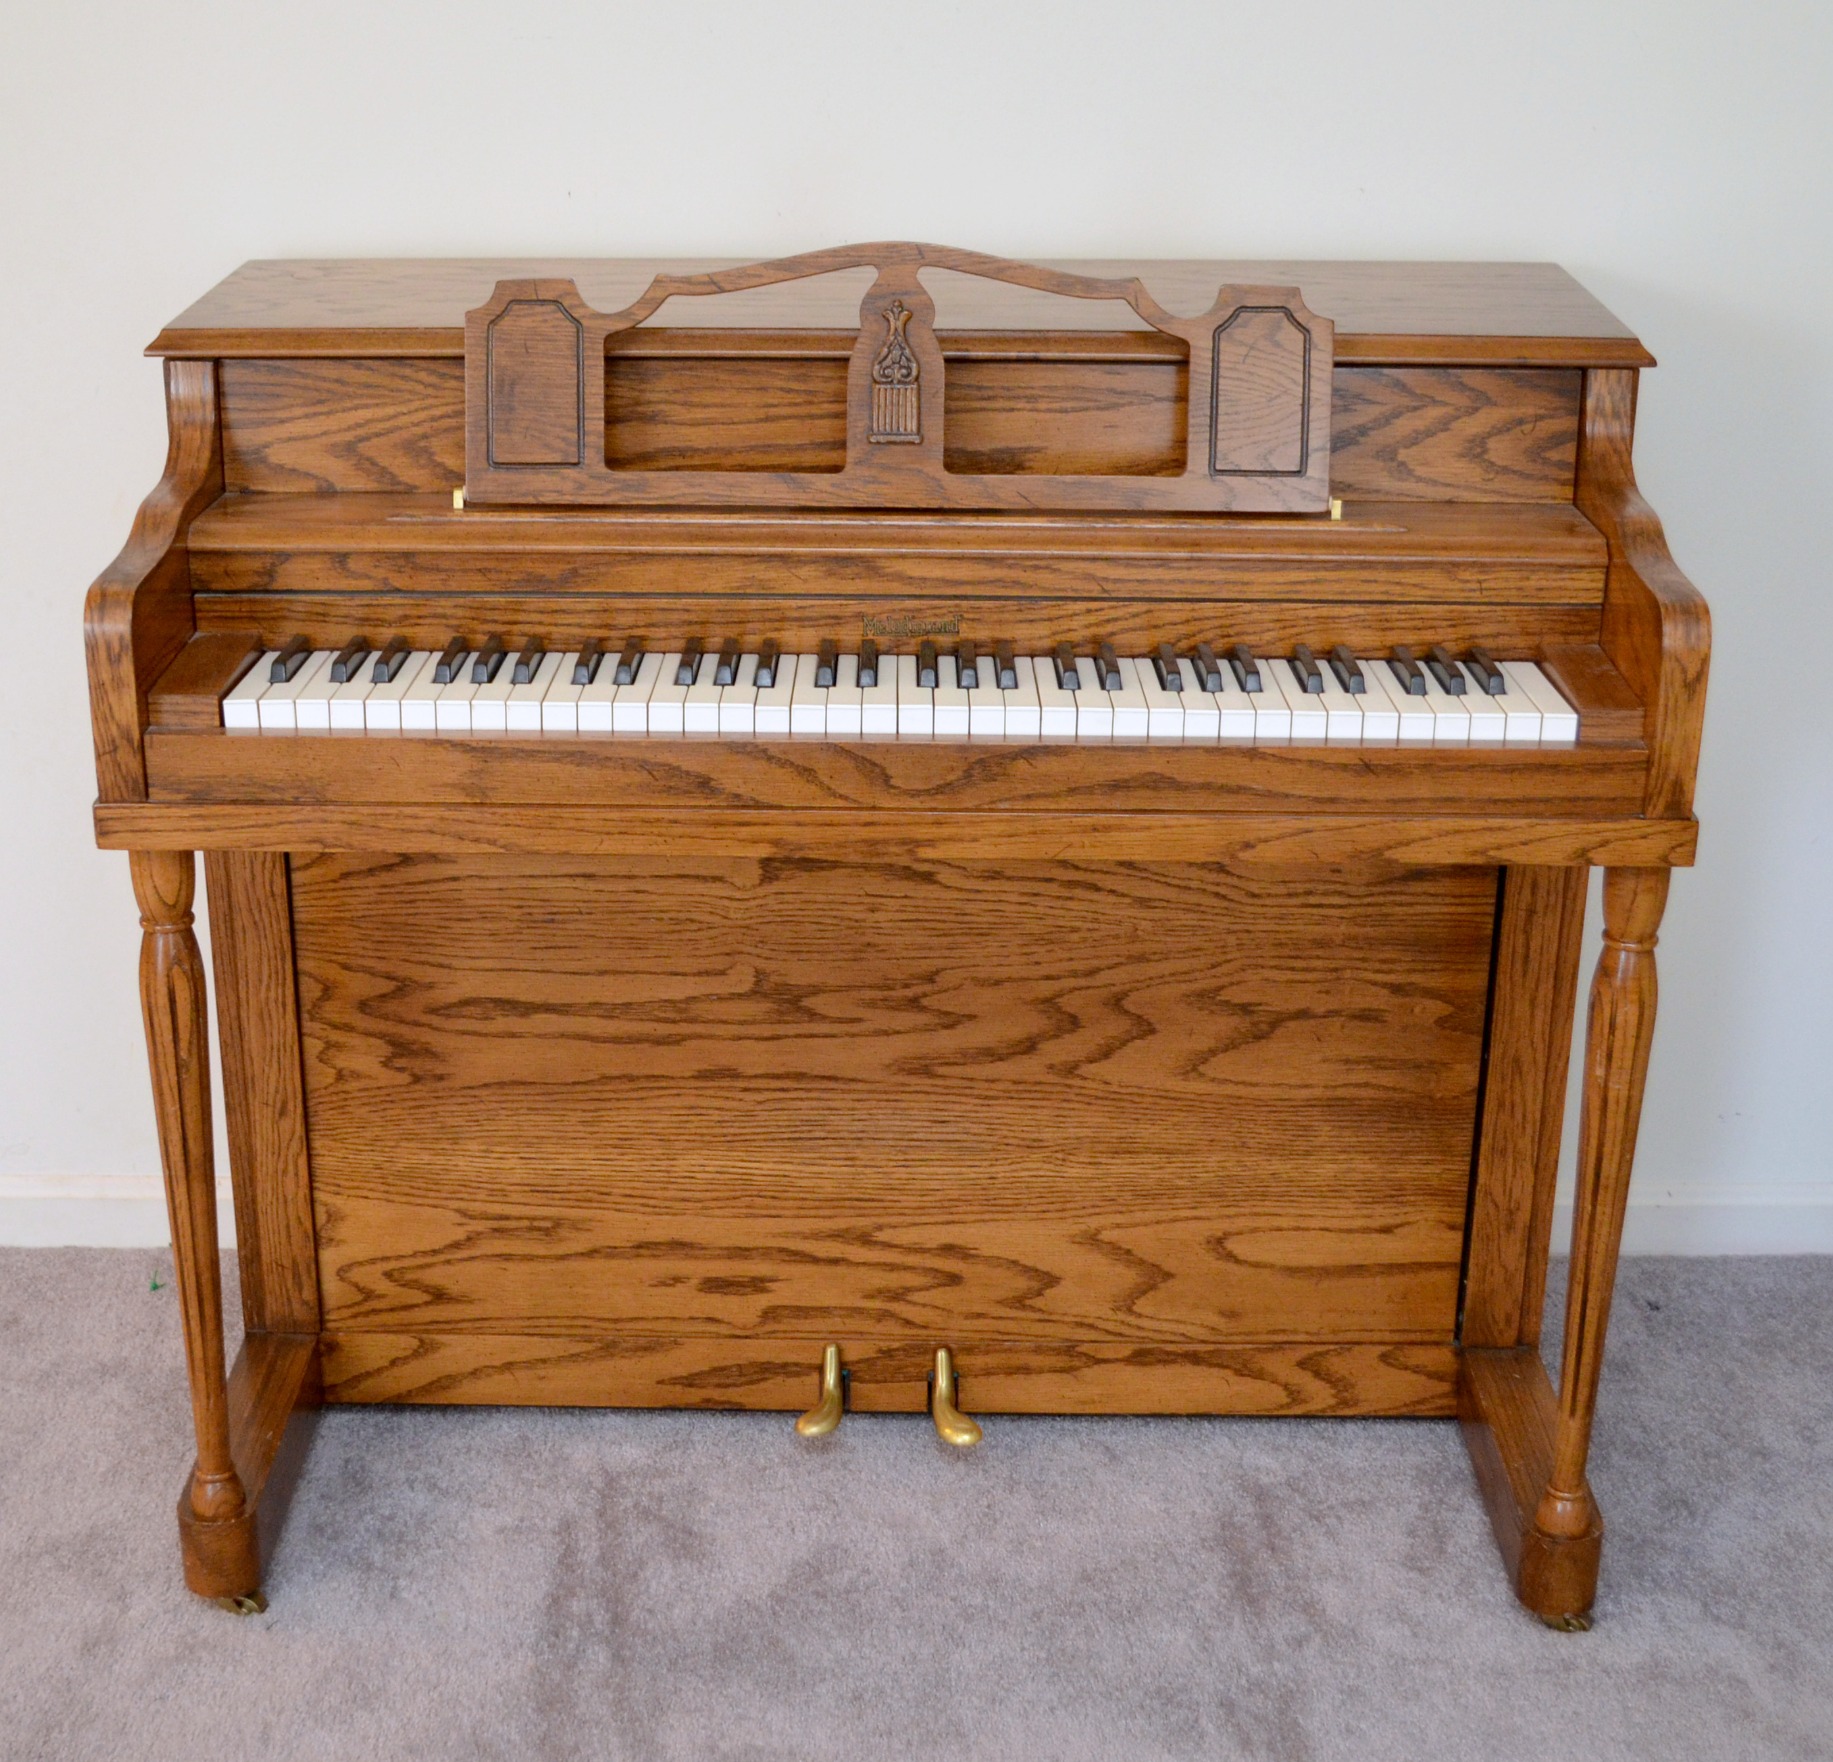
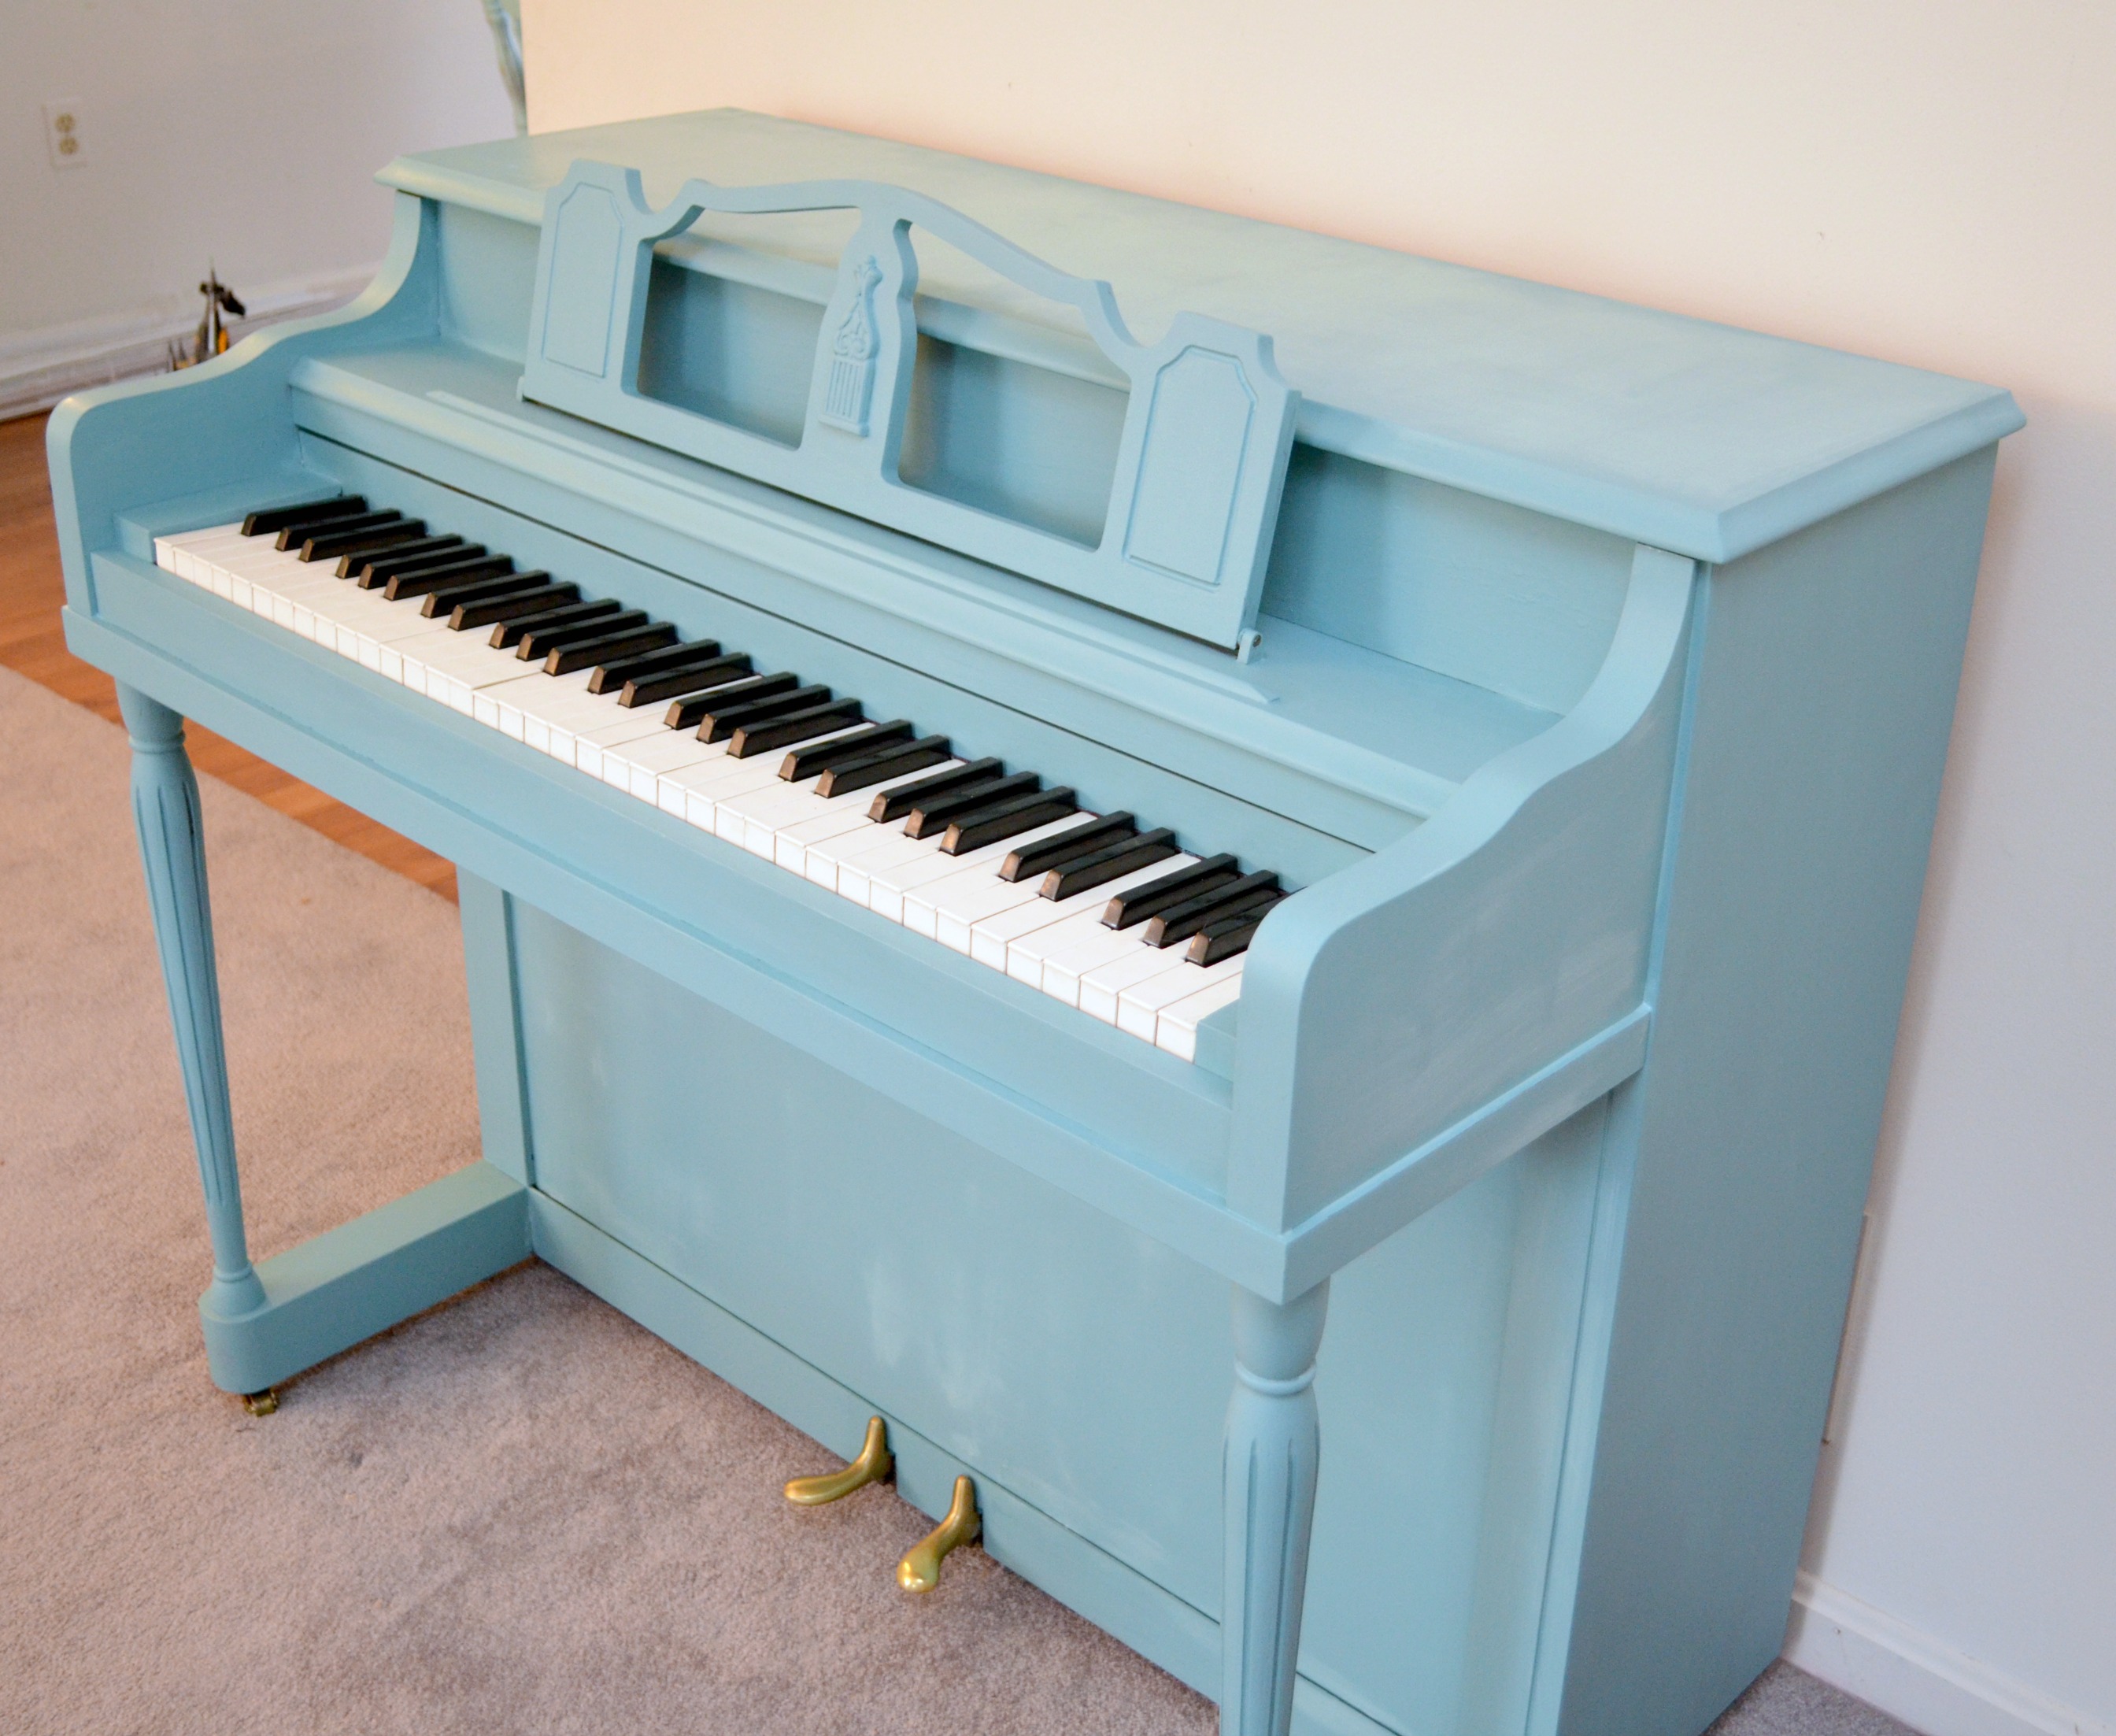
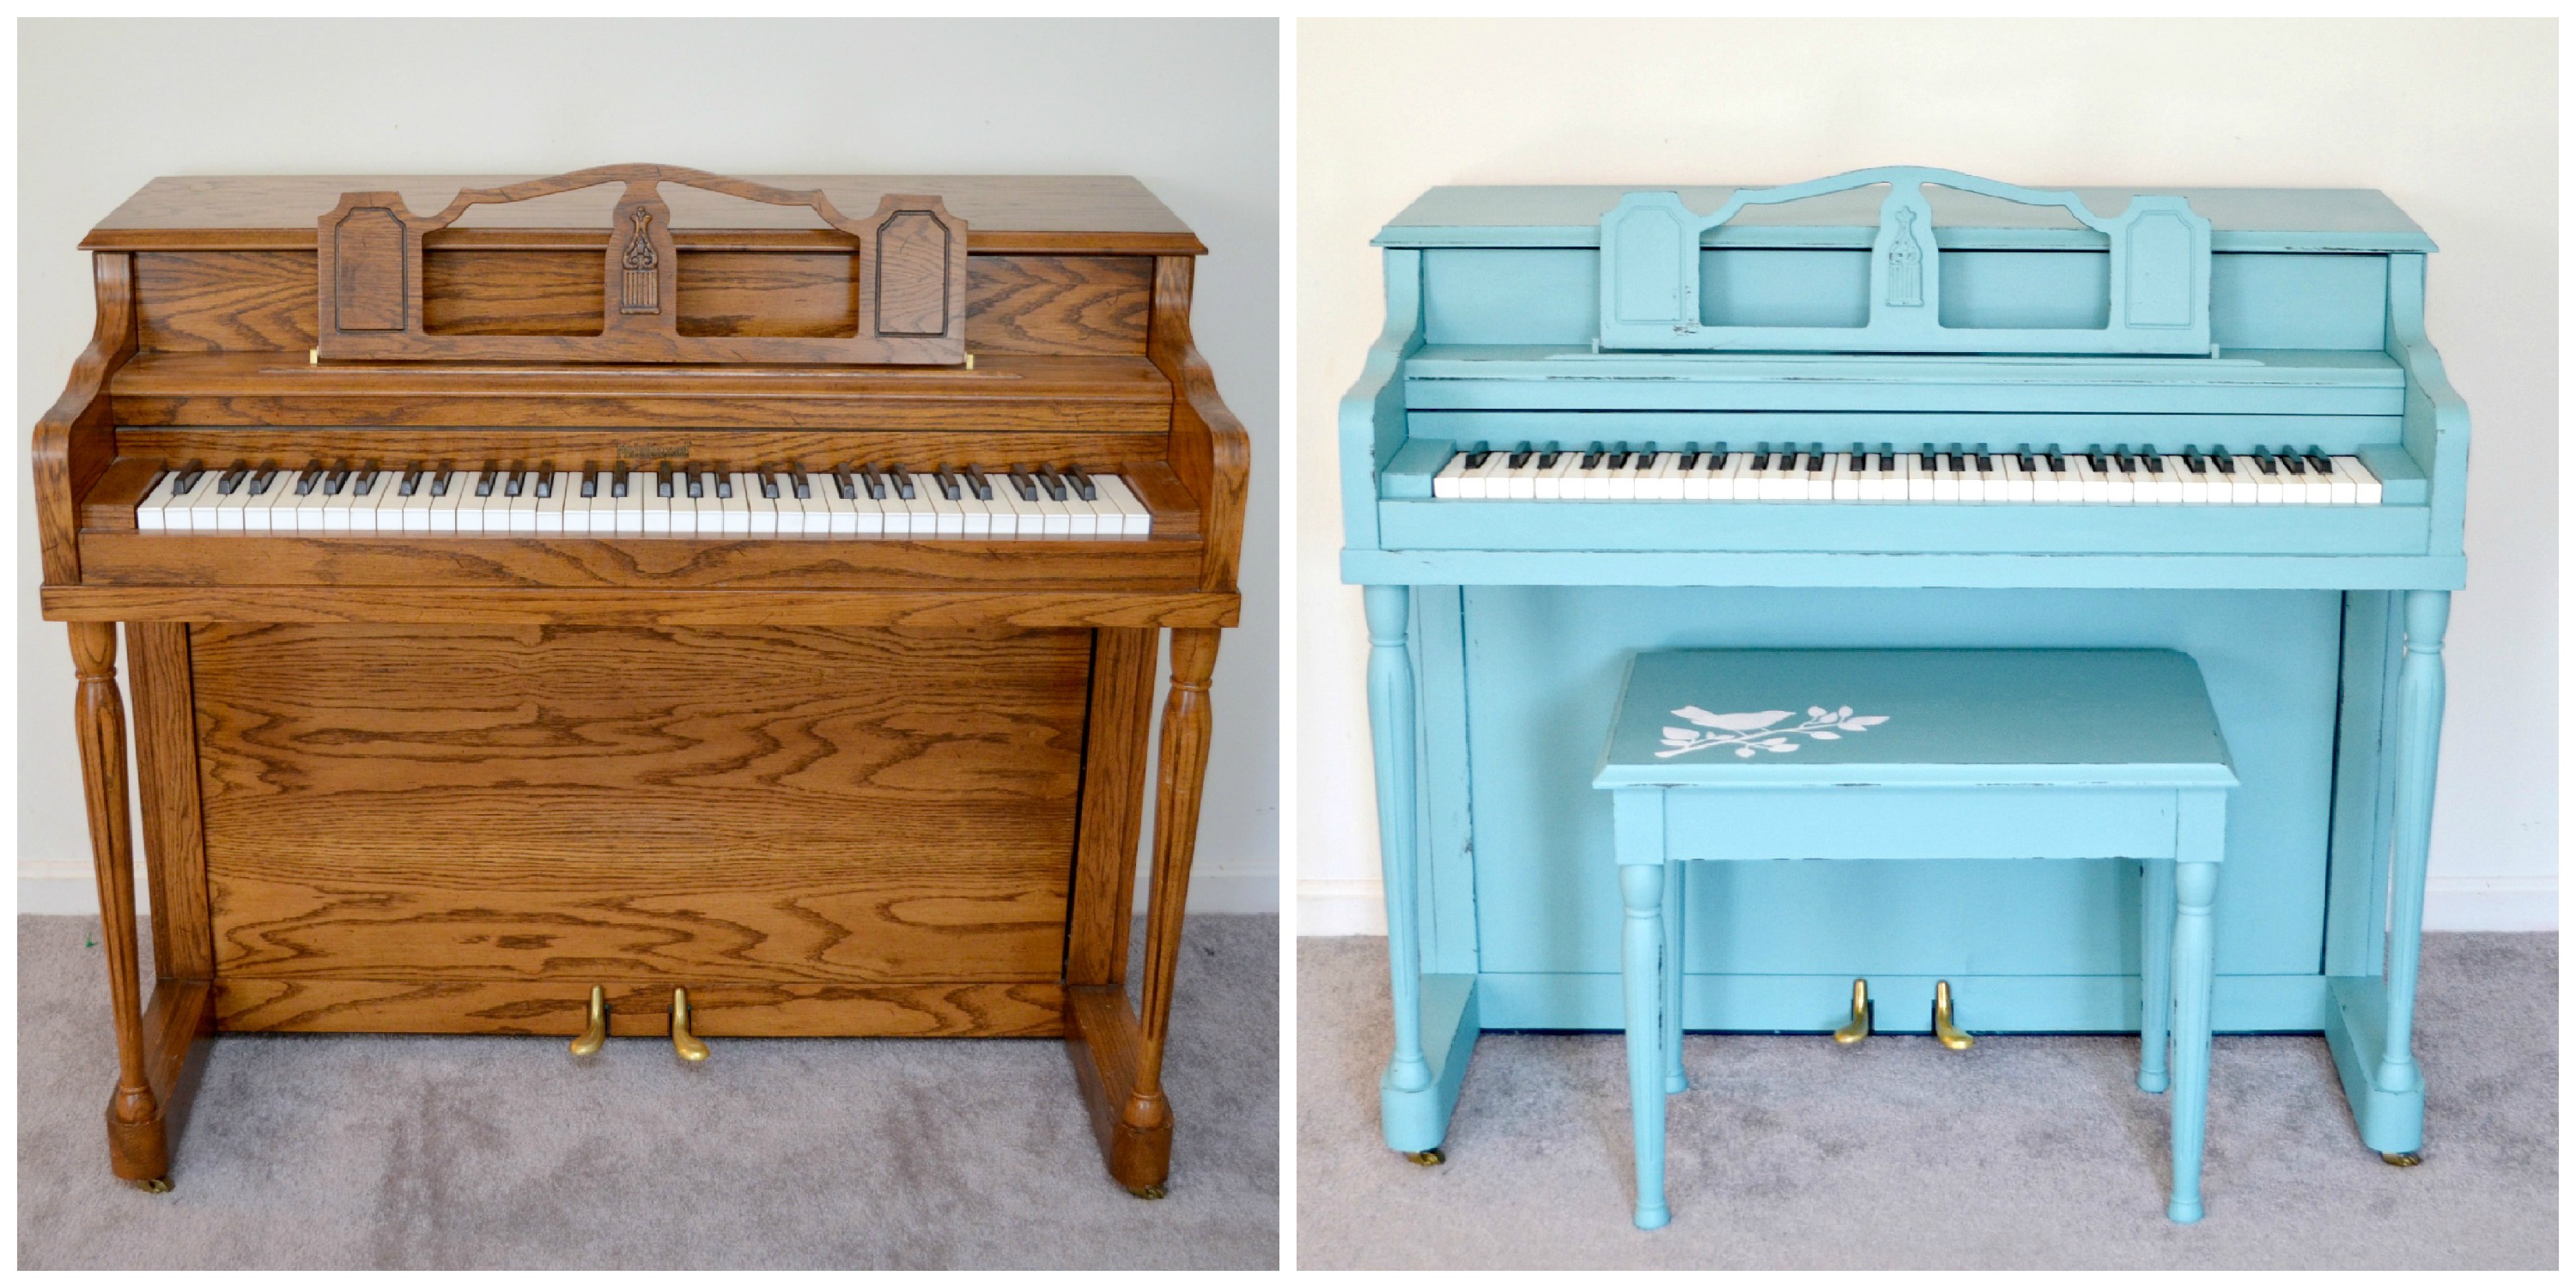
These steps are the same, no matter what kind of furniture you’re painting. I will be showing you the process using my piano, but you can apply it to whatever you have. I actually struggled a bit with starting this project because the piano has incredible sentimental value to me. My parents bought it for me when I was three years old and had started taking piano lessons. It “lived” in my bedroom until I got married, then it moved with me. You may not be able to tell at a glance, but it’s a shortened piano, missing several keys on each end. {That always made it fun practicing sonatas…} It also has no key cover, which drives me crazy every time we host 6th grade Bible Study.
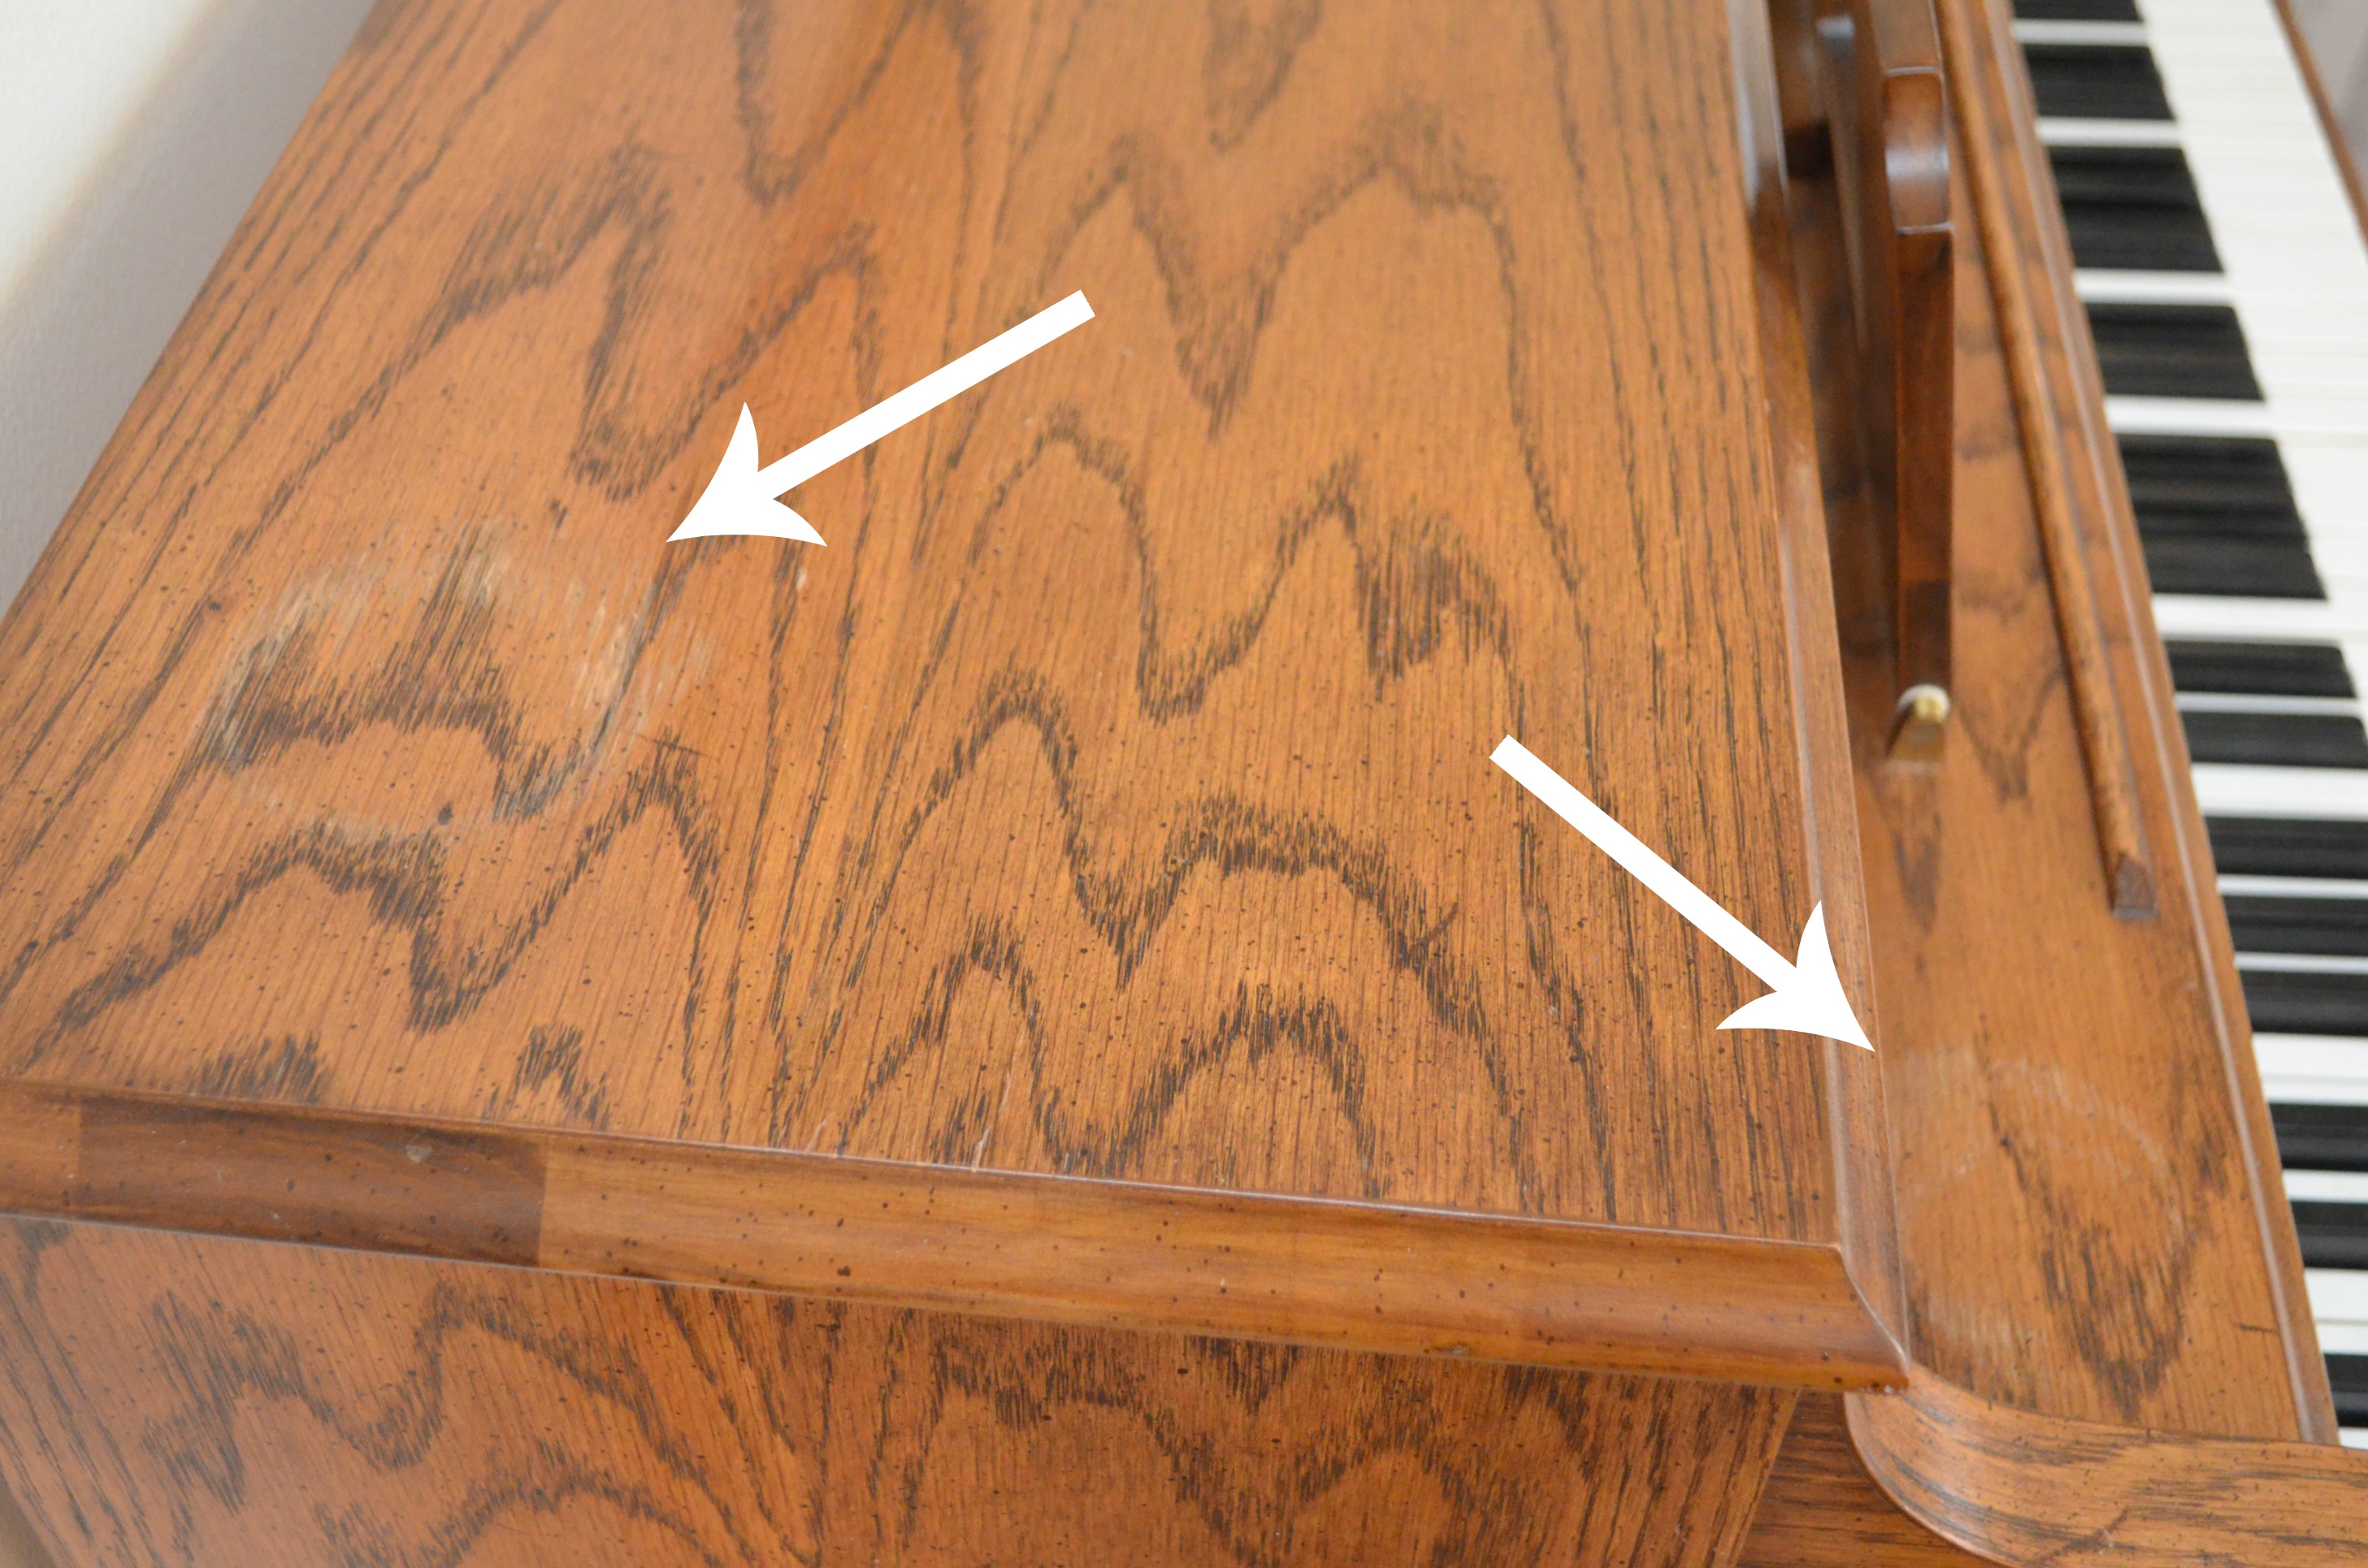
Ironically, hosting that Bible Study is what finally motivated me to bite the bullet and give the piano a makeover. Thanks to a few well-intentioned middle schoolers with ill-placed cups, there were several rings visible on the wood. I had been toying with the idea of painting it for a few years, and this was just the reason I needed.
Here’s how I transformed it, and you can do the same with your own furniture! Let’s get started.
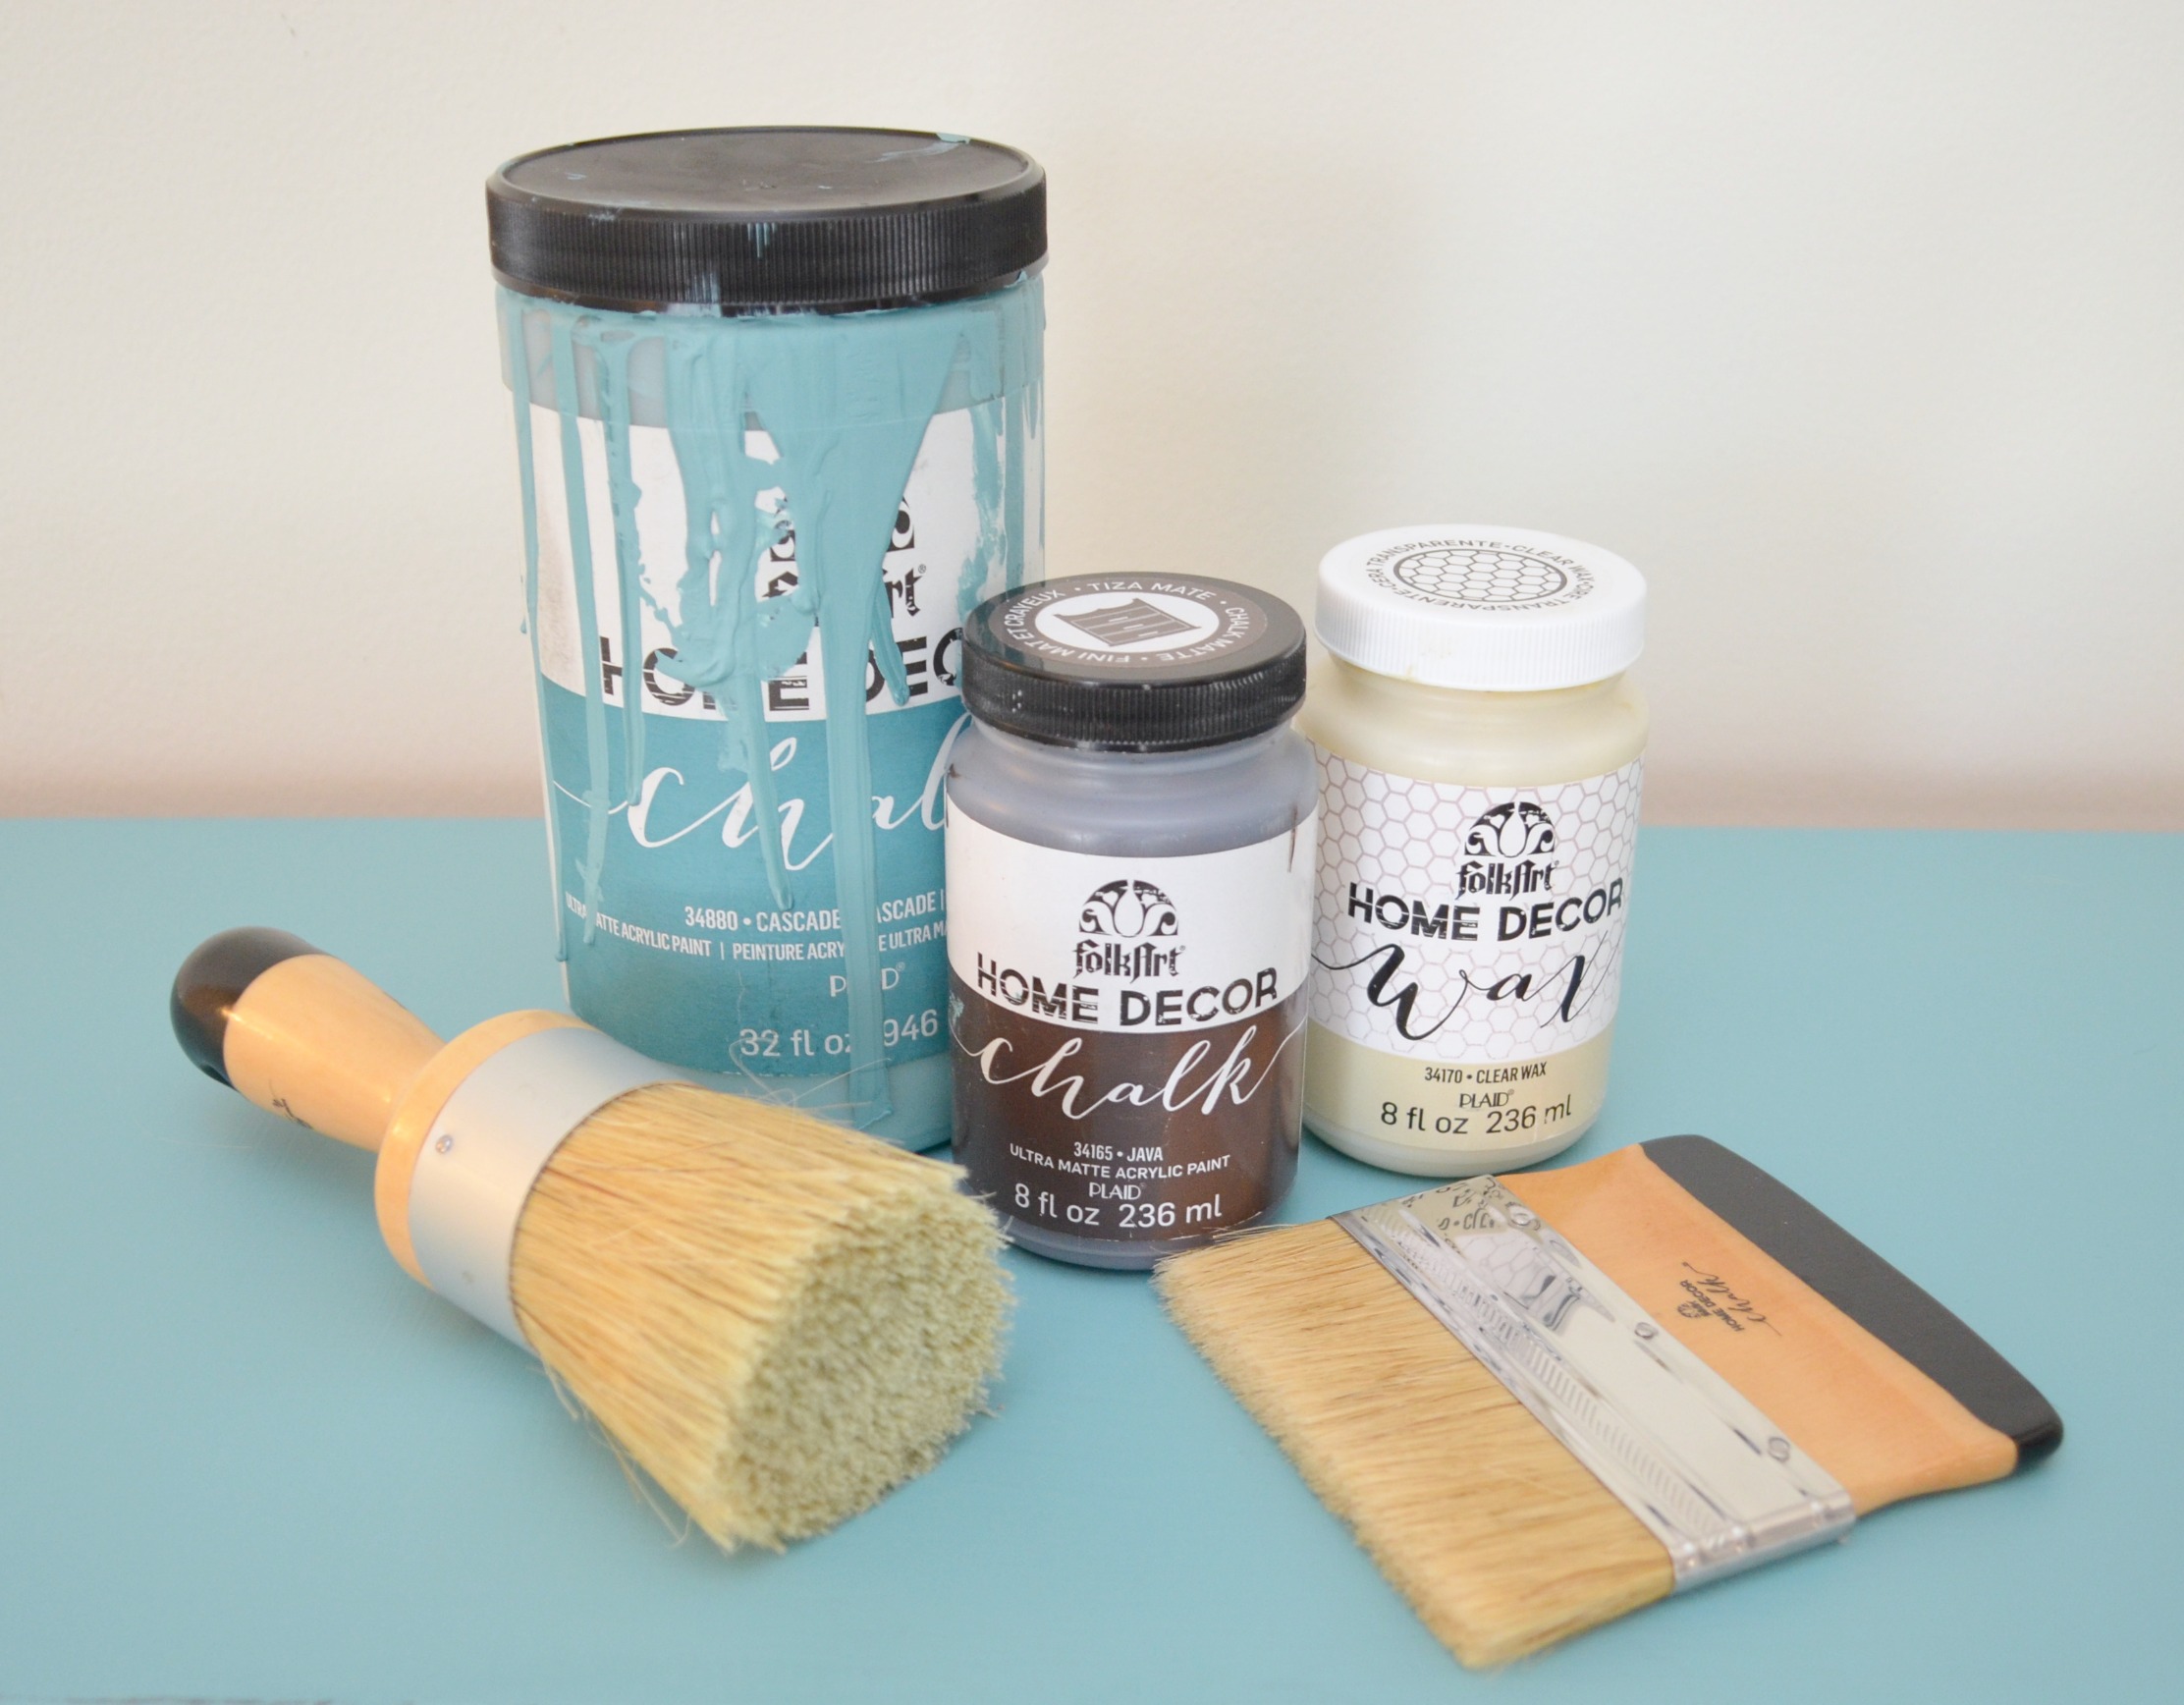
You’ll need:
{the following are affiliate links, meaning that if you click and buy, a small percentage goes back to support this site.}
FolkArt Home Decor Chalk paint {I used Cascade and Java}
FolkArt Home Decor Chalk Wide Brush
Small to medium sized paintbrushes
FolkArt Home Decor Layering Block
Optional: Stencil, Painter’s Tape, and Stencil Brush
Step 1: Apply a coat of paint to your surface.
If you have lots of large, flat areas on your piece, the Wide Brush should work for just about everything. For something like my piano, you’ll want to use a small brush for more detailed areas and to get in all the crevices. I found that gently pressing the keys down made enough space for me to get a brush behind them.
Step 2: Apply more coats as necessary, allowing the paint to dry completely in between.
Many of my furniture projects have only required two coats of paint for great coverage. For the piano, I used three. The color of the original wood, as well as how shiny the surface is, will determine how much paint you need. Make sure the previous coat is completely dry before applying more paint.
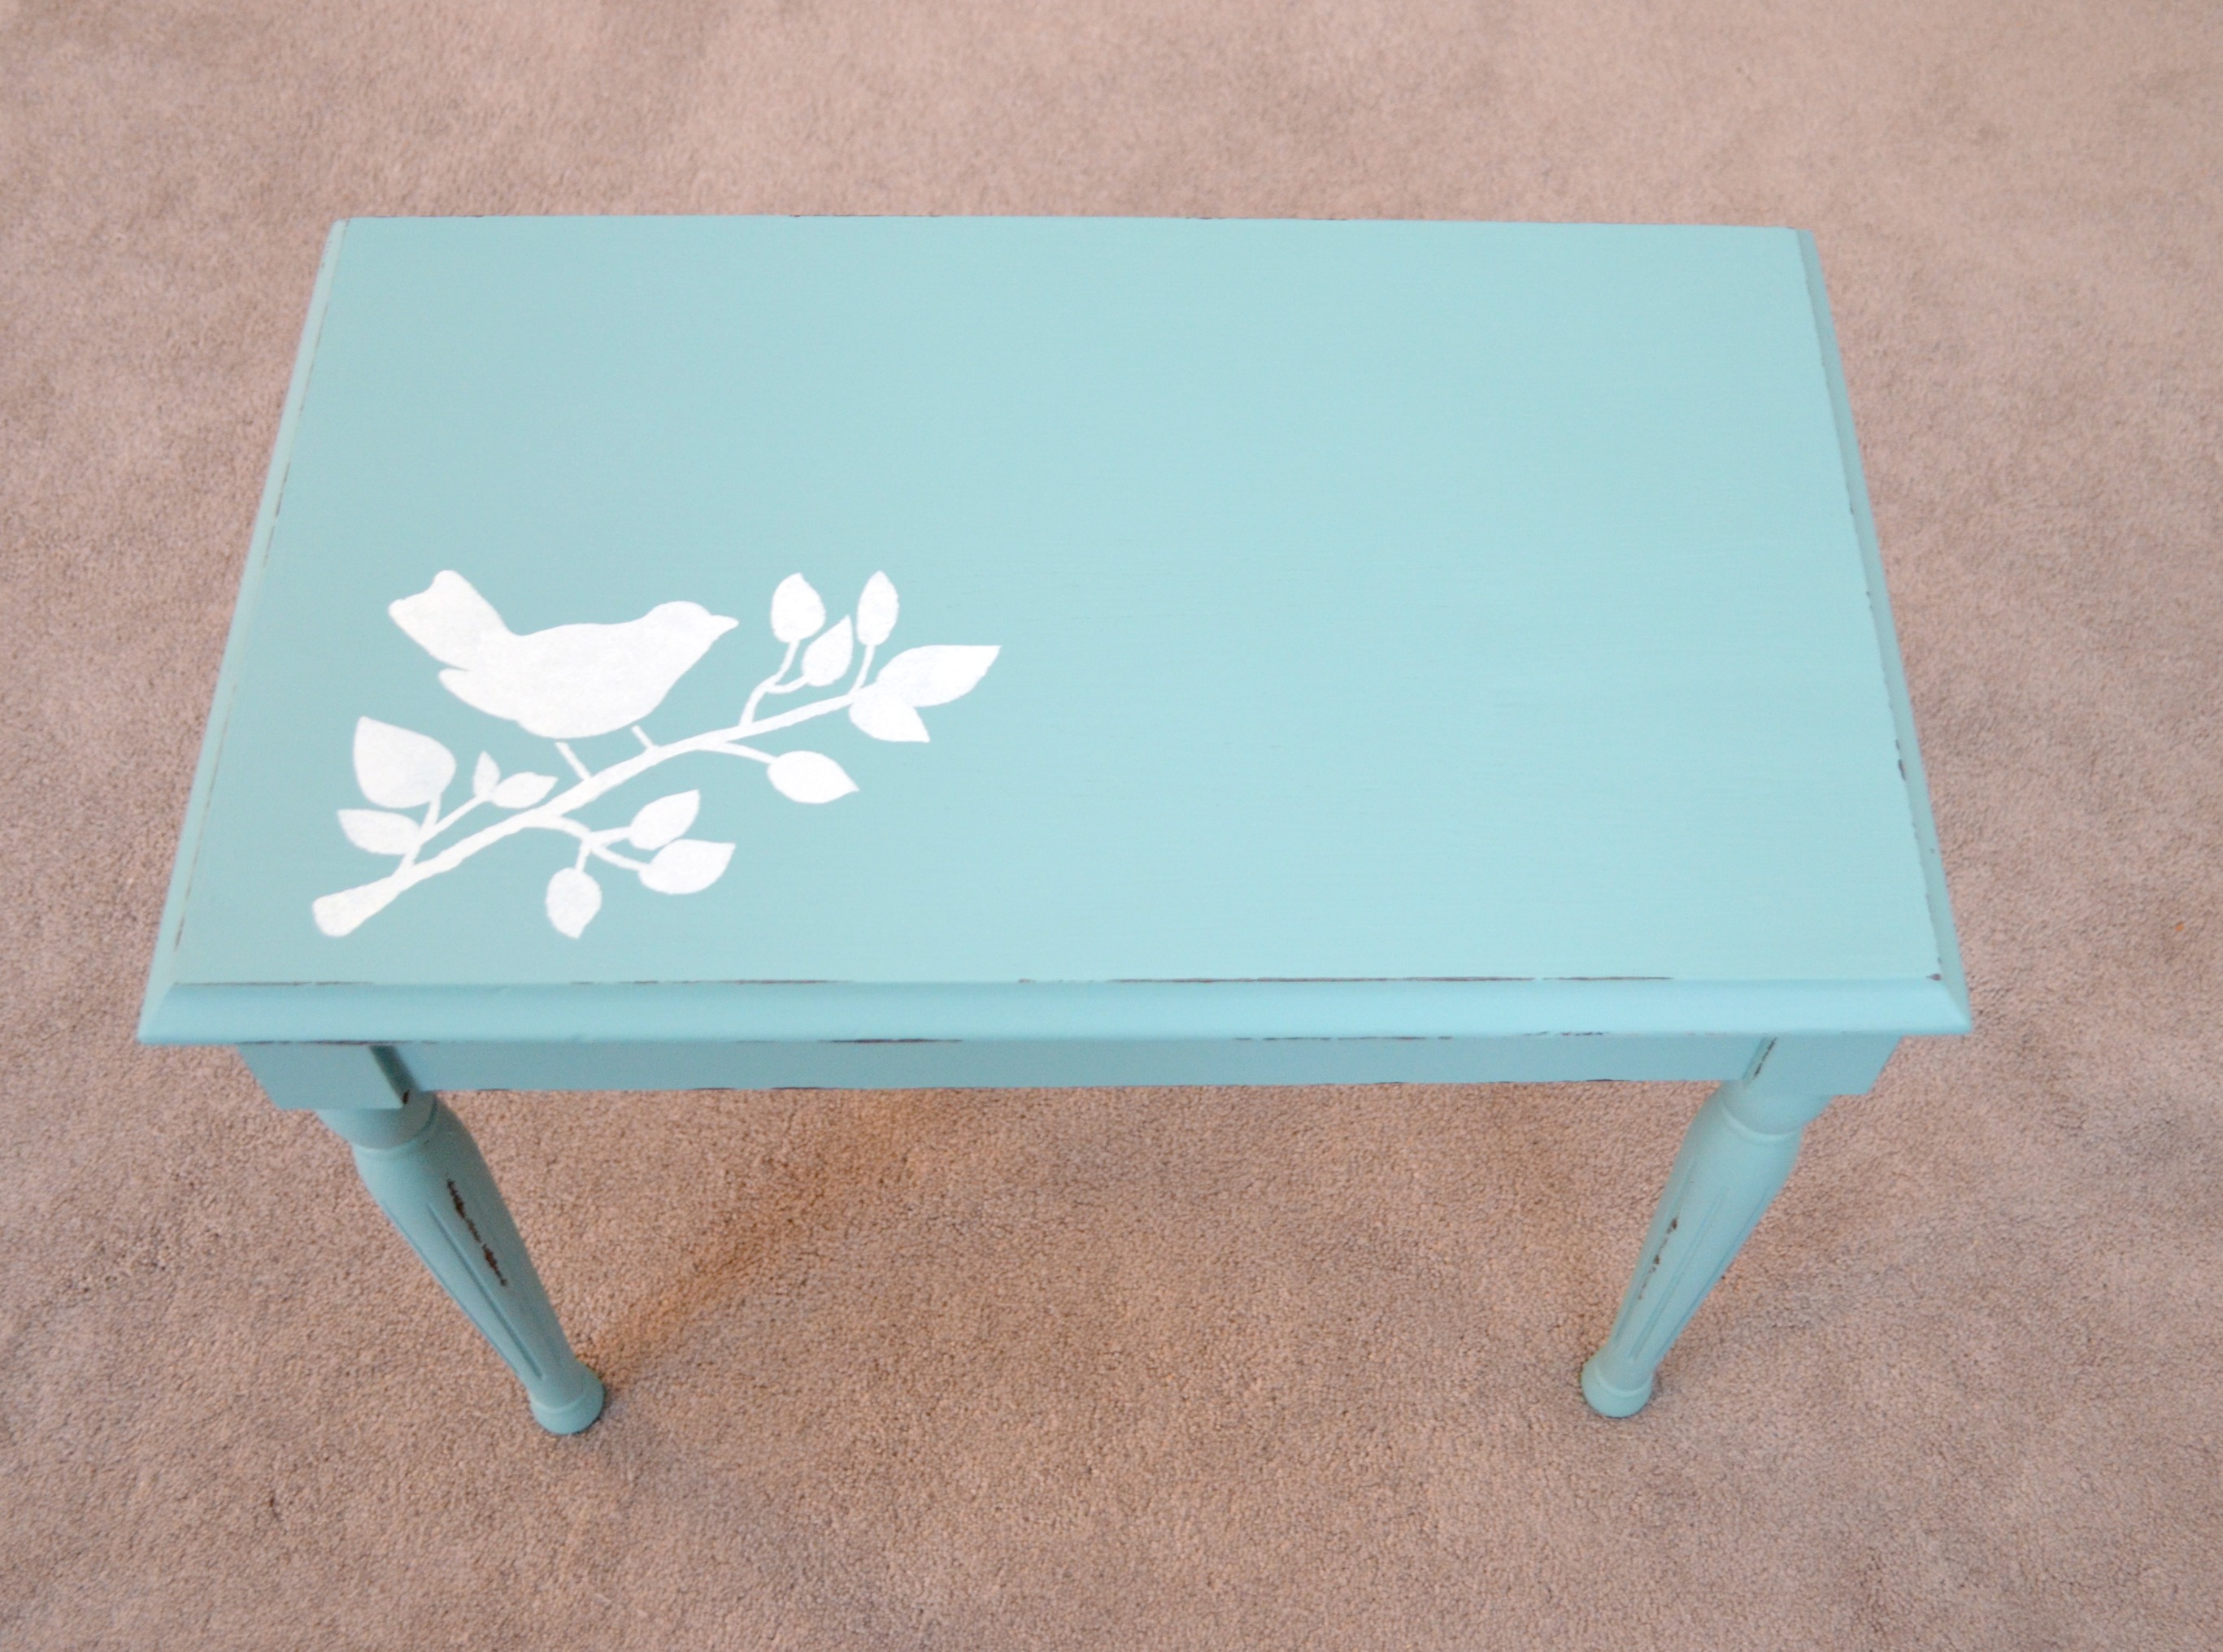
Step 3: {optional} Stencil a design.
I wanted just a tiny pop of a design to help break up the solid color of the piano and bench, so I stenciled this cute little bird and branch. When you stencil, remember to use a stencil brush and to offload some paint onto a paper towel or plate first so that your brush is almost dry. Tap the brush up and down into the cut-out areas of the stencil, filling them with paint. Remove the stencil while the paint is still wet so that it doesn’t stick to your project. Check out my pro stenciling post for more tips!
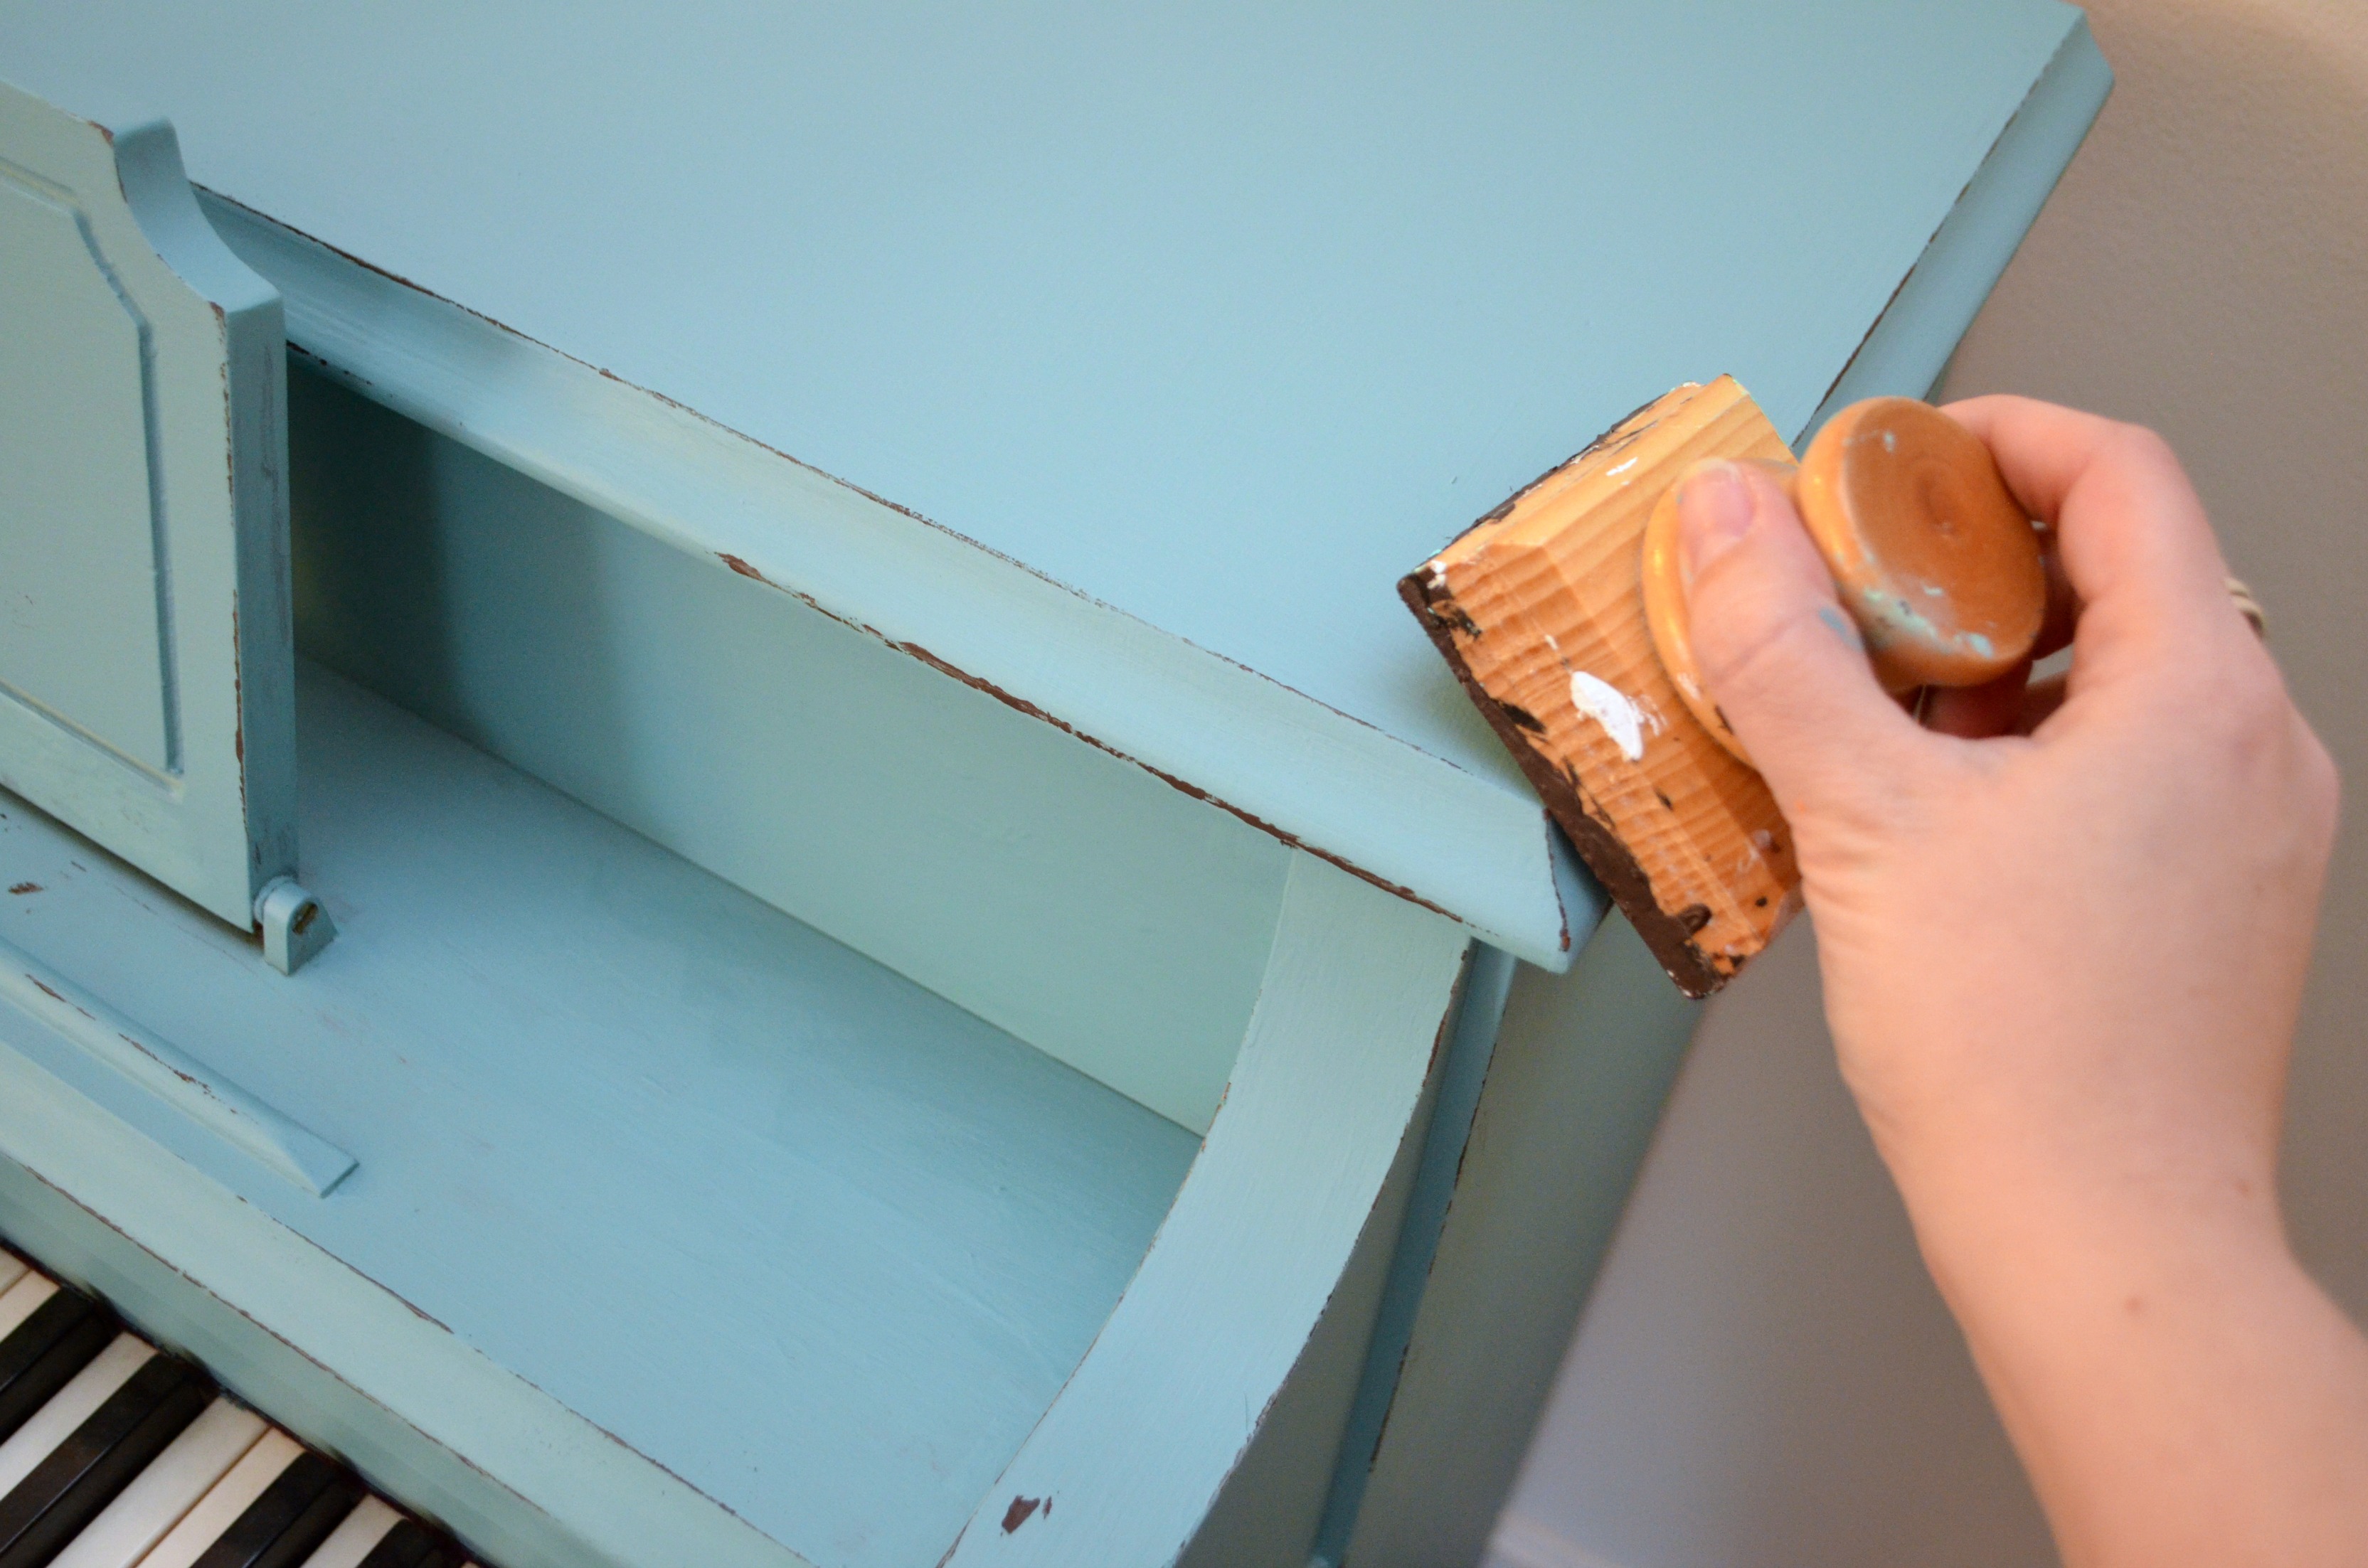
Step 4: Distress your piece using a layering block and paint.
If you don’t care for the distressed look, you can skip this step. Personally, I love it, because then when normal wear and tear happens {remember, I have two pre-teen boys!}, I’ll never notice. Rather than sanding paint away, which can also sand away part of the wood itself, I prefer to create the distressed look by adding paint. Choose a color {I picked Java, a nice dark brown}, then place a thin coat of it on the flat surface of your layering block. Gently run the block along corners, edges, and any other areas of your piece that you want to distress. More paint = more distressing. It’s totally up to you how much or how little of this you like.
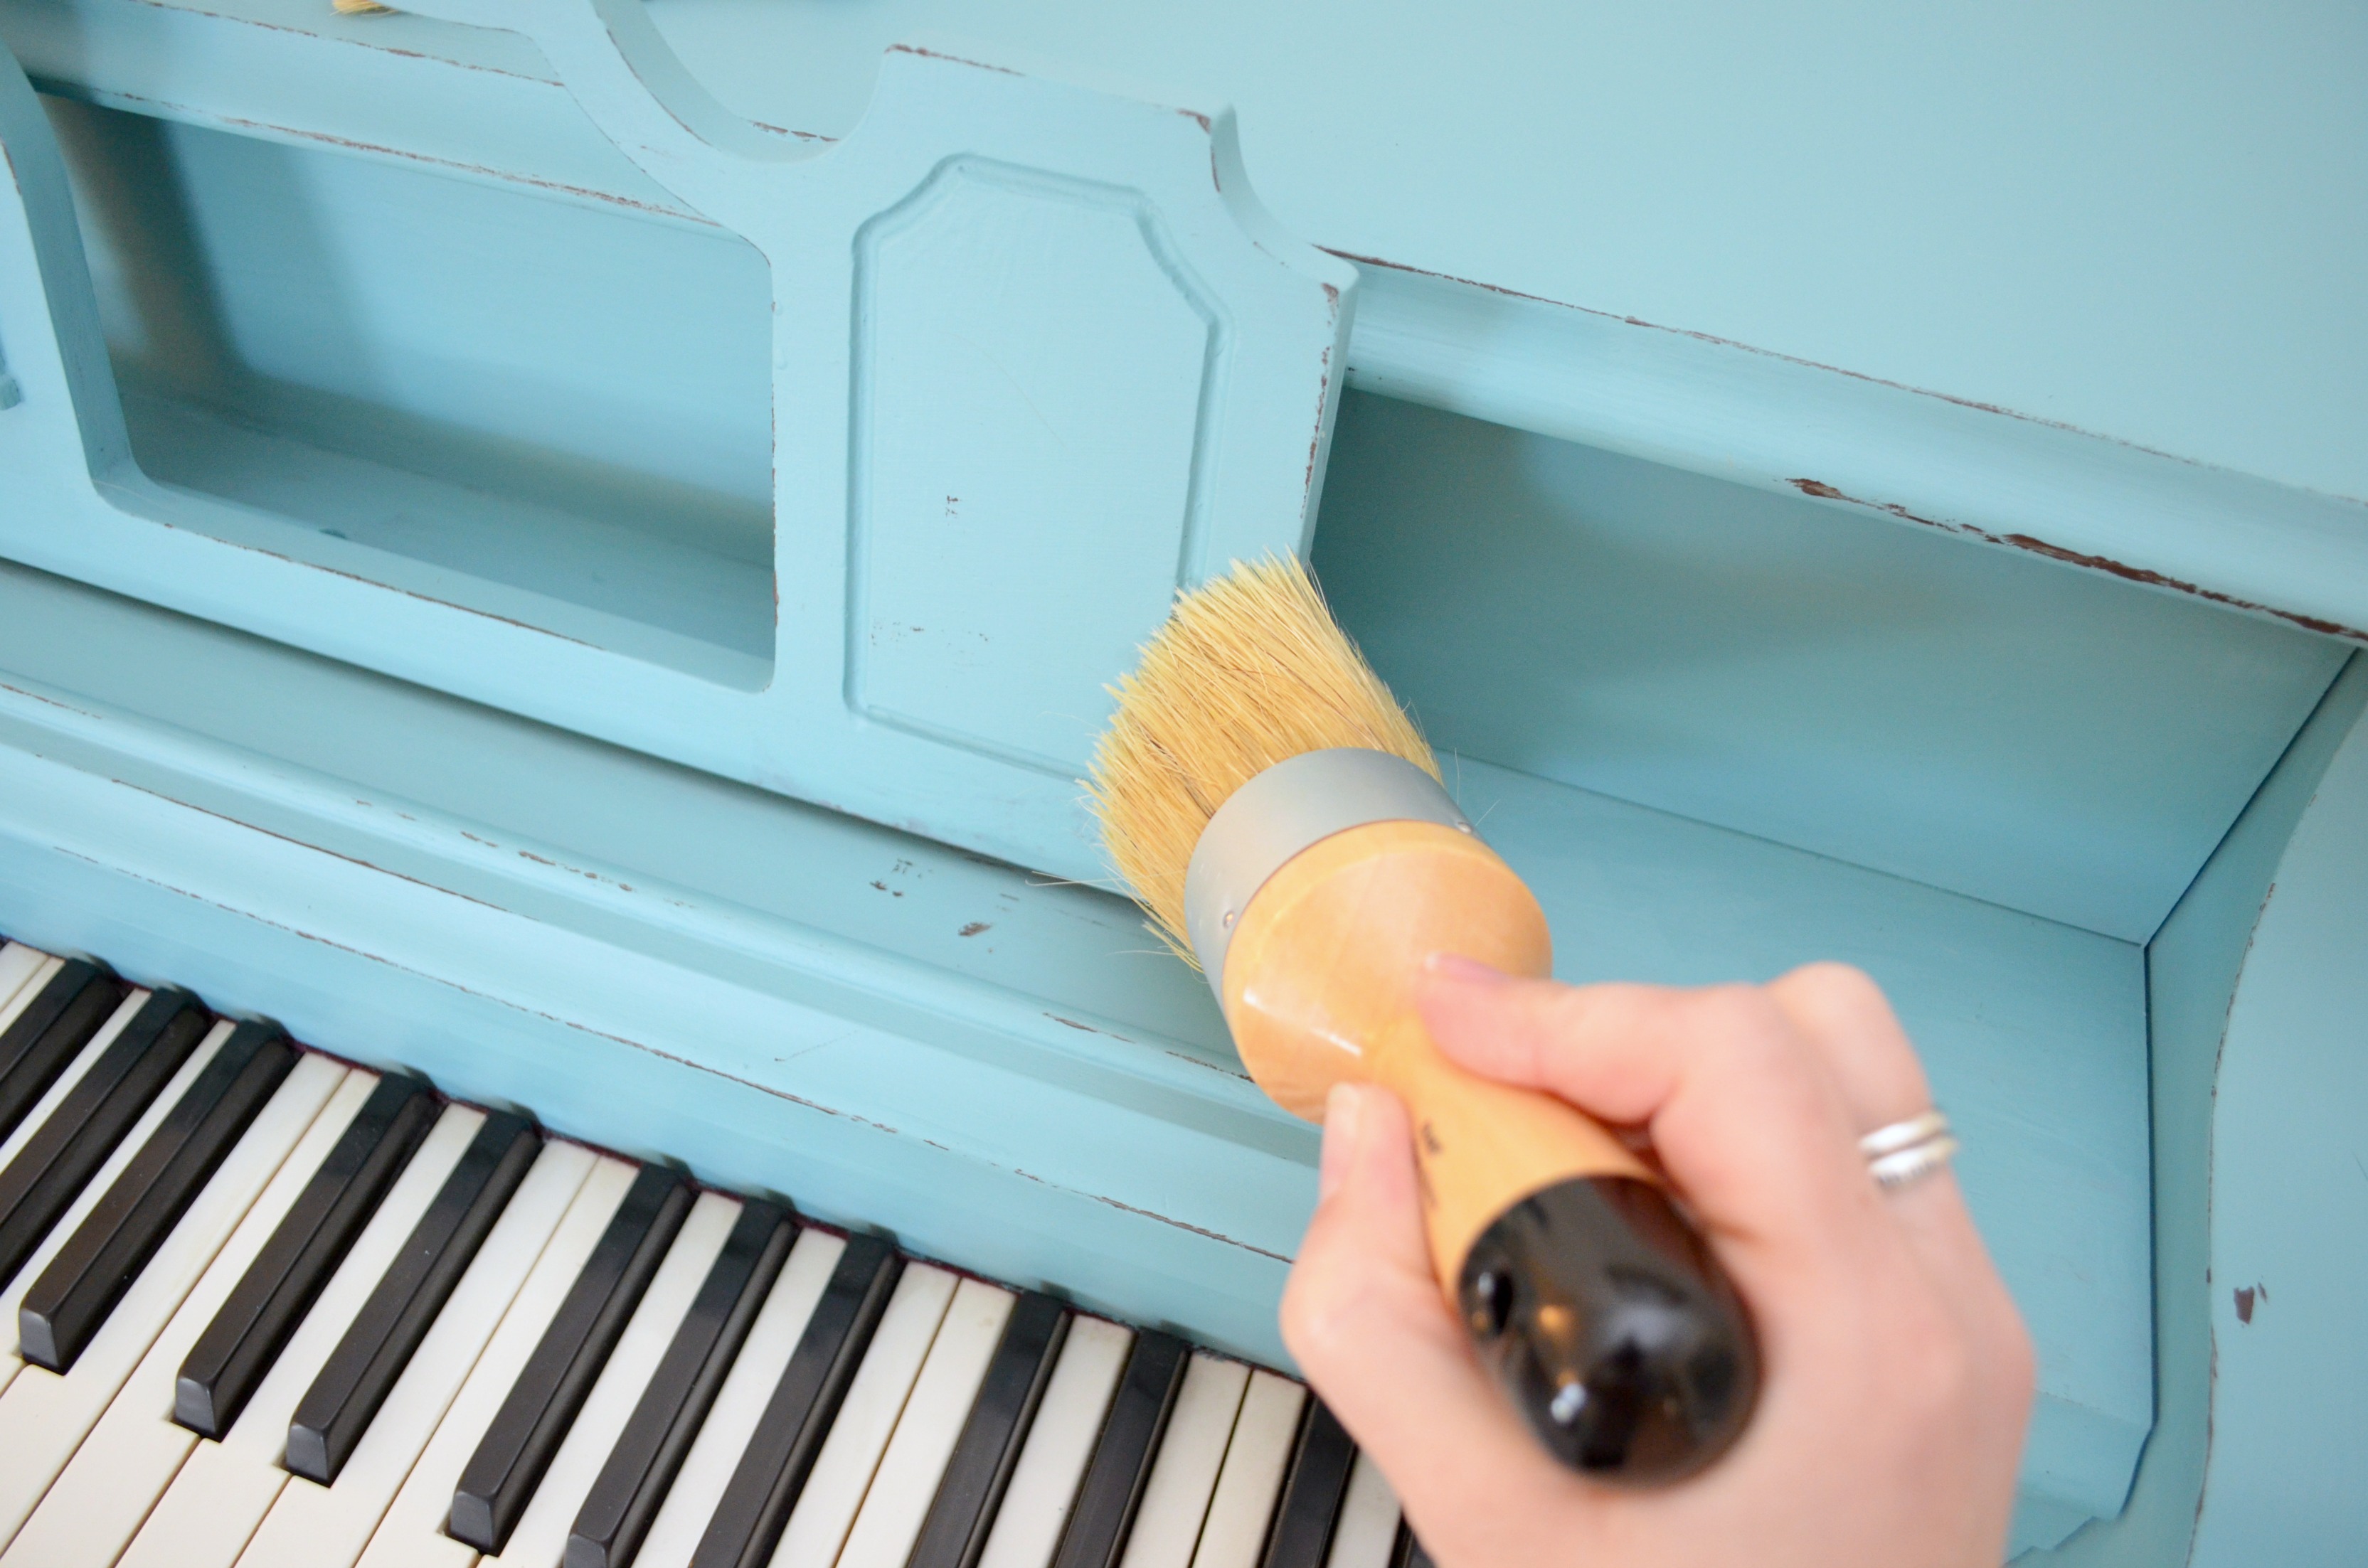
Step 5: Apply clear wax.
Wait for your piece to dry thoroughly, preferably overnight. Place a small amount of wax on your wax brush and rub it into the painted surface. This wax layer will protect and seal your paint as well as giving it a bit of a sheen.
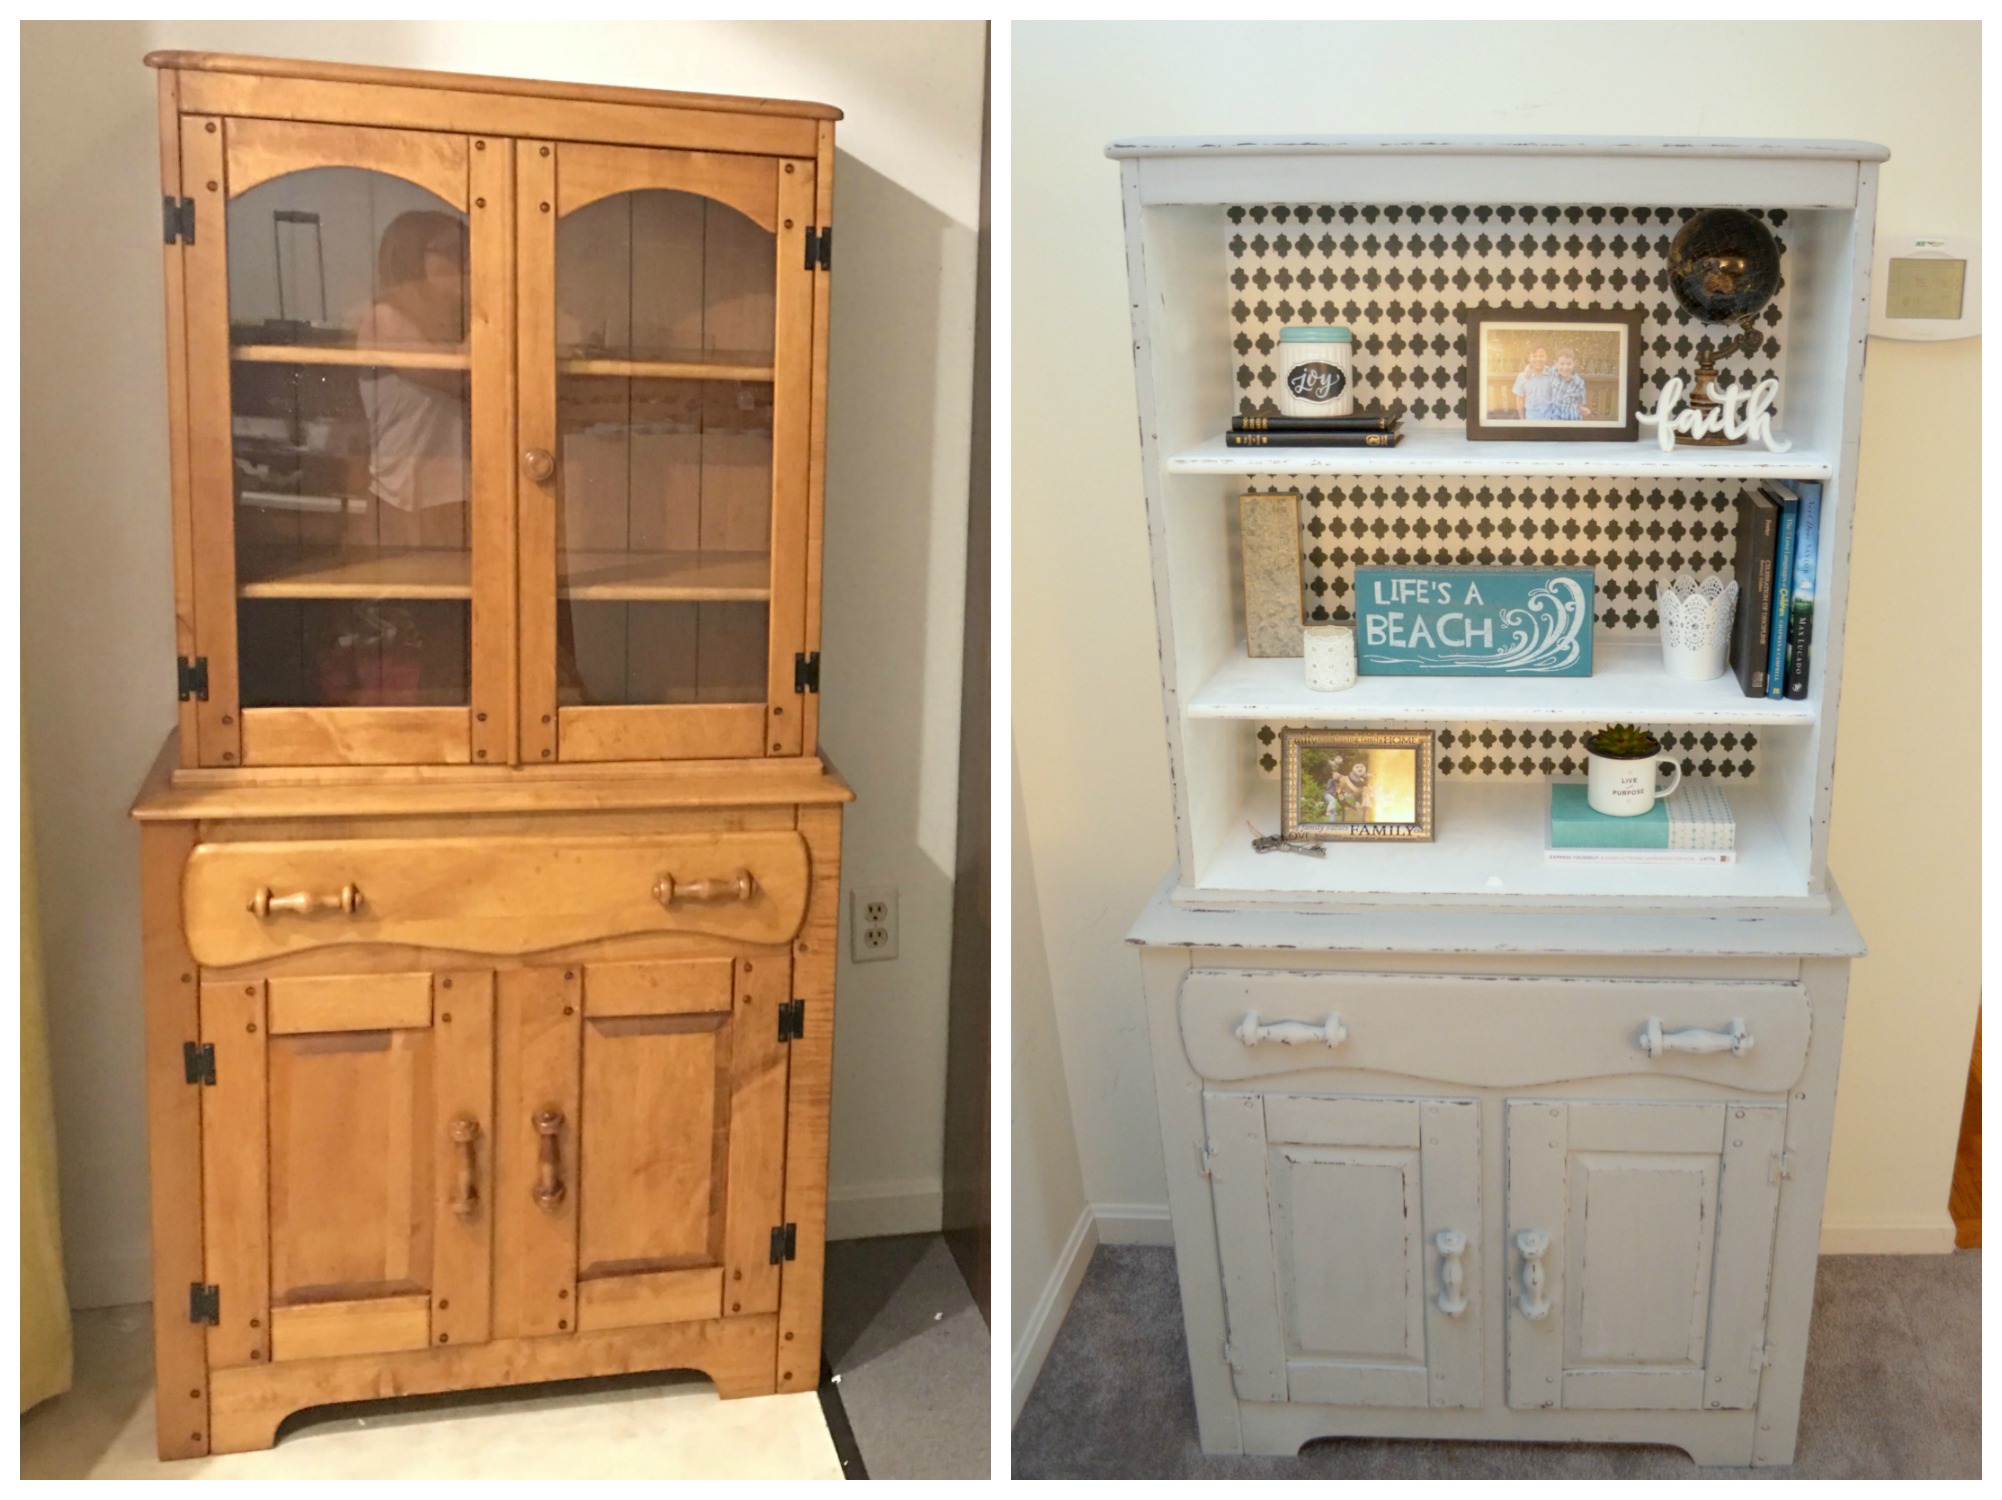
All that’s left to do is enjoy the beautiful new look of your furniture! Isn’t it unbelievable what a difference a little bit of paint can make?! I have used this same technique to paint just about every possible surface in my home, including coffee tables, end tables, kitchen and dining room tables, chairs, a buffet, dressers, my kitchen cabinets, and a hutch. Whether they’re for display only or something we use every day like the kitchen table, all of them have stood the test of time. With the wax coating, they’re easy to wipe clean, too!
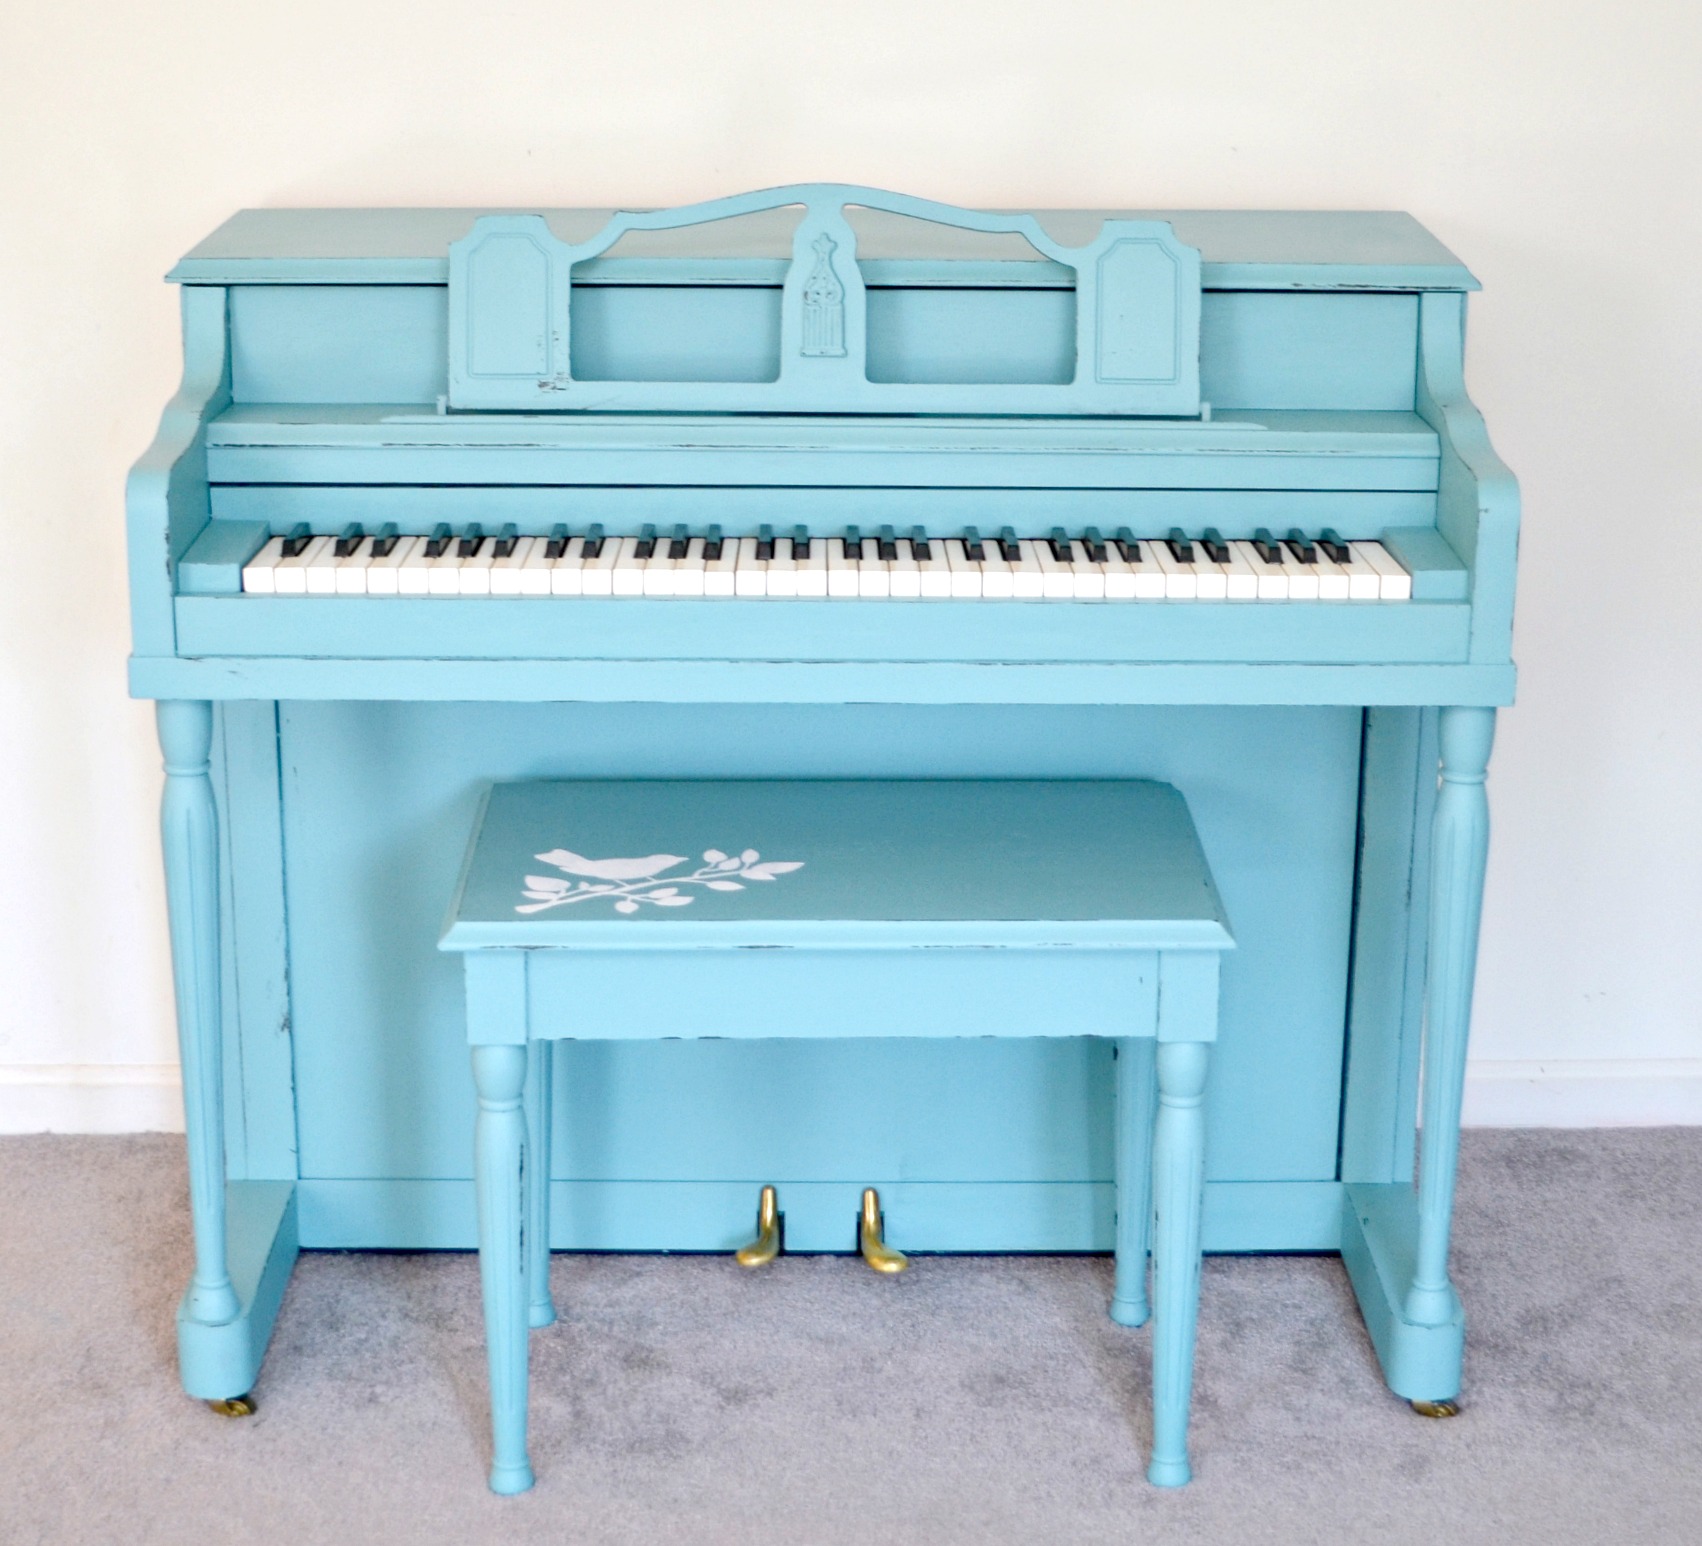
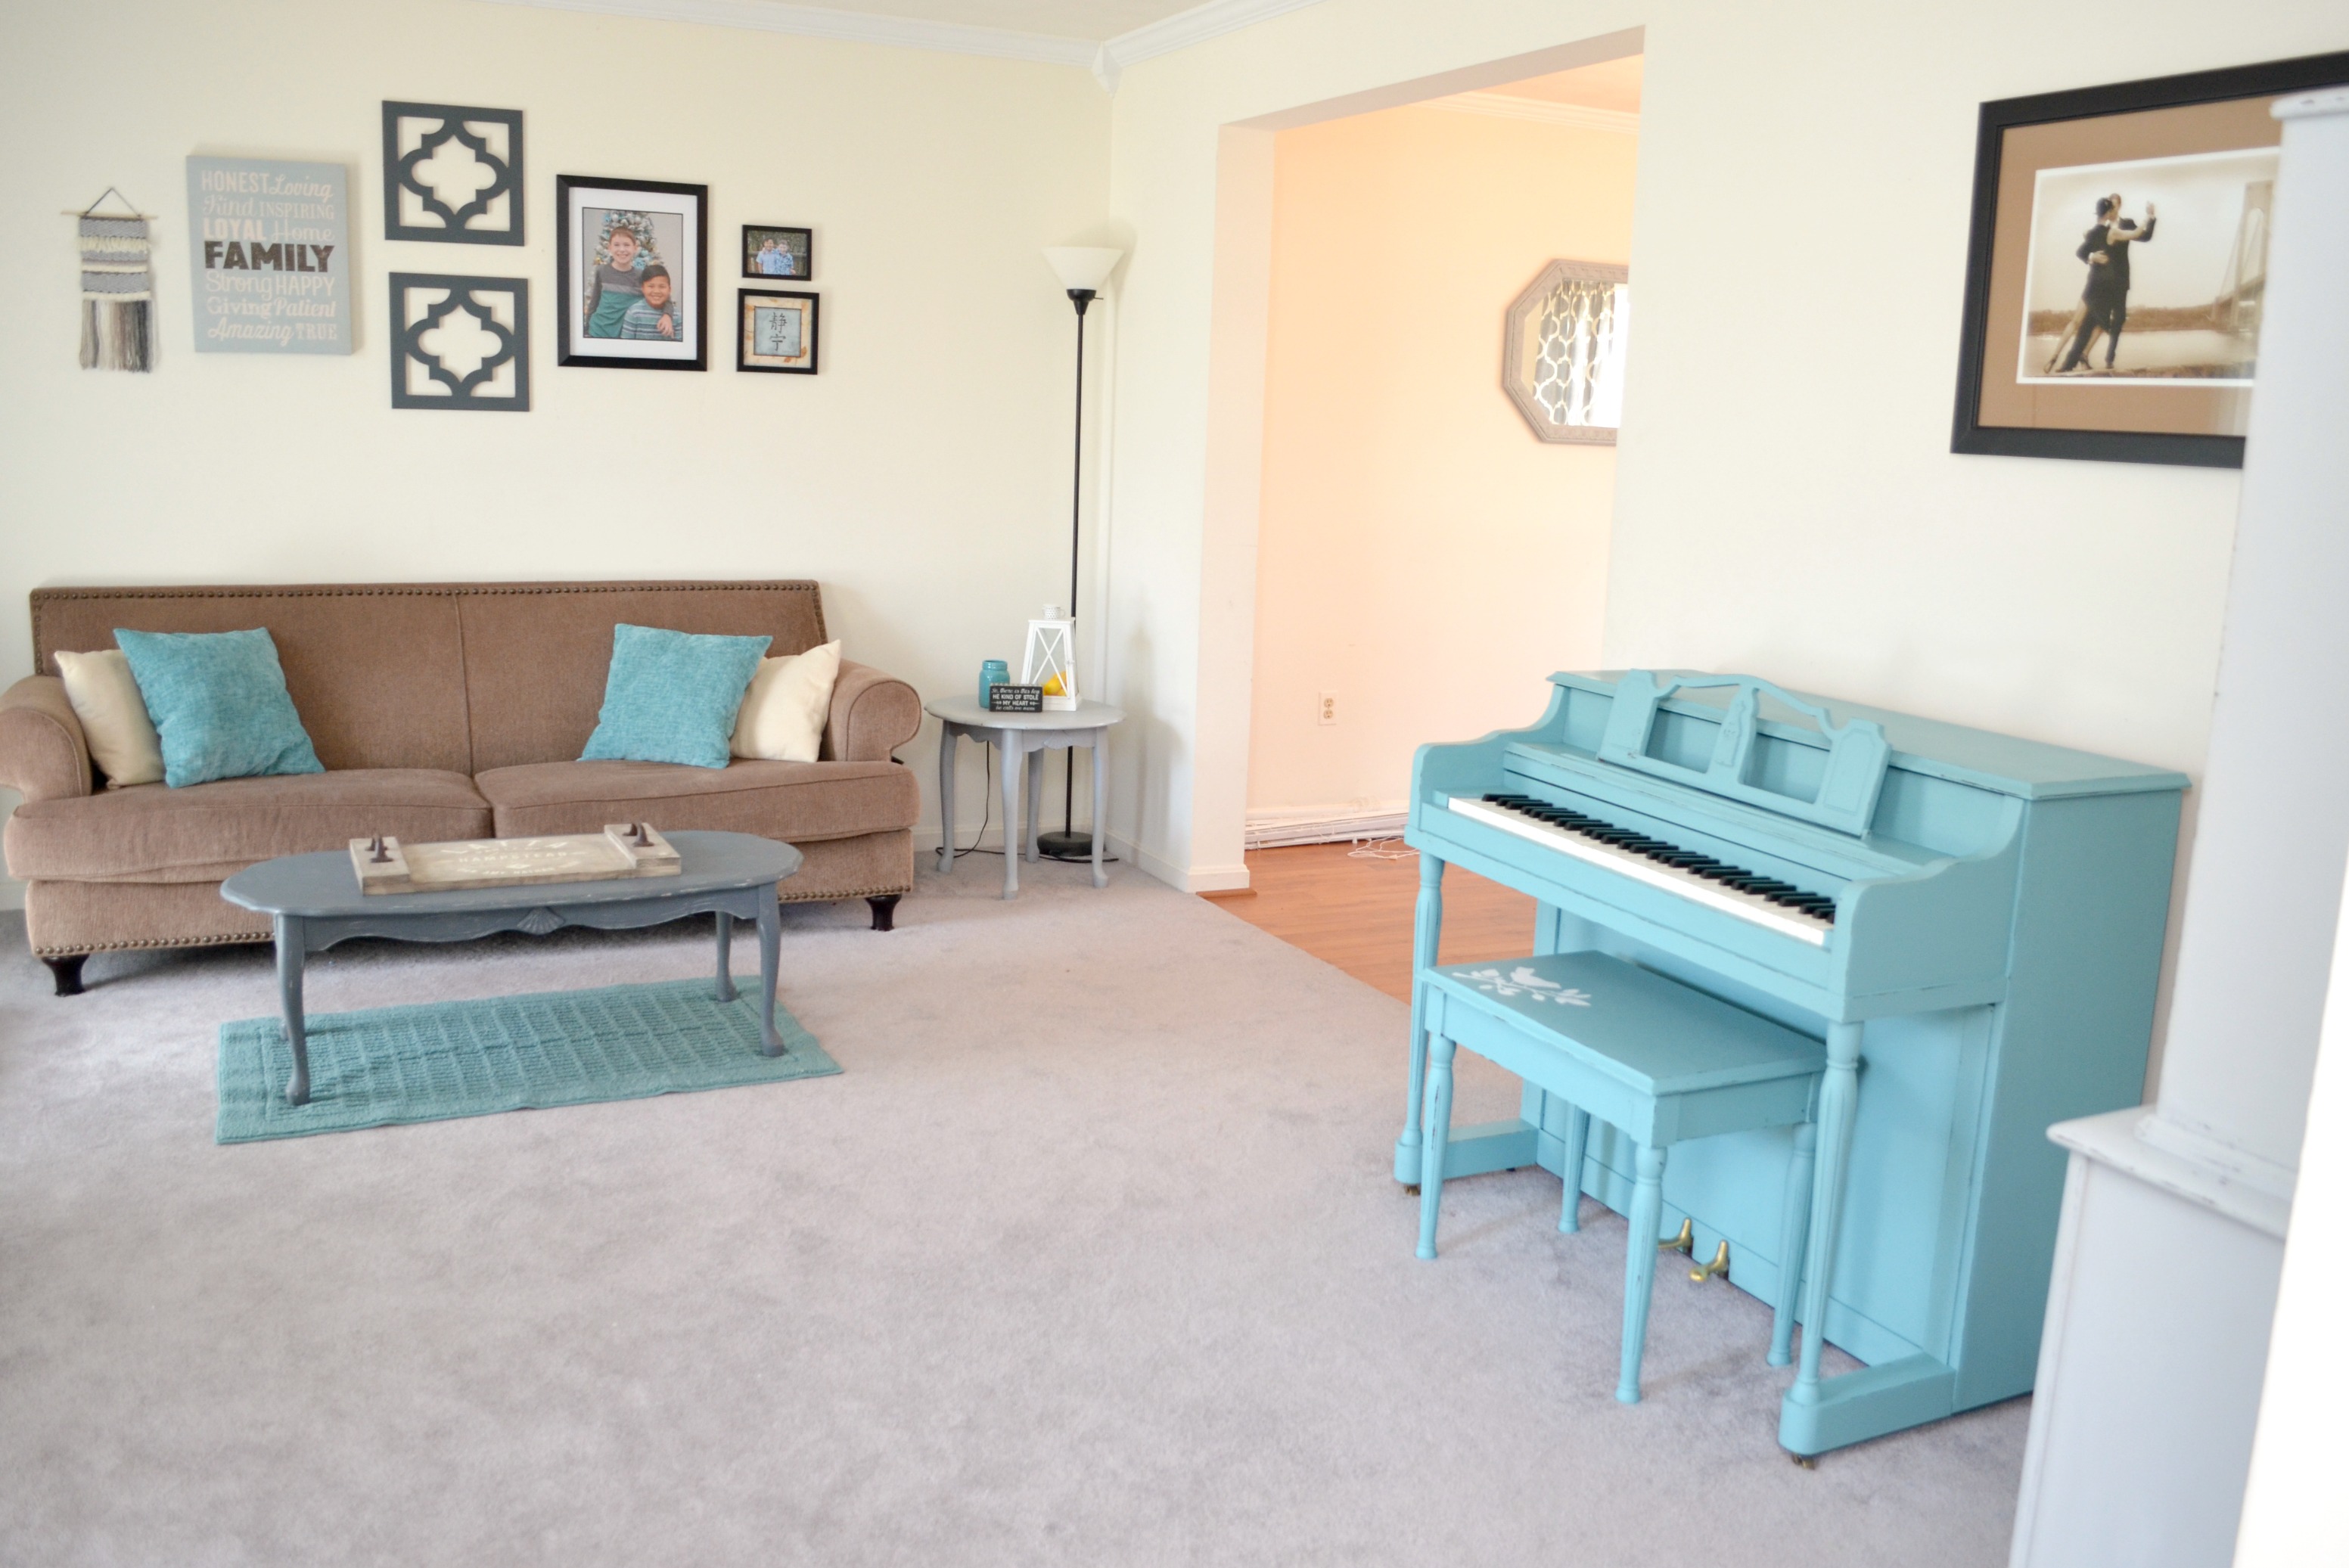
I just love this transformation, and I’m so glad I finally did it! What do you think? At first I was nervous about choosing a bold color for such a large piece rather than a neutral, but with all the other neutrals in the room, the teal was definitely the right call.
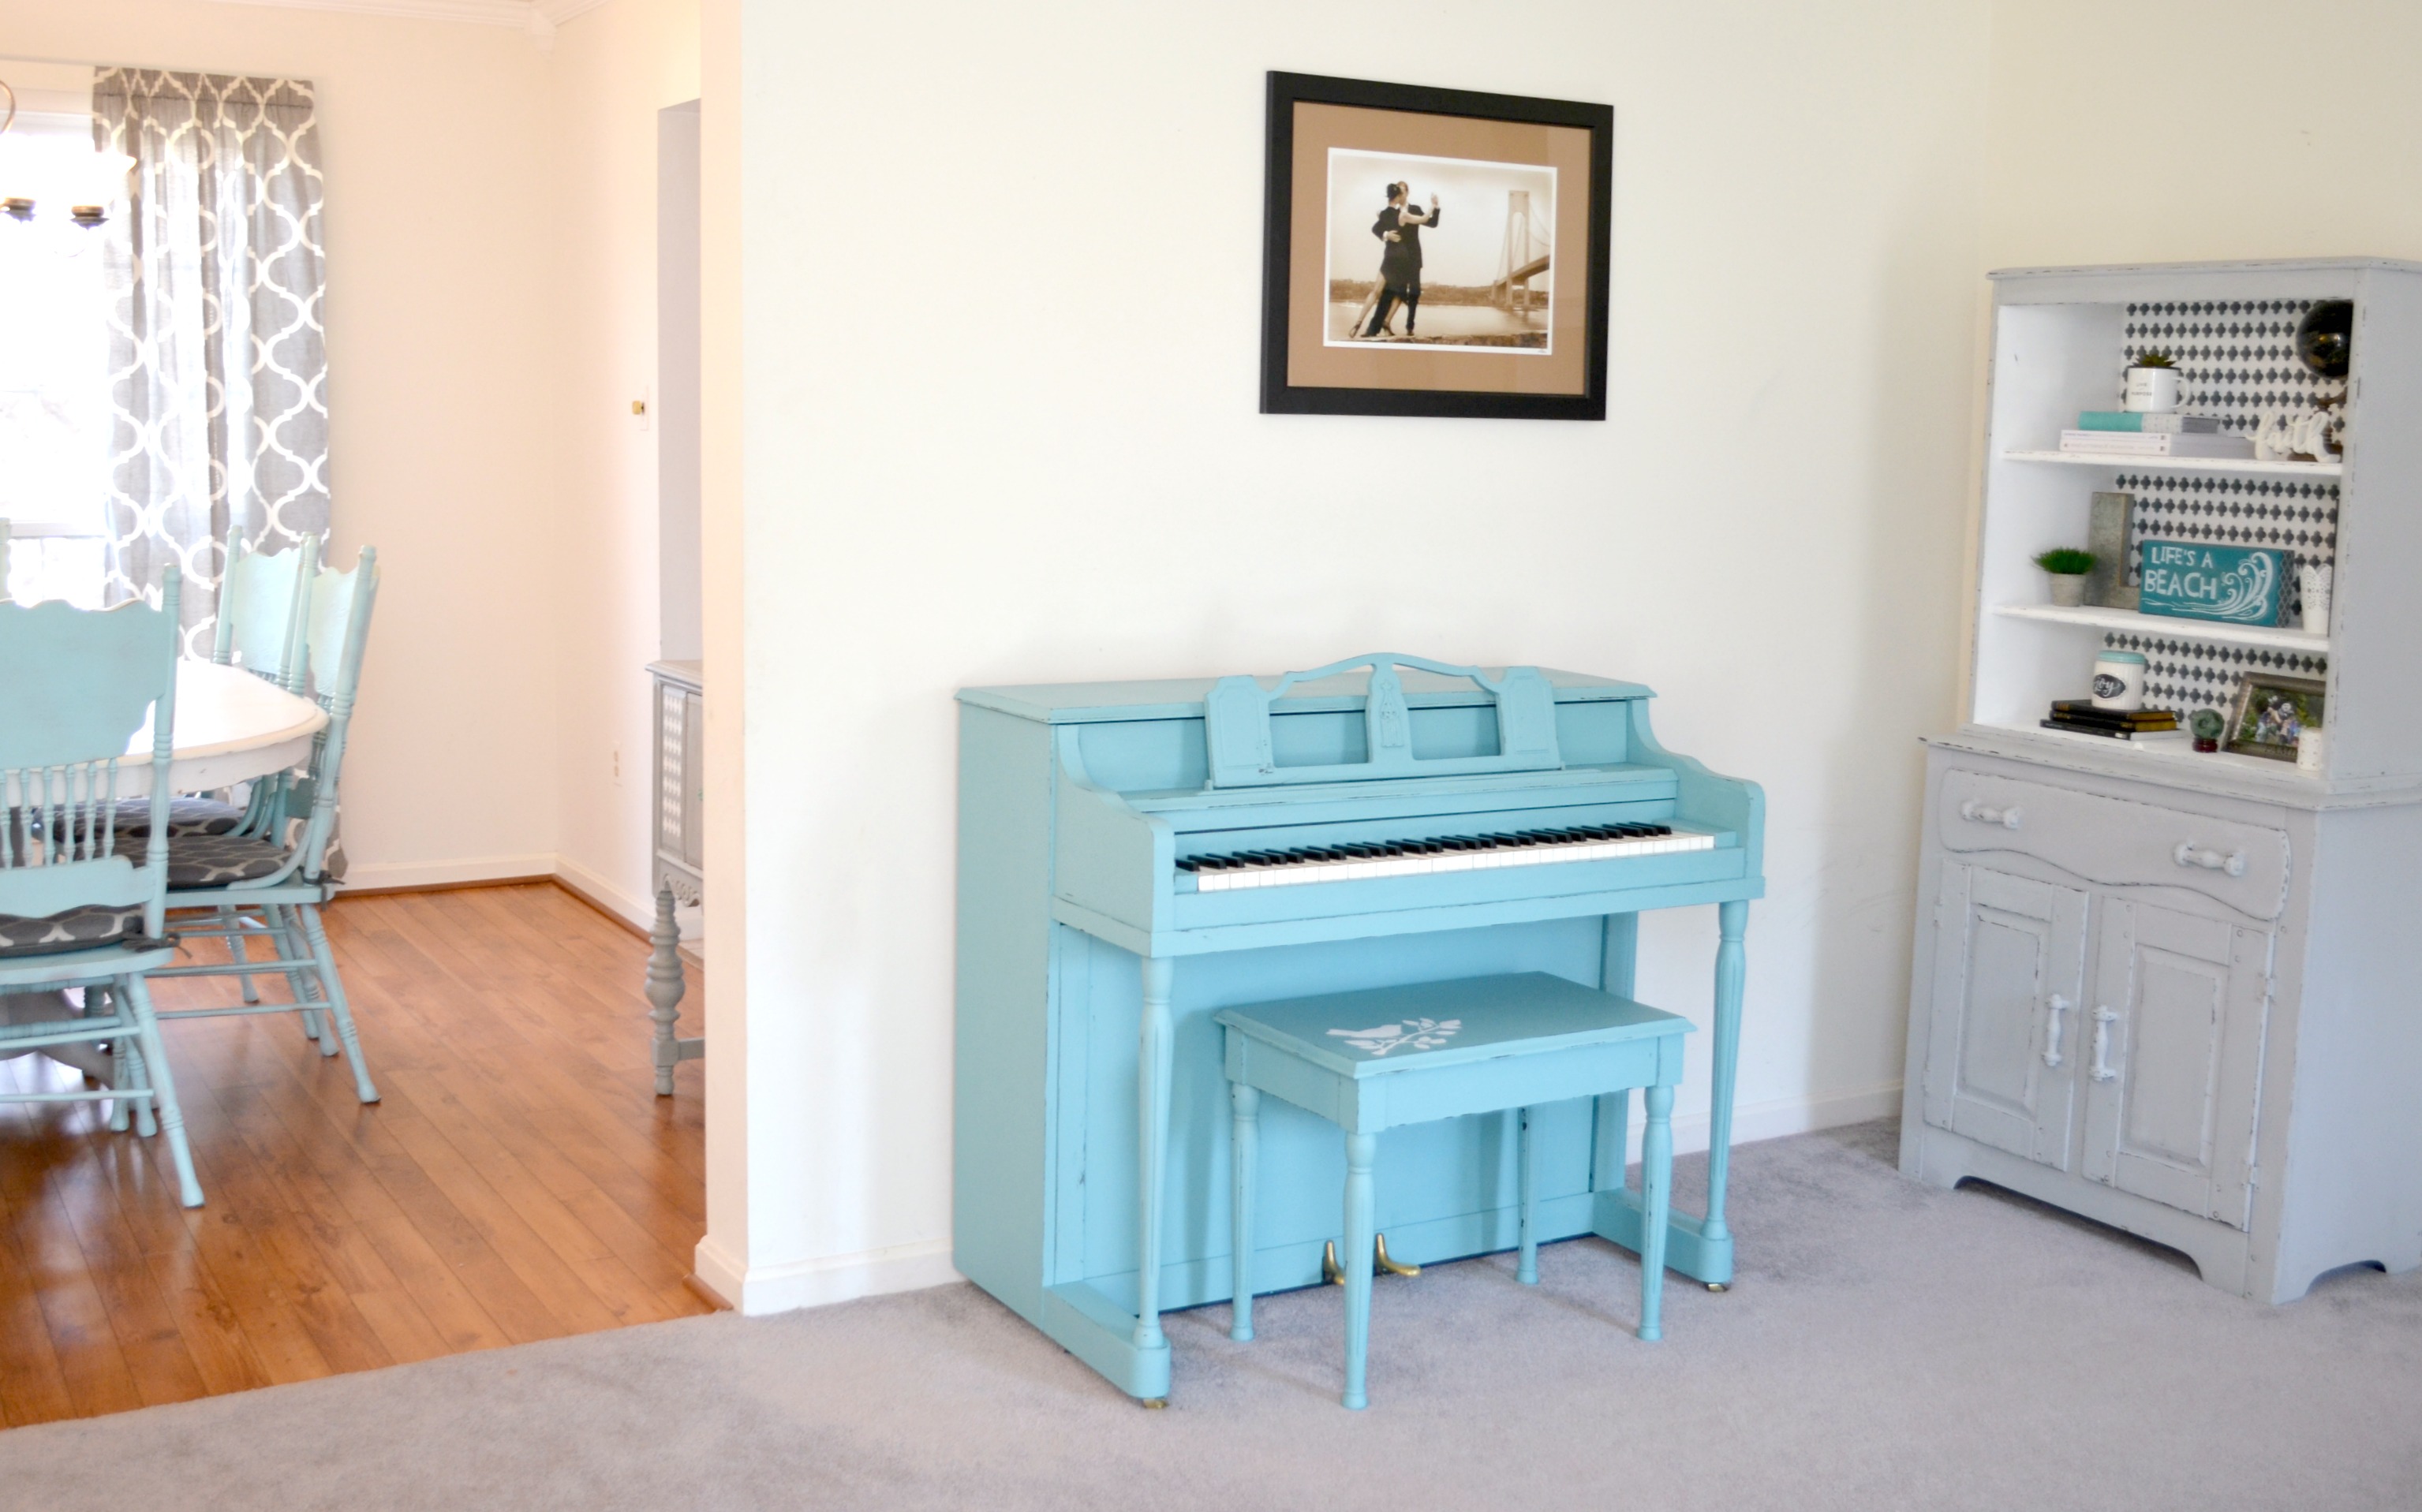
The whole room looks bigger and brighter now, don’t you think? What pieces in your home could use a fresh new look for Spring? I’d love to hear about and see your projects; be sure to join the Amy Latta & Friends Facebook group so we can share inspiration.
To see more about some of the other furniture transformations in this photo and in the rest of my home, check out these posts:
China Cabinet Makeover
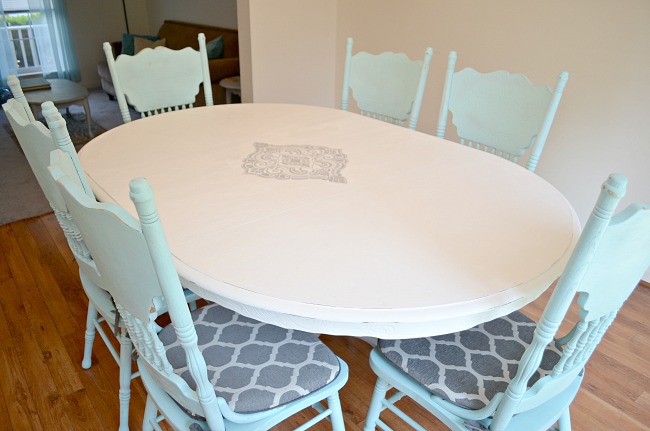
Painted Dining Room Set
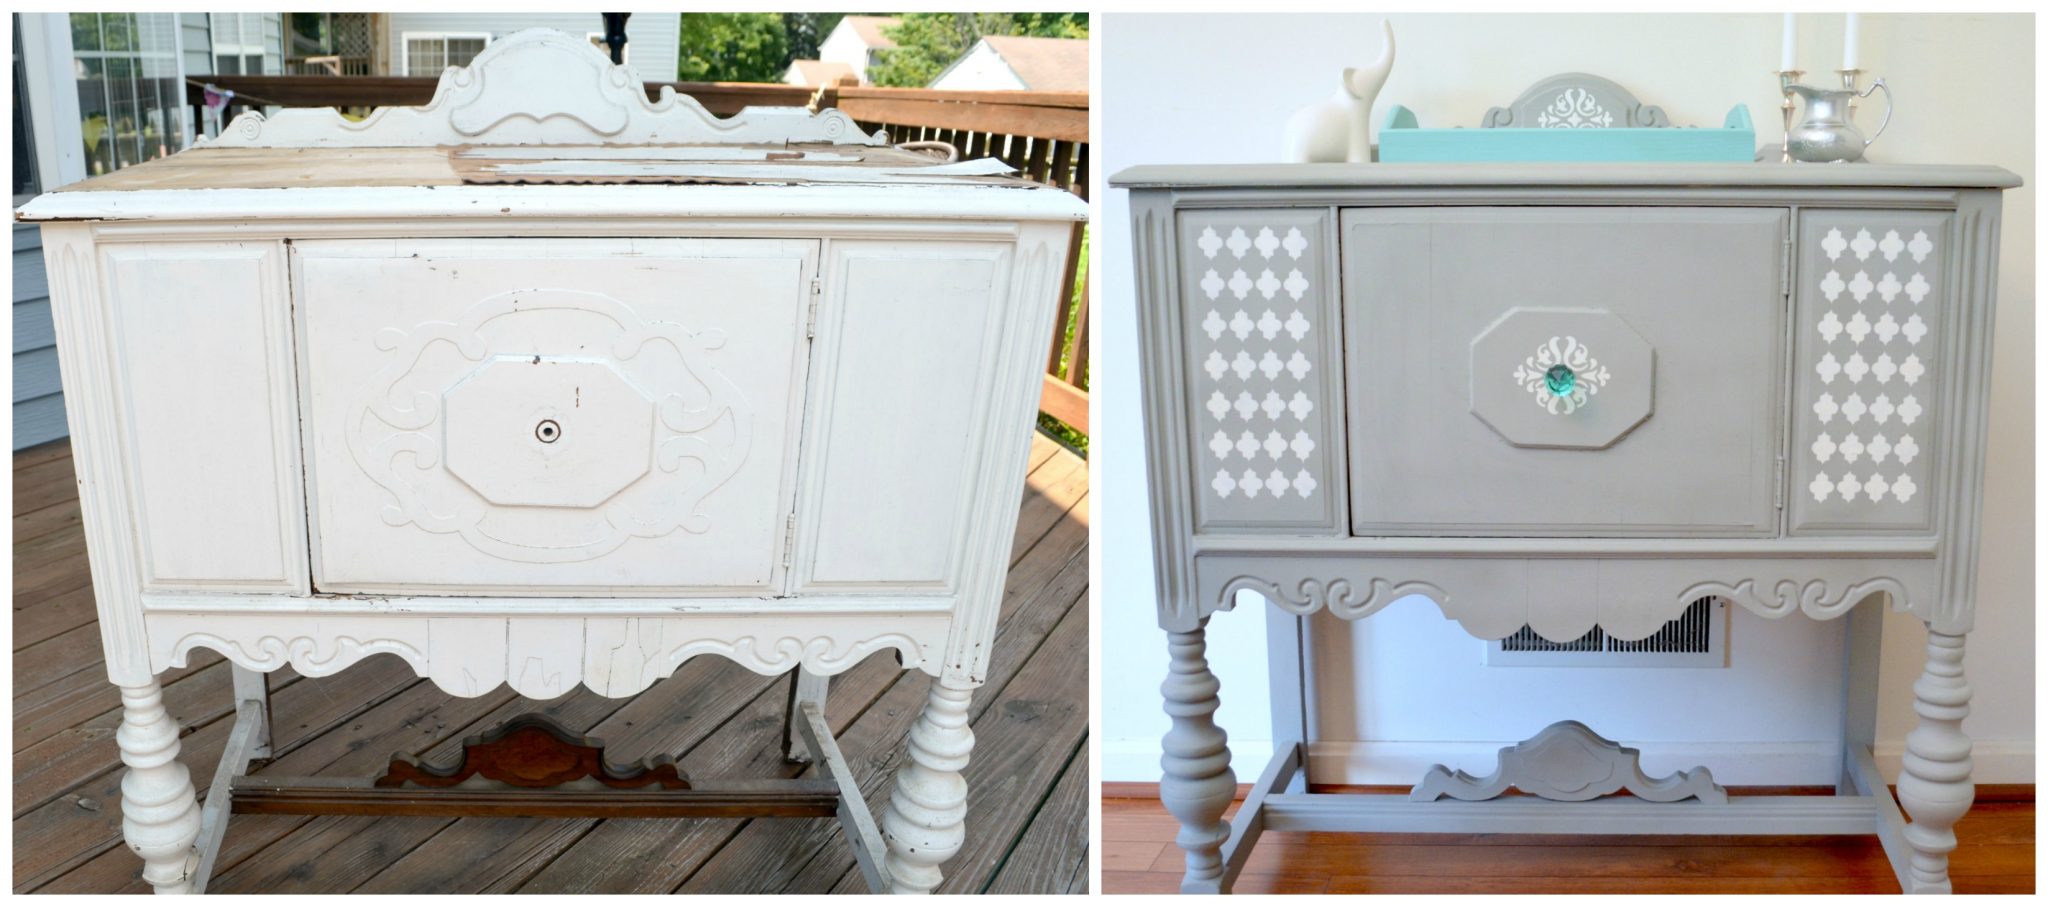
Buffet Makeover
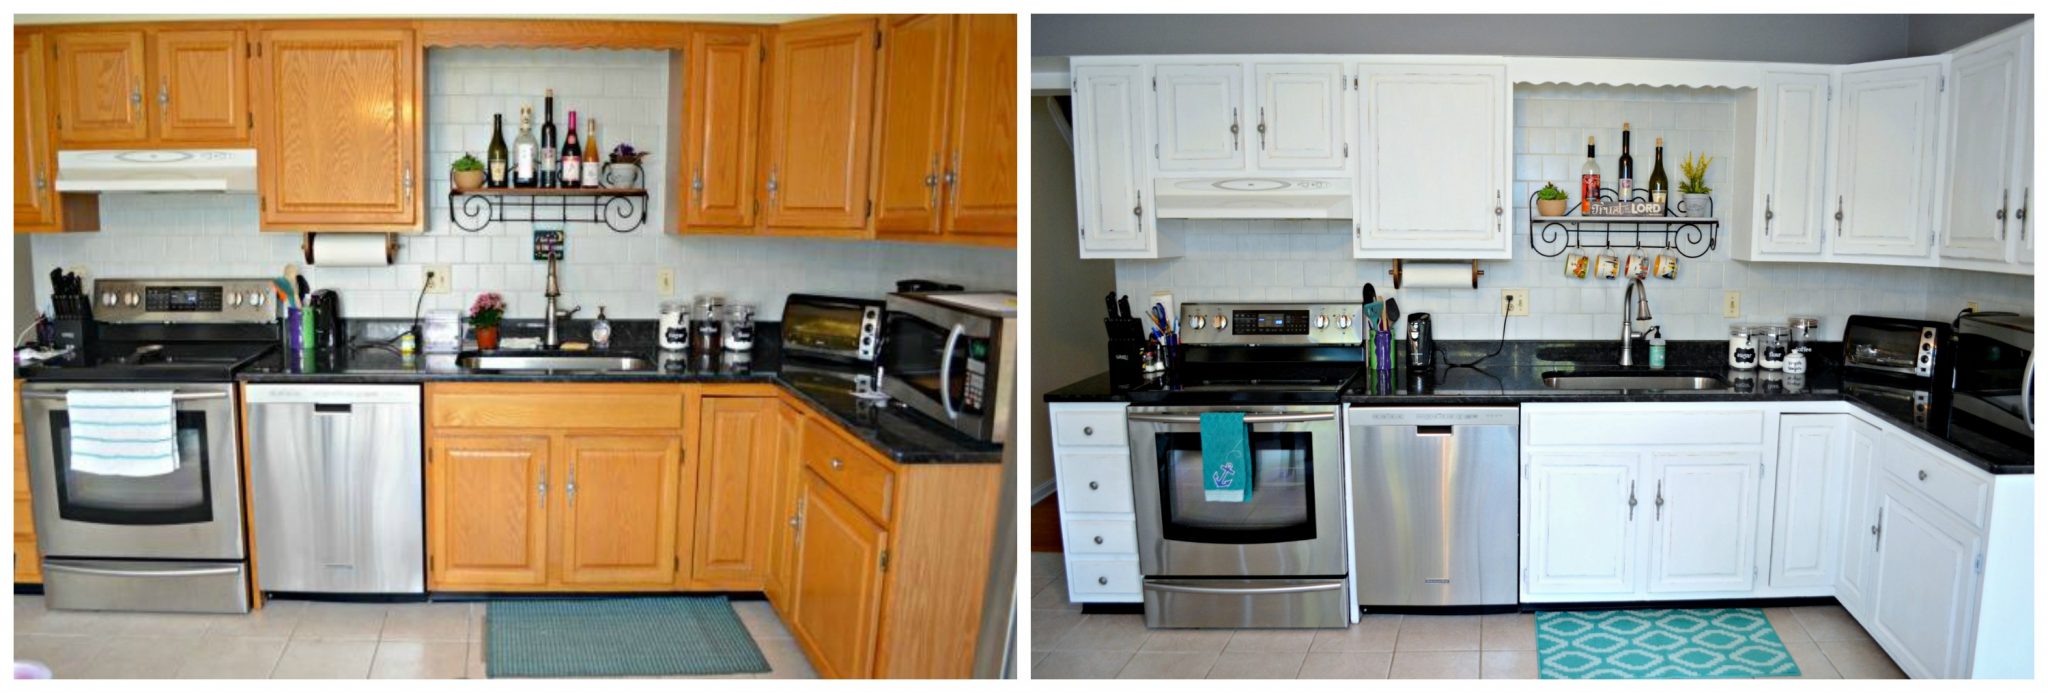
Painted Kitchen Cabinets
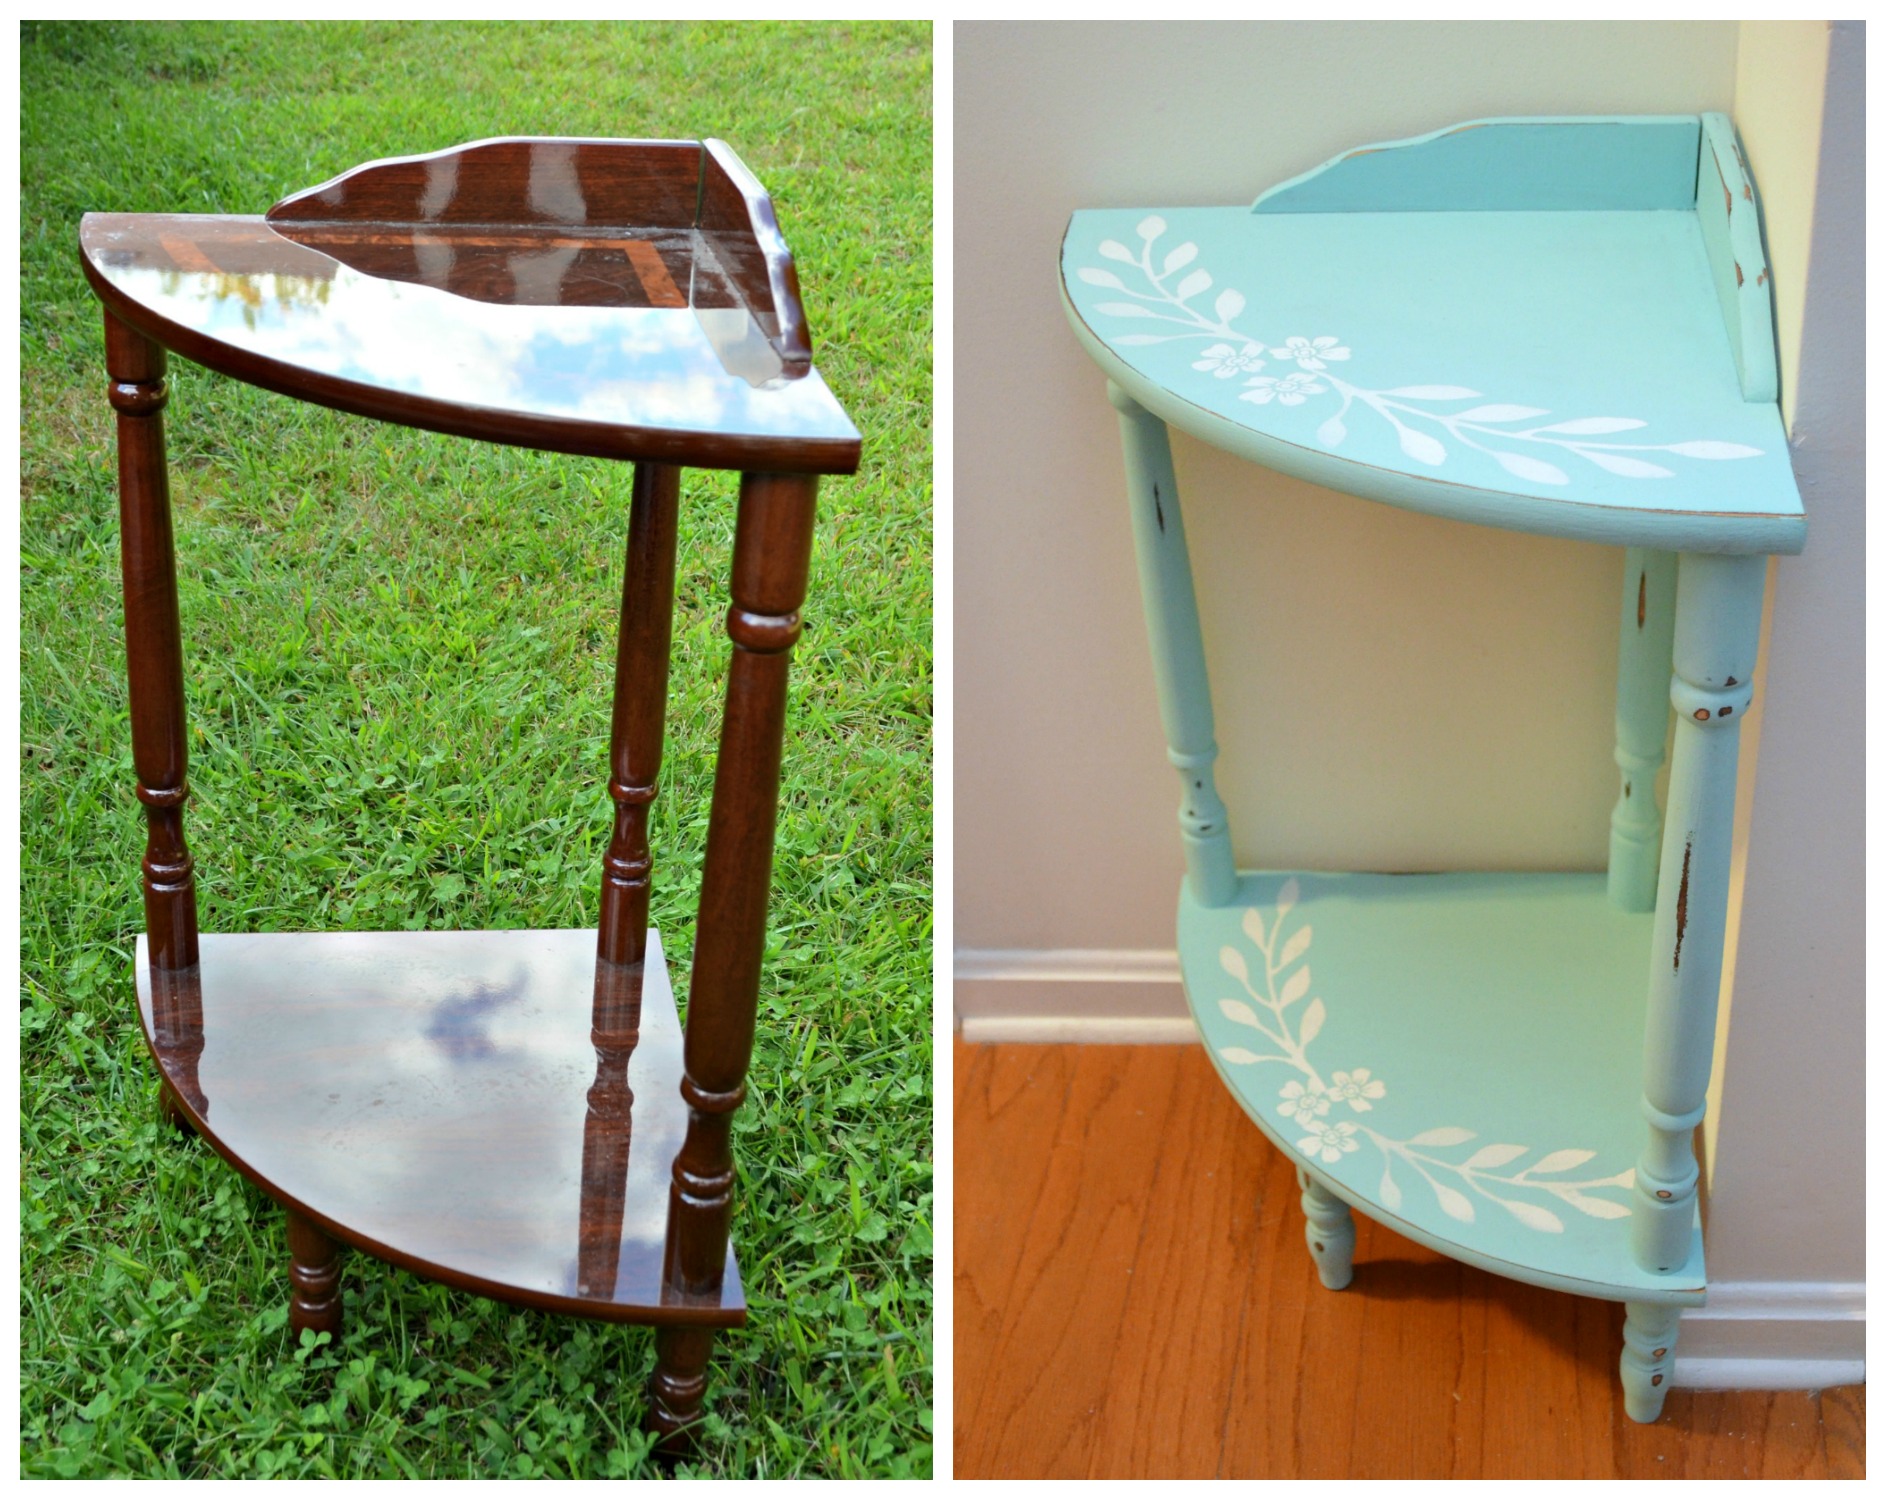
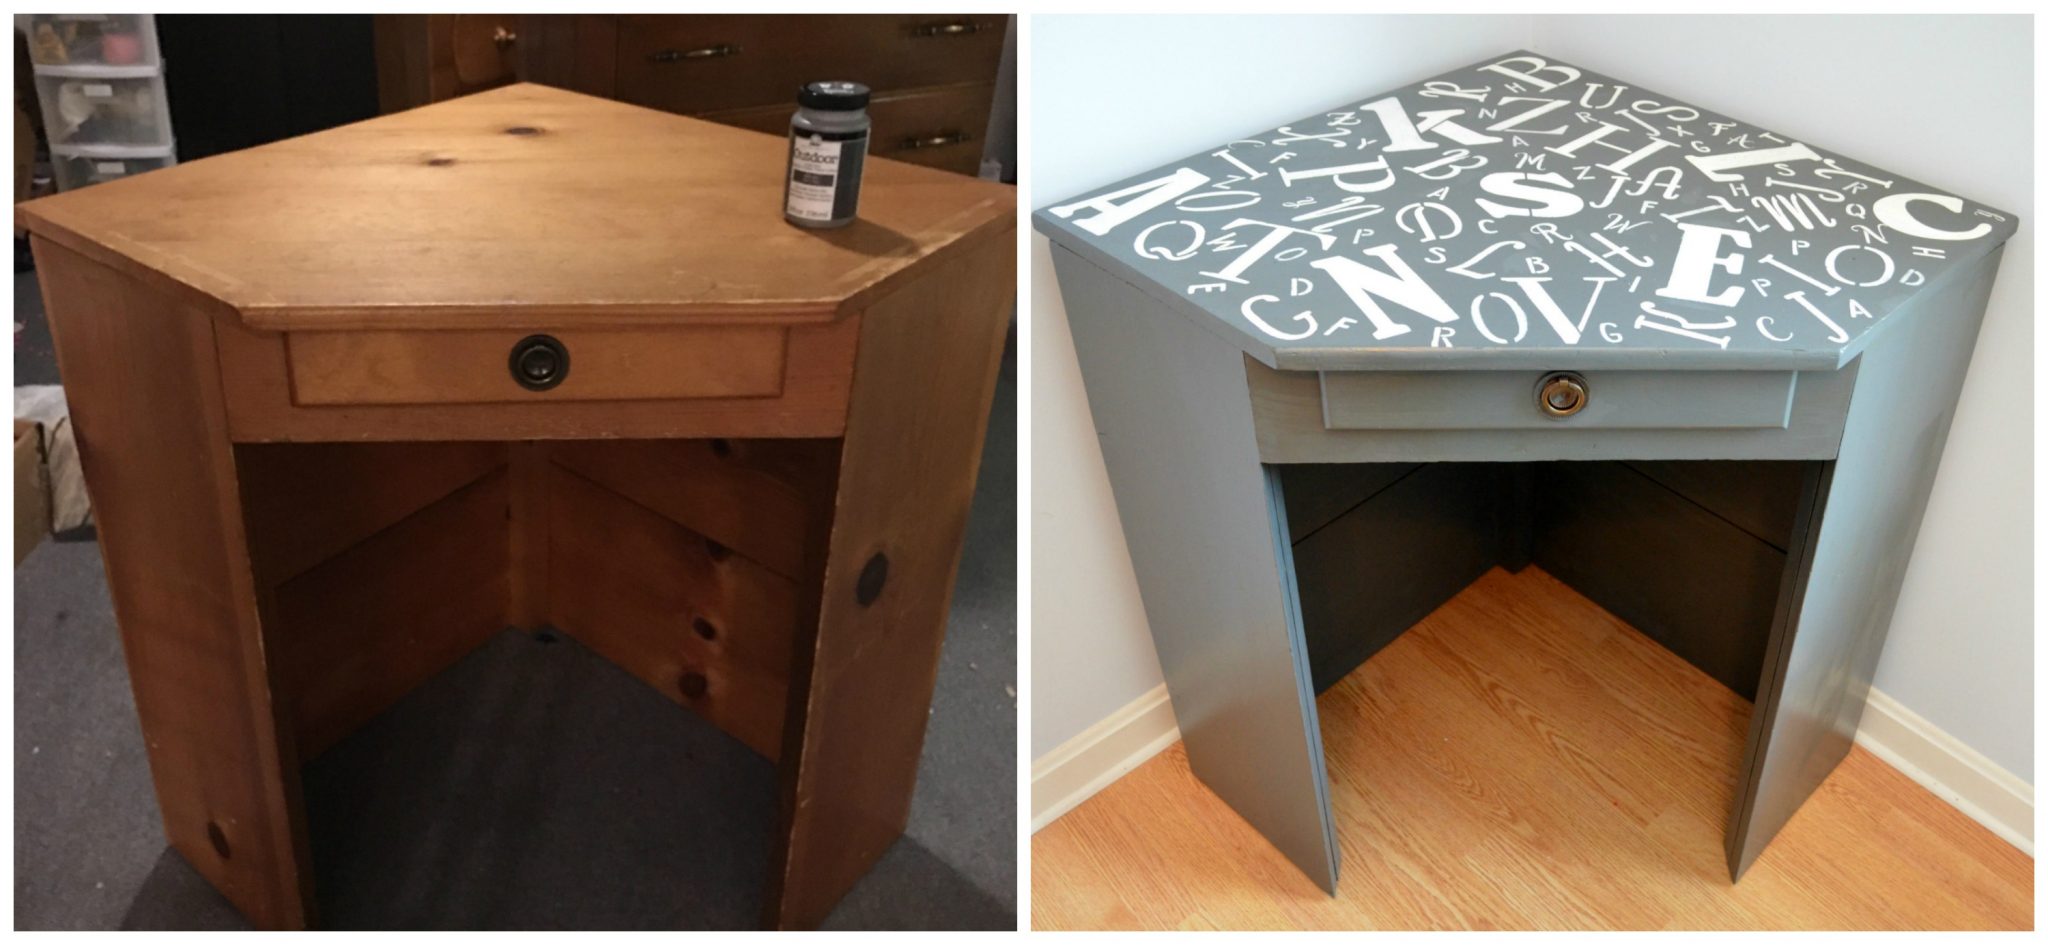
Stenciled Corner Table
Alphabet Desk
And don’t forget, if you liked this project, put a Pin on it!

This gives me courage! I have several wood pieces of furniture that could really benefit from a refresh, but I have been afraid to paint them. I think I will give it a try.